20 Embroidery Storage Ideas for 2026
Embroidery is a relaxing and rewarding hobby, but managing dozens of thread colors, needles, hoops, and unfinished projects can quickly become a challenge. Without a good storage system, floss gets tangled, supplies go missing, and finding the right shade takes longer than stitching. The good news is that you don't need an expensive craft room to keep everything organized. From compact bobbin boxes to dedicated thread cabinets, these embroidery storage ideas can help you create a tidy, accessible, and enjoyable workspace.
How Can You Store Embroidery Floss Without Tangling?
The best way to prevent embroidery floss from tangling is to separate each color, secure loose ends, and store threads in a container that keeps them from shifting around. Plastic bobbins, small resealable bags, divided boxes, and labeled drawers are all practical options.
If you prefer keeping floss in its original skein, use thread organizers or individual compartments to prevent strands from catching on one another. Wrap loose ends neatly rather than pulling them tightly, as excessive tension can crease or distort the thread. Keep frequently used colors together and store specialty threads separately to protect delicate fibers.
A little preparation after each stitching session makes a significant difference. Return unused floss to its designated space, discard unnecessary scraps, and label unfamiliar shades before putting everything away.
1. Bobbin Boxes
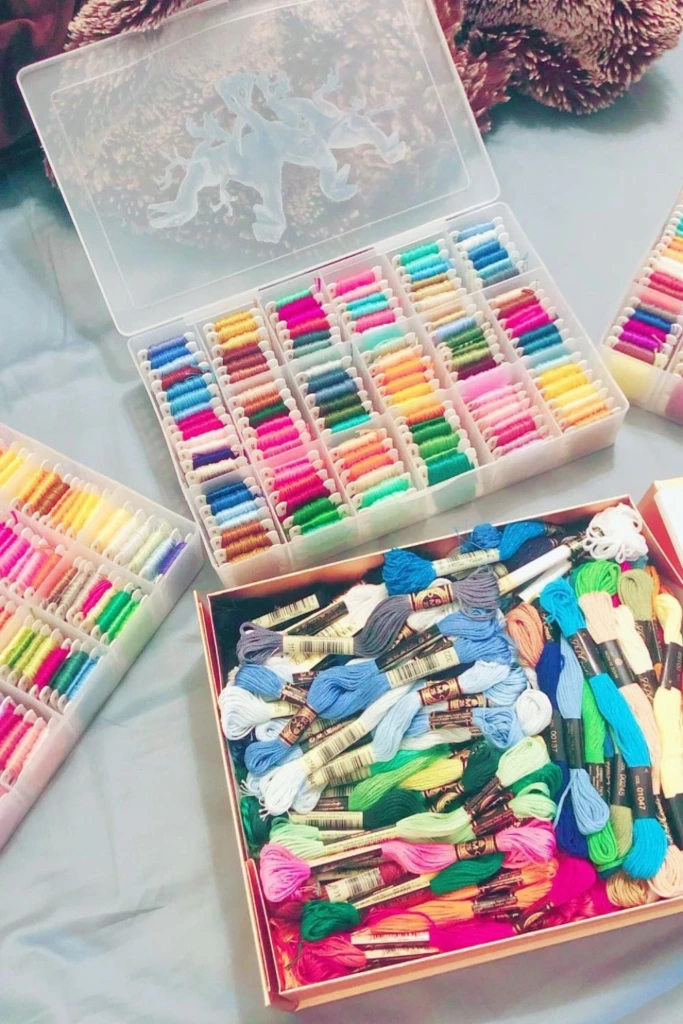
Bobbin boxes are a convenient choice for stitchers who wind their embroidery floss onto plastic or cardboard bobbins. Each bobbin holds one color, making it easy to identify shades without sorting through a pile of loose skeins.
Choose a box with adjustable dividers if your collection contains many colors. Transparent lids let you see the contents at a glance, while secure closures help keep dust away and prevent bobbins from spilling during transport.
For easier identification, write the thread brand and color number on each bobbin. Arrange the bobbins numerically or by color family so replacements are easy to locate when a project requires an exact shade.
2. Pegboard Wall
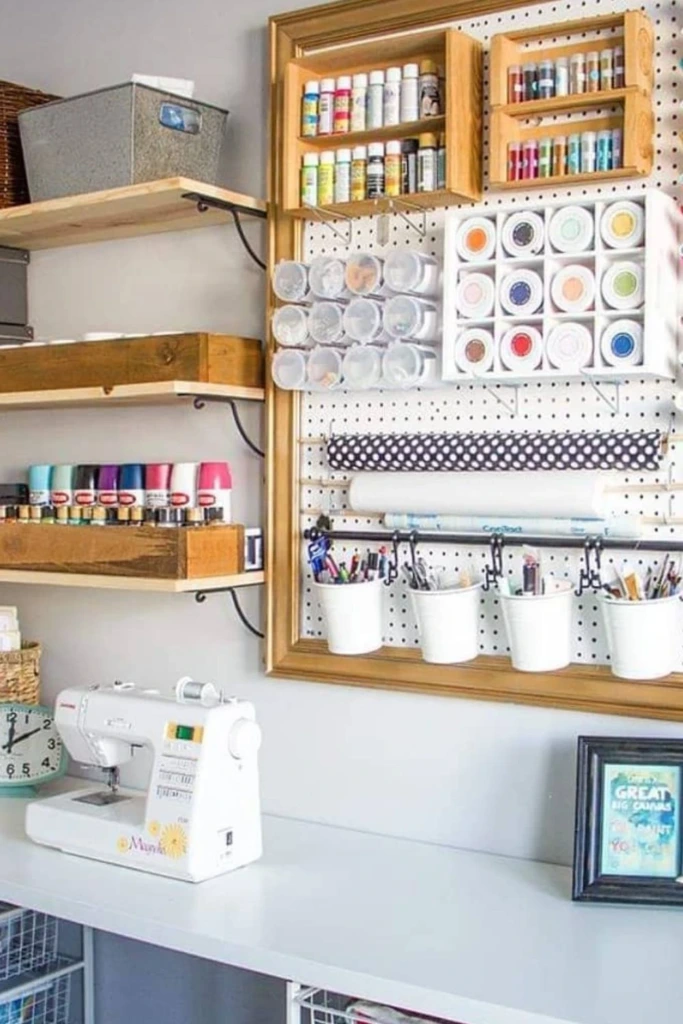
A pegboard transforms unused wall space into a practical embroidery storage area. Install hooks, small baskets, and hanging containers to hold scissors, embroidery hoops, thread cards, rulers, and other frequently used supplies.
You can also attach small shelves for jars of needles or place lightweight thread organizers on the board. Keeping essential tools visible reduces the time spent searching through drawers and frees up valuable desk space.
Arrange supplies according to how often you use them. Place everyday tools within easy reach and reserve higher sections for less frequently needed materials. Make sure the board and its mounting hardware can safely support the combined weight of everything you hang on it.
3. Drawer Cabinet
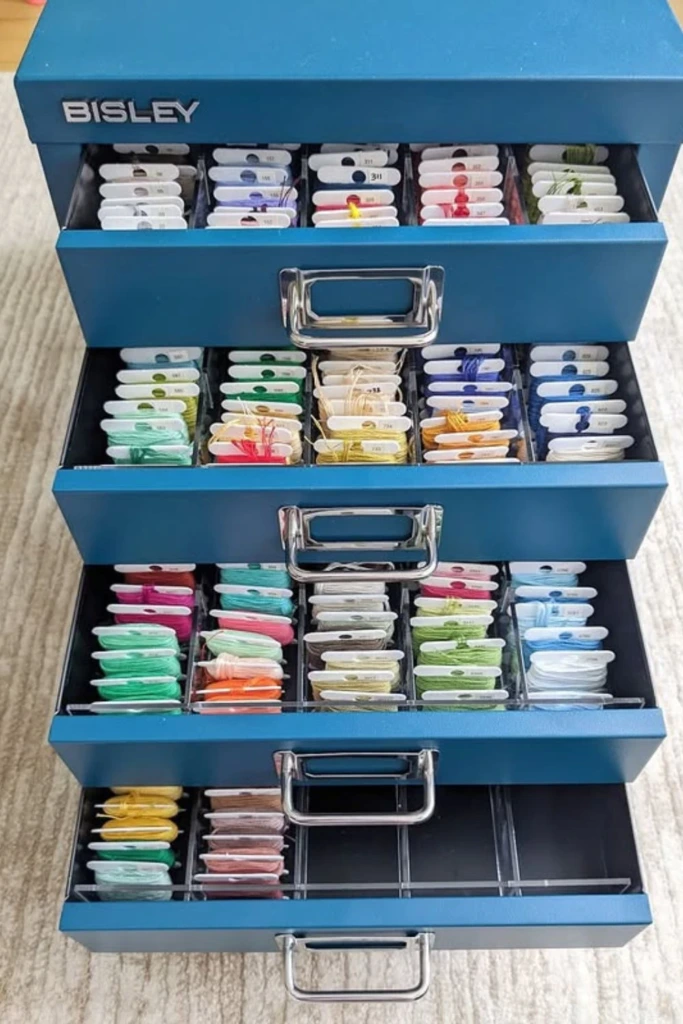
A drawer cabinet provides a dedicated home for embroidery supplies while keeping your workspace looking neat. Depending on the size of your collection, you can choose a small desktop unit, a rolling storage cabinet, or a larger furniture piece with multiple drawers.
Assign each drawer a purpose, such as embroidery floss, needles, fabric, hoops, patterns, or completed projects. Add smaller containers inside the drawers to prevent supplies from sliding around whenever you open them.
Clear drawer fronts make identification easier, while labels help when the contents aren't visible. If you have limited floor space, a compact cabinet that fits beneath a desk can provide substantial storage without taking over the room.
4. Stitch Board
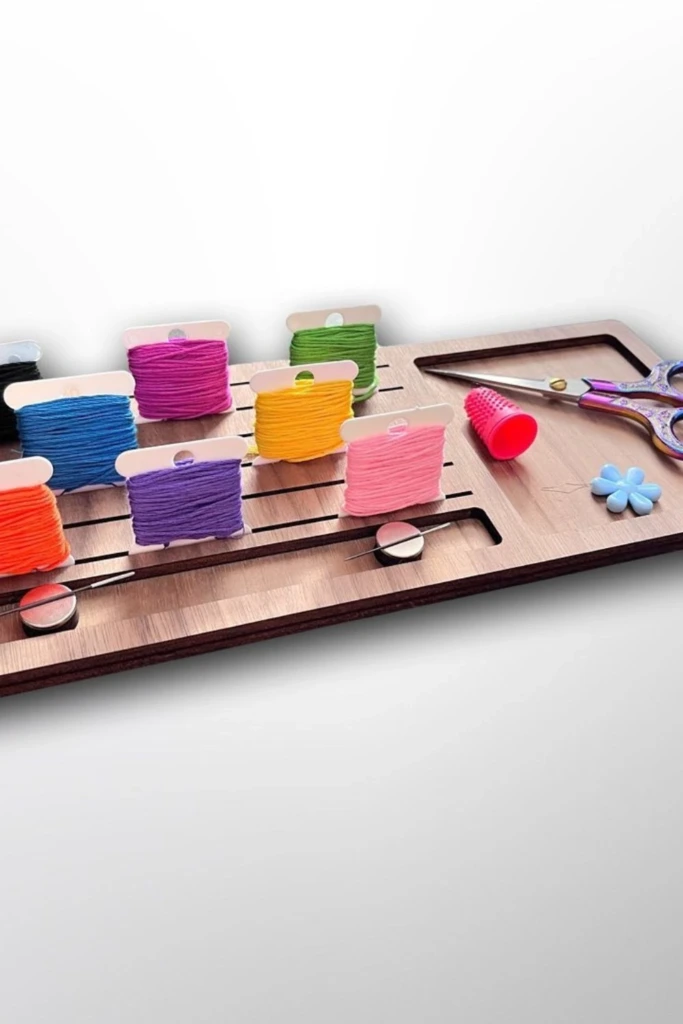
A stitch board is a useful way to keep an active embroidery project organized between sessions. Depending on its design, it can hold thread, needles, fabric pieces, pattern references, and small tools in one accessible place.
Choose a board with pockets, clips, or attachment points that suit your working style. You might dedicate one section to the current project's floss and another to its instructions and fabric. A magnetic section can also be useful for temporarily holding compatible metal tools, provided small items remain secure.
Keep the board close to your stitching chair or craft table. Having everything for a project in one location makes it easier to resume work without reconstructing your setup each time.
5. Drawer Grid
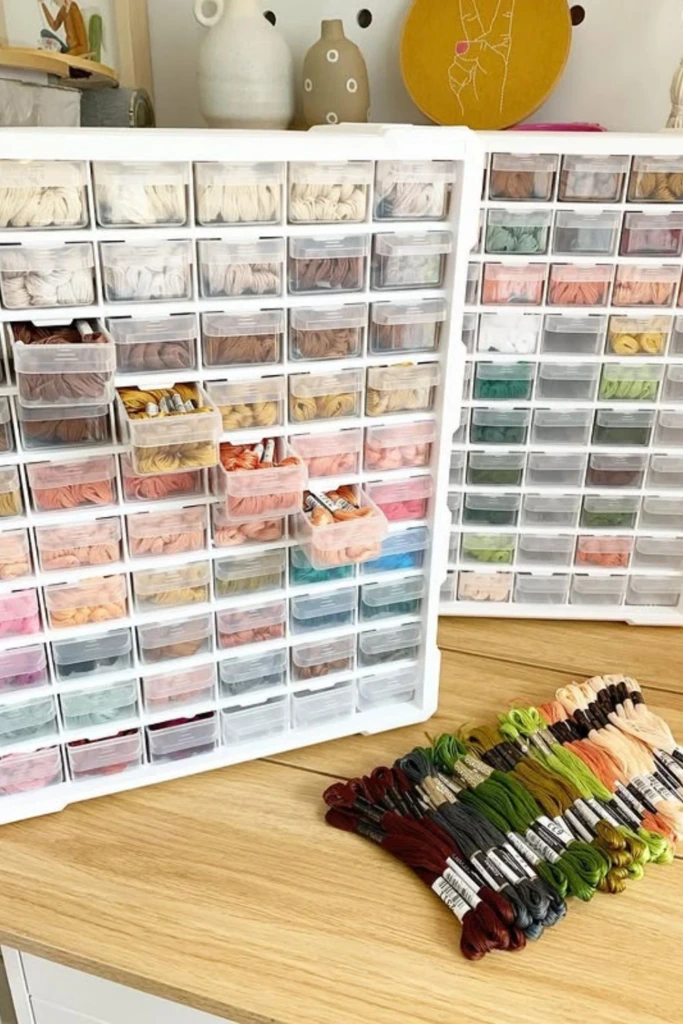
Drawer grids create individual compartments inside otherwise open storage spaces. They are especially helpful for organizing bobbins, small thread skeins, needles, beads, buttons, and other embroidery accessories.
You can purchase adjustable dividers or use small boxes that fit snugly inside an existing drawer. Group related supplies in separate sections, and avoid mixing loose needles with thread where they could snag the fibers.
For a large floss collection, dedicate each row to a particular color family. You can then move from reds and oranges to yellows, greens, blues, and neutrals without searching through unrelated shades.
6. Floss Display
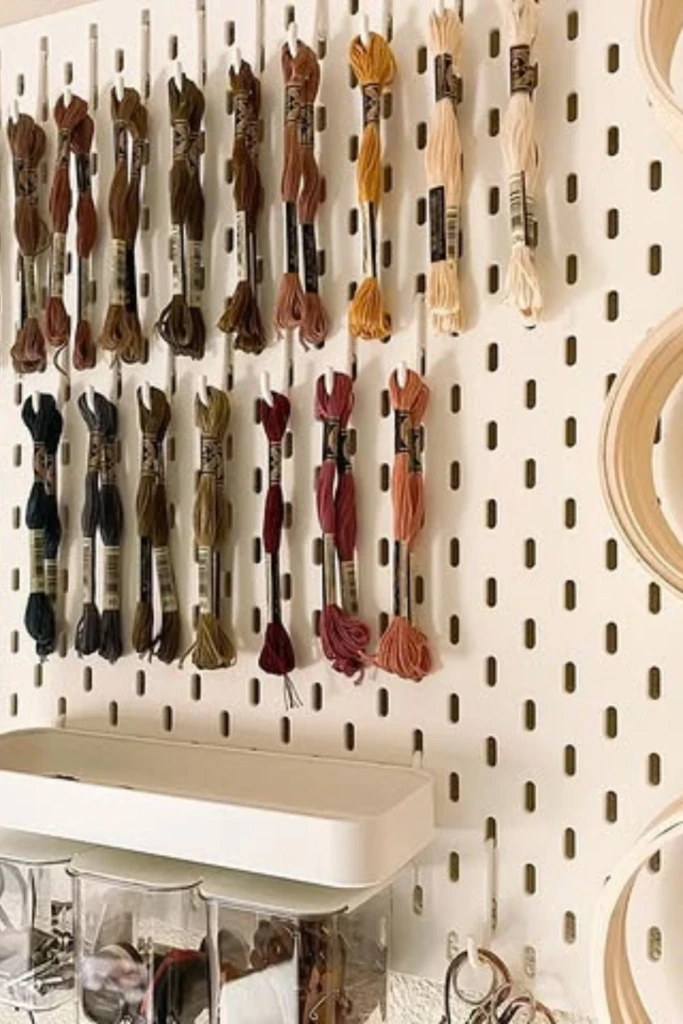
A floss display makes your thread collection easy to browse while adding a decorative touch to your craft space. Wall-mounted racks, countertop stands, and tiered holders allow you to arrange skeins or spools so their colors remain visible.
This option works particularly well for frequently used threads and collections that you enjoy seeing while planning new projects. Arrange the colors in a rainbow sequence or group them according to brand and shade number.
Keep in mind that exposed thread can collect dust and may fade if left in direct sunlight for long periods. Place the display away from bright windows, cooking areas, and other sources of dirt or moisture. Store delicate or rarely used threads in closed containers for additional protection.
7. Clothespin Rack
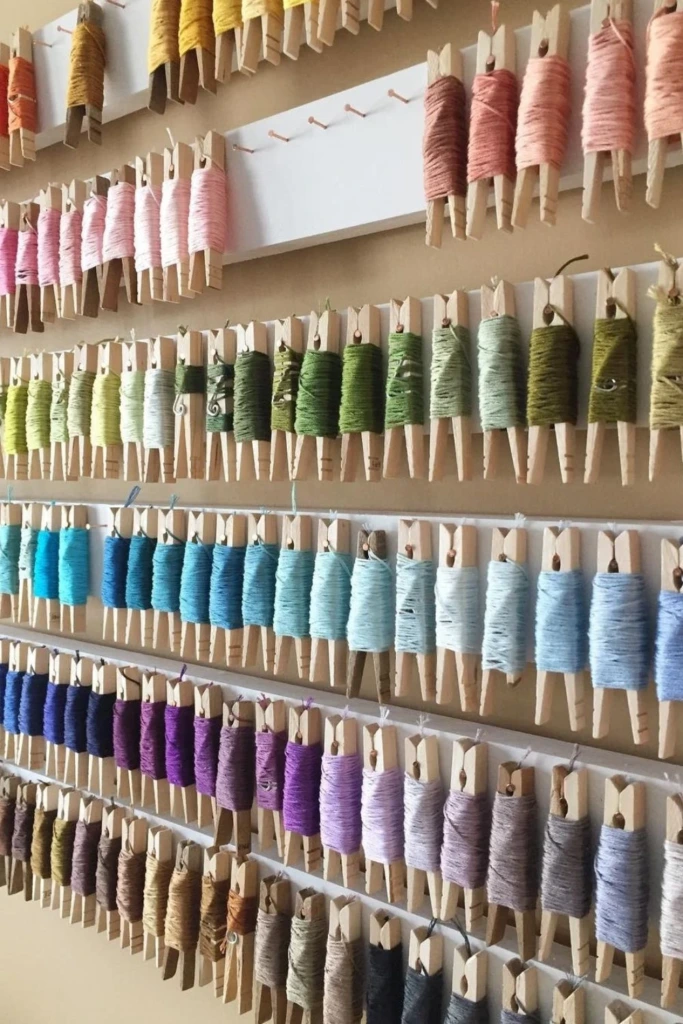
A clothespin rack offers an inexpensive solution for managing embroidery floss without investing in specialized organizers. Wind a manageable length of floss around each clothespin and tuck the loose end into the clip or around the pin so it stays in place.
Arrange the clothespins in a shallow box, on a rail, or inside a divided container. If you use wooden clothespins, make sure they are smooth and free from splinters that could catch on the thread.
Label each pin with the color number or a short description. This approach is especially useful for leftover floss from completed projects, although it may be less convenient than bobbins for storing a large collection of full skeins.
8. Project Cases
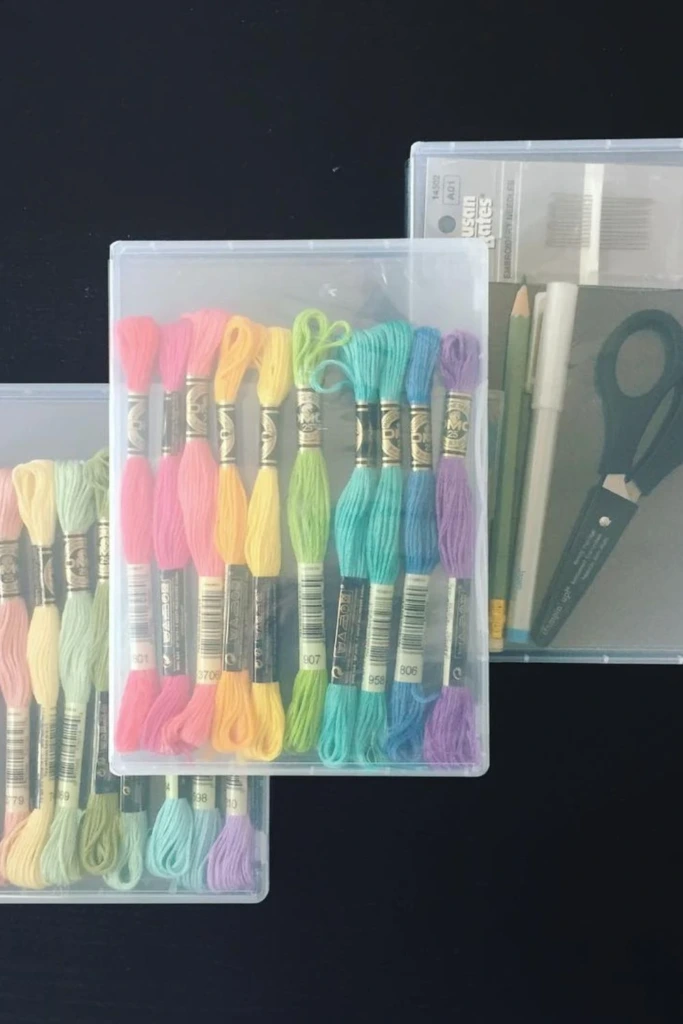
Project cases keep the materials for individual embroidery designs together. Instead of gathering your floss, fabric, pattern, and tools every time you want to stitch, you can store everything in one portable container.
Look for cases with separate pockets or compartments for small supplies. A flat zippered pouch works well for simple projects, while a larger case with adjustable dividers can accommodate hoops, scissors, thread organizers, and printed instructions.
Consider labeling each case with the project's name or intended design. Keep needles in a secure needle holder and scissors in a protective sleeve. If you work on several projects simultaneously, separate cases help prevent thread colors and pattern pieces from becoming mixed up.
9. Color Wall
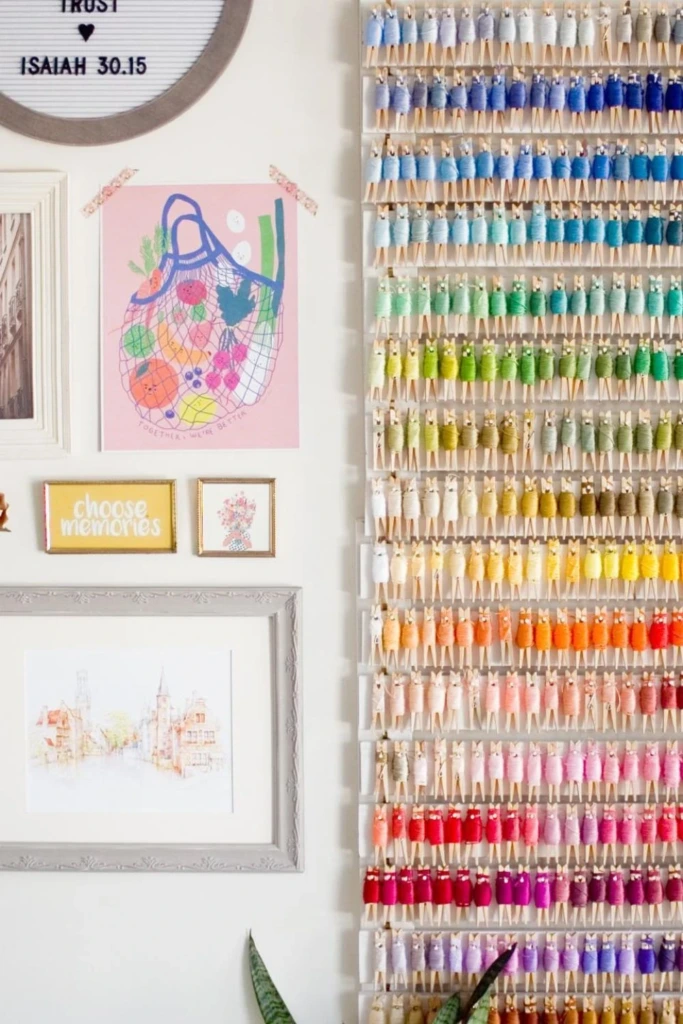
A color wall turns thread organization into a visual system. Use wall-mounted racks, shallow shelves, or a collection of small transparent containers to arrange embroidery floss by hue.
Start with a consistent sequence, such as red, orange, yellow, green, blue, purple, pink, brown, gray, and white. Within each group, arrange shades from light to dark. This makes it easier to compare similar colors when selecting floss for shading, gradients, or detailed designs.
You can add color labels and thread numbers beneath each section to make the system more accurate. A color wall is particularly helpful for stitchers who frequently choose shades by sight, but protect the threads from direct sunlight and dust to preserve their appearance.
10. Acrylic Drawers
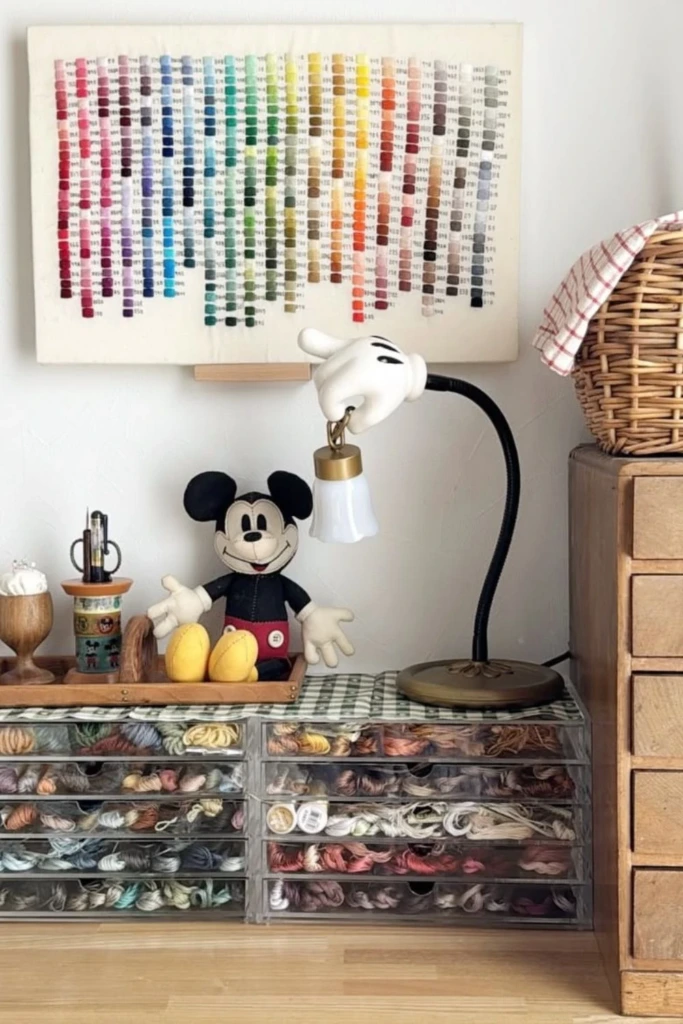
Acrylic drawers provide clear, compact storage for embroidery materials. Because the containers are transparent, you can see the contents without opening every drawer, which is useful when working with many similar-looking thread shades.
Use smaller drawers for bobbins, beads, needles, and other accessories, and reserve larger compartments for skeins, fabric scraps, or project supplies. Removable inserts can help divide a drawer into sections for different colors or thread brands.
These organizers work well on desks, shelves, and craft carts. To maintain a tidy appearance, avoid overfilling the drawers and place a label on the front of each one. Keep acrylic storage away from excessive heat and strong sunlight.
11. Travel Kit
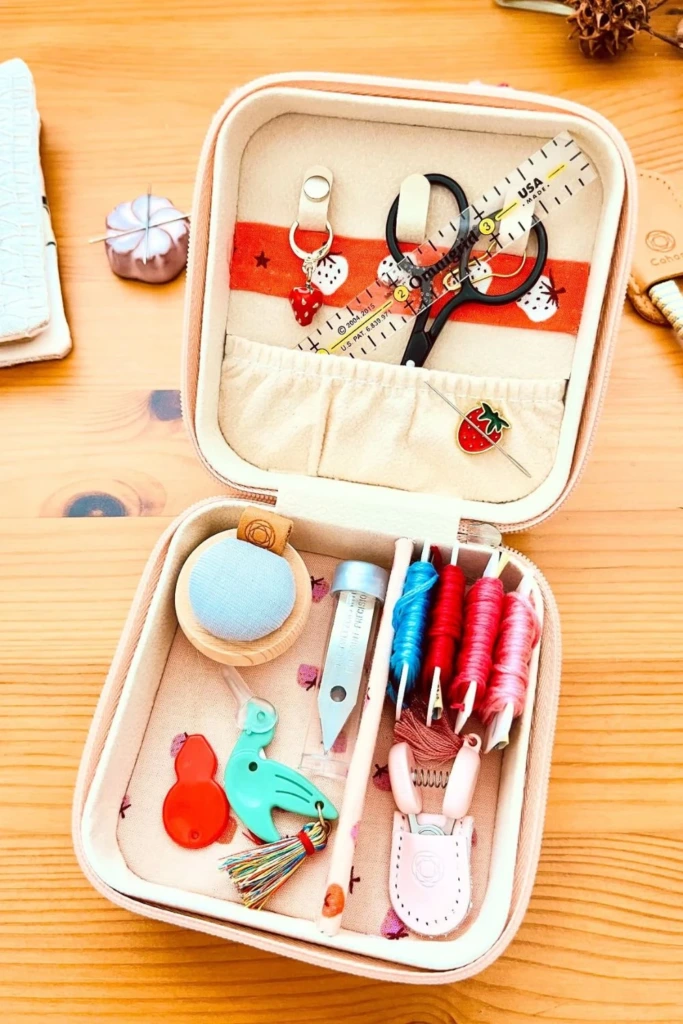
An embroidery travel kit lets you take your hobby on trips, commutes, or visits without carrying your entire collection. A compact zippered pouch or small hard-sided case can hold the essentials for one or two projects.
Include the required floss, fabric, pattern, needles, small scissors where permitted, and a needle minder or secure needle holder. Store each thread color separately so loose strands don't become tangled while the kit moves around.
Choose a case that closes securely and has enough structure to protect your work. If you travel frequently, prepare a ready-to-go kit containing your most-used tools, then add project-specific supplies before leaving. Check applicable transport rules before packing scissors or other sharp tools.
12. Thread Tray
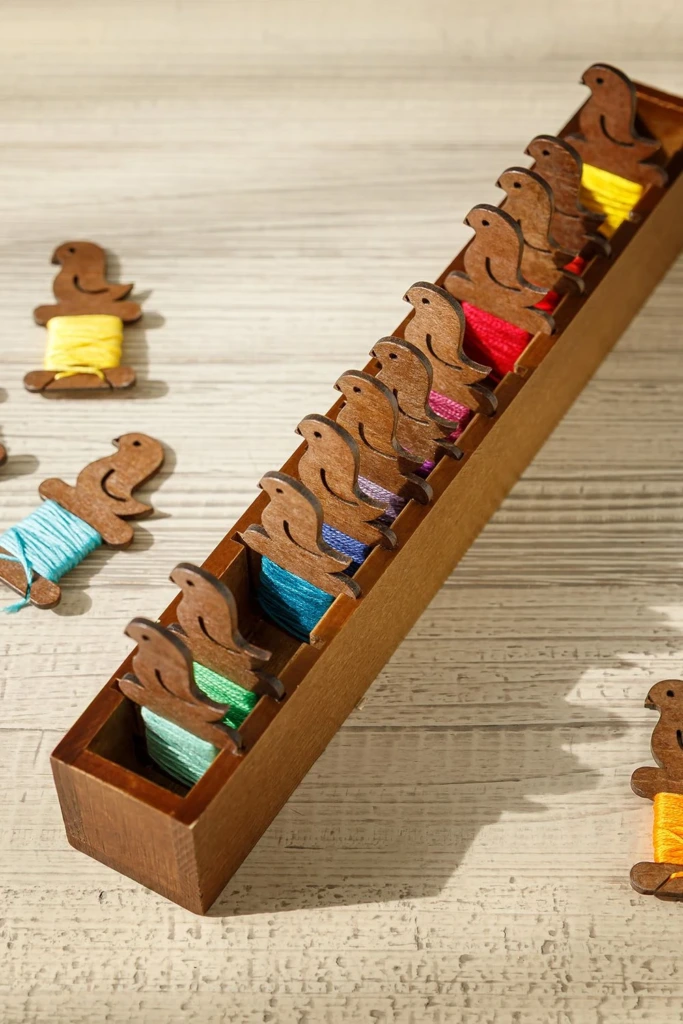
A thread tray keeps the supplies for your current project within easy reach. Place it beside your embroidery frame or on your craft table so you can access thread, scissors, needles, and other small tools without interrupting your stitching.
Trays with multiple compartments are especially useful because they separate different colors and prevent small accessories from rolling off the work surface. A shallow tray is ideal for a compact setup, while a larger model can accommodate several thread organizers and a pattern reference.
If you regularly stitch in different rooms, choose a tray with raised edges and sturdy handles. You can move your working supplies together and return the tray to a designated storage spot when you're finished.
13. Spool Board
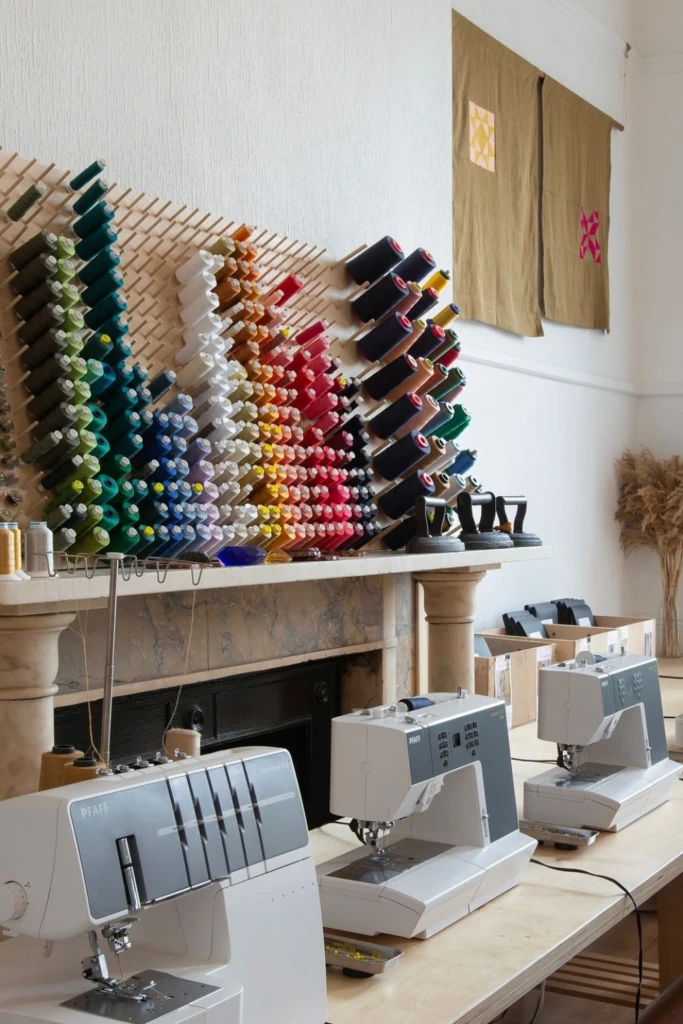
A spool board is useful for organizing embroidery thread that comes on spools or small reels. Pegs or fitted holders keep each spool upright, making the thread color and remaining quantity easier to inspect.
Arrange spools by shade, thread type, or manufacturer, depending on how you select supplies. Labels beneath the holders can record color numbers and other useful details.
Before using a board, check that the pegs fit your spools and that the board can support their combined weight. Mount it securely if it's intended for wall use. Since an open board exposes thread to dust and light, consider covering it or keeping delicate specialty threads in closed storage.
14. Cubby Organizer
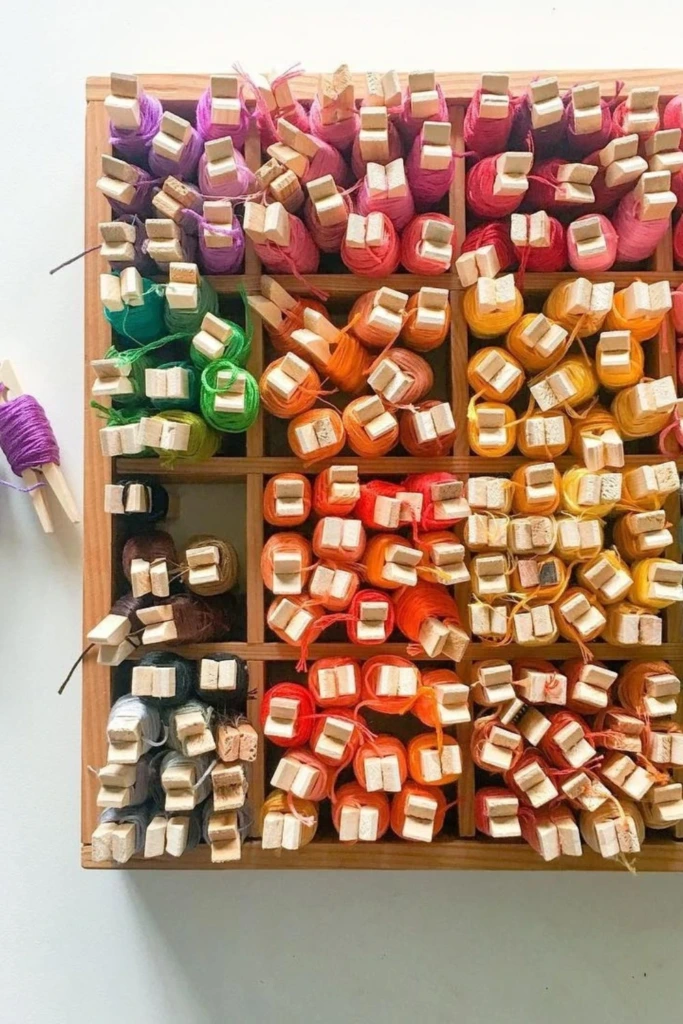
A cubby organizer provides flexible storage for embroidery supplies of different sizes. Each compartment can hold a particular category, such as floss boxes, fabric bundles, hoops, pattern folders, or project cases.
Use small bins inside the cubbies to keep loose materials contained. Matching containers create a coordinated look, while transparent or open-front bins make it easier to identify what's inside.
Assign the most accessible compartments to frequently used supplies and reserve higher or lower sections for occasional materials. Labeling each cubby prevents the system from becoming a collection of miscellaneous items over time.
If you place a cubby unit on a desk or shelf, make sure it is stable and suitable for the weight of the contents. Secure tall units to the wall when necessary.
15. Spool Stand
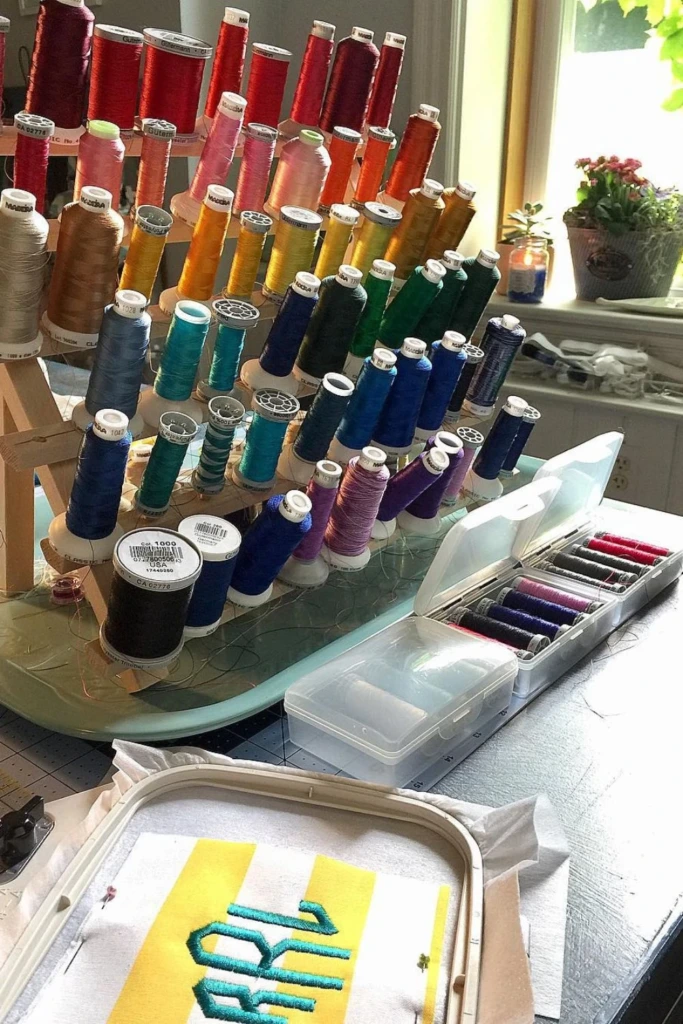
A spool stand keeps thread spools upright and accessible while you work. Depending on the design, it may hold a handful of spools on a tabletop or accommodate a larger collection on a rotating base.
This arrangement is useful when you regularly use machine embroidery thread or other floss supplied on reels. It lets you compare colors quickly and reduces the need to stack spools inside a drawer.
Choose a stand with pegs that fit your spool sizes and a stable base that won't tip easily. If you work with several types of thread, dedicate separate stands to different materials or thread weights so you can find the appropriate option quickly.
For long-term storage, keep the stand away from direct sunlight and excessive humidity. A cover can also help prevent dust from accumulating on exposed spools.
16. Color Cases
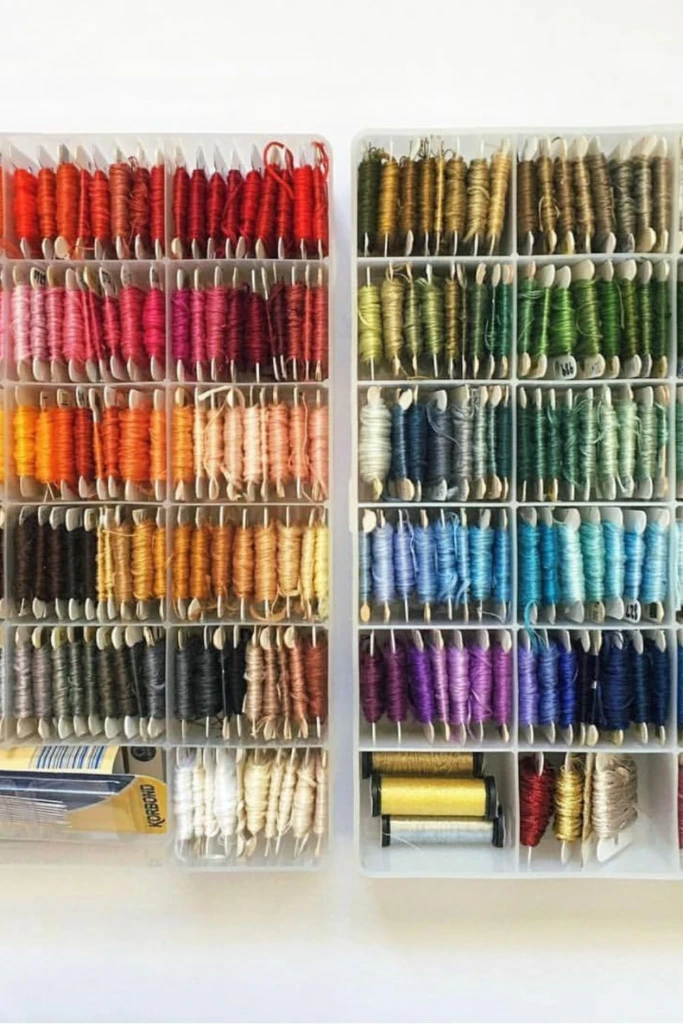
Color cases organize embroidery floss into groups that are easy to retrieve. These cases typically feature multiple compartments or small removable containers, allowing you to separate threads by color family, project, or shade number.
For example, one case could hold warm colors while another contains blues, greens, and purples. If you prefer working with manufacturer color codes, arrange the floss numerically and keep an index of the shades in each case.
Compact cases are convenient for smaller collections and travel, while larger models can store a substantial number of bobbins. Choose a design with secure latches and dividers that won't shift when the case is moved.
Label the outside clearly, and return each thread to its assigned compartment after use. Consistency makes the system far more useful than simply sorting everything once.
17. Craft Station
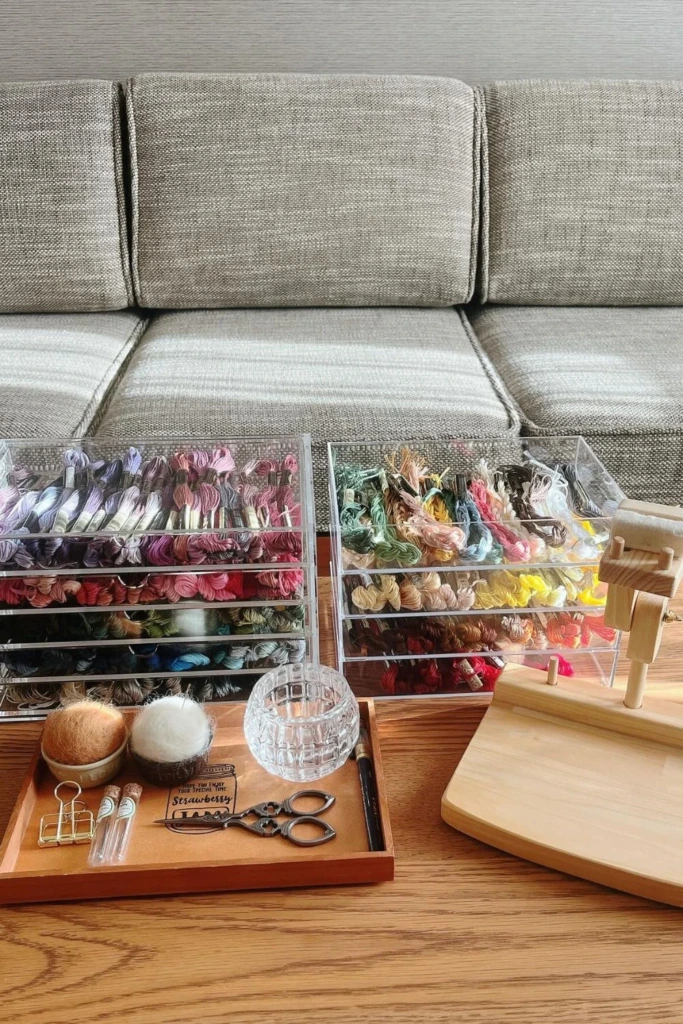
A dedicated craft station brings your embroidery supplies, work surface, and storage together. It doesn't need to be a separate room; a small desk, a corner of a bedroom, or a section of a multipurpose table can serve the same purpose.
Keep the items you use most often within reach, including scissors, needles, hoops, and current project materials. Store reserve floss, spare fabric, and completed projects in nearby drawers, cabinets, or labeled boxes.
Good lighting is essential, particularly when working with dark thread or detailed stitches. Add a comfortable chair and leave enough space to spread out your fabric without knocking over supplies.
At the end of each session, return tools to their usual places and clear the main work surface. A brief reset helps you begin the next project without first having to reorganize the entire station.
18. Label Drawers
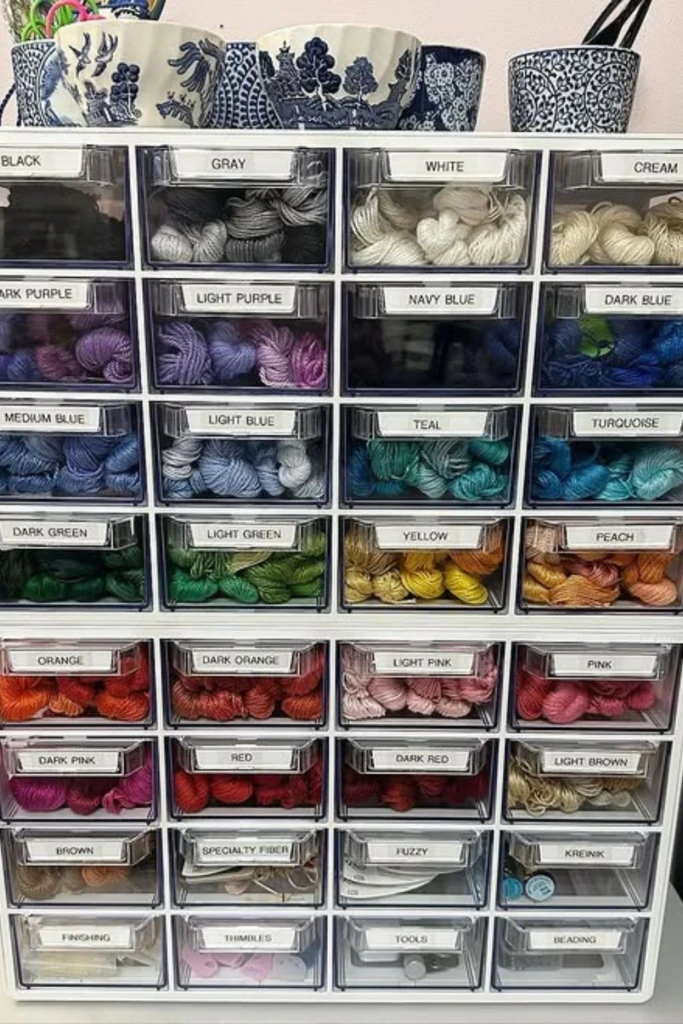
Labels make embroidery storage easier to maintain, especially when multiple drawers look alike. Instead of opening every compartment to find a particular shade or tool, you can identify the correct location immediately.
Use broad labels for categories such as floss, needles, fabric, hoops, and patterns. For more detailed collections, add color-family names, manufacturer codes, or numerical ranges.
Labels can be handwritten, printed, or attached to removable holders. Clear wording matters more than decorative design, although color-coded labels can provide an additional visual cue.
If you frequently change your organization system, use removable labels that can be updated without leaving residue. Review them occasionally to ensure they still match the contents, particularly after adding supplies or rearranging drawers.
19. Thread Chest
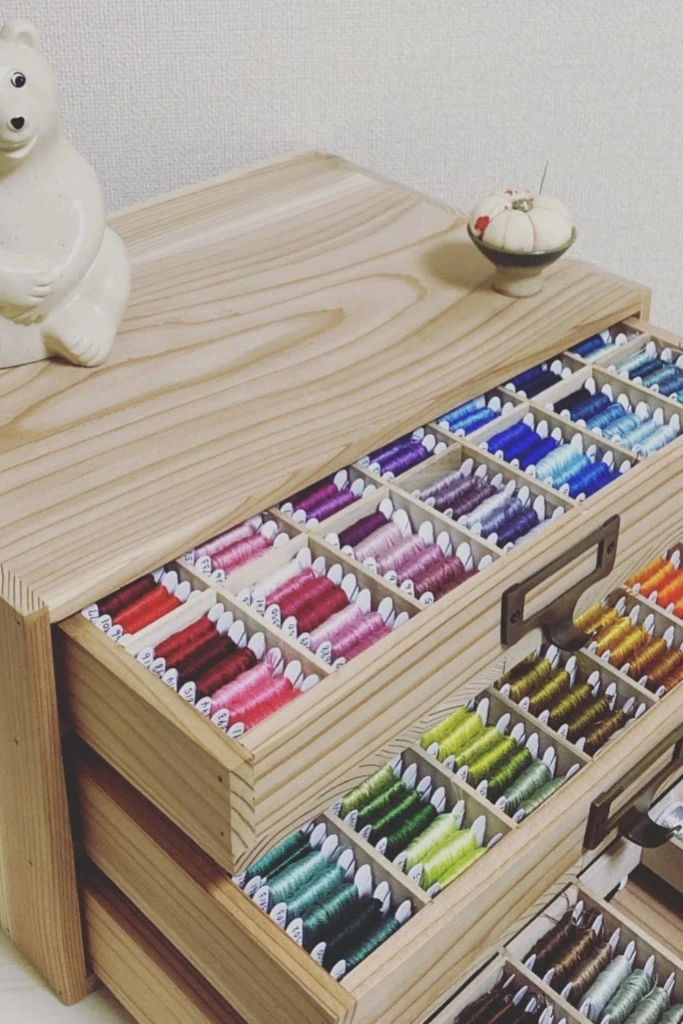
A thread chest is a traditional storage option for embroidery enthusiasts with extensive collections. These chests often feature several drawers or compartments, allowing different thread types, colors, and accessories to remain organized in one piece of furniture.
Choose a chest with drawers deep enough for your preferred storage method. Shallow drawers are convenient for bobbins, while deeper compartments can hold skeins, spools, fabric, and larger tools.
You can organize the chest by color family, thread brand, project type, or numerical shade sequence. Small dividers and labeled sections help keep everything in place.
A thread chest can also protect supplies from everyday dust and clutter. Place it in a dry location and avoid storing damp fabric or unfinished projects inside, as trapped moisture can damage both textiles and wooden furniture.
20. Floss Cabinet
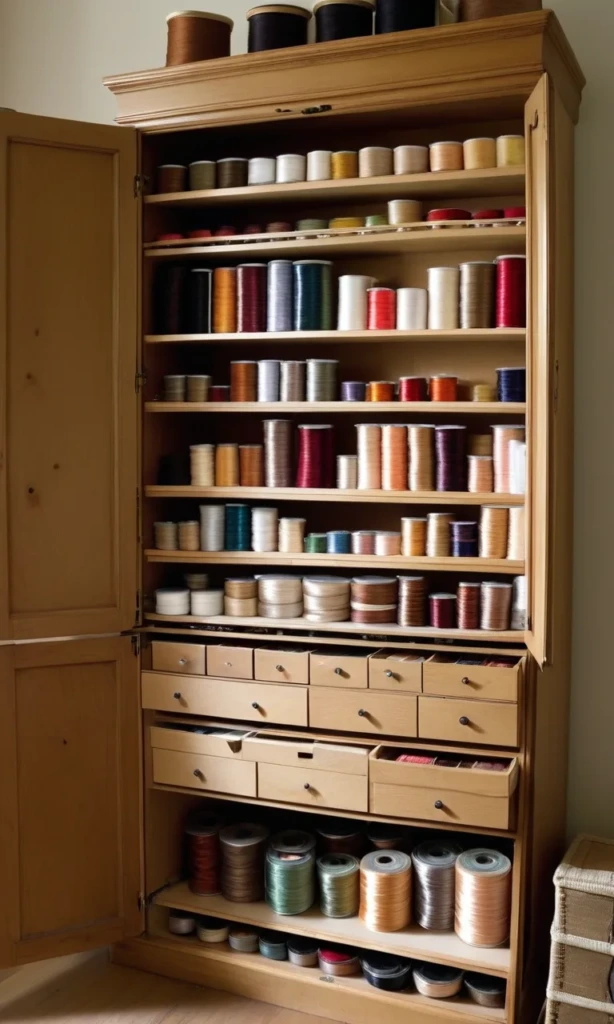
A floss cabinet offers substantial storage for stitchers who have accumulated hundreds of colors. Cabinets with numerous shallow drawers are particularly useful because they provide a dedicated place for individual shades while keeping the overall collection contained.
Organize the floss according to a system that suits your workflow. A numerical arrangement works well when patterns specify manufacturer color codes, while a color-based arrangement is useful when you select thread visually.
Create an index showing which drawer contains each shade or numerical range. This becomes increasingly helpful as the collection grows. You can also reserve separate drawers for specialty threads, metallic floss, variegated colors, and partially used skeins.
Before purchasing a cabinet, measure the available space and consider drawer capacity, accessibility, and stability. A well-planned cabinet makes it easier to track supplies, identify missing colors, and avoid buying duplicates unnecessarily.
FAQs
Embroidery storage becomes easier when you choose a system that matches the size of your collection and the way you work. Some stitchers prefer neatly wound bobbins, while others want to preserve their floss in its original skein. The following answers cover two common questions to help you decide how to organize your supplies.
Is it better to store embroidery floss on bobbins or keep it in skeins?
Both methods work well, and the right choice depends on how you use your embroidery floss.
Bobbins are convenient when you frequently work with individual colors, want a compact storage system, or need to keep partially used thread organized. Winding the floss onto labeled bobbins makes it easier to see your collection and prevents loose strands from becoming tangled. Plastic bobbins are generally durable, while cardboard versions offer an inexpensive alternative.
Keeping floss in skeins is a good option when you prefer the original packaging, want to preserve the manufacturer's color information, or use longer lengths of thread. It also avoids the extra step of winding every new skein. However, loose skeins can become tangled if they're stored together without dividers or protective bags.
A practical approach is to use both methods. Wind frequently used or partially used floss onto bobbins, and keep unopened or specialty skeins in labeled compartments. This gives you convenient access without requiring you to reorganize your entire collection.
How do you organize embroidery floss by color efficiently?
Begin by gathering your floss in one place and separating it into broad color families. Common groups include reds, oranges, yellows, greens, blues, purples, pinks, browns, grays, blacks, and whites.
Next, choose a consistent arrangement within each family. You might sort shades from light to dark, arrange them by manufacturer color number, or combine the two methods by grouping colors first and ordering them numerically within each section.
Use labeled bobbins, divided boxes, drawer organizers, or transparent cases to maintain the arrangement. If you follow embroidery patterns that specify particular thread codes, recording those codes is especially important because visually similar shades are not always interchangeable.
For a large collection, create a simple inventory in a notebook or spreadsheet. Record each thread's brand, color number, and storage location so you can check what you already own before buying more.
Most importantly, choose a system you can maintain after every project. An easy-to-follow arrangement will save more time in the long run than an elaborate system that becomes difficult to update.
With the right embroidery storage setup, your threads stay easier to find, your tools remain accessible, and your workspace becomes more enjoyable to use. Start with a simple organizer that meets your current needs, then expand your system as your collection grows. Whether you choose a small bobbin box or a full floss cabinet, consistency is the key to keeping your embroidery supplies tidy and ready for your next creative idea.