Valentine Crafts for Adults: 50 DIY Ideas That Look Beautiful at Home
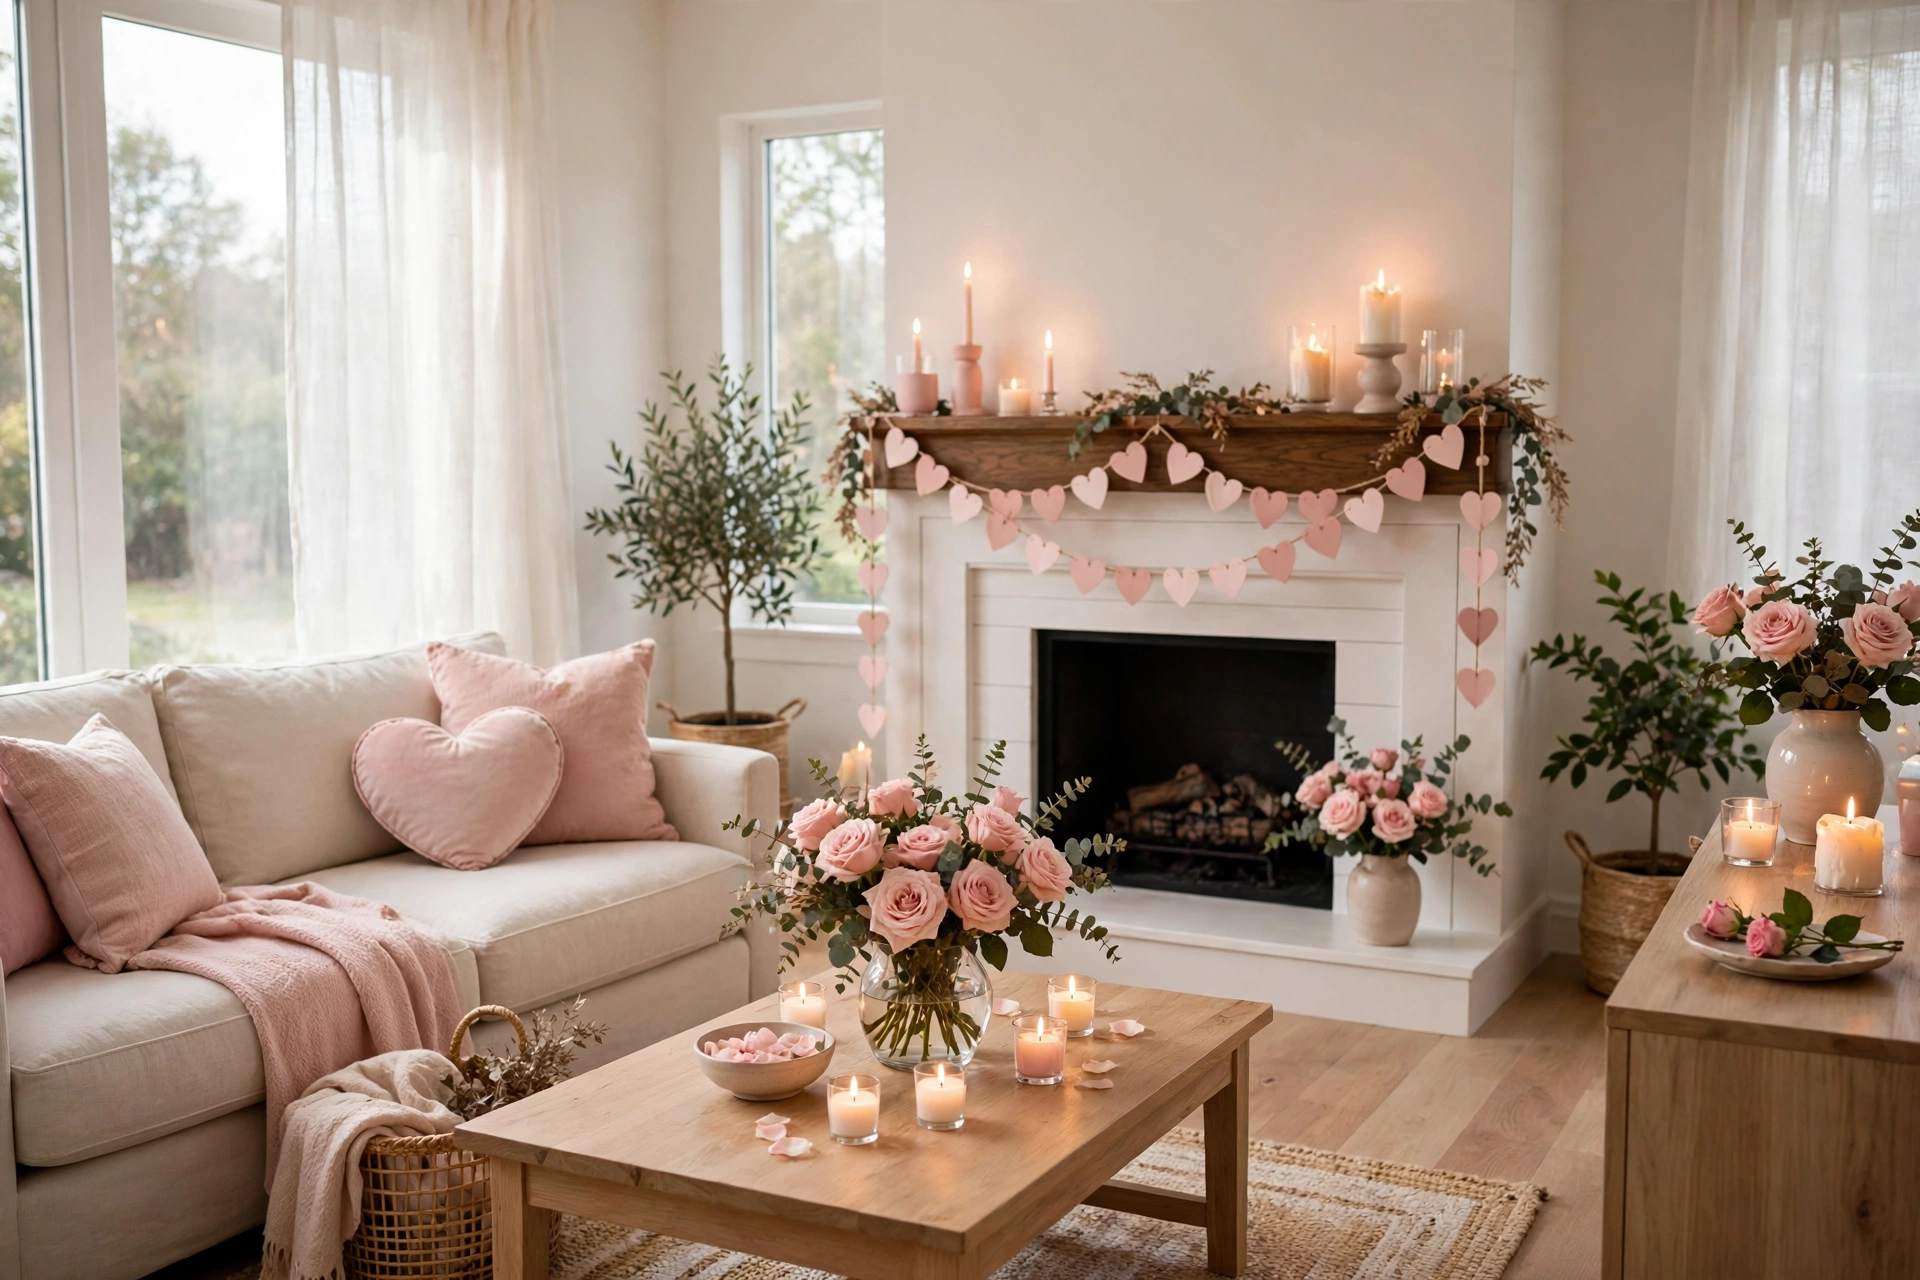
Valentine crafts for adults should be things you actually want to keep out, not projects you hide when guests come over. This list is full of modern, romantic ideas that look at home on a mantel, a dining table, or a nightstand: velvet wreaths, wax seals, resin coasters, embroidered linen, and plenty of gifts worth giving.
Every craft below is a project a grown-up will enjoy making, whether you have a quiet evening to yourself, a Galentine’s night with friends, or a weekend to fill. Most use basic supplies you may already own, like a glue gun, scissors, paint, and ribbon, and none of them need advanced skills. Pick one to start, or mix a few into a set: a self-care gift with soap and bath bombs, a party corner with garlands and lanterns, or a slow evening project with embroidery and a cup of tea.
If little hands want to join in, our Valentine’s Day crafts for kids keep the glitter where it belongs. The ideas below are the grown-up table.

Jump to section (52)
- Velvet Heart Wreath
- Disco Heart Garland
- Heart-Shaped Resin Coasters
- Pressed Flower Heart Frame
- Wax Seal Love Notes Set
- Painted Heart Wine Glasses
- Minimalist Heart Clay Ring Dish
- Dried Orange and Rosebud Heart Swag
- Chunky Knit Heart Pillow (No-Sew)
- Elegant Heart Candle Wraps
- Painted “Love Letter” Mirror
- Heart-Shaped Floral Foam Arrangement (Faux)
- Embroidered “XO” Hoop Art
- Macrame Heart Wall Hanging
- Linen Napkins with Heart Embroidery
- Heart-Shaped Bath Bombs
- Heart-Shaped Marbled Soap Bars
- Heart Beaded Bracelet Stack
- Heart Photo Clip Display
- “Love Potion” Apothecary Labels
- Heart-Shaped Charcuterie Marker Flags
- Ombre Heart Canvas Painting
- Heart-Shaped Candle
- Romantic Book Page Heart Banner
- Faux Neon “LOVE” Sign
- Framed “Reasons I Love You” Mini Notes
- Heart-Shaped Pom-Pom Rug
- Heart-Shaped Air-Dry Clay Trinket Tray
- Heart-Shaped Felt Coasters
- Heart “Gallery Wall” Printable-Style Collage
- Heart-Shaped Chocolate Wrapper Gift Labels
- Heart-Shaped Paper Lantern Cluster
- Heart-Shaped Succulent Planter Wrap
- Heart-Shaped Jewelry Dish
- Heart-Shaped Keychain
- Heart-Shaped “Open When” Envelope Bundle
- Heart-Shaped “Message in a Bottle” Jar
- Heart-Shaped Suncatcher Clings
- Heart-Shaped Woven Wall Basket
- Heart-Shaped “Love Tokens” Clay Charms
- Heart-Shaped “Sparkle” Phone Grip Topper
- “Love” Ceramic Mug Vinyl Decal
- Heart-Shaped “Date Night” Jar Cards
- Heart-Shaped “Sweetheart” Door Hanger
- Heart Confetti “Shake Frame”
- Heart-Shaped “Bougie” Matchbox Covers
- Heart-Shaped “Kiss” Lip Balm Labels
- Heart-Shaped “Love Notes” Cupcake Topper Picks
- Heart-Shaped “Satin Bow” Garland
- Heart-Shaped “Love Language” Conversation Cards
- Valentine Crafts for Adults: Frequently Asked Questions
- Valentine Crafts for Adults Worth Making Again
1. Velvet Heart Wreath
A soft velvet wreath makes a front door feel welcoming before anyone steps inside, and this heart shape keeps the look romantic without feeling fussy. Deep red ribbon catches the light beautifully, and the full bow at the top adds a polished finish that suits both classic and modern entryways.
This is one of those valentine crafts for adults that looks far more involved than it really is, since most of the time goes to wrapping and smoothing the ribbon. Choose a sturdy heart frame, keep your tension even, and step back now and then to check that the shape stays balanced on both sides.
What you need:
- Heart-shaped wreath frame
- Wide velvet ribbon in deep red
- Scissors
- Craft glue or a glue gun
- Hanging ribbon or a wreath hook
How to make it:
- Anchor the end of the velvet ribbon to the back of the frame with a small dot of glue and let it set.
- Wrap the ribbon around the frame, overlapping each pass slightly and pulling gently so the surface stays smooth.
- Continue around the full heart, easing the ribbon around the point and the top dip without bunching it.
- Glue the ribbon end neatly at the back, then trim any loose threads.
- Tie a full bow from a fresh length of ribbon, glue it at the top dip, and add a hanging loop at the back.

2. Disco Heart Garland
A little sparkle goes a long way at a Valentine gathering, and this garland brings shine without taking over the room. Small mirrored balls and hearts catch candlelight and daylight alike, so the display keeps changing as you move around it. Hang it over a bar cart or a mirror for an instant focal point.
Varying the drop lengths is what makes this piece feel styled rather than flat, so let some hearts hang low and keep others close to the main line. Work on a table first to settle your spacing, then lift the finished garland into place and adjust the heights once you can see it in the room.
What you need:
- Twine or clear thread
- Small mirrored disco balls
- Mirrored heart ornaments
- Small metal rings
- Scissors
- Removable hooks
How to make it:
- Cut a length of twine to fit your space, leaving extra at each end for tying.
- Tie short drops of twine along the main line at varied lengths.
- Attach a disco ball or a heart to the end of each drop with a small ring, checking that each knot holds.
- Lay the garland flat and adjust the spacing until the mix of balls and hearts feels balanced.
- Hang the garland with removable hooks and tweak the drops so nothing crowds the cart or mirror below.

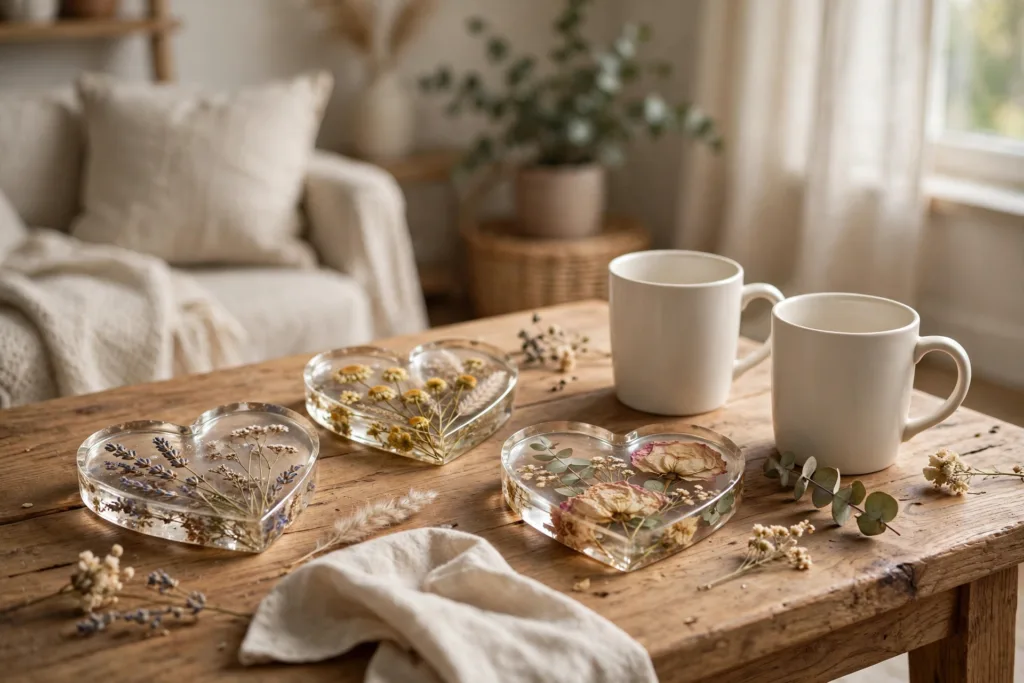
3. Heart-Shaped Resin Coasters
Clear resin turns a handful of dried flowers into coasters that look delicate but hold up to everyday mugs. The flowers stay suspended in the clear surface, so each coaster has its own soft pattern and no two pieces match exactly. Thin layers keep bubbles low and help the flowers stay where you place them.
Take your time with this one and work in a well-ventilated space, with gloves on and your surface fully covered. Read the instructions on your resin kit before you begin, since curing times vary, and let each layer set before you add the next so the flowers do not drift or float to the top.
What you need:
- Heart-shaped coaster molds
- Clear craft resin kit
- Dried flowers and small leaves
- Mixing cups and stir sticks
- Disposable gloves
- Toothpick for popping bubbles
How to make it:
- Cover your work surface, put on gloves, and arrange the dried flowers beside the molds.
- Mix a small batch of resin exactly as the kit directs, stirring slowly to limit bubbles.
- Pour a thin base layer into each mold and let it begin to set.
- Place dried flowers on the base layer, pressing them gently into position with a toothpick.
- Pour the next thin layer to cover the flowers, then pop surface bubbles with the toothpick.
- Let the coasters cure fully as directed, then pop them from the molds and check the edges.
4. Pressed Flower Heart Frame
Pressed flowers have a quiet, romantic feel that suits a mantel all season, and arranging them in a heart shape keeps the design focused. A glass frame lets light pass through the petals, so the colors look soft and natural rather than flat. This is a gentle project that rewards patience more than speed.
Choose flat blooms and small leaves that will press evenly, and plan your heart outline before you glue anything down. A light hand with adhesive keeps the glass clean, and leaving a little breathing room between stems helps each flower show. Once the arrangement feels balanced, close the frame and set it where daylight can reach it.
What you need:
- Glass floating frame
- Pressed flowers and leaves
- Plain background card or paper
- Craft glue or clear adhesive dots
- Tweezers
How to make it:
- Lay out the pressed flowers and sort them by size and color.
- Sketch a light heart outline on the background card as a guide, keeping it centered.
- Arrange the flowers along the outline with tweezers, starting with the largest blooms.
- Fill gaps with small leaves and tiny flowers until the heart shape reads clearly.
- Glue each piece in place, let the adhesive dry fully, and close the frame.

5. Wax Seal Love Notes Set
A folded note closed with a wax seal feels special the moment someone picks it up, whether it holds a love letter or a place setting message. The deep red seal adds color and texture, and the slight irregularity of each seal is part of its charm. Make a small set at once so you always have one ready to give.
Practice a few seals on scrap paper first to find the right amount of wax and the best pressing time for your stamp. Keep your stamp cool and dry between uses, and work on a heat-safe surface so drips do not mark your desk. Once you feel confident, move on to your good envelopes and note cards.
What you need:
- Blank note cards and envelopes
- Sealing wax sticks or beads
- Wax seal stamp
- Small spoon and a low heat source
- Scrap paper for practice
- Heat-safe mat
How to make it:
- Fold your notes and slip each one into an envelope, leaving the flap open.
- Melt a small amount of wax and spoon a neat pool onto the envelope flap.
- Press the stamp firmly into the wax and hold it still for a few seconds.
- Lift the stamp straight up and let the seal cool fully before handling the envelope.
- Repeat for the remaining notes, practicing on scrap paper again if a seal looks uneven.

6. Painted Heart Wine Glasses
Hand-painted wine glasses turn an ordinary dinner into something worth remembering, and simple hearts are forgiving for a first painting project. Soft pink and red hearts look pretty against clear glass, especially when the sizes vary a little. Keep the design above the base and away from the rim for comfortable sipping.
Two thin coats give a smoother, more even color than one thick coat, so let the first coat dry fully before you paint over it. A small brush or a pencil eraser dipped in paint makes neat heart dots, and a damp cloth wipes away a wobble while the paint is still wet. Let the finished glasses cure as the paint directs before washing.
What you need:
- Plain wine glasses
- Glass paint in pink and red
- Small paintbrushes
- Rubbing alcohol and a lint-free cloth
- Pencil eraser or dotting tool
How to make it:
- Wash and dry the glasses, then wipe the outside with rubbing alcohol to remove oils.
- Plan your heart placement, keeping the design below the rim and above the stem.
- Paint the first coat of hearts with a small brush, using light, even strokes.
- Let the first coat dry fully, then add a second coat over each heart for opacity.
- Touch up edges with a damp cloth while the paint is wet, or a toothpick once dry.
- Let the glasses cure as directed, then hand wash gently before first use.

7. Minimalist Heart Clay Ring Dish
A small clay heart dish gives rings a proper home on a nightstand, and its clean white surface suits almost any bedroom. Air-dry clay is easy to shape by hand, so you do not need a kiln or special tools to get a smooth result. The finished dish feels personal and useful long after Valentine’s Day has passed.
Smoothing the edges while the clay is still damp makes the biggest difference to the final look, so keep a little water nearby and work slowly. Press the center down gently to form a shallow bowl, and let the dish dry fully before you sand or seal it. A clear sealant helps protect the surface from water and everyday wear.
What you need:
- Air-dry clay
- Rolling pin
- Heart template cut from card
- Craft knife or clay cutting tool
- Fine sandpaper and clear sealant
How to make it:
- Knead the clay until soft, then roll it to an even thickness on a clean surface.
- Place the heart template on the clay and cut around it with a craft knife.
- Smooth the cut edges with a damp fingertip until they feel even.
- Press the center down gently and lift the edges slightly to form a shallow dish.
- Let the dish dry fully, turning it once so both sides dry evenly.
- Sand lightly, wipe away dust, and apply clear sealant as directed.

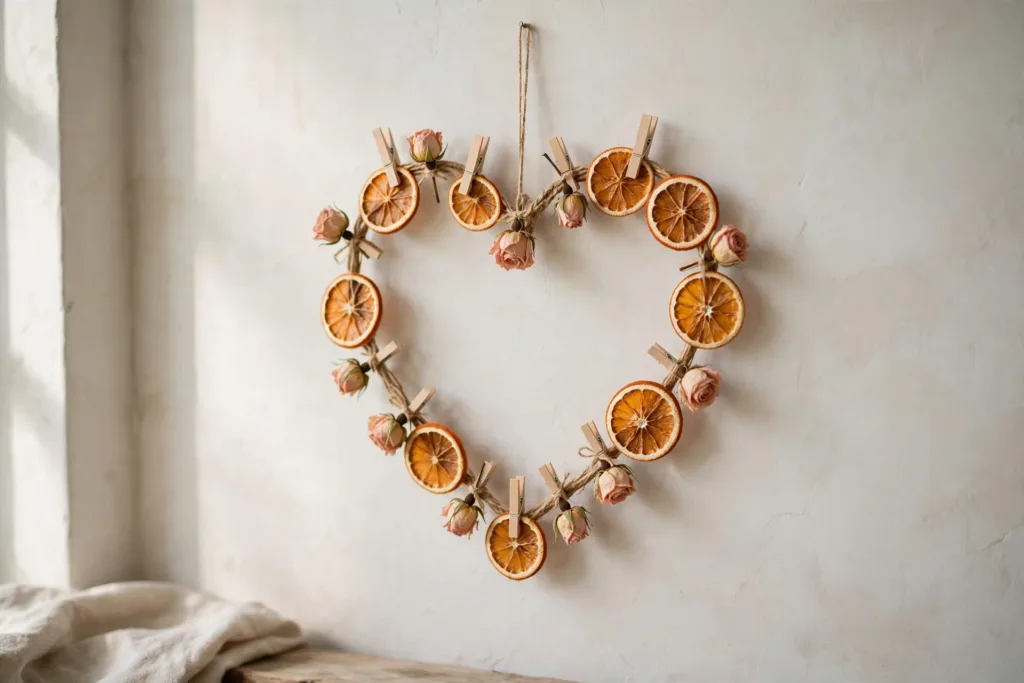
8. Dried Orange and Rosebud Heart Swag
Dried orange slices and rosebuds bring warmth, color, and a light citrus scent to a plain wall, and the heart curve gives this swag a clear Valentine feel. The natural materials look lovely against pale paint, and the simple twine base keeps the whole piece relaxed rather than formal. It is light enough to hang with a single nail or hook.
Use fully dried orange slices so the swag stays flat and does not curl as it hangs, and space the rosebuds evenly so the heart shape stays easy to read. Small clips make it simple to adjust the layout before you commit, and they add a charming handmade detail. Check the balance from across the room before you hang it for good.
What you need:
- Dried orange slices
- Dried rosebuds
- Sturdy twine
- Small wooden clips
- Scissors
- Wire or a heart-shaped frame for shaping
How to make it:
- Form the twine into a heart curve on a table, using a frame or wire as a guide if needed.
- Clip dried orange slices along the twine, spacing them evenly around the curve.
- Add rosebuds between the slices, turning some outward so the buds show from the front.
- Step back and adjust the spacing until the heart shape looks balanced.
- Tie a hanging loop at the top and hang the swag on a nail or hook.
9. Chunky Knit Heart Pillow (No-Sew)
A cream pillow with a chunky heart outline feels cozy and handmade, and you can make it without picking up a needle and thread. Thick yarn gives the heart a soft, raised texture that stands out against smooth cushion fabric. Keep the rest of your sofa styling simple so this pillow becomes the focal point.
The trick is to fix the yarn heart firmly so it holds its shape through everyday use, using fabric glue or iron-on bonding tape made for fabric. Lay the yarn out first and pin the shape with the cushion flat, checking the curves from a distance. Let any adhesive set fully before you prop the pillow on the sofa.
What you need:
- Plain cream cushion cover with insert
- Chunky yarn in cream or blush
- Fabric glue or iron-on bonding tape
- Scissors
- Chalk or washable marker for marking
How to make it:
- Mark a heart outline lightly on the front of the cushion cover.
- Cut a length of chunky yarn long enough to follow the full outline with a little extra.
- Apply fabric glue or bonding tape along the marked line, working in short sections.
- Press the yarn onto the line, easing it around the curves and the point of the heart.
- Trim the yarn ends, tuck them neatly at the join, and let the adhesive set fully before use.

10. Elegant Heart Candle Wraps
Paper and ribbon wraps turn plain pillar candles into a polished centerpiece in minutes, with no carving or painting needed. Small heart motifs add a Valentine touch while the neutral candles keep the look calm and elegant. Group candles of different heights on a tray so the display feels layered and intentional.
Safety matters here, so keep every wrap well below the top of the candle and away from the flame, and never leave a lit candle unattended. Removable wraps are the practical choice, since you can slide them off before lighting or use flameless candles for the same glow without worry. Store the wraps flat so they stay crisp for next time.
What you need:
- Pillar candles in varied heights
- Craft paper in blush and cream
- Ribbon
- Scissors and craft glue or double-sided tape
- Heart punch or template and pencil
How to make it:
- Measure around each candle and cut paper bands to fit, leaving a small overlap.
- Cut small paper hearts with a punch or a template, varying the sizes slightly.
- Glue the hearts onto the bands, spacing them evenly and letting the glue dry.
- Wrap each band around a candle and secure it at the back with tape or a dot of glue.
- Tie ribbon around the band, trim the ends neatly, and arrange the candles on a tray.

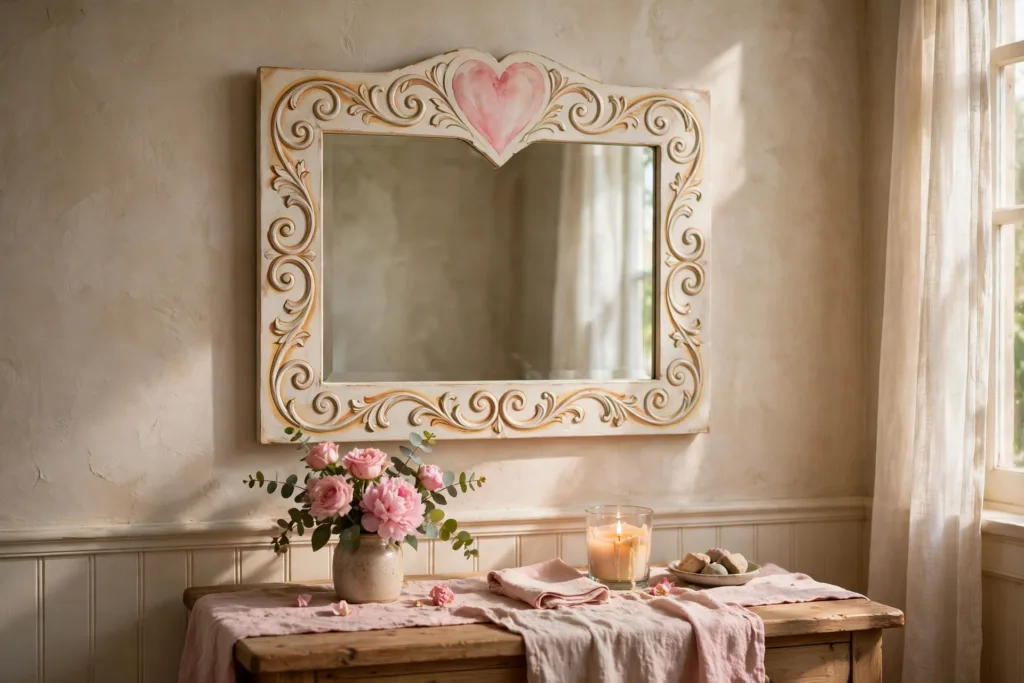
11. Painted “Love Letter” Mirror
A plain mirror becomes a romantic focal point with a little paint and patience. A soft heart and gentle scrolls give a vanity or entryway a sweet, personal touch without a large budget or special tools. Keep the design simple so the mirror still feels calm and elegant, not busy.
This is one of those valentine crafts for adults that looks far more involved than it really is. Work in thin layers, let each one dry fully, and step back often to check the balance before you add more detail.
What you need:
- Small wall mirror with a flat frame
- Glass paint and acrylic craft paint in blush pink and cream
- Fine paintbrushes in two sizes
- Painter’s tape and a soft cloth
- Clear sealer suitable for glass and painted wood
How to make it:
- Clean the mirror and frame well, then let both dry completely.
- Use painter’s tape to protect the glass edges you want to keep clear.
- Paint soft scroll shapes along the top and sides of the frame, using thin, even strokes.
- Add a small painted heart at the top center, then let the paint dry fully.
- Remove the tape, touch up any uneven edges, and finish with a thin coat of sealer.
12. Heart-Shaped Floral Foam Arrangement (Faux)
A heart-shaped floral centerpiece brings instant romance to a dinner table, and faux stems mean it stays fresh all season. Pink roses and soft greenery look lush against a simple tablecloth, and you can reuse the arrangement for other gatherings. Build it low and full so guests can still see each other across the table.
Choose stems in two or three shades of pink so the heart reads clearly from across the room. Tuck greenery around the edges last, since it hides the foam and softens the outline.
What you need:
- Heart-shaped floral foam base
- Faux pink roses in two shades
- Faux eucalyptus or other soft greenery
- Wire cutters
- Floral pins or a hot glue gun with glue sticks
- Shallow tray or plate to sit under the arrangement
How to make it:
- Set the foam base on the tray and check that it sits flat and steady.
- Trim the rose stems short, leaving just enough stem to push firmly into the foam.
- Place the largest roses around the outer edge first to define the heart shape.
- Fill the center with smaller roses, turning the base as you work so the coverage stays even.
- Add greenery around the edges and in any gaps, angling the leaves slightly outward.
- Step back and check the shape from all sides, then adjust any stems that sit too high.

13. Embroidered “XO” Hoop Art
Hoop art is a quiet, satisfying project, and a stitched heart makes a lovely shelf or wall accent long after the season ends. Linen gives the piece a soft, natural texture, and pink thread keeps the design fresh and simple. Even a first embroidery project can look polished when the shape is bold and the stitches stay even.
If you like the idea in the title, add small stitched XO letters beneath the heart as an option. Keep them tiny and centered so the heart stays the star, or leave them out for a cleaner look.
What you need:
- Wooden embroidery hoop
- Plain linen fabric
- Embroidery floss in pink and red
- Embroidery needle and small scissors
- Pencil and a heart template cut from cardstock
How to make it:
- Trace the heart lightly in the center of the linen with the pencil.
- Stretch the linen in the hoop until it feels taut, then tighten the screw.
- Outline the heart with small, even backstitches, following the pencil line closely.
- Fill the outline with rows of close stitches, or leave the center open for a lighter look.
- Add the XO letters below the heart if you wish, then trim the extra fabric at the back and finish the edges neatly.

14. Macrame Heart Wall Hanging
A cream macrame heart adds soft texture to a plain wall and suits almost any style of room. The knotting is repetitive in the best way, slow and calming, and the finished shape feels handmade in the loveliest sense. Hang it above a side table or bed, where the fringe can move gently and catch the light.
Measure and cut all your cords before you start, and keep your tension even from the first knot. Matching the left and right sides as you go is the secret to a neat, symmetrical heart.
What you need:
- Cream cotton macrame cord
- Wooden dowel or metal heart frame
- Sharp scissors
- Measuring tape and a comb for brushing out fringe
How to make it:
- Cut the cords to matching lengths, adding extra length for the fringe at the bottom.
- Attach the cords to the dowel or frame with folded loop knots, spacing them evenly.
- Work rows of square knots across the piece, keeping the tension steady.
- Shape the heart by reducing the number of knots toward the bottom point, checking that both sides match.
- Trim the fringe to a soft point or a gentle curve, then comb it out lightly.
- Add a hanging loop at the top and hang the piece where it can be seen clearly.

15. Linen Napkins with Heart Embroidery
A tiny embroidered heart near the corner of a linen napkin turns an ordinary place setting into something thoughtful. The detail is small, so a full set is very doable in an evening or two, and the napkins wash and reuse beautifully. Use the same thread color on every napkin for a calm, matched set, or vary the pinks slightly for a relaxed feel.
Mark each heart in the same spot before you stitch, so the set looks intentional when folded. A light pencil mark washes out easily and keeps the hearts level across all the corners.
What you need:
- Plain linen napkins
- Embroidery floss in soft pink
- Embroidery needle
- Small embroidery hoop
- Water-soluble fabric pencil or a light pencil
How to make it:
- Wash, dry, and press the napkins so the fabric is smooth and ready to stitch.
- Mark a small heart near one corner of each napkin, keeping the position the same on every napkin.
- Place the marked corner in the hoop and pull the linen gently taut.
- Stitch the heart outline with small, even stitches, then knot the thread neatly at the back.
- Remove the hoop, press the napkin from the back, and fold it so the heart shows at the top.

16. Heart-Shaped Bath Bombs
Heart-shaped bath bombs feel like a small luxury, and they make a charming gift tucked into a jar with a ribbon. The fizz comes from a simple mix of dry ingredients and a little oil, and a light scent keeps them gentle and pleasant. Make a batch, let them harden fully, and keep them dry until you are ready to use or gift them.
Add liquid very slowly, a few drops at a time, and mix well after each addition. If the mix starts to fizz in the bowl, you have added liquid too quickly, so pause and stir until it calms.
What you need:
- Baking soda
- Citric acid
- Cornstarch
- Skin-safe oil, such as sweet almond oil
- Skin-safe fragrance oil or essential oil
- Soap colorant in blush pink
- Heart-shaped molds and a glass jar for gifting
How to make it:
- Whisk the baking soda, citric acid, and cornstarch together in a large bowl until smooth.
- Stir the oil, fragrance, and a few drops of colorant together in a small cup.
- Drizzle the wet mix into the dry mix very slowly, whisking constantly so the mix holds together like damp sand.
- Press the mix firmly into the heart molds, overfilling slightly, then press the halves together if your mold has two parts.
- Let the bath bombs rest in the molds until firm, then unmold them carefully.
- Leave them to dry fully in a cool, dry spot before placing them in the jar.

17. Heart-Shaped Marbled Soap Bars
Marbled soap looks like it came from a boutique, but melt and pour soap base makes it a very friendly project. Two colors swirled together give every bar its own pattern, so no two hearts look quite alike. Stack the finished bars on a wooden dish for the bathroom, or wrap a pair in tissue paper as a gift.
Pour the second color in a thin stream and swirl just once or twice with a skewer. Overmixing blends the colors into one flat shade, while a light touch keeps the marbling clear and pretty.
What you need:
- Clear or white melt and pour soap base
- Soap colorant in pink
- Skin-safe fragrance oil
- Heart-shaped silicone molds
- Microwave-safe jug and stirring spoon
- Wooden skewer and rubbing alcohol in a spray bottle
How to make it:
- Cut the soap base into small cubes and melt them gently in the jug, stirring often.
- Divide the melted base between two cups and tint one cup pink, leaving the other plain.
- Stir a little fragrance into each cup, then pour the two colors into the molds in alternating streams.
- Swirl once or twice with the skewer, then mist the tops lightly to clear any bubbles.
- Let the bars cool and set completely, then pop them out of the molds and leave them to harden before use.

18. Heart Beaded Bracelet Stack
A stack of beaded bracelets is a sweet gift because the wearer can mix the strands to suit her mood. Small heart beads keep the set romantic without feeling too themed, and soft blush, cream, and gold tones go with almost everything. Make three or four strands for a full stack, or start with two and add more later.
Lay out each strand before you string it, and check the length against your wrist as you work. A little extra slack helps the bracelets sit comfortably and slide on easily.
What you need:
- Small glass beads in blush, cream, and gold
- Heart beads in pink and gold
- Stretch cord for beading
- Small scissors
- Clear jewelry glue
How to make it:
- Measure the stretch cord around your wrist, then cut a length with a few extra inches for knotting.
- Arrange the beads for one strand on a flat surface, placing a heart bead near the center.
- String the beads in your planned order, checking the fit around your wrist as you go.
- Tie the ends with a firm double knot, pulling gently so the knot sits snug against the last beads.
- Add a tiny drop of glue to the knot, let it dry, then trim the cord ends close and repeat for the remaining strands.

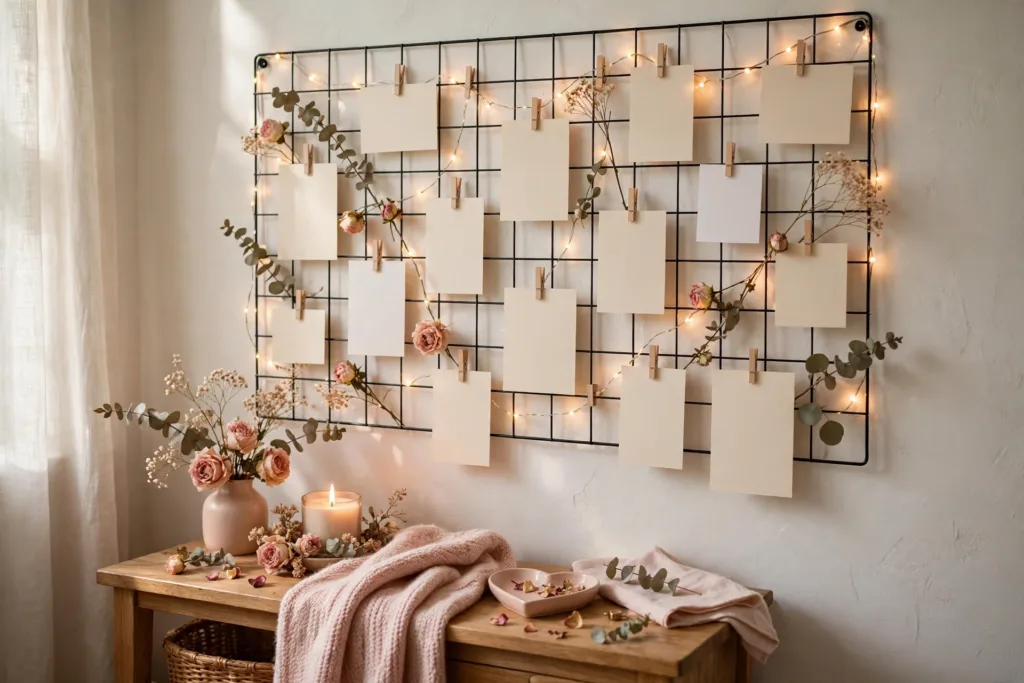
19. Heart Photo Clip Display
A wire grid display turns favorite photos and notes into wall art you can change whenever you like. Clips make swapping pictures easy, and warm fairy lights give the whole display a soft evening glow. It works beautifully in a hallway, bedroom, or above a desk, and it suits couples, friends, and family photos alike.
Mix photos with blank cards, dried stems, and small paper hearts so the grid feels full without looking crowded. Leave a little space around each clip so the lights can shine through.
What you need:
- Metal wire wall grid with wall hooks
- Small wooden clips
- Printed photos and blank cards
- Battery-operated fairy lights
- Dried flowers or small paper hearts for decorating
- Picture hanging hardware suited to your wall type
How to make it:
- Hang the wire grid level on the wall, using hardware suited to your wall type.
- Weave the fairy lights loosely through the grid, keeping the battery pack hidden behind the grid or on the table below.
- Plan your layout on a table first, mixing photos, cards, and decorations in a pleasing balance.
- Clip each photo and card to the grid, starting at the top and working down.
- Tuck dried flowers and paper hearts into the grid, step back to check the balance, and switch the lights on.
20. “Love Potion” Apothecary Labels
Small vintage-style bottles with aged paper labels bring a playful, romantic touch to a shelf or party table. Fill them with dried petals, colored water, or tiny fairy lights, and group different heights together for a collected, apothecary feel. They also make lovely party favors when each guest takes one home.
Keep the label wording short and charming, such as Love Potion, Sweetheart Tonic, or Cupid Elixir. Hand lettering suits the vintage look best, so write slowly and let the ink dry before you handle the bottles.
What you need:
- Small glass bottles with corks or stoppers
- Kraft paper or aged-style label paper
- Fine pen with brown or black ink
- Scissors or a paper trimmer
- Double-sided tape or glue dots
- Dried rose petals, colored water, or small fairy lights for filling
How to make it:
- Clean and dry the bottles, removing any old labels and sticky residue.
- Cut the paper into small label shapes, keeping the sizes suited to each bottle.
- Write one short phrase on each label, such as Love Potion, and let the ink dry fully.
- Lightly distress the label edges with the scissor blade or a folded edge for an aged look.
- Attach each label to a bottle with tape or glue dots, pressing gently so it lies flat.
- Fill the bottles with petals, colored water, or lights, add the corks, and arrange the group on a shelf or table.

21. Heart-Shaped Charcuterie Marker Flags
A cheese board looks instantly more thoughtful when every item has a little label, and these heart flags do the job with charm to spare. Cut from cardstock in soft pink, red, or cream, each flag sits on a wooden pick and tells guests what they are tasting, from a creamy brie to a sharp aged cheddar. They are one of the simplest valentine crafts for adults, and they take only a few minutes to make before guests arrive.
Write each cheese name in your neatest handwriting, or leave the flags blank and let the heart shapes speak for themselves. Either way, the board looks styled instead of thrown together, and your guests will notice the personal touch before they take a single bite.
What you need:
- Cardstock in pink, red, and cream
- Wooden cocktail picks
- Pencil and scissors
- Fine-tip pen
- Craft glue or clear tape
How to make it:
- Draw a heart about two inches wide on scrap paper and cut it out to use as a template.
- Trace the template onto cardstock and cut out one heart for each cheese or item on the board.
- Write the name of each item on a heart with the fine-tip pen, and let the ink dry fully.
- Glue or tape a wooden pick to the back of each heart, leaving most of the pick free.
- Push the picks into the cheeses or tuck them beside each item just before serving.

22. Ombre Heart Canvas Painting
A single bold heart on a plain canvas makes a striking piece of wall art, and the soft blend of color is easier to paint than it looks. You start with the palest blush at the top and deepen the shade as you work down, blending each band of paint into the next while it is still wet. A heart stencil or a paper template keeps the edges crisp, so the finished painting looks polished even if you have never picked up a brush before.
Practice the blend on a spare sheet of paper first, and keep a clean damp brush nearby to soften any hard line. Once the heart is dry, hang the canvas as it is, or slip it into a frame for a more finished look.
What you need:
- Stretched canvas
- Acrylic paint in blush pink, rose, and deep red
- Flat paintbrush and a smaller detail brush
- Heart stencil or cardstock for a template
- Painter’s tape
- Paper plate or palette and a cup of water
How to make it:
- Tape the stencil or template to the center of the canvas and press the edges down firmly.
- Paint a band of blush pink across the top of the heart.
- Add a band of rose below it, blending the two colors together where they meet.
- Finish with deep red at the bottom point, blending upward into the rose.
- Peel off the stencil while the paint is still slightly damp, then let the canvas dry flat.

23. Heart-Shaped Candle
A heart-shaped candle brings a soft glow to a dinner table or a bath, and pouring your own means you choose the color and the scent. Soy wax melts smoothly and holds a gentle blush tint beautifully, so the finished candle looks as good unlit as it does when it is burning. Make a few at once, since they also make lovely gifts when wrapped in tissue paper and tied with ribbon.
Work in a ventilated room, keep the melted wax away from open flames, and never leave a burning candle unattended. A candle left to set overnight gives the smoothest finish and the cleanest release from the mold.
What you need:
- Soy wax flakes
- Heart-shaped silicone mold
- Cotton candle wick with a wick sticker
- Candle dye in blush pink
- Fragrance oil made for candles (optional)
- Heatproof pouring jug and a double boiler
How to make it:
- Fix the wick to the center of the mold with the wick sticker and hold it upright with a skewer laid across the top.
- Melt the wax gently in the double boiler, stirring now and then until no flakes remain.
- Remove the wax from the heat and stir in the dye, plus fragrance oil if you are using it.
- Let the wax cool slightly, then pour it slowly into the mold.
- Leave the candle undisturbed until it is fully set, then trim the wick to about half an inch.
- Ease the candle from the mold and set it on a heatproof tray before lighting.

24. Romantic Book Page Heart Banner
There is something quietly romantic about hearts cut from the pages of a worn old book, and this banner suits a mantel, a doorway, or a bedroom wall. Choose a damaged or thrifted book you do not mind cutting up, since the yellowed pages and faded print give the hearts their charm. Strung on twine with a little space between each heart, the banner looks soft and handmade in the best possible way.
Mix in one or two hearts cut from plain cream paper if you want a little contrast, and save the prettiest pages for the center of the banner. When the season ends, fold the banner gently and store it flat so you can hang it again next year.
What you need:
- Pages from an old or damaged book
- Natural twine
- Heart template, pencil, and scissors
- Small wooden pegs or craft glue
How to make it:
- Trace the heart template onto the book pages and cut out as many hearts as you need.
- Cut a length of twine to fit your mantel or wall, leaving extra at each end for tying.
- Space the hearts evenly along the twine.
- Attach each heart with a small peg, or fold the top edge over the twine and glue it in place.
- Tie the ends of the twine to hooks or pins and adjust the spacing until the banner hangs evenly.

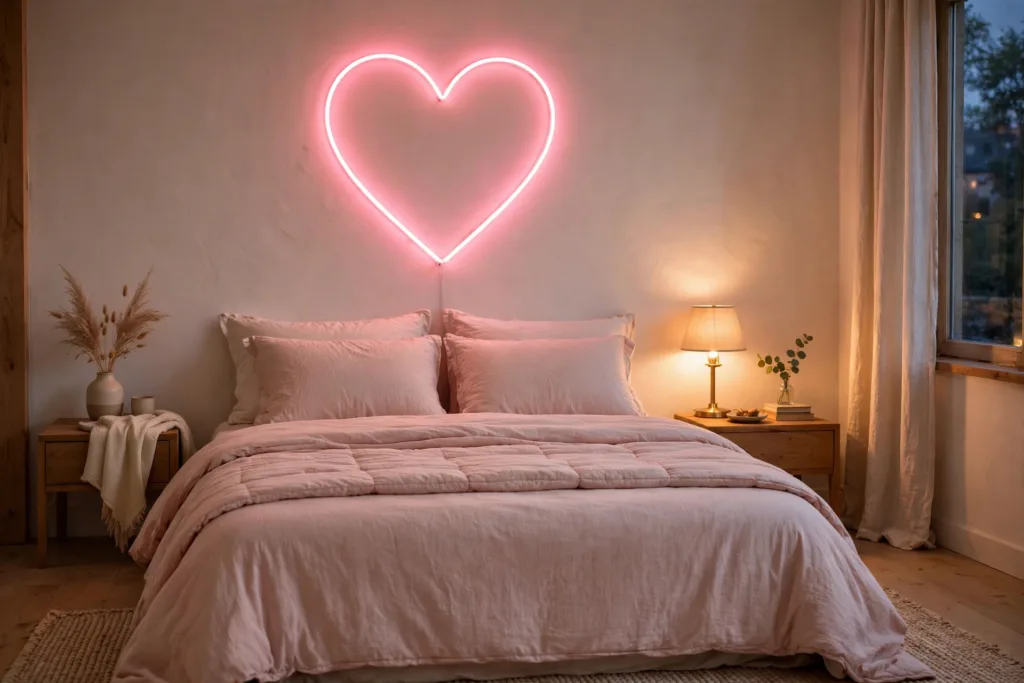
25. Faux Neon “LOVE” Sign
A glowing heart on the wall feels like something from a boutique hotel, yet this version is simply a length of flexible LED rope light fixed to a board. The soft pink glow flatters a bedroom in the evening, and the light runs cool, so it is safe to hang above a headboard. Shape the rope into a heart outline first, then secure it and hide the cord neatly behind the board.
Draw the heart on the board lightly in pencil before you start, and test the light before you fix anything in place. Once you are happy with the heart, confident makers can try simple letter shapes with a second length of rope light as an advanced option.
What you need:
- Flexible LED rope light with a power adapter
- Plywood or foam backing board
- Clear cable clips
- Pencil and a large heart template
- Drill or strong adhesive for hanging
- Small screws or strong glue for the clips
How to make it:
- Trace a large heart outline onto the backing board with the template.
- Lay the rope light along the outline to check the length, starting at the bottom point.
- Fix the rope in place with cable clips, keeping the curve smooth and even.
- Plug in the light to test it, then adjust any clips that pinch or flatten the rope.
- Tidy the power cord behind the board and secure it with tape or a cable cover.
- Hang the finished sign with screws or strong adhesive, following the hanger instructions.
26. Framed “Reasons I Love You” Mini Notes
This little frame holds a whole love letter in miniature, one tiny note for each reason you adore someone. Write a single reason on each slip of paper, fold it small, and tuck the notes into a shallow frame with a scattering of heart confetti. It sits sweetly on a nightstand, and the best part comes later, when your loved one opens the frame and reads every note one by one.
Aim for notes that are specific rather than grand, since small honest details are the ones that get remembered. A favorite shared joke, a kind habit, or a moment from an ordinary Tuesday all make wonderful reasons.
What you need:
- Small shallow frame or shadow box frame
- Plain paper in cream and blush pink
- Fine-tip pen
- Heart-shaped paper punch or scissors
- Small heart confetti
How to make it:
- Cut the paper into small slips, all about the same size.
- Write one reason on each slip with the fine-tip pen and let the ink dry.
- Fold each slip in half, or roll it and tie it with a short length of thread.
- Arrange the folded notes inside the frame, filling gaps with heart confetti.
- Close the frame and set it on a nightstand or shelf, ready to be opened and read.

27. Heart-Shaped Pom-Pom Rug
Few things feel as inviting under bare feet as a rug made of soft pom-poms, and shaping it into a heart makes it a sweet fit for a bathroom. You make the pom-poms from yarn in blush and cream, then tie them close together onto a mesh base cut into a heart shape. It is a slow, soothing project, so settle in with a film or a podcast and make a batch of pom-poms each evening until you have enough.
Pack the pom-poms tightly so the mesh does not show through, and trim any stray yarn ends for a neat, even surface. Shake the rug outside now and then to keep it fresh, and spot clean it rather than soaking it.
What you need:
- Soft yarn in blush pink and cream
- Rug mesh or non-slip rug backing
- Pom-pom maker or two cardboard rings
- Sharp scissors
- Marker and a large heart template
How to make it:
- Cut the mesh into a heart shape using the template, leaving the edges neat.
- Wrap yarn around the pom-pom maker or cardboard rings until it is thick and full.
- Tie the bundle tightly at the center, cut the loops open, and fluff it into a round pom-pom.
- Repeat until you have enough pom-poms to cover the mesh with a little to spare.
- Tie each pom-pom to the mesh through the holes, working from the outside edge inward.
- Trim the pom-poms to an even height and check the back for loose ends.

28. Heart-Shaped Air-Dry Clay Trinket Tray
A handmade trinket tray keeps rings and earrings in one pretty place, and air-dry clay makes the project wonderfully simple. You roll the clay flat, cut a heart, and shape a gentle scalloped edge with your fingertips or the rim of a small round cutter. A thin line of gold paint around the rim lifts the whole piece, and a coat of sealant keeps the tray looking fresh through daily use.
Let the tray dry slowly and fully before you paint it, since rushing this step can cause cracks. If a small crack does appear, smooth a little fresh clay over it with a damp finger and let it dry again.
What you need:
- Air-dry clay
- Rolling pin
- Heart template and a craft knife
- Small round cutter for the scalloped edge
- Gold paint and a fine brush
- Clear sealant and a soft brush
How to make it:
- Roll the clay to an even thickness on a clean, smooth surface.
- Cut a heart shape with the template and the craft knife, then smooth the cut edges with a damp finger.
- Press the small round cutter gently along the edge to form scallops, or pinch them with your fingertips.
- Press the center down very slightly to form a shallow dish and let the tray dry fully, turning it once.
- Paint a thin gold line around the rim and let the paint dry.
- Brush on a coat of sealant, let it dry, and add a second coat if you like.

29. Heart-Shaped Felt Coasters
Felt coasters are quick to sew, endlessly useful, and far prettier than the plain cork kind. Two layers of felt give each coaster a sturdy feel, while a whip stitch in contrasting thread turns the edge into a feature. Make a set of four or six in mixed reds and blush pinks, stack them with a ribbon, and you have a gift that looks far more effortful than it was.
Keep your stitches small and even, and use a fresh needle so it glides through the felt without snagging. A smaller heart stitched on top adds a sweet layered look, and it is a good way to use up felt scraps.
What you need:
- Felt sheets in red, blush pink, and cream
- Embroidery thread in a contrasting color
- Sewing needle and scissors
- Heart template and a fabric marker
- Ribbon for tying the finished set
How to make it:
- Trace the heart template onto the felt and cut out two matching hearts for each coaster.
- Place the two hearts together with the edges lined up neatly.
- Whip stitch around the edge, passing the needle over the edge and through both layers each time.
- Knot the thread at the starting point and tuck the end between the layers.
- Repeat for the rest of the set, then stack the coasters and tie them with ribbon.

30. Heart “Gallery Wall” Printable-Style Collage
A gallery wall of heart art looks wonderfully considered, and the most personal version is one you create yourself with paints, pens, and paper. Each frame holds a piece you made by hand, from a loose watercolor wash in blush pink to a bold ink heart on cream paper, so no two walls ever look the same. Keep the color palette tight, blush, black, and cream work beautifully together, and let the shapes and brushstrokes do all the talking.
Make more pieces than you need, then lay them on the floor and choose the arrangement that feels balanced before you hang anything. Matching frames pull the whole display together, even when every piece of art inside them is completely different.
What you need:
- Heavy paper or watercolor paper
- Watercolor paints, ink pens, and markers
- Paintbrushes in a few sizes
- Pencil and a heart template
- Matching picture frames in one color
- Picture hanging hooks and a level
How to make it:
- Sketch a heart lightly in pencil on each sheet of paper, varying the size and style.
- Fill the hearts with watercolor washes, ink lines, or layered marker strokes, keeping to your chosen palette.
- Let every piece dry fully, then erase any pencil lines that still show.
- Trim the art to fit the frames and place each piece in a frame.
- Lay the framed pieces on the floor and move them around until the arrangement feels balanced.
- Hang the frames on the wall, starting from the center and working outward, checking each one with the level.

31. Heart-Shaped Chocolate Wrapper Gift Labels
A plain chocolate bar becomes a thoughtful little gift when you wrap it in pretty paper and finish it with ribbon. This is a sweet way to dress up a store-bought treat for a partner, a friend, or a coworker. It takes only a few minutes per bar, so it works well when you need several gifts at once.
Among simple valentine crafts for adults, this one is hard to beat for charm and speed. Choose blush, cream, or soft red paper with small hearts, then add a narrow ribbon and a neat bow. Keep the wrapper snug and the seams at the back, and each bar will look polished and ready to give.
What you need:
- Chocolate bars in flat wrappers
- Patterned paper in blush or cream with hearts
- Scissors
- Clear tape
- Narrow ribbon
How to make it:
- Measure and cut the paper so it wraps around the bar with a small overlap.
- Center the bar on the paper, fold the paper around it, and tape the seam at the back.
- Fold the ends neatly like a parcel and tape them flat.
- Wrap ribbon around the center and tie a firm bow on the front.
- Trim the ribbon ends at an angle and check that the wrapper sits smooth.

32. Heart-Shaped Paper Lantern Cluster
A cluster of heart lanterns fills an empty corner with soft color and gentle movement. Hang them at different heights so the group looks full and playful from across the room. Tissue paper keeps the project light, affordable, and easy to adjust until you like the shape.
Mix pink, blush, and cream so the hearts read as a set without looking flat. Add small battery lights inside a few lanterns for a warm glow in the evening, and keep real candles far away from paper. When the party ends, the lanterns fold flat for storage or can be kept up as a cheerful seasonal display.
What you need:
- Tissue paper in pink, blush, and cream
- Scissors
- Clear tape or glue stick
- String or clear thread
- Small battery lights (optional)
- Adhesive hooks
How to make it:
- Cut matching heart shapes from folded tissue paper, two layers per lantern.
- Tape or glue the edges together, leaving a small opening at the top.
- Gently puff each lantern open and shape the sides with your fingers.
- Tie a length of string to the top of each lantern, using different lengths.
- Hang the lanterns from adhesive hooks, spacing them so they do not touch.
- Tuck a battery light inside a few lanterns and switch them on at dusk.

33. Heart-Shaped Succulent Planter Wrap
A small succulent already makes a lovely gift, and a heart-patterned wrap turns it into something personal. The paper sleeve takes minutes to fold and needs no special tools. It is a tidy choice for a desk, a windowsill, or a bedside table.
Choose sturdy paper so the wrap holds its shape around the pot, and pick a pattern that suits the room. A length of twine keeps the folds in place and adds a simple rustic finish. Leave the base open or add a small saucer underneath so water can drain and the paper stays dry.
What you need:
- Small potted succulent
- Sturdy patterned paper with hearts
- Scissors
- Twine and clear tape
How to make it:
- Cut a square of paper large enough to wrap around the pot with extra height at the top.
- Center the pot on the paper and fold the corners up around the sides.
- Secure the folds with small pieces of tape on the inside.
- Tie twine around the middle, knot it at the front, and trim the ends.

34. Heart-Shaped Jewelry Dish
A heart-shaped dish is a pretty home for rings and earrings, and decoupage gives it a soft floral finish. Start with a plain wooden dish and a paper napkin with a pattern you love. The layers of glue seal the design and leave a smooth surface that feels lovely to use.
Peel the napkin down to the printed layer so it lies flat without wrinkles. Press it gently from the center outward, and let each coat dry before you add the next one. A final clear coat protects the surface from water spots and daily handling.
What you need:
- Plain wooden heart-shaped dish
- Floral paper napkin
- Decoupage glue
- Soft paintbrush
- Scissors
- Clear varnish
How to make it:
- Lightly sand the dish, wipe away dust, and paint a thin coat of decoupage glue inside.
- Separate the napkin layers and cut the printed layer to fit the dish.
- Lay the napkin in place and brush more glue over the top, smoothing from the center outward.
- Trim any extra paper at the edges and let the dish dry fully.
- Add two thin coats of clear varnish, letting each coat dry between layers.

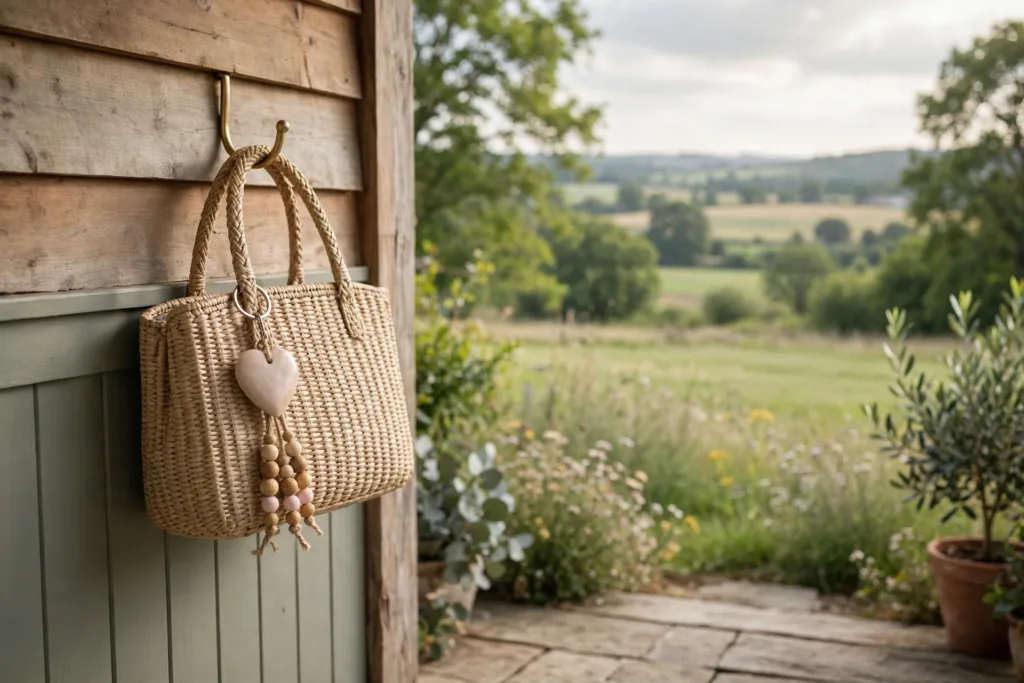
35. Heart-Shaped Keychain
A heart keychain is a small gift with a lot of charm, and it is easy to make several in one sitting. Use a sturdy heart charm, a few beads, and a split ring, then vary the colors for each person. The finished keychain adds a sweet touch to keys, a purse, or a tote bag.
Keep the design simple so it survives daily use and does not catch on pockets. Check that each jump ring is closed tightly and that the beads sit snugly on the cord. A small tassel or a single accent bead can finish the look without making the keychain bulky.
What you need:
- Heart charms
- Split key rings
- Jump rings
- Beads and cord
- Pliers
How to make it:
- Thread beads onto a short length of cord and knot both ends.
- Attach the heart charm to a jump ring and close the ring with pliers.
- Link the beaded cord and the charm to the split key ring.
- Check every connection by giving it a gentle tug.
- Trim any extra cord close to the knot and tuck the end inside a bead.
36. Heart-Shaped “Open When” Envelope Bundle
An envelope bundle is a gift that keeps giving, because each envelope holds a note for a different moment. Write short, kind messages for days when your partner needs comfort, cheer, or a laugh. The bundle looks beautiful tied with ribbon, and it invites the reader to open one envelope at a time.
Try prompts such as open when you miss me, open when you need a smile, or open when you had a hard day. Keep each note honest and specific, with a memory or a reason you care. Seal the envelopes, stack them neatly, and tie the bundle with ribbon and a wax seal for a finished look.
What you need:
- Small blank envelopes
- Note paper or cards
- Pen
- Ribbon
- Wax seal and wax
- Heart stickers (optional)
How to make it:
- Choose six to ten moments and write a prompt on the front of each envelope.
- Write a short note for each prompt and fold it to fit inside.
- Seal each envelope and add a small heart sticker if you like.
- Stack the envelopes in an order that feels natural, with the first one on top.
- Tie the stack with ribbon and finish with a neat bow.
- Press a wax seal over the ribbon knot and let it cool before wrapping the gift.

37. Heart-Shaped “Message in a Bottle” Jar
A jar filled with folded paper hearts turns small notes into a keepsake your loved one can open again and again. Each heart holds a message, a memory, or a reason you are glad to know them. The jar looks lovely on a shelf, and it grows more meaningful as each heart is read.
Fold the hearts from pink, cream, and blush paper so the jar has soft variety. Write your notes before folding so the words stay hidden inside each heart. Add a ribbon around the neck of the jar and a small tag with a simple greeting, then place it where it will be noticed.
What you need:
- Clean glass jar with a lid
- Colored paper in pink, cream, and blush
- Scissors
- Pen
- Ribbon
How to make it:
- Cut small squares of paper and write one message on each square.
- Fold each square into a heart shape with the writing on the inside.
- Fill the jar with the folded hearts, pressing them down gently as you go.
- Close the lid and tie ribbon around the neck of the jar.
- Add a small tag and set the jar on a shelf or table.

38. Heart-Shaped Suncatcher Clings
Heart suncatchers bring color into a room on the brightest days. Contact paper and iridescent cellophane catch the light and throw soft rainbows across the walls. They are simple to make, easy to move, and lovely in a kitchen or bedroom window.
Cut the hearts in a few sizes so the window has a natural, scattered look. Keep the sticky side facing out until you are ready to place each heart, and smooth it gently to remove air bubbles. In strong sun the colors deepen, so a south-facing window gives the prettiest effect.
What you need:
- Clear contact paper
- Iridescent cellophane sheets
- Scissors
- Pencil and heart template
How to make it:
- Trace heart shapes onto the cellophane and cut them out.
- Cut matching heart shapes from contact paper, slightly larger than the cellophane.
- Peel the backing from the contact paper and press the cellophane heart onto the sticky side.
- Press a second piece of contact paper over the top to seal the edges.
- Press each finished heart onto a clean window and smooth out any bubbles.

39. Heart-Shaped Woven Wall Basket
A woven heart basket adds texture to a plain wall and gives you a pocket for flowers or dried stems. Paper strips are easy to weave once you get the rhythm, and the finished basket feels sturdy and handmade. Hang it by the front door, in a hallway, or above a small table.
Use two tones of paper so the weave stands out, such as kraft and cream or blush and white. Keep the strips even and pull each row snug so the basket holds its shape. Fill it lightly at first, then add more stems once the basket is hanging and you can see the balance.
What you need:
- Sturdy paper in two colors
- Scissors or paper trimmer
- Ruler
- Pencil
- Glue stick
- Ribbon or twine for hanging
- Faux flowers or dried stems
How to make it:
- Cut even paper strips, about one inch wide, in both colors.
- Lay half the strips side by side and weave the other half over and under them.
- Push the rows together so the weave is tight and even.
- Fold the woven sheet into a heart pocket shape and glue the side edges.
- Trim the top edge and fold it over to make a neat rim.
- Attach a loop of ribbon or twine at the top for hanging.
- Hang the basket on a nail or hook and arrange flowers inside.

40. Heart-Shaped “Love Tokens” Clay Charms
Small clay heart charms are sweet toppers for gifts, and they also work well on keychains or as table decorations. Polymer clay is easy to shape, and stamped dot patterns give each charm a neat handmade look. Make a batch in one color, or mix blush, cream, and terracotta for variety.
Roll the clay to an even thickness so the charms bake evenly and keep their shape. Press the dot pattern gently with the end of a pencil or a small round tool, and poke a hole near the top if you plan to hang the charm. Follow the clay package directions for baking, and let the charms cool fully before you handle them.
What you need:
- Polymer clay in blush, cream, and terracotta
- Rolling pin
- Small heart cutter
- Pencil or round stamping tool
- Toothpick for holes
- Baking tray lined with parchment paper
How to make it:
- Knead the clay until soft, then roll it to an even thickness.
- Cut heart shapes with the cutter and smooth the edges with your fingers.
- Stamp a dot pattern around the edge and in the center of each heart.
- Poke a small hole near the top of each charm if you want to hang it.
- Bake the charms on the lined tray following the package directions.
- Cool the charms fully, then tie them to gifts or add them to key rings.

41. Heart-Shaped “Sparkle” Phone Grip Topper
This little topper turns an everyday phone into something that feels festive every time you pick it up. A glittery resin heart sits on a plain grip base, so it looks polished without feeling overdone. If you enjoy valentine crafts for adults that are small, quick, and easy to gift, this one is a sweet place to start.
Work on a covered surface and give the resin plenty of time to set before you attach it. A thin layer of glitter gives a soft sparkle, while a heavier pour looks bold and glossy. Make a second one in a different shade and you have a ready gift for a friend.
What you need:
- Heart-shaped silicone mold
- Clear craft resin with mixing cups and stir sticks
- Fine pink glitter
- Plain phone grip base with adhesive back
- Disposable gloves and a covered work surface
- Strong craft glue
How to make it:
- Put on gloves, work in a ventilated area, and mix the resin following the package directions, stirring slowly to limit bubbles.
- Stir in the glitter a little at a time until the color and sparkle look right to you.
- Pour the mixture into the mold, pop any surface bubbles with a toothpick, and let it cure fully without moving it.
- Pop the heart out of the mold and smooth any rough edge with fine sandpaper.
- Glue the heart to the grip base, let the glue dry completely, then press the grip onto the back of the phone.

42. “Love” Ceramic Mug Vinyl Decal
A plain white mug gets a fresh look with one small heart, and the result feels thoughtful rather than fussy. Vinyl holds up well to gentle hand washing, so this is a practical gift as well as a pretty one. Choose a classic red heart for a bold look, or try blush or gold for something softer.
Take your time lining up the decal before you press it down, since vinyl is hard to reposition once it sticks. Smooth it from the center outward to keep air bubbles away from the edges. Let the mug sit untouched for a day before you wash it, so the adhesive can settle fully.
What you need:
- Plain ceramic mug
- Adhesive vinyl sheet in red
- Transfer tape
- Cutting machine or craft knife and cutting mat
- Rubbing alcohol and a soft cloth
- Plastic scraper
How to make it:
- Wipe the mug with rubbing alcohol and let it dry completely so the vinyl can grip the surface.
- Cut a small heart shape from the vinyl, sized to suit the front of the mug.
- Remove the excess vinyl around the heart, leaving only the heart shape on its backing.
- Press transfer tape over the heart, lift it gently, and place it where you want it on the mug.
- Smooth it firmly with the scraper, peel the transfer tape away slowly, and check that all the edges are sealed.

43. Heart-Shaped “Date Night” Jar Cards
Instead of debating what to do on a Friday night, pull a card and let the jar decide. Each folded card holds one simple date idea, from a walk with coffee to a movie night at home with snacks. The heart seals add a charming finish, and the jar looks lovely sitting out between dates.
Mix easy ideas with a few special ones so every draw feels doable. Keep the wording short and clear, and leave a few blank cards in the jar for ideas you think of later. This also makes a thoughtful gift when you fill it with ideas tailored to the couple who will use it.
What you need:
- Clean glass jar with a lid
- Cardstock in cream and blush
- Fine-tip pen
- Small heart stickers
- Ribbon for a bow
How to make it:
- Cut the cardstock into small rectangles that fit easily inside the jar when folded.
- Write one date idea on each card, keeping the wording short and easy to read.
- Fold each card in half so the writing is hidden inside.
- Seal each folded card with a heart sticker.
- Fill the jar with the sealed cards and close the lid.
- Tie a ribbon bow around the neck of the jar.

44. Heart-Shaped “Sweetheart” Door Hanger
A cream wooden heart is a calm welcome at the front door, especially when the rest of your entry stays simple. The velvet ribbon adds softness without adding clutter, and the neutral base works with almost any door color. Hang it on its own for a quiet look, or layer it with a small wreath for more texture.
Sand the edges lightly before you paint so the finish stays smooth. Two thin coats of paint will look better than one thick coat, and a clear sealer helps it hold up outdoors. Check that your hanging hardware suits your door, so the hanger stays secure in wind.
What you need:
- Wooden heart cutout with a hanging hole
- Fine sandpaper
- Cream craft paint and a brush
- Clear outdoor sealer
- Velvet ribbon
- Adhesive door hook
How to make it:
- Sand the heart lightly, paying attention to the edges, then wipe away the dust.
- Paint two thin coats of cream paint, letting the first coat dry fully before you add the second.
- Apply a coat of clear sealer and let it dry completely.
- Thread the velvet ribbon through the hole and tie it into a loop, trimming the ends neatly.
- Hang the heart on the door hook and adjust the loop so it sits straight.

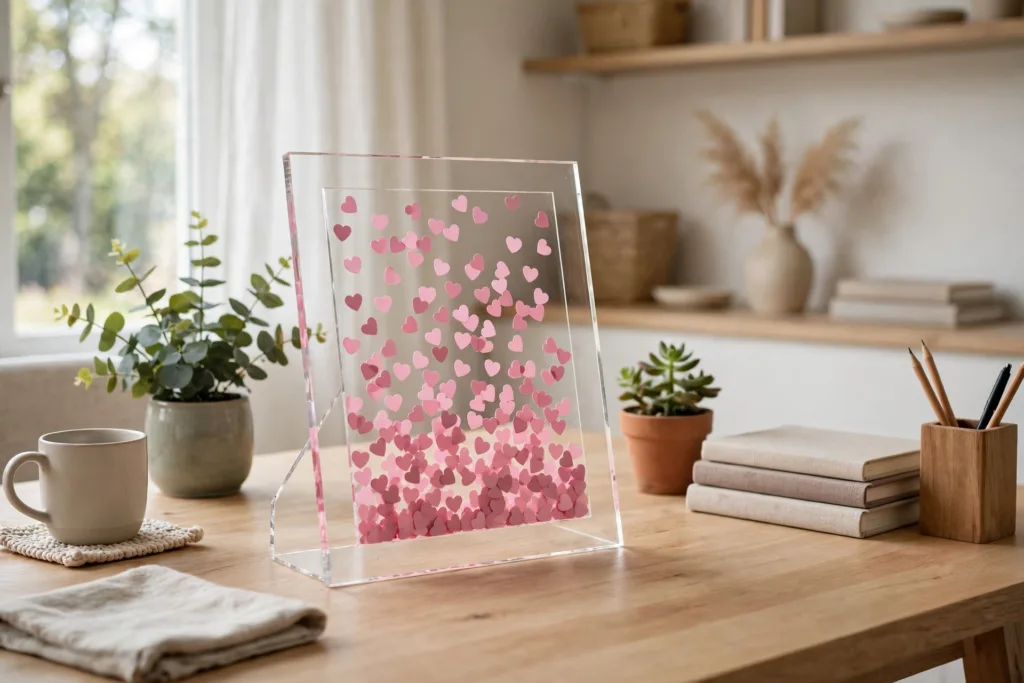
45. Heart Confetti “Shake Frame”
This frame is part decor and part delight, since a gentle shake sends the heart confetti drifting and settling in a new pattern. The clear layers keep the look light, so it suits a desk, a bookshelf, or a bedside table. Use shades of pink and red for a classic feel, or mix in white and gold for a softer palette.
Keep the confetti layer shallow so the pieces can move freely. Too much confetti will clump at the bottom and hide the effect. Seal the edges well, and test the frame over a tray the first time you shake it, just in case a corner needs more glue.
What you need:
- Clear photo frame with a deep edge
- Foam adhesive strips
- Stiff cardstock for the backing
- Pink heart confetti in mixed sizes
- Clear craft glue
How to make it:
- Cut the cardstock to fit the frame and place it behind the clear front panel.
- Build a border around the edges with foam adhesive strips to create a shallow pocket.
- Spoon in a small amount of heart confetti, keeping the layer thin enough for the pieces to move.
- Seal the front panel in place with clear craft glue and let it dry fully.
- Close up the frame, wipe the front clean, and give it a gentle shake to test the movement.
46. Heart-Shaped “Bougie” Matchbox Covers
Plain matchboxes disappear into a drawer, but dressed up covers turn them into a pretty detail beside a candle. Heart-patterned paper gives an instant seasonal look with very little effort. Make a small stack to keep near candles around the house, or tuck one into a gift basket for a friend who loves cozy evenings.
Measure each box before you cut, since matchboxes vary in size more than you might expect. Score the fold lines with a ruler edge so the paper wraps crisply around the corners. Always leave the striker panel uncovered, so the matches stay safe and easy to light.
What you need:
- Small matchboxes
- Heart-patterned paper
- Ruler and pencil
- Scissors or craft knife
- Glue stick and double-sided tape
How to make it:
- Measure the length, width, and depth of one matchbox, then mark those measurements on the back of the paper.
- Cut out the paper cover, leaving a small overlap where the ends will meet.
- Score along each fold line with the edge of a ruler so the folds stay neat.
- Wrap the paper around the outer sleeve of the box and secure the overlap with glue or tape.
- Check that the striker panel is fully exposed, then slide the match tray back into the sleeve.

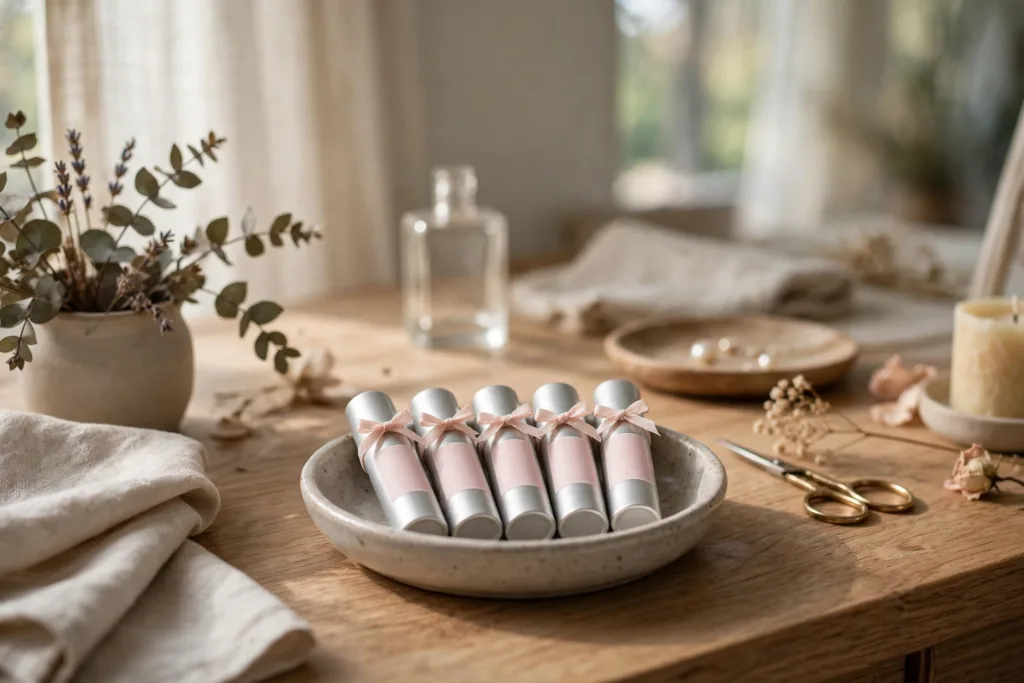
47. Heart-Shaped “Kiss” Lip Balm Labels
Plain lip balm tubes become sweet Galentine favors with a blush label and a tiny ribbon. The hand-lettered look feels personal, and you can match the label color to your party palette. These are easy to make in a batch, so they work well for a group gift or a table favor at a brunch.
Keep the lettering simple and leave plenty of blank space around it, since small labels look best uncluttered. Write on a practice strip first to test your pen and spacing. If your handwriting feels wobbly, try short words and a steady, slow stroke rather than fancy flourishes.
What you need:
- Plain lip balm tubes
- Blush adhesive label paper
- Fine-tip pen in dark brown or black
- Scissors and ruler
- Narrow satin ribbon
- Clear tape for securing the ends
How to make it:
- Measure around one lip balm tube and cut the label paper to that size.
- Letter each label by hand, keeping the design simple and centered.
- Wrap the label around the tube, smooth it flat, and press the seam firmly.
- Cut a short length of ribbon, wrap it around the tube, and tie a small bow.
- Secure the ribbon ends with a tiny piece of clear tape on the back, then arrange the finished tubes in a small dish.
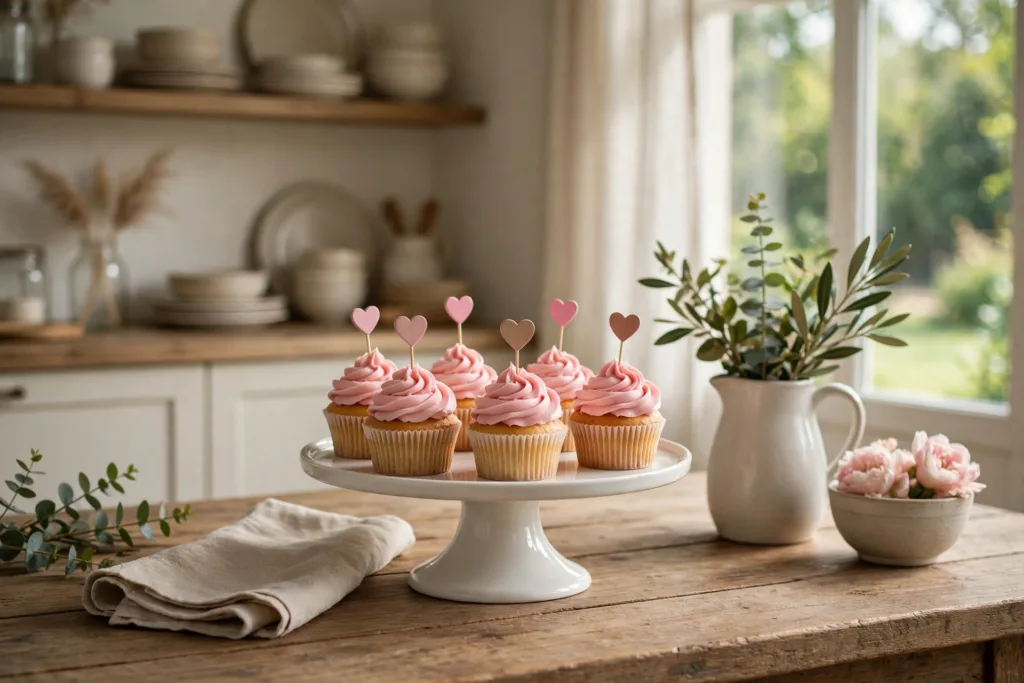
48. Heart-Shaped “Love Notes” Cupcake Topper Picks
Cupcakes need very little help to look festive, and a small heart pick is often all it takes. These toppers sit neatly in pink frosting and add height to a cake stand without overwhelming the bake itself. Make them in a mix of pink shades for a playful table, or keep them all one color for a cleaner look.
Attach the hearts firmly so they stay upright while guests serve themselves. A dab of glue on both sides of the pick gives a sturdier hold than glue on one side alone. Add the picks just before serving so the paper stays crisp and the frosting stays neat.
What you need:
- Cardstock in pink shades
- Wooden cocktail picks
- Craft glue
- Scissors or heart punch
- Heart template cut from cardboard
How to make it:
- Trace the heart template onto the cardstock and cut out two hearts for each pick.
- Place a cocktail pick between each pair of hearts, with the point facing down.
- Glue the hearts together around the top of the pick, press firmly, and let the toppers dry flat.
- Check that each heart is secure, then press one pick gently into the center of each frosted cupcake just before serving.
49. Heart-Shaped “Satin Bow” Garland
Satin bows catch the light in a way that paper garlands cannot, and the effect is soft rather than showy. Draped along a mantel, this garland adds romance without covering up the candles and greenery already there. Blush works beautifully with cream and gold, but deep red bows feel just as classic.
Space the bows evenly and step back often to check the drape. Fishing line is nearly invisible, which keeps the focus on the bows, but it can tangle easily, so work on a clear surface. Tie a small loop at each end for hanging, and keep the garland away from open flames.
What you need:
- Wide satin ribbon in blush
- Clear fishing line
- Scissors
- Measuring tape
- Small adhesive hooks
How to make it:
- Measure the mantel and cut a length of fishing line with extra length at each end for hanging loops.
- Cut equal lengths of ribbon and tie each one into a full bow, trimming the tails at an angle.
- Attach the bows along the fishing line at even intervals, knotting the line around the center of each bow.
- Adjust the spacing and fluff each bow so the loops sit evenly.
- Hang the garland from the adhesive hooks, tie the end loops in place, and shape the bows once more.

50. Heart-Shaped “Love Language” Conversation Cards
Good conversation is the heart of a relaxed date night, and these prompt cards take the pressure off thinking of what to say next. Each card holds one question, from light favorites to deeper memories worth revisiting. Tied with ribbon, the deck looks like a gift in itself, and it is easy to keep on the coffee table for regular use.
Write questions that invite stories rather than one-word answers. Mix playful prompts with thoughtful ones so the mood stays warm and easy. Leave a few cards blank at the back, and add new questions together as you think of them over time.
What you need:
- Sturdy cardstock in cream
- Fine-tip pens in two colors
- Paper trimmer or scissors and ruler
- Corner rounder
- Satin ribbon
How to make it:
- Cut the cardstock into cards of equal size, large enough to hold one question comfortably.
- Round the corners of each card so the deck feels smooth to handle and shuffle.
- Write one conversation prompt on each card, using neat, clear lettering.
- Set a few blank cards aside at the back of the deck for questions you think of later.
- Stack the cards in a neat deck, mixing playful and thoughtful prompts throughout.
- Tie the deck with satin ribbon in a simple bow, leaving enough slack to untie and retie it easily.

Valentine Crafts for Adults: Frequently Asked Questions
What are the easiest valentine crafts for adults?
Wax seal love notes, matchbox covers, and the ombre heart canvas are the friendliest places to start. They need only basic tools, they forgive wobbly lines, and they look finished in under an hour. Keep a glue gun and fine-tip markers handy and you can make most of the simpler projects on this list with what is already in a kitchen drawer.
Which valentine crafts make the best gifts?
Useful handmade gifts get the biggest reactions. Heart coasters, bath bombs, marbled soap bars, embroidered napkins, and the beaded bracelet stack all get used long after February, which is what makes them feel thoughtful rather than decorative. Add polished packaging, a parchment envelope, a ribbon bow, or a small gift tag, and a simple craft reads as a boutique gift.
How do I make valentine crafts look expensive instead of childish?
Keep the palette tight: blush, cream, black, and gold carry almost every project on this list. Repeat one design element, like tiny hearts or minimal line work, instead of mixing five motifs. And use crisp tools where it counts: paint pens for lettering, a paper trimmer for straight edges, and a light hand with glitter. Restraint is what makes a craft look store-bought.
What valentine crafts work for a Galentine’s party?
Pick projects that double as decor: the disco heart garland, the satin bow garland, the paper lantern cluster, and the photo clip display all dress the room while guests arrive. Then set up one make-and-take station, like wax seals or bracelet stacks, with supplies laid out and one finished example to copy. Guests leave with something they made, and the host keeps the decor.
What supplies do I need to start making valentine crafts?
A basic kit covers most of this list: sharp scissors, a glue gun and glue sticks, double-sided tape, paint pens, neutral cardstock, ribbon, and twine. Specialty supplies, like resin, clay, or embroidery floss, are listed per project, so you only buy what your chosen craft needs. If your supplies live in three different drawers, our craft room organization ideas will get them into one station before you start.
When should I start making valentine crafts?
Early January is ideal for gifts, since resin, candles, and soap need curing and drying time, and anything posted needs a week in the mail. Party decor can wait until the week before Valentine’s Day, and most paper projects come together in a single evening. Starting early also means you can make a second batch of the one everyone asks about.
Valentine Crafts for Adults Worth Making Again
You do not need to make all 50 ideas to have a season that feels special. One simple project, a set of wax seal notes or a fresh wreath on the door, can carry the whole holiday, and the best crafts on this list are the ones you will happily make again next year.
Start with the project that made you pause while scrolling, gather the supplies in one spot, and give yourself an unhurried evening. Mix textures as you go, velvet next to satin, glossy resin next to soft linen, and the finished pieces will look collected rather than crafted. That is the whole secret: simple shapes, a calm palette, and one small handmade touch in every room.