16 DIY Ring Holder Ideas for 2026
Keeping your favorite rings organized doesn't require expensive jewelry storage. With a few affordable materials and some creativity, you can make a beautiful DIY ring holder that protects your jewelry while adding personality to your space.
Whether you prefer modern designs, cute animal shapes, or elegant jewelry displays, handmade ring holders offer plenty of possibilities. Many projects use everyday supplies such as clay, wooden boxes, fabric, and paint, making them suitable for beginners.
Here are 16 creative DIY ring holder ideas for 2026 that combine practical storage with decorative style.
What is the Easiest DIY Ring Holder to Make at Home?
A basic clay ring cone is one of the simplest ring holders you can create without specialized equipment. All you need is air-dry clay, a smooth work surface, and a little patience.
Roll a small piece of clay into a tapered shape with a flat bottom. Make sure the narrow end can fit through your rings while the wider base provides stability. Allow the clay to dry according to the manufacturer's instructions before decorating it.
You can leave the finished holder plain for a minimalist appearance or personalize it with acrylic paint. A small clay dish is another beginner-friendly alternative, especially if you prefer laying your rings flat.
Both options are inexpensive, customizable, and easy to incorporate into your bedroom or dressing area.
1. Velvet Slot Tray
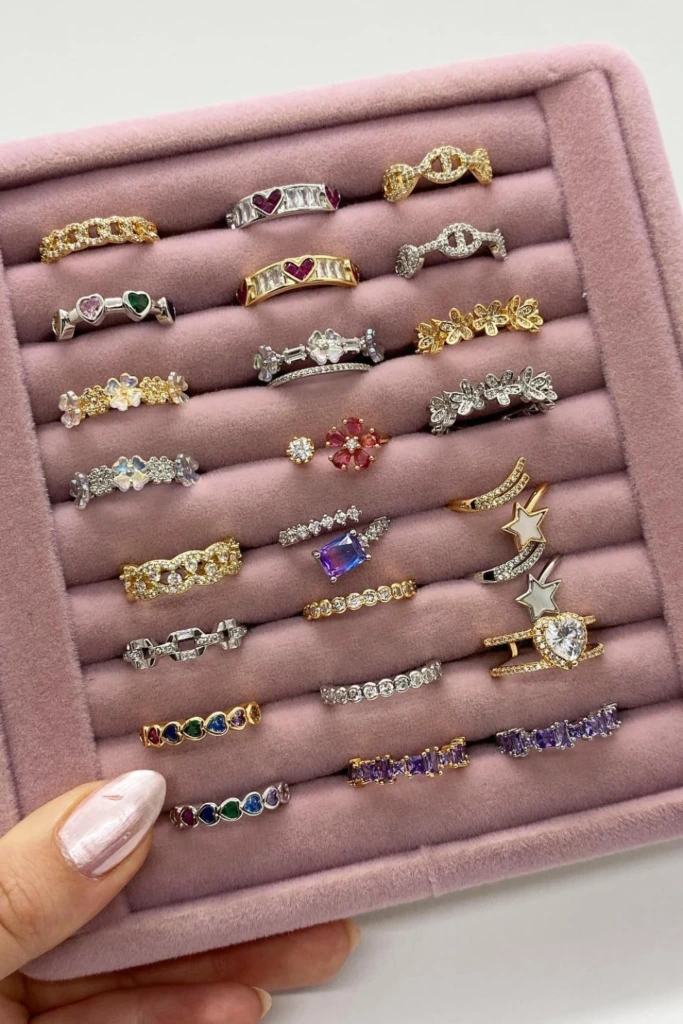
A velvet slot tray is an excellent solution for anyone who owns several rings and wants to keep them neatly arranged. Its soft interior helps reduce contact between jewelry pieces while creating an elegant display.
Start with a shallow wooden or cardboard box. Cut several strips of firm foam to fit inside, then cover each strip with velvet fabric. Arrange the padded strips closely together so rings can slide into the spaces between them.
Choose neutral velvet shades such as beige, charcoal, or dusty pink for a sophisticated appearance. This project works particularly well inside dresser drawers or on dressing tables.
2. Painted Ring Cones
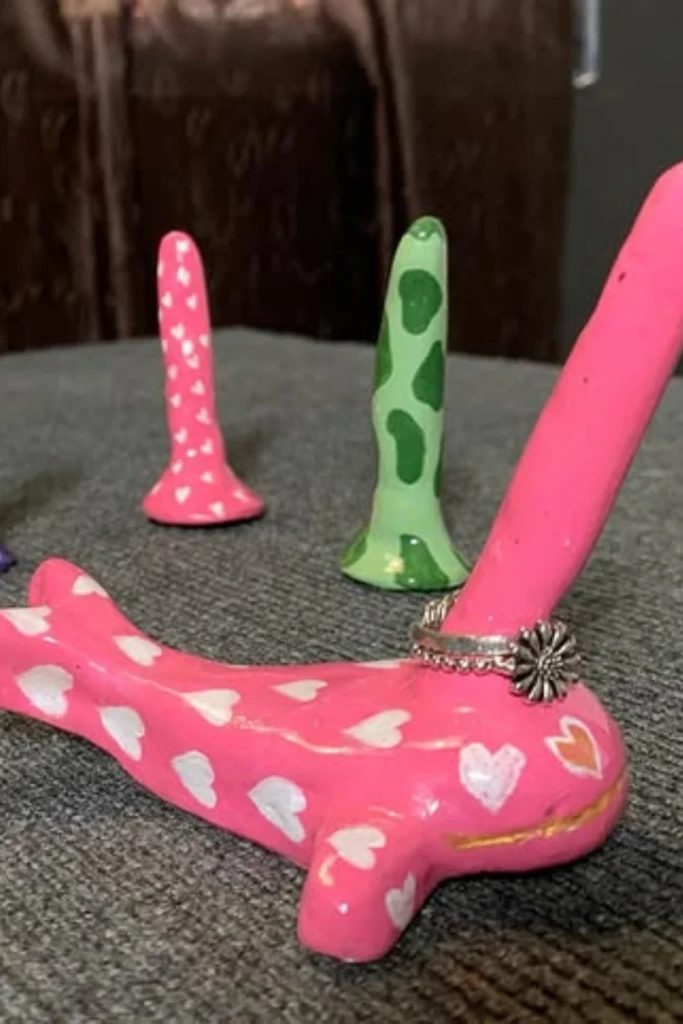
Painted ring cones offer an easy way to introduce color into your jewelry organization. Their upright design keeps rings visible while occupying very little space.
Create several cone shapes using air-dry clay, making each one slightly different in height. Once completely hardened, smooth any rough areas with fine sandpaper.
Decorate the cones with acrylic paint using stripes, dots, abstract patterns, or solid colors. For a coordinated arrangement, choose shades that complement your bedroom decor.
A group of three painted cones can hold everyday rings while doubling as a cheerful decorative accent.
3. Palmistry Hand Stand
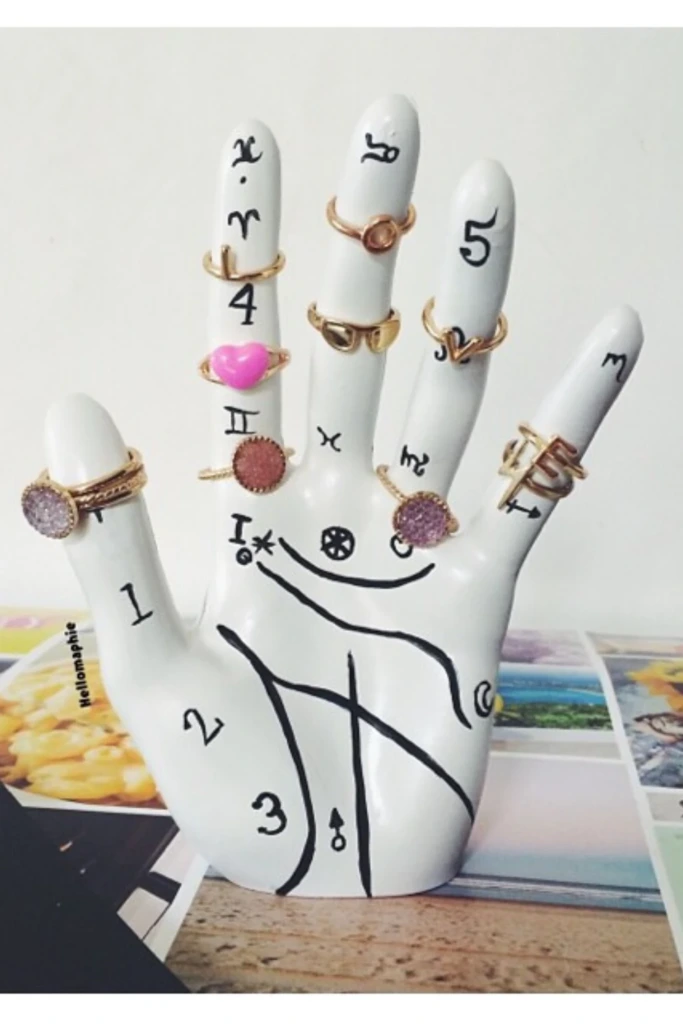
A palmistry-inspired hand stand combines artistic decoration with functional jewelry storage. The hand-shaped structure provides several places to display rings, making it especially appealing for unusual or oversized designs.
Use a ready-made unfinished hand sculpture or create a simplified hand form from suitable sculpting clay. If making your own, build it around a stable base and ensure the fingers are strong enough to support jewelry.
After the material has fully cured, decorate the surface with delicate palmistry lines, stars, moons, or other symbolic illustrations.
Black detailing on a cream-colored base creates a vintage-inspired finish, while metallic accents give the stand a more contemporary appearance.
4. Finger Dish Holder
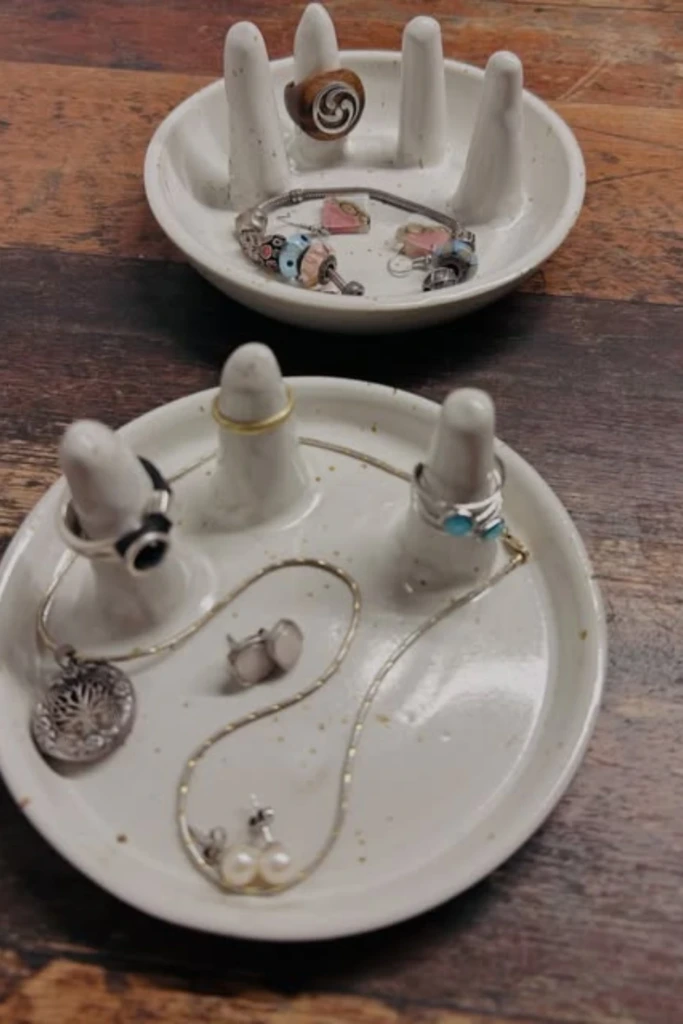
A finger dish holder combines a small jewelry tray with raised supports that keep rings organized. It is particularly convenient when you want to store multiple rings without mixing them with other accessories.
Flatten a piece of clay into a circular base and gently raise its edges to create a shallow dish. Form two or three short, rounded finger-like posts and attach them securely to the base while the clay is workable.
Smooth all connection points and allow the entire piece to dry thoroughly.
Use the raised sections for rings and the surrounding dish for small earrings or other lightweight jewelry. Place it on a bedside table or dressing surface for easy access.
5. Minimal Block Stands
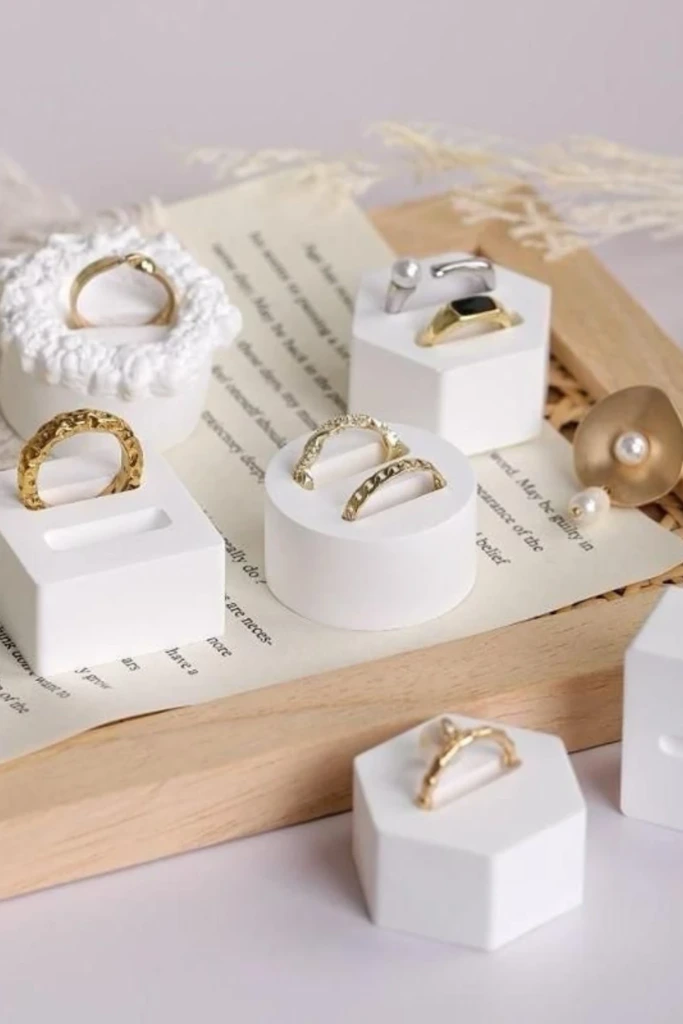
Minimal block stands are ideal for people who prefer simple, understated home accessories. Their geometric appearance works beautifully in modern bedrooms and uncluttered spaces.
Shape air-dry clay into small rectangular or square blocks. Before the clay hardens, create a narrow groove across the upper surface using a thin crafting tool.
The groove should be wide enough to hold a ring securely without forcing it into place.
Once dry, refine the edges and leave the blocks in their natural color or paint them in muted tones. Arrange several blocks together for a clean jewelry display that doesn't dominate your furniture.
6. Cactus Ring Bowl
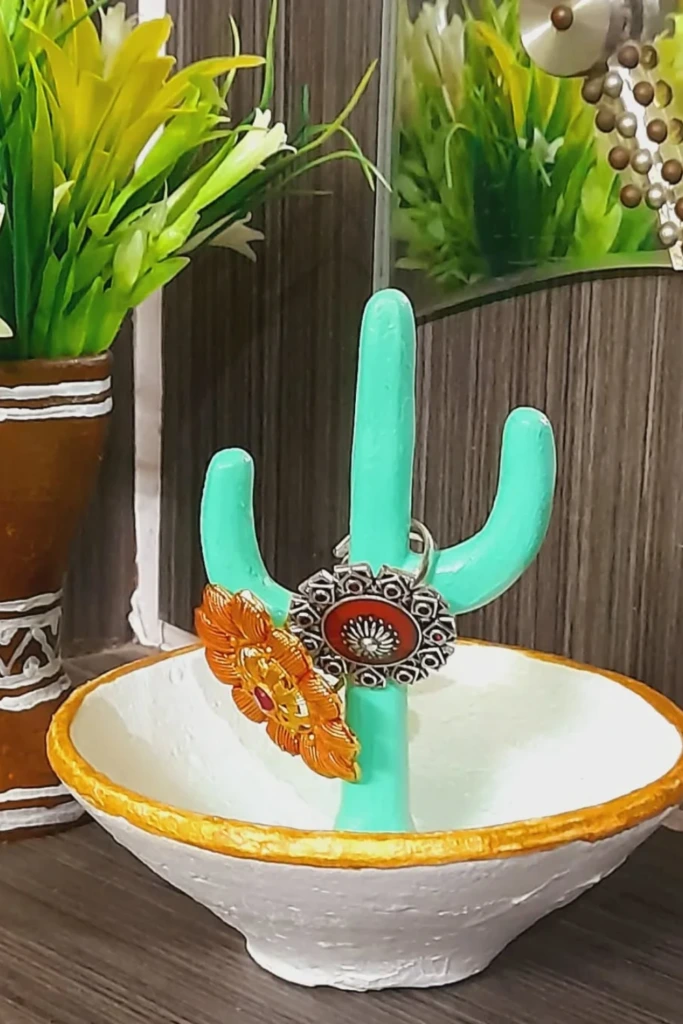
A cactus ring bowl brings a playful, nature-inspired element to your jewelry collection. The central cactus shape provides a convenient place to stack rings, while the surrounding bowl catches smaller accessories.
Begin by forming a shallow clay bowl with a level bottom. Sculpt a short cactus with a sturdy trunk and rounded arms, keeping the protruding sections thick enough to resist breaking.
Attach the cactus to the center of the bowl, carefully blending the clay around its base.
Once dry, paint the cactus green and finish the dish in a contrasting shade such as terracotta, white, or sandy beige.
This design looks especially attractive alongside small houseplants and other botanical decorations.
7. Cat Paw Catchall
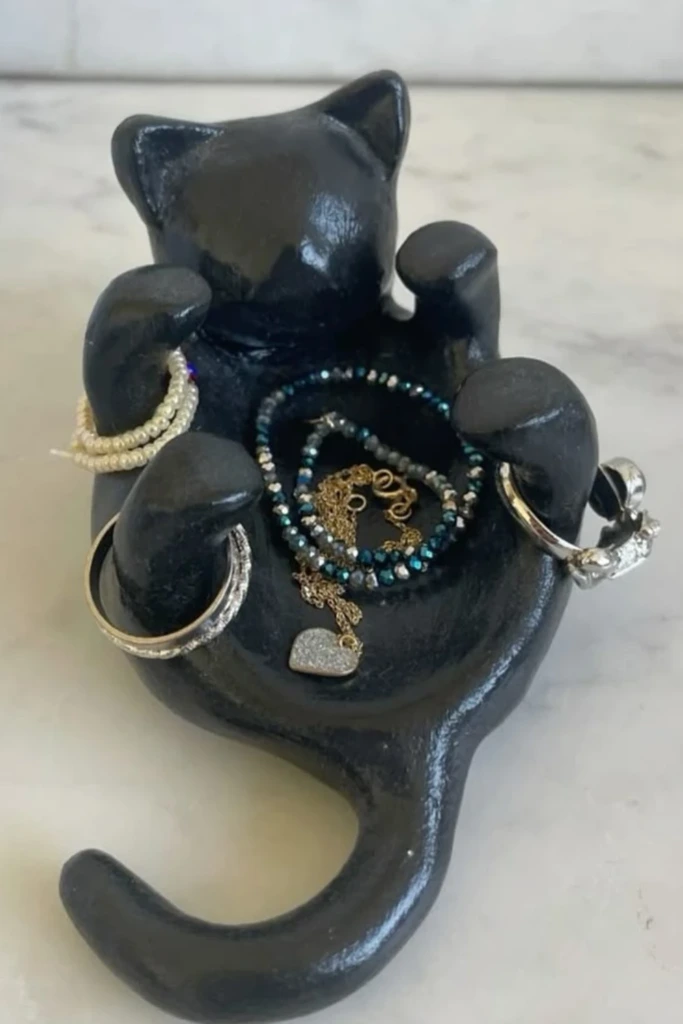
A cat paw catchall is a charming storage accessory for animal lovers. Its playful design makes it a lovely addition to a nightstand, vanity, or small decorative shelf.
Create a shallow clay base and sculpt a cat-inspired figure with raised paws. The paws can form gentle supports for lightweight rings, while the base provides room for additional jewelry.
Keep the surfaces rounded and avoid creating narrow projections that could snap under pressure.
Finish the piece with soft pastel colors, or paint it to resemble your favorite cat. Small details such as paw pads, whiskers, and ears make the design more expressive without requiring advanced sculpting skills.
8. Wooden Keepsake Box
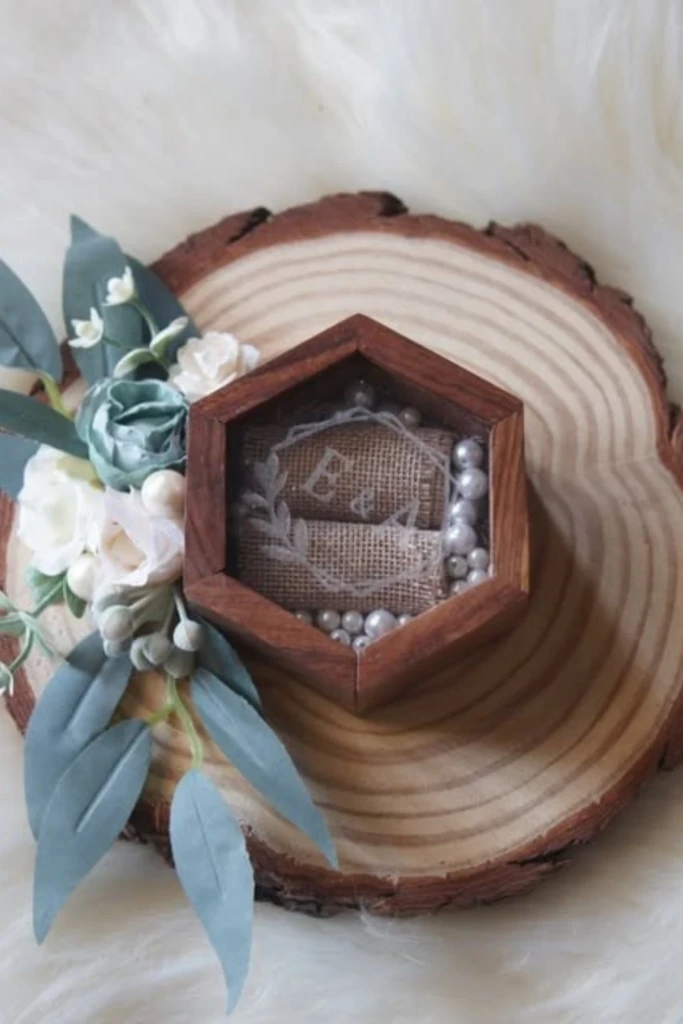
A wooden keepsake box provides a more enclosed storage option for rings that you don't wear every day. It is especially useful for sentimental jewelry and pieces you want to protect from dust.
Select a small unfinished wooden box with a secure lid. Sand the interior carefully to remove splinters, then add a soft fabric lining.
You can use velvet, felt, or another smooth material to cushion the jewelry. For better organization, install a small padded insert with individual spaces for rings.
Decorate the exterior with wood stain, paint, or a simple engraved design.
A personalized wooden box also makes a thoughtful handmade gift for anniversaries, birthdays, or other meaningful occasions.
9. Floral Ring Display
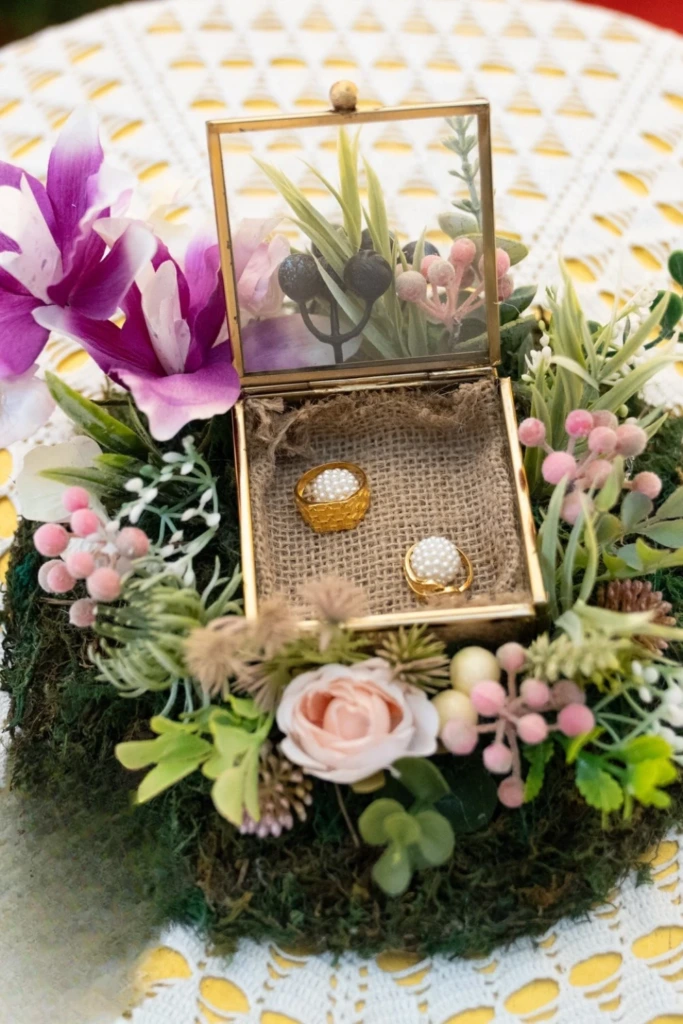
A floral ring display creates an attractive presentation for special jewelry, particularly during weddings, engagement celebrations, or photography sessions.
Start with a small decorative tray or sturdy platform. Position a compact ring box in the center and surround it with artificial flowers, preserved greenery, or other botanical decorations.
Choose flowers that complement the jewelry rather than overpowering it. Cream roses, eucalyptus leaves, and delicate blossoms create a romantic arrangement.
Keep loose petals and greenery away from delicate ring settings, and use a secure ring box to prevent accidental movement.
After the occasion, the floral arrangement can become a decorative keepsake for a dresser or shelf.
10. Cute Animal Stand
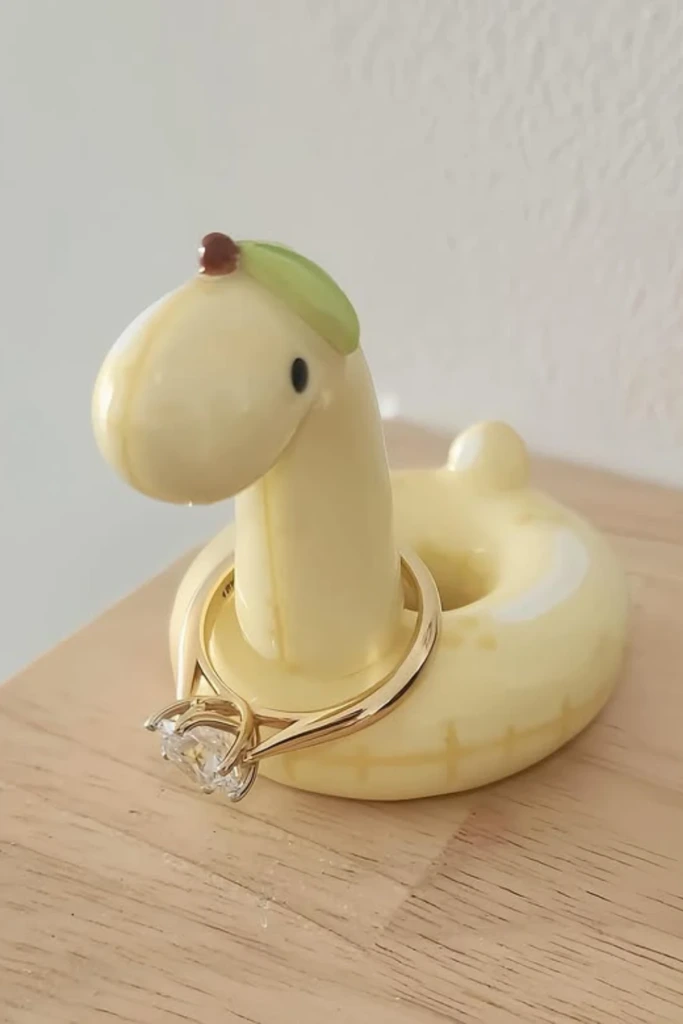
Animal-inspired ring stands are perfect for adding character to a jewelry display. Simple shapes such as giraffes, rabbits, elephants, or swans can be adapted into practical holders.
Choose an animal with a naturally elongated feature, such as a giraffe's neck or an elephant's trunk. Sculpt the figure from clay, making sure the base is broad enough to remain balanced when holding rings.
Keep the supporting section smooth and appropriately sized for your jewelry.
After curing, add painted details to bring the animal to life. You can create a realistic appearance or experiment with whimsical colors.
These handmade stands also make delightful gifts for friends who enjoy quirky home accessories.
11. Stacked Cone Set
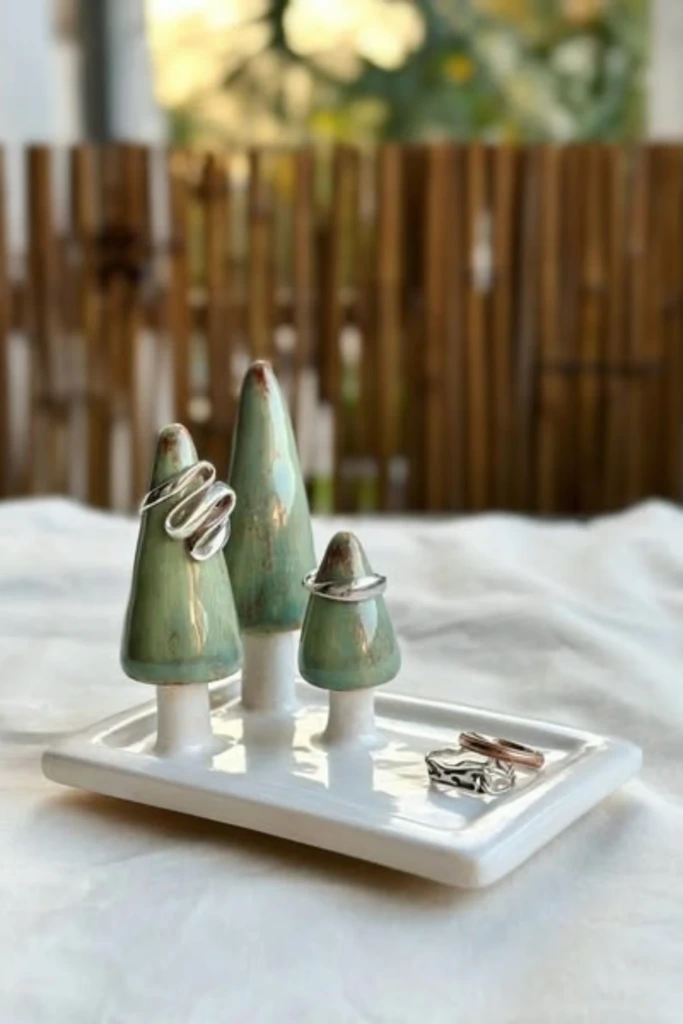
A stacked cone set provides an organized way to display several rings without crowding them onto a single holder. Different cone heights make the arrangement visually interesting and easier to use.
Create three to five clay cones in varying sizes. Arrange them on a flat base, leaving enough room between each cone to slide rings on and off comfortably.
Attach the cones securely before the clay dries, using the joining method recommended for your chosen material.
For a cohesive design, paint the entire set one color. Alternatively, combine complementary shades for a more decorative finish.
This project is particularly useful for separating everyday bands, decorative rings, and frequently worn favorites.
12. Cat Dish Stand
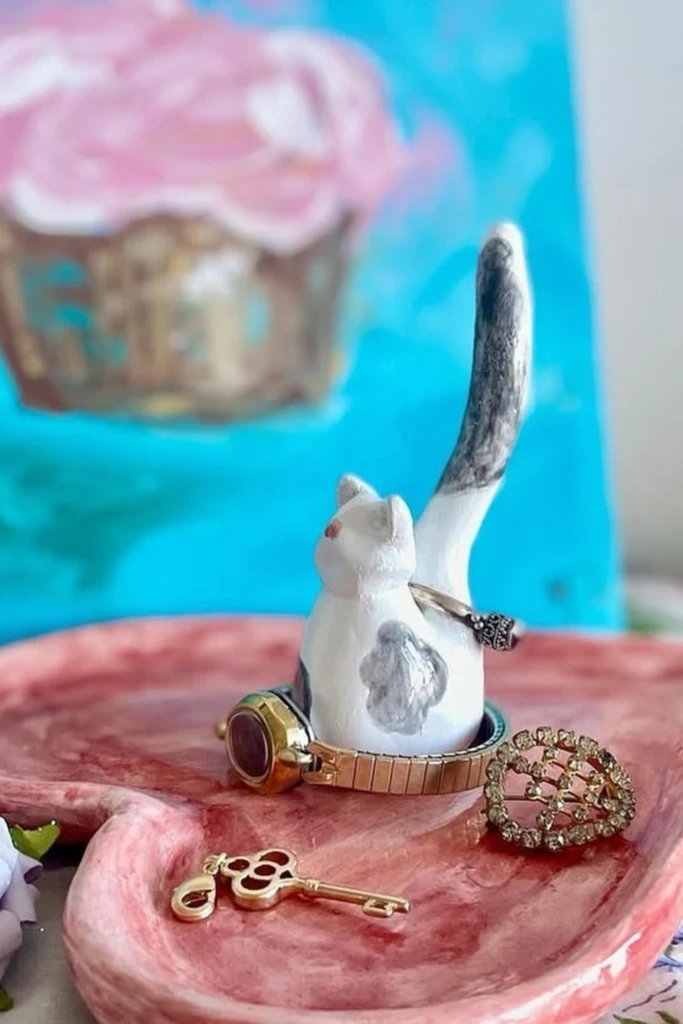
A cat dish stand combines the convenience of a shallow tray with a small decorative sculpture. Unlike a traditional ring cone, this design provides additional space for earrings and other tiny accessories.
Form a rounded dish from clay and create a small seated cat figure for the center or one side.
Give the cat an upright tail that can support a few lightweight rings. Make the tail thick and gently curved so it remains durable.
Once the clay has hardened, paint the cat and dish in coordinating colors. White, gray, and warm brown are attractive options for a subtle appearance.
The finished piece works well on compact dressing tables where multifunctional storage is especially useful.
13. Padded Ring Box
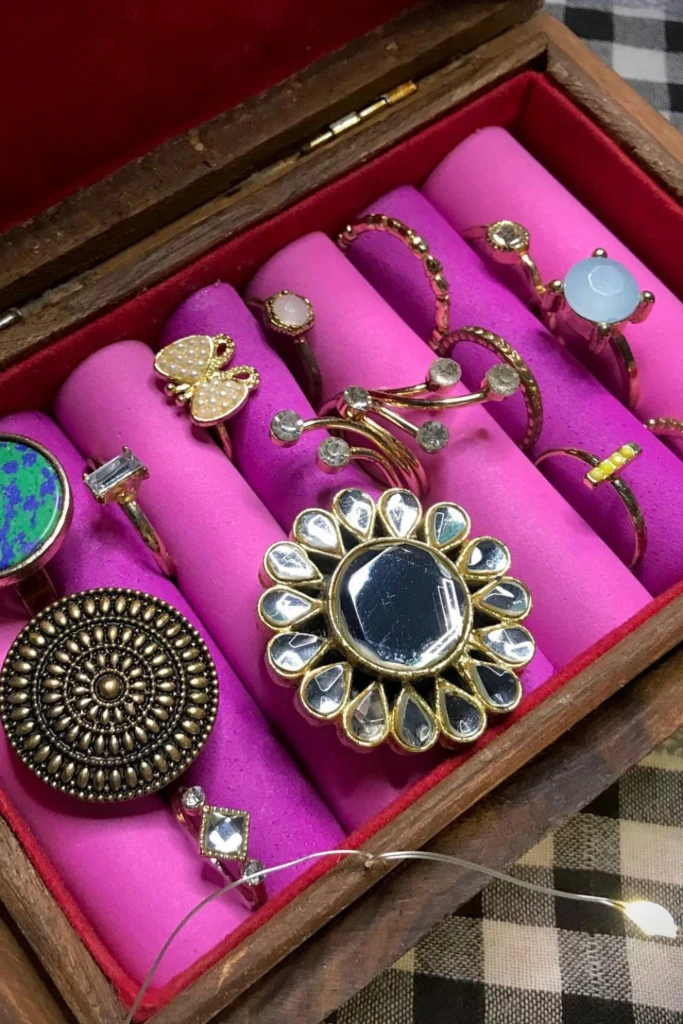
A padded ring box offers structured storage for jewelry collections that include delicate stones, wide bands, or rings of different sizes.
Begin with a shallow wooden box or sturdy container. Measure the interior and cut several pieces of foam to create evenly spaced padded rows.
Wrap the foam in soft velvet or microfiber fabric, securing the fabric underneath each piece. Fit the rows closely inside the box, leaving narrow channels where rings can sit upright.
Make sure the slots hold rings gently rather than squeezing their settings.
A fitted lid adds protection against dust, making this design suitable for both everyday organization and longer-term storage.
14. Mushroom Ring Cones
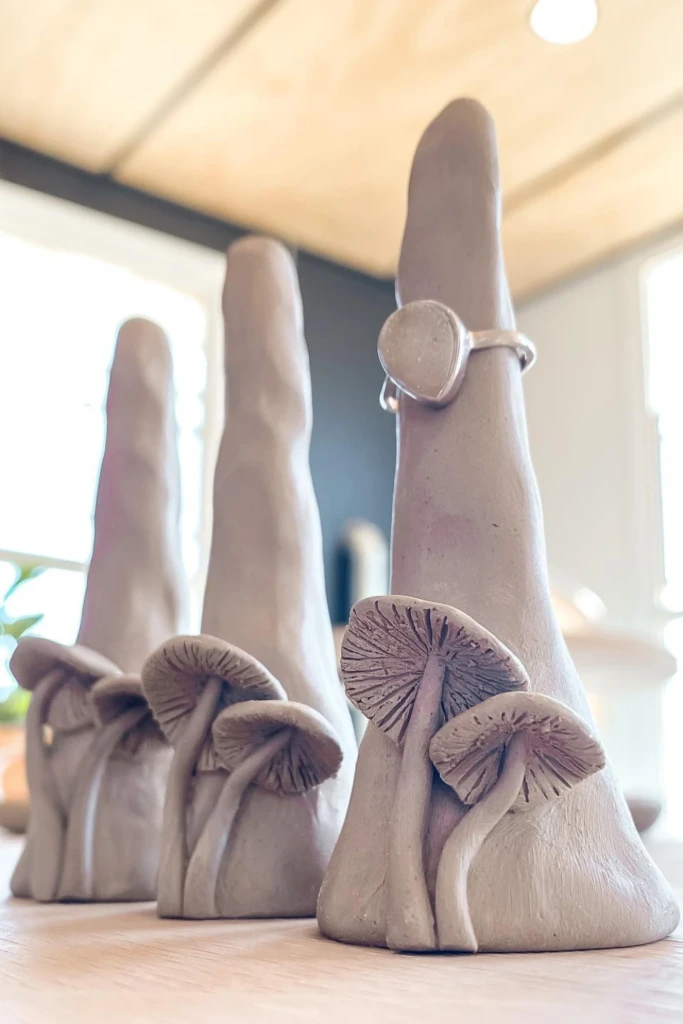
Mushroom ring cones bring a woodland-inspired look to traditional jewelry holders. Their organic shapes work particularly well with cottagecore, rustic, and nature-themed interiors.
Create a tall, tapered clay cone with a wide, stable bottom. Sculpt several miniature mushrooms around the lower section, using rounded caps and short stems.
Attach each mushroom carefully and smooth the joints to create a unified structure.
After the clay dries, decorate the mushrooms with earthy shades, tiny white spots, or soft pastel colors.
Keep the upper portion of the cone free from bulky decorations so rings can slide onto it easily. Display the finished piece on a wooden shelf or bedside table.
15. Cone Dish Combo
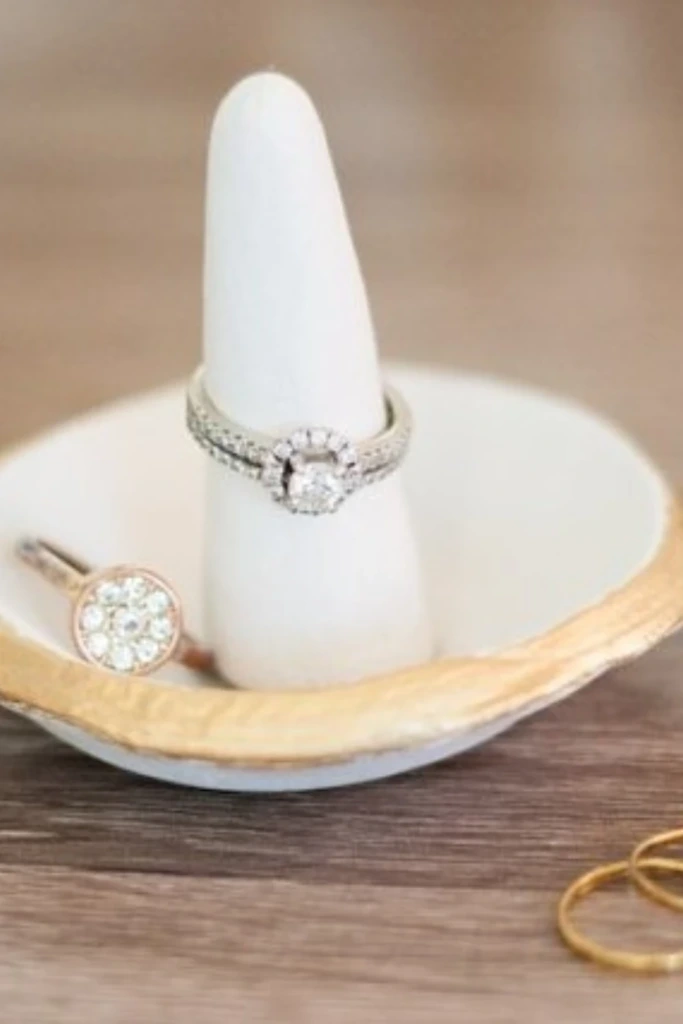
A cone dish combo is one of the most practical designs for everyday jewelry storage because it provides two different ways to organize accessories.
Start with a circular piece of clay and shape it into a shallow bowl. Create a short cone and position it in the center, joining it securely to the dish.
Smooth the interior and make sure the base sits evenly on a flat surface.
Once hardened, decorate the piece with your preferred finish. Neutral colors create a timeless look, while marbled or speckled effects add visual interest.
The cone can hold frequently worn rings, while the dish offers a convenient place for earrings and other small items.
16. Color Block Tray
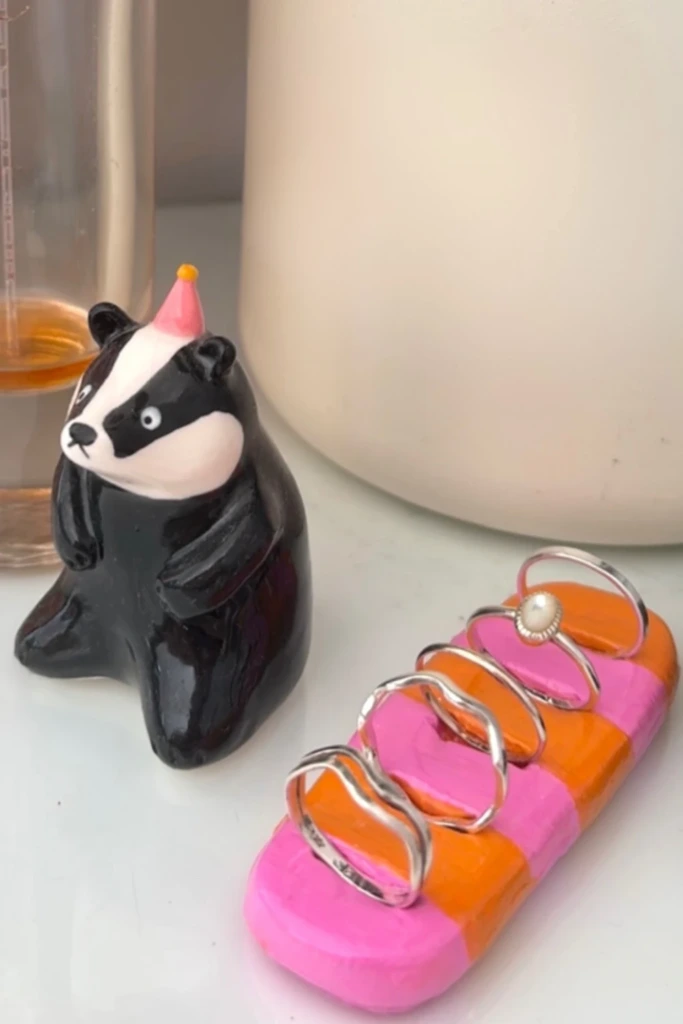
A color block tray is an easy project for anyone who enjoys bold patterns and modern decorative accessories. It turns a simple jewelry dish into a colorful statement piece.
Shape a low rectangular, oval, or circular tray using air-dry clay. Smooth the surface and edges carefully, then let it dry completely.
Use painter's tape to divide the tray into geometric sections. Apply acrylic paint in contrasting shades, allowing each section to dry before removing the tape.
Try combinations such as peach and burgundy, sage and cream, or terracotta and pale pink.
Finish with a compatible protective coating if desired, ensuring it cures fully before placing jewelry on the surface.
Can a DIY ring holder damage rings?
Yes, a poorly finished DIY ring holder can potentially scratch or damage jewelry. Rough clay, exposed wire, sharp wooden edges, and abrasive coatings may harm delicate metal finishes or gemstone surfaces.
To reduce the risk, sand rough areas, cover hard contact points with soft fabric where practical, and allow paints and sealants to cure completely.
Avoid forcing rings onto holders that are too wide. For valuable jewelry, especially pieces with delicate settings or softer gemstones, a fabric-lined compartment is generally a safer storage choice.
Where should a DIY ring holder be placed for daily use?
The best location is somewhere convenient, stable, and away from situations where jewelry could accidentally fall or become damaged.
A bedside table, dresser, or vanity is usually a practical choice because these are common places to remove accessories.
If you frequently take off rings before washing dishes or applying skincare products, keep a holder nearby but away from sink edges, drains, splashes, and cleaning chemicals.
Choose a level surface where the holder won't be knocked over, and avoid prolonged direct sunlight when storing jewelry containing light-sensitive gemstones.
A consistent storage location makes it easier to keep track of your rings and helps prevent unnecessary searching.
With these 16 DIY ring holder ideas, you can create jewelry storage that suits your personal style, available space, and everyday habits. From simple clay cones to fabric-lined wooden boxes, each project offers a creative way to keep your favorite pieces organized while adding a handmade touch to your home.