DIY Coat Rack Ideas to Organize Your Home in Style
I’ll keep the article focused on practical DIY coat rack ideas, materials, construction methods, and useful tips, with original wording throughout.
A well-designed coat rack can make your home feel more organized while adding personality to your interior. Instead of leaving jackets on chairs, bags on tables, or scarves scattered around the entryway, you can create a dedicated place for everyday essentials. The best part is that a DIY coat rack can be customized to suit your available space, preferred decor style, and budget.
Whether you enjoy working with wood, repurposing old materials, or creating simple home improvement projects, there are plenty of ways to build a practical coat rack. From rustic wooden designs to modern wall-mounted hooks, these ideas can help you transform an unused corner into a useful storage area.
Why Make Your Own Coat Rack?
Building your own coat rack gives you greater control over its size, appearance, and functionality. Store-bought options may not fit a narrow hallway or provide enough hooks for a busy household, but a homemade design can be tailored to your specific needs.
DIY projects also offer an opportunity to reuse leftover lumber, old furniture parts, metal pipes, and other materials you already have. This can reduce expenses while giving discarded items a new purpose.
Another advantage is the freedom to match the rack to your existing decor. You can stain natural wood, paint it in a bold color, or combine different materials for a distinctive finish. With basic tools and careful planning, even beginners can create a useful storage solution.
Rustic Wooden Coat Rack
A rustic wooden coat rack is a timeless option for farmhouse-inspired interiors, cottages, and traditional entryways. Its natural grain and slightly weathered appearance add warmth without requiring complicated construction.
Start with a sturdy wooden board and sand the surface until it feels smooth. Apply a wood stain to emphasize the grain, or use paint for a softer, aged appearance. Attach several coat hooks along the front, leaving enough room between them for bulky jackets and bags.
For additional character, consider using reclaimed timber or an old wooden plank. Check recycled wood carefully for loose sections, protruding nails, and signs of damage before using it.
Secure the finished rack to wall studs or use suitable anchors for the wall material. A properly mounted wooden rack can provide convenient storage while serving as an attractive decorative feature.
DIY Wall-Mounted Coat Rack
A wall-mounted coat rack is especially useful when floor space is limited. It keeps outerwear organized without taking up valuable room in a small hallway, apartment, bedroom, or mudroom.
To build one, choose a wooden board that fits the available wall space. Measure and mark the positions for your hooks, keeping the spacing consistent so coats do not overlap excessively. Drill pilot holes where needed, then attach the hooks using the appropriate screws.
Before installation, sand and finish the board to protect the wood and improve its appearance. You can leave it natural, paint it to match your walls, or choose contrasting hardware for a more contemporary look.
The mounting method matters as much as the design. Locate wall studs whenever possible, especially if the rack will support heavy coats, backpacks, or handbags. Use appropriately rated anchors when studs are unavailable and follow the hardware manufacturer's installation instructions.
Freestanding DIY Coat Rack
A freestanding coat rack provides flexible storage without requiring permanent wall installation. You can position it near the entrance, move it between rooms, or place it wherever extra hanging space is needed.
A traditional design consists of a vertical wooden post, several projecting hooks, and a wide base. Cut the post to your preferred height, attach the hooks securely, and construct a stable base that distributes weight evenly.
The base deserves particular attention. A tall rack with a narrow footprint may tip when several heavy items hang from one side. A broad, well-balanced base helps improve stability, while a heavier base may provide additional support.
Sand all exposed surfaces to eliminate splinters and finish the wood with paint, stain, or a protective coating. Test the completed rack gradually before relying on it for everyday storage.
This design works well for households that need portable storage or prefer not to drill into their walls.
Industrial Pipe Coat Rack
An industrial-style coat rack combines metal plumbing pipes with a simple, functional design. Its dark hardware and clean lines complement loft apartments, modern interiors, and rooms with exposed brick or reclaimed wood.
You can create a wall-mounted version using a metal pipe, compatible flanges, elbows, and mounting hardware. Alternatively, assemble a freestanding frame with a horizontal hanging bar supported by vertical pipes and a stable base.
Measure the intended location before purchasing components. Check that the pipe diameter, fittings, and fasteners are compatible, and make sure the structure can support the expected load.
Metal pipes can be left in their original finish or paired with a wooden backing board for added visual warmth. If you use reclaimed pipes, clean them thoroughly and inspect them for corrosion or damaged threads.
Because metal assemblies can become heavy, attach wall-mounted designs to suitable structural support. A properly assembled pipe rack offers a durable alternative to conventional wooden hooks.
DIY Pallet Wood Coat Rack
Old pallets can be a useful source of inexpensive wood for home improvement projects. With a little preparation, the boards can become a decorative coat rack that suits rustic, farmhouse, or casual interiors.
Begin by selecting clean, sound timber. Avoid wood with chemical contamination, unusual stains, persistent odors, or signs of rot. Sand the selected boards carefully, removing rough edges and splinters before assembly.
Cut the wood to your desired dimensions and arrange the pieces into a simple backboard. Secure the boards together with suitable fasteners, then add hooks at evenly measured intervals.
A natural clear finish preserves the character of the wood, while white, gray, or muted green paint can create a more finished appearance. You could also add a small shelf above the hooks for hats or lightweight accessories.
Before hanging the rack, check every joint and mounting point. Reclaimed wood varies in strength, so inspect it closely and avoid assuming that an old pallet board can safely support heavy loads.
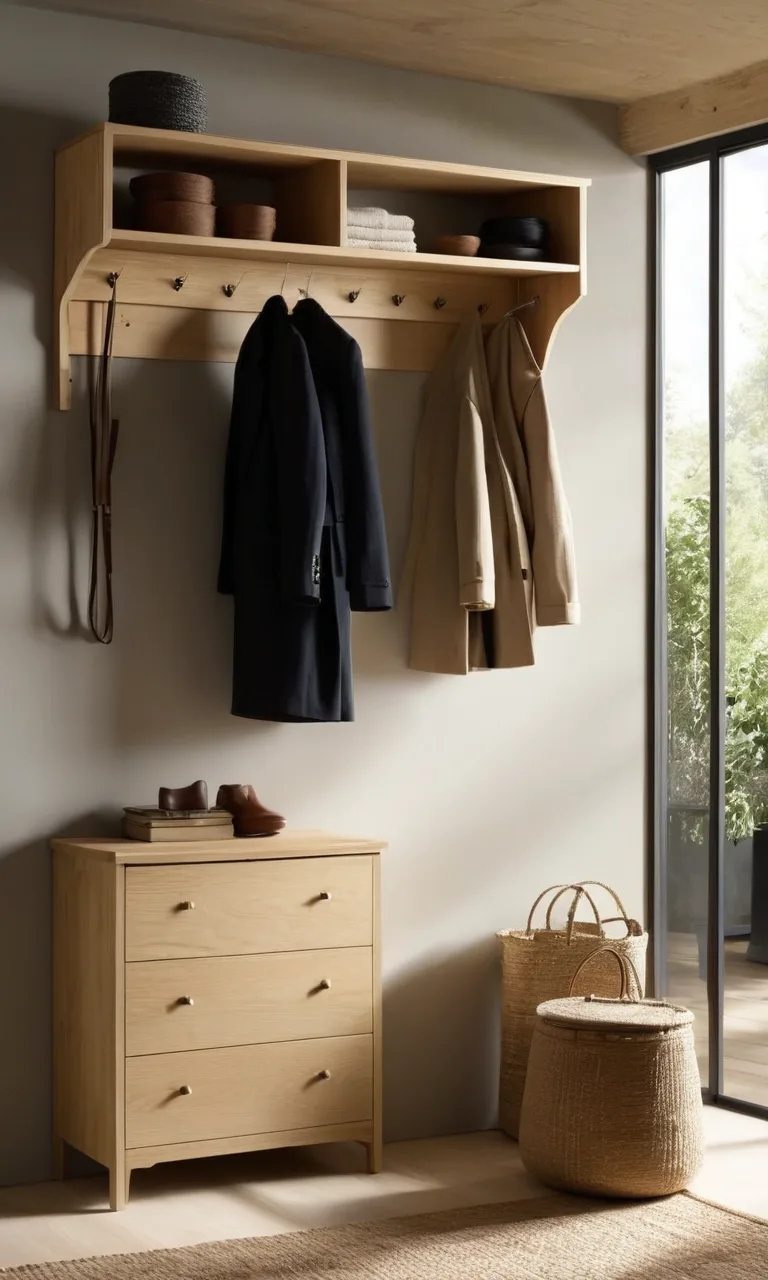
DIY Coat Rack With a Shelf
Combining a coat rack with a shelf makes better use of vertical space. The hooks provide a place for jackets and bags, while the upper shelf can hold hats, gloves, small baskets, or decorative objects.
For a basic design, attach a shelf to a sturdy wooden backboard or build a compact frame that supports both components. Position the hooks low enough that hanging coats will not interfere with items stored above them.
Choose shelf brackets and fasteners appropriate for the intended load. Lightweight accessories require less support than storage baskets filled with winter gear.
You can customize the design with matching wood finishes, contrasting brackets, or a painted backboard. A narrow shelf is ideal for compact entryways, while a wider version may work better in a mudroom.
Keep frequently used items within easy reach and avoid placing heavy objects where they could fall onto people passing underneath.
DIY Coat Rack From an Old Door or Shutter
Repurposing an old door or wooden shutter creates a distinctive coat rack with plenty of character. The original grooves, panels, and weathered finish can become part of the design, reducing the need for additional decoration.
Choose a piece that is structurally sound and suitable for the space. Remove loose paint, dirt, damaged hardware, and splintered sections. If the item is old, take appropriate precautions when assessing painted surfaces that could contain lead.
Once the surface is prepared, attach coat hooks directly to sturdy sections of the wood. A shutter with vertical slats may require a solid backing board to distribute the weight and provide reliable attachment points.
You can preserve an aged finish for a vintage appearance or repaint the piece to coordinate with your room. Decorative knobs, labels, or a small shelf can provide additional functionality.
Mount the finished rack securely, taking its weight into account. A repurposed door or shutter can become an eye-catching feature while giving an otherwise unused item a practical new role.
DIY Coat Rack With Wooden Pegs
Wooden pegs offer a simple alternative to traditional metal hooks. Their rounded shapes create a clean, understated appearance that works particularly well in Scandinavian, minimalist, and contemporary interiors.
To make this style, use a solid wooden board and compatible wooden pegs. Mark the locations carefully, ensuring that the pegs are evenly spaced and have enough room for hanging garments.
Depending on the peg design, you may need to drill angled holes or use mounting hardware supplied with the components. Follow the manufacturer's specifications to achieve a secure fit rather than relying on glue alone for heavily loaded hooks.
Sand the board and pegs before assembly, paying attention to the areas that will contact clothing. A clear finish highlights the natural grain, while a painted board with contrasting pegs creates a more playful look.
This style is particularly suitable for lightweight jackets, hats, scarves, and everyday accessories. For heavier coats, choose appropriately rated components and a mounting arrangement designed to withstand the load.
DIY Coat Rack for Kids
A coat rack designed for children encourages them to put away their belongings independently. By placing hooks at an accessible height, you can make it easier for young family members to hang jackets, school bags, and hats after coming home.
Choose a smooth wooden board or a collection of individual hooks that can be installed securely. Round the exposed edges, sand the surface thoroughly, and avoid finishes that remain tacky or leave sharp imperfections.
Bright colors can help make the rack appealing. You might paint each hook area a different shade or add simple name labels so every child has a designated place for their belongings.
Measure the mounting height according to the children's ages and reach. If several children will use the rack, leave sufficient space between hooks to prevent bags and coats from becoming tangled.
Safety is essential in a child's room or entryway. Fasten the rack securely, avoid sharp protrusions, and do not place heavy objects above the hooks where they could fall. Adhesive-mounted hooks should only be used within their stated weight limits and on compatible surfaces.
Minimalist DIY Coat Rack
A minimalist coat rack focuses on simple shapes, practical storage, and a clean appearance. It is a good choice for contemporary homes where excessive decoration can make a small room feel crowded.
A narrow wooden board with a few discreet hooks is often enough. Alternatively, install individual hooks in a straight line or arrange them in a carefully planned pattern on an otherwise empty wall.
Choose finishes that complement the surrounding space. Natural oak tones, matte black hardware, white paint, and muted neutral colors can all work well without overwhelming the room.
Before installation, plan the hook positions around the items you expect to hang. A rack intended for lightweight jackets may need less space than one used for thick winter coats and large backpacks.
Minimalist designs are relatively easy to maintain because they have fewer decorative details and hard-to-reach corners. With accurate measurements and secure mounting, this straightforward approach can provide practical storage without distracting from the rest of your interior.
DIY Coat Rack Using Recycled Materials
Recycled materials can turn a simple storage project into an opportunity for creative reuse. Old drawer fronts, leftover lumber, unused furniture legs, sturdy knobs, and salvaged metal components may all be suitable for a coat rack.
Start by examining what you already have. Look for materials that are strong enough to support hanging items and can be attached securely. Avoid brittle plastic, badly cracked wood, corroded hardware, or components with unknown structural limitations.
Once you select your materials, sketch a basic design and determine how the pieces will connect. A reclaimed wooden board paired with new hooks, for example, can provide an attractive balance between reused materials and reliable hardware.
Clean and prepare every component before assembly. Remove loose finishes, sand rough surfaces, and replace worn fasteners. If the materials come from different sources, check that their thicknesses and attachment points work together.
Reusing existing materials can reduce waste and help control costs, although additional cleaning, repairs, or hardware may be necessary. The most successful designs combine creative reuse with dependable construction.
Tips for Building a Durable DIY Coat Rack
A coat rack should be attractive, but it also needs to withstand regular use. Before starting your project, consider how many items it will hold, where it will be installed, and which materials are suitable for that location.
Choose strong materials: Use sound lumber, compatible metal components, and hooks rated for the intended load.
Measure before cutting: Confirm the available wall or floor space and account for the width of bulky garments.
Space hooks thoughtfully: Leave enough room for coats, bags, and scarves without overcrowding the rack.
Sand wooden surfaces: Smooth edges help prevent splinters and reduce the chance of snagging clothing.
Use suitable fasteners: Select screws, anchors, and brackets based on the wall material and expected weight.
Check stability: Freestanding racks need a balanced base, while wall-mounted versions need secure attachment points.
Apply an appropriate finish: Paint, stain, or a compatible protective coating can improve appearance and help protect the wood.
Test before regular use: Apply weight gradually and inspect the hooks, joints, and mounting hardware for movement.
If you are new to DIY projects, begin with a straightforward wall-mounted board and a few hooks. More elaborate designs can be attempted once you are comfortable measuring, drilling, sanding, and assembling basic components.
Final Thoughts
A DIY coat rack is a practical way to improve organization while adding a personal touch to your home. Whether you choose reclaimed pallet wood, industrial piping, wooden pegs, or a simple shelf-and-hook combination, the design can be adapted to your available space and preferred style.
The key is to balance appearance with stability. Use suitable materials, position the hooks where they are easy to reach, and make sure the completed rack is securely installed. With thoughtful planning and careful construction, a homemade coat rack can keep everyday essentials organized and make your entryway feel more welcoming.