How to Make a DIY Pin Board – Ultimate Guide
A DIY pin board is a practical way to organize reminders, display photographs, collect creative inspiration, and keep important information visible. Whether you need a bulletin board for your home office, bedroom, study area, or craft room, making your own allows you to choose the size, material, and appearance that suit your space.
Building a pin board is a straightforward project that requires only a few basic supplies. However, the quality of the materials and the way you assemble them can make a significant difference in how well the finished board performs.
A good pin board should hold pushpins securely, maintain a smooth surface, and remain firmly attached to the wall.
This guide explains how to select suitable materials, assemble a fabric-covered pin board, install it safely, and avoid common construction problems.
Which Adhesives Should You Use?
Choosing an appropriate adhesive is essential when making a DIY pin board. Different backing materials require different bonding products, and using an incompatible glue can damage the surface or create a weak connection.
For cork attached to plywood, MDF, or another wood-based backing, PVA wood glue is often a practical option. Apply a thin, consistent layer and press the cork firmly against the backing. Keep the pieces flat while the adhesive cures according to the manufacturer's instructions.
Contact cement can also work for certain cork installations, particularly when bonding larger surfaces. However, it requires careful positioning because the materials may bond immediately after contact.
Foam insulation boards need additional consideration. Some solvent-based adhesives can dissolve or deform certain types of foam.
When working with foam, select a product specifically labeled as compatible with your foam material. Low-temperature hot glue may be suitable for small attachment points, but test it on a leftover piece first.
For reliable results:
Clean and dry all surfaces before applying adhesive.
Spread glue evenly to prevent raised areas.
Avoid excessive adhesive that could soak through thin materials.
Allow the recommended curing time before hanging the board.
Test unfamiliar adhesives on scrap materials.
Proper bonding helps the pin board maintain its shape and prevents the layers from separating during everyday use.
Materials That Actually Work
The materials you choose determine the durability, appearance, and functionality of your homemade pin board.
For a fabric-covered board with a rigid backing, gather the following supplies:
MDF board: A ¼-inch-thick sheet provides a firm base for a lightweight project. Plywood is another option.
Foam insulation panel: Creates a surface that can accept pushpins. Choose a thickness that accommodates the pins you intend to use.
Fabric: Cotton canvas, linen, upholstery fabric, or another tightly woven material works well.
Foam-compatible adhesive: Secures the foam panel to the backing.
Staple gun: Helps fasten the fabric to the rear of the board.
Suitable staples: Choose a length appropriate for the backing thickness so the staples do not penetrate the front.
Measuring tape and pencil: Useful for marking dimensions and mounting positions.
Utility knife or saw: Needed to cut the foam or backing to size.
Mounting hardware: Screws, washers, wall anchors, or picture-hanging hardware appropriate for the finished board.
A board measuring approximately 24 × 36 inches is a useful starting point for a home workspace, although you can adjust the dimensions to suit your wall.
If you prefer a traditional cork surface, consider cork approximately ¼ inch thick or thicker. Thin decorative cork sheets may not provide enough depth for repeated pinning.
Before purchasing materials, decide where the board will hang and what you plan to display. A large inspiration board may need stronger backing and mounting hardware than a small board used for occasional notes.
Step-by-step method to Make a DIY Pin Board
Making a fabric-covered pin board involves attaching a pinnable surface to a sturdy base, wrapping it neatly with fabric, and securing it to the wall.
Work on a clean, level surface and check your measurements before cutting any materials.
Glue foam to the MDF
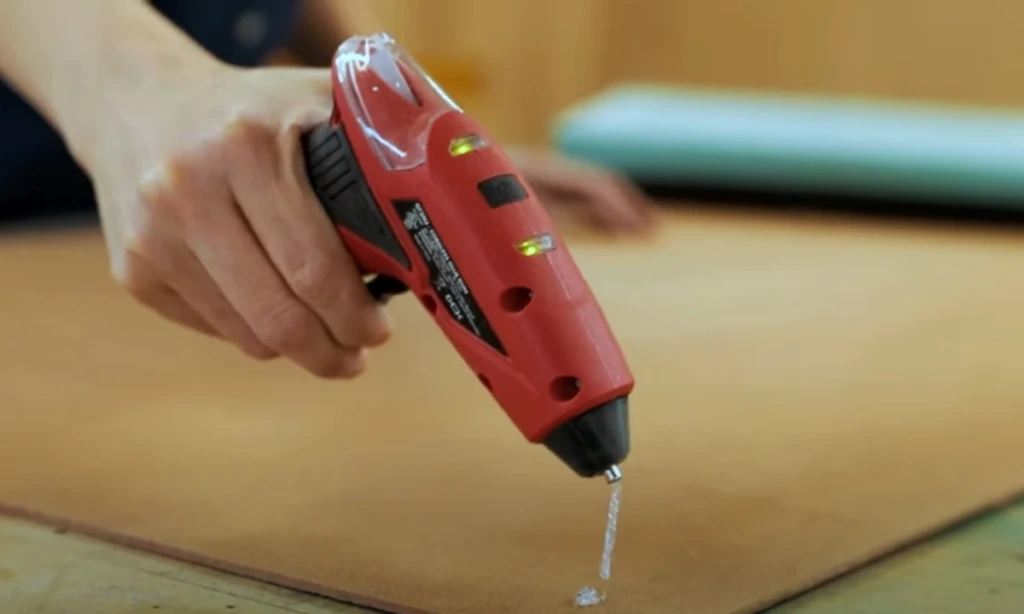
Begin by cutting the MDF and foam panel to matching dimensions.
Place the MDF on a protected work surface and remove any dust or loose particles. Apply a foam-compatible adhesive according to the product instructions.
Carefully position the foam over the MDF, aligning the edges before pressing the materials together.
Use gentle, even pressure to establish contact without crushing the foam.
If the adhesive requires additional drying or curing time, leave the board undisturbed until the bond is ready for the next step.
The MDF provides structural support, while the foam creates a surface into which pushpins can be inserted.
Prep the fabric
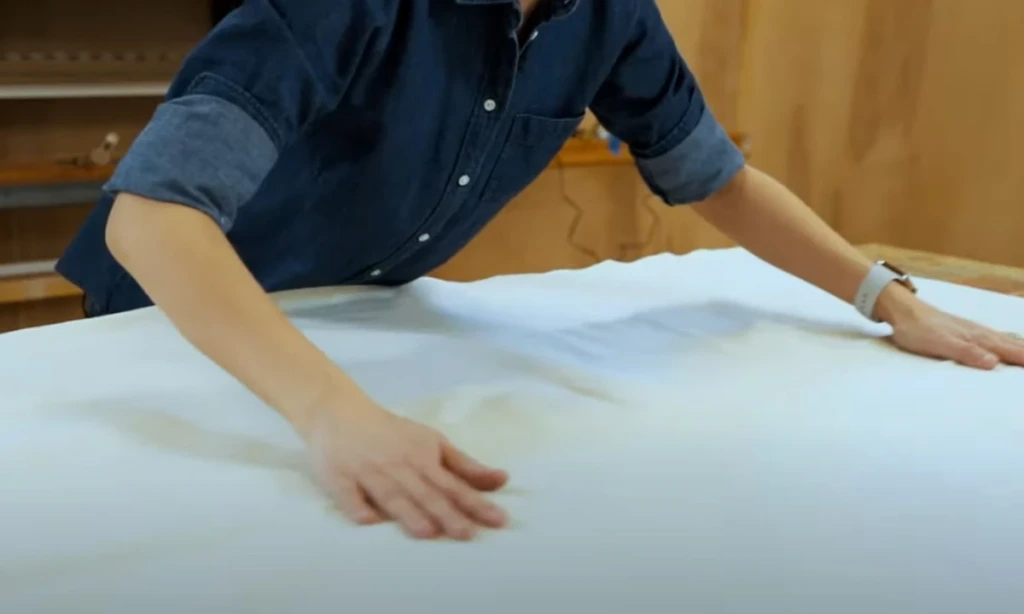
Choose a fabric that complements the room where your pin board will be displayed.
Cut the fabric large enough to cover the front and edges of the board, leaving approximately 3–4 inches of extra material on every side. The exact allowance depends on the board's thickness.
Place the fabric face down on a clean table or floor.
Smooth out creases and wrinkles. If the fabric is suitable for ironing, press it beforehand to create a neater finish.
Position the board in the center of the fabric with the foam facing downward.
Check that enough fabric extends beyond each edge to fold securely around the back.
For patterned fabric, verify that the design is straight before beginning to staple.
Start stapling the long sides
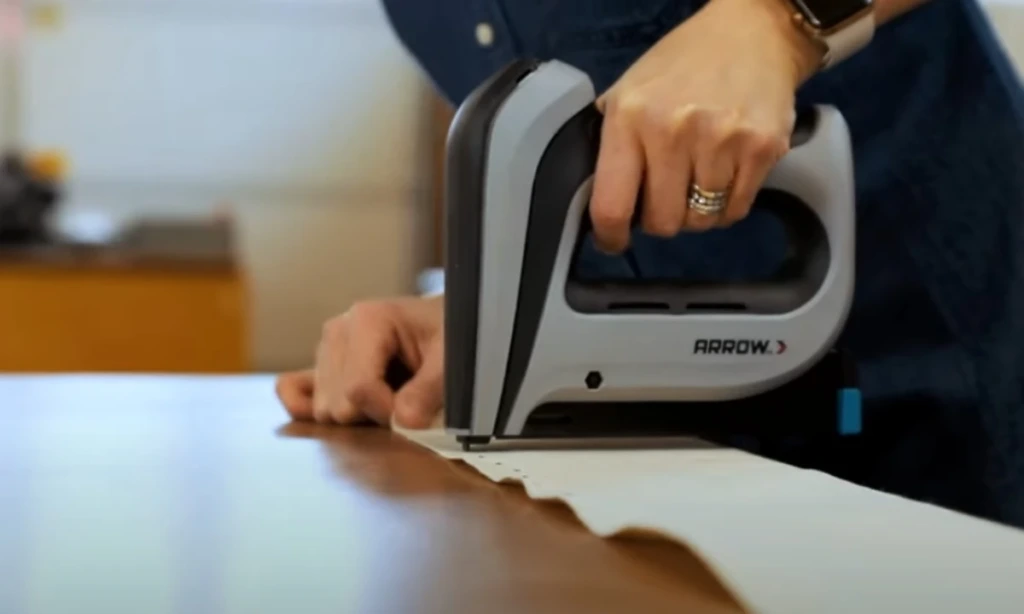
Begin fastening the fabric at the center of one long edge.
Fold the material over the back of the MDF and secure it with a staple. Move to the opposite long edge, pull the fabric gently until it lies smooth, and insert another staple.
Continue working outward from the center, alternating between opposite sides.
This approach distributes tension more evenly and reduces the chance of wrinkles developing across the front.
Place staples several inches apart initially, then add more wherever additional support is needed.
Avoid pulling excessively, as this can distort the fabric pattern or compress the foam.
The goal is a smooth, firm covering that maintains its shape without unnecessary strain.
Wrap the short ends like a gift
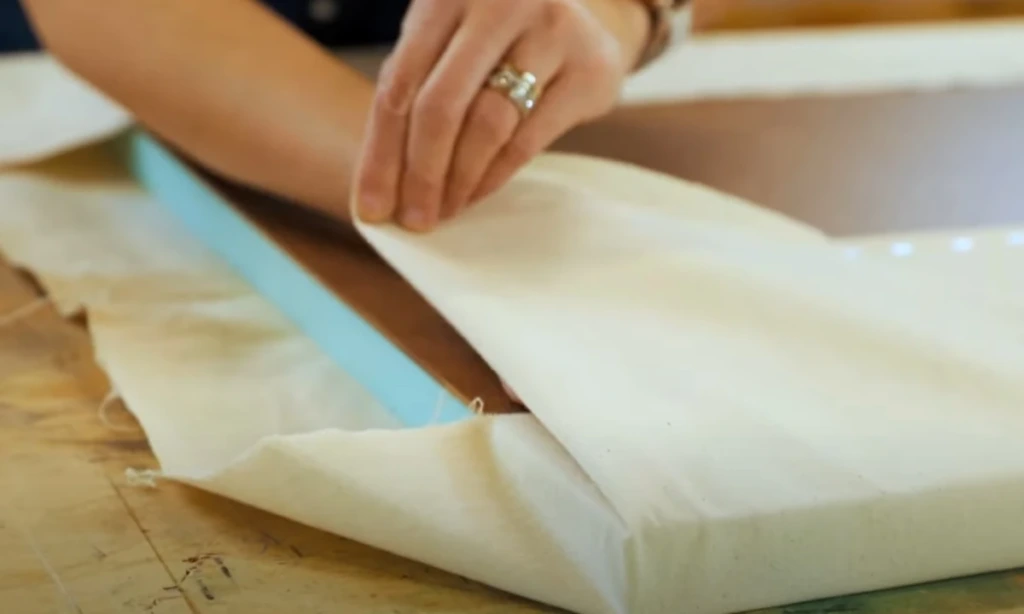
Once the long edges are secure, turn your attention to the shorter sides.
Fold the remaining fabric toward the back of the board, keeping the material flat against the edges.
At each corner, tuck the excess fabric inward to create a compact, tidy fold.
Think of the technique used to wrap a rectangular gift box. The fabric should lie neatly without creating thick bunches at the corners.
Secure the folds with staples, checking the front periodically.
Well-finished corners improve the appearance of the board and help it sit more evenly against the wall.
If the fabric is particularly thick, carefully trim unnecessary excess from the back without cutting into the visible covering.
Finish the perimeter
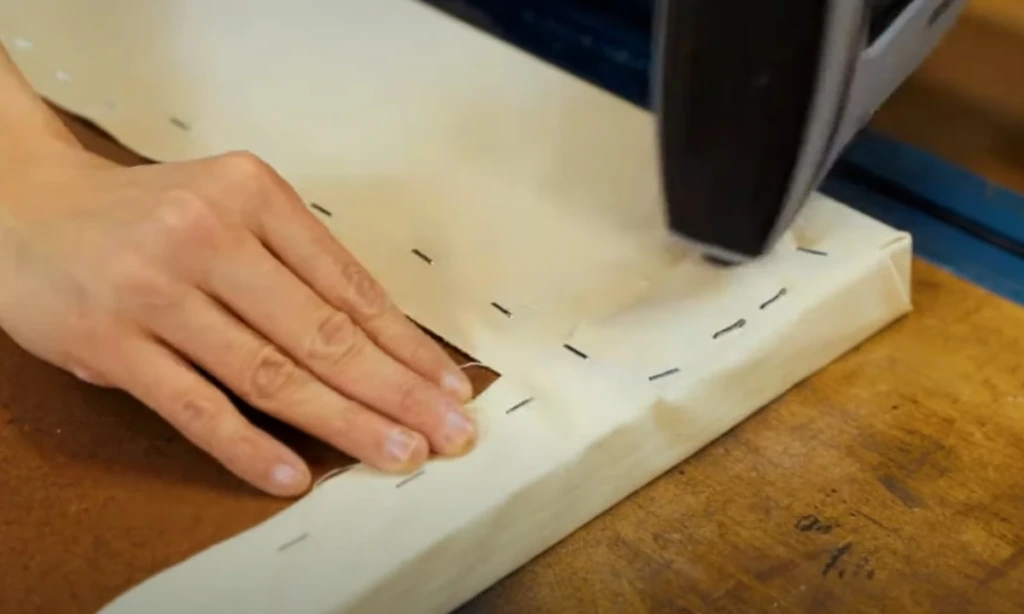
Inspect the entire back edge and add staples wherever the fabric feels loose.
Pay special attention to the corners and areas between existing staples.
Turn the board over and examine the front in good lighting.
Look for uneven tension, diagonal creases, or fabric that appears to shift when touched.
If necessary, remove a few staples and readjust the material before securing it again.
Trim loose threads and excess fabric from the back, keeping enough material beneath the staples to prevent fraying.
At this stage, the board should have a smooth front surface, neatly wrapped edges, and a firmly attached covering.
Mark mounting points
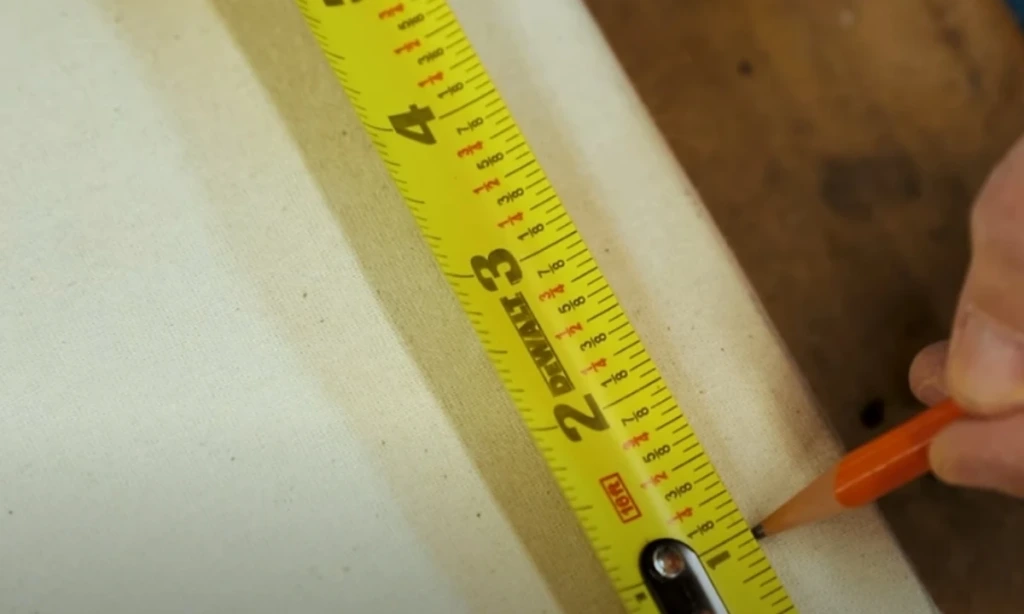
Before hanging the board, determine its position on the wall.
Measure the finished board and use a level to establish a straight mounting line.
If you plan to fasten the board directly through its face, mark suitable fixing points near the corners, leaving enough distance from the edges to avoid damaging the backing.
Alternatively, attach rated hanging hardware to the rigid backing, following the hardware manufacturer's instructions.
For larger boards, locate wall studs using a stud finder whenever possible.
Check the wall for electrical wiring or plumbing before drilling.
Accurate marking makes installation easier and helps prevent a crooked or unstable finished board.
Mount with screws + washers
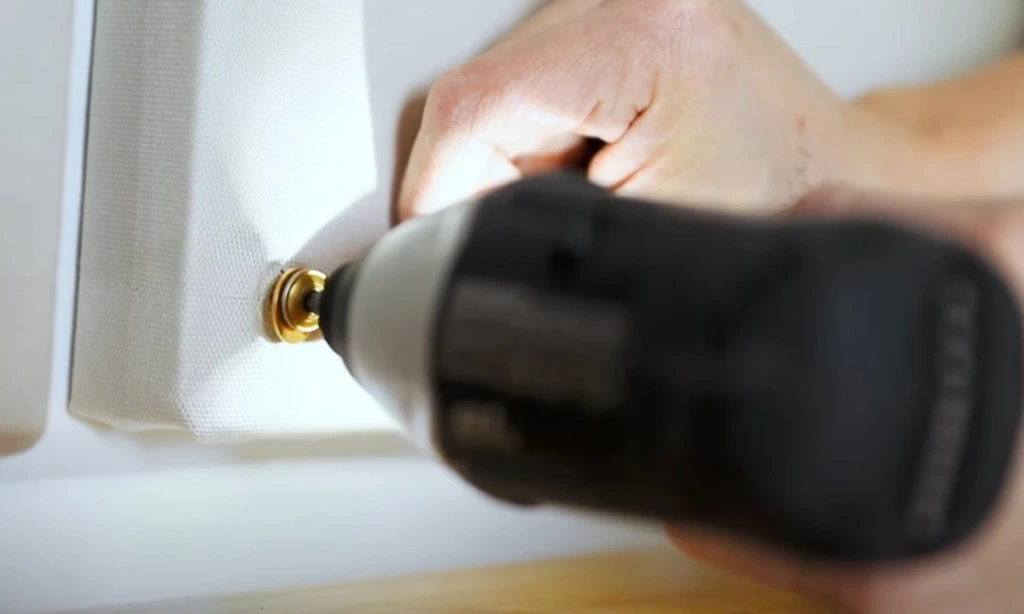
Direct mounting with screws and washers can provide a secure installation when the fasteners are appropriate for the board and wall.
Position the board against the wall and confirm that it is level.
If fastening through the front, use washers beneath the screw heads to distribute pressure and reduce the chance of the fasteners pulling into the foam.
Drive screws into wall studs where practical. When studs are unavailable, use anchors rated for the wall material and the combined weight of the board and anything attached to it.
Do not rely on ordinary screws driven into unsupported drywall.
Tighten each fastener until the board is secure, but avoid excessive pressure that could deform the surface.
Once installed, gently check for movement.
A properly mounted board should remain stable when you add or remove pinned items.
Style and use
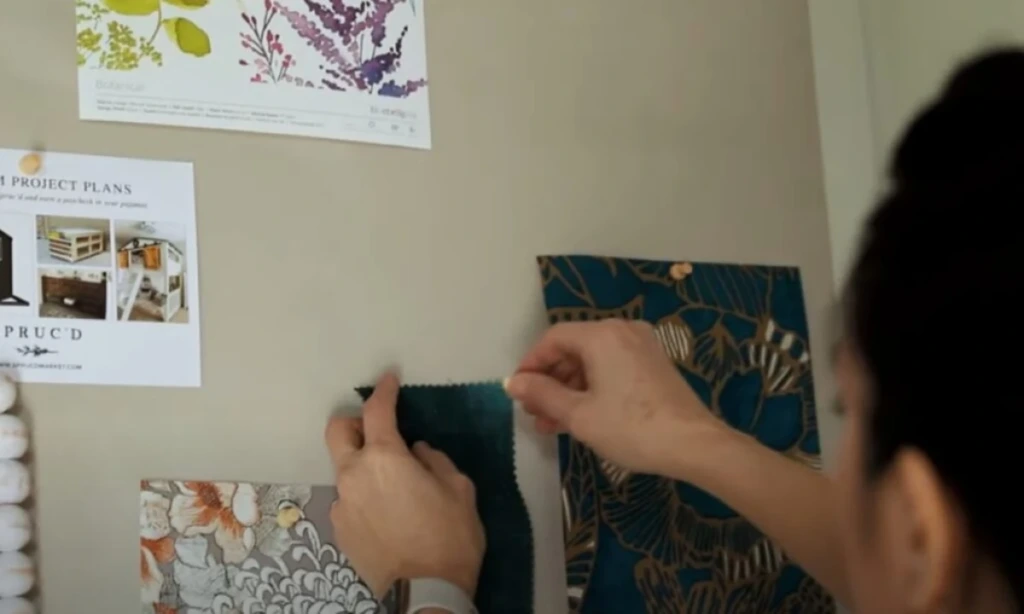
With the construction complete, you can turn your pin board into a functional part of your room.
Use pushpins to display photographs, appointment reminders, calendars, sketches, fabric samples, or inspirational images.
For a home office, divide the board into areas for current tasks, upcoming deadlines, and reference materials.
In a bedroom, combine personal photographs with postcards and decorative artwork.
A craft-room board can hold color palettes, project plans, and design ideas.
Try leaving some empty space so new items can be added without making the display feel overcrowded.
Choose pushpins with suitable lengths, and avoid pushing them so deeply that they damage the backing or wall.
Rearranging the contents regularly keeps the board useful as your needs change.
How to Hang Your Pin Board Securely?
A secure installation is just as important as the construction of the board itself.
The best hanging method depends on the board's dimensions, total weight, backing material, and wall surface.
For small, lightweight boards, removable picture-hanging strips may be convenient. However, they should only be used when the manufacturer approves the specific surface and the weight remains within the stated limit.
Remember that pressing pushpins into a board can create additional force against the mounting system.
For medium-sized boards, D-ring hangers attached to a suitable wooden backing or frame offer a more traditional solution. Use compatible wall hooks, screws, or anchors.
Large boards with heavy backing materials may benefit from a French cleat system. This uses two interlocking components to distribute weight across a wider mounting area.
For the safest installation, consider these points:
Weigh the completed board before selecting hardware.
Include the expected weight of anything you will attach.
Use fasteners suitable for drywall, masonry, plaster, or wood.
Secure heavy boards to structural supports whenever possible.
Check the mounting hardware periodically for loosening.
Avoid placing a heavy board directly above a bed, crib, or frequently occupied seating area unless it has been securely installed using suitable structural fixings.
Different DIY Pin Board Styles You Can Try
One advantage of making your own pin board is the freedom to customize its design.
A fabric-covered foam board is a popular option for bedrooms, home offices, and creative workspaces. You can coordinate the fabric with curtains, furniture, or other decorative elements.
For a natural appearance, try a cork pin board with a simple wooden frame. Cork offers a familiar bulletin-board texture and works well with neutral or rustic interiors.
A large inspiration board is useful for displaying design concepts, photographs, and project references. Lightweight foam panels can make oversized displays easier to handle, although they still require suitable support.
For smaller spaces, consider individual felt or cork tiles arranged in a geometric pattern. These allow you to create a customized display without committing to one large rectangular board.
Renters may prefer removable mounting solutions, but adhesive products should always be checked for compatibility with the wall finish. Even products advertised as removable can sometimes damage paint.
Another interesting option is a combined magnetic and pin board. A thin ferromagnetic steel sheet can create a magnetic section, while cork or foam provides a separate pinnable area.
For a decorative finish, add a painted wooden frame, fabric trim, or ribbon detailing.
The best style is one that suits both your available space and how frequently you plan to use the board.
Common Mistakes to Avoid
Even a simple DIY pin board can develop problems when important construction details are overlooked.
Using material that is too thin: A shallow pinnable layer may not grip pushpins securely. Select a suitable thickness and test it with your intended pins before assembly.
Choosing incompatible adhesive: Some glues damage foam or fail to bond porous materials effectively. Always check product compatibility.
Skipping the backing board: Large or flexible pin boards may bend or lose their shape without sufficient structural support.
Leaving the fabric loose: Uneven tension can cause wrinkles and sagging. Fasten opposite sides progressively to achieve a smoother result.
Using unsuitable staples: Staples that are too long can penetrate the front surface, while short staples may fail to hold securely.
Rushing adhesive curing: Moving or hanging the board before the adhesive has fully cured can weaken the bond.
Ignoring mounting requirements: Weak hooks, unsuitable anchors, or poorly positioned screws can cause the board to fall.
Overloading the surface: Pin boards are intended primarily for lightweight displays. Heavy objects should be supported by separate wall-mounted hardware.
Taking time to check these details during construction can prevent repairs and help the finished board remain functional.
Final Thoughts
Making a DIY pin board is an affordable and customizable way to create additional organization and display space at home.
With a sturdy backing, a suitable pinnable material, carefully fitted fabric, and dependable mounting hardware, you can build a board that looks attractive and performs well during regular use.
The project can be adapted to different room sizes and decorating styles, making it useful for home offices, bedrooms, classrooms, and creative spaces.
Focus on accurate measurements, compatible materials, and secure installation rather than rushing through the process.
A thoughtfully constructed pin board can become a convenient place to organize ideas, keep reminders visible, and display the things that matter to you.
FAQs
Why don’t my pins stay on the board?
Pushpins may fall out when the pinnable layer is too thin, too soft, damaged, or unsuitable for repeated use.
For a cork board, choose a sufficiently thick, dense cork material designed for bulletin boards. Around ¼ inch is a useful starting point, although performance varies with cork density and pin length.
If you are using foam, make sure it provides enough resistance to hold the pins without allowing them to move freely.
Also check the pushpins themselves. Bent, damaged, or unusually long pins may not work well with your chosen board material.
Can I make a pin board without cork?
Yes. Cork is not essential for making a functional pin board.
Foam insulation panels, purpose-made pinnable fiberboard, and certain dense felt materials can serve as alternatives.
A fabric-covered foam board is especially suitable for decorative projects because the fabric conceals the underlying material.
However, different materials offer different levels of durability and pin retention. Ordinary craft felt alone may be too thin to grip pushpins effectively, and some lightweight foams can deteriorate with frequent use.
For a board that will be used regularly, choose a material designed to accept repeated pin insertion and test a small sample before building the full project.