21 DIY Cork Board Ideas for 2026
A DIY cork board is an affordable way to bring personality and organization into your home. Whether you're creating a workspace, decorating a bedroom, or finding a better place for family reminders, a customized cork board can serve a practical purpose while adding character to your walls.
The beauty of cork is its versatility. You can cut it into different shapes, decorate it with paint, wrap it in fabric, or combine it with attractive frames. Most designs require only basic crafting supplies, making them suitable for beginners and experienced DIY enthusiasts alike.
Before choosing a project, consider where you'll hang your board and how frequently you'll use it. A decorative display for photographs has different requirements from a busy planning board that needs to withstand daily pinning.
Explore these 18 creative DIY cork board ideas to find a design that complements your space and everyday needs.
1. Floral Frame Cork Board
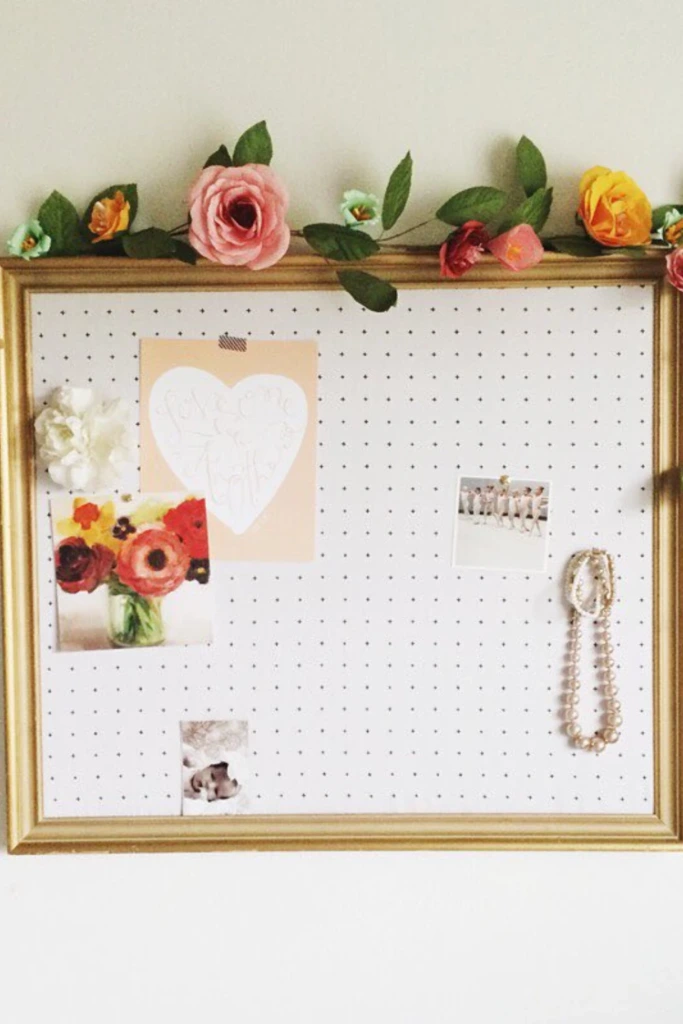
A floral frame cork board combines practical organization with romantic, decorative details. It's an appealing choice for bedrooms, dressing areas, and feminine-inspired home offices.
Begin with a wooden picture frame and a cork sheet cut to match its interior dimensions. Paint the frame in a complementary shade, such as cream, dusty pink, or sage green.
Once the paint dries, attach artificial flowers around selected sections of the frame using hot glue. Small roses, daisies, and greenery work particularly well together.
For a balanced appearance, concentrate the floral decorations along one corner rather than covering the entire border. This creates an elegant focal point while leaving the cork surface accessible.
Use the completed board to display favorite photographs, handwritten notes, jewelry inspiration, or encouraging messages.
2. Terrazzo Cork Board
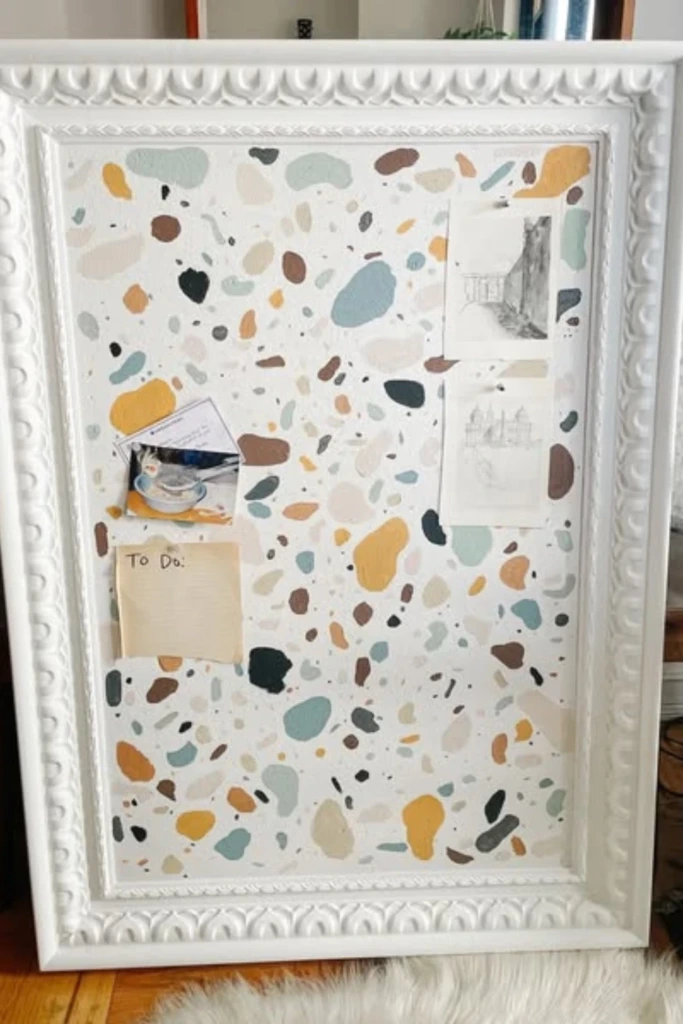
A terrazzo-inspired cork board introduces playful patterns and contemporary style into an otherwise ordinary organization accessory.
The terrazzo look features scattered shapes resembling pieces of colored stone. You can recreate this effect using acrylic paint, small stencils, or lightweight decorative adhesive paper.
For a painted design, choose a neutral background and add irregular shapes in three or four coordinating colors. Terracotta, muted blue, mustard, and beige create an attractive combination.
Apply paint sparingly to preserve the cork's natural flexibility. If using adhesive paper, select a thin material that allows push pins to penetrate easily.
This project works especially well in modern bedrooms, study spaces, and minimalist offices that need a subtle decorative accent.
3. Hexagon Cork Wall
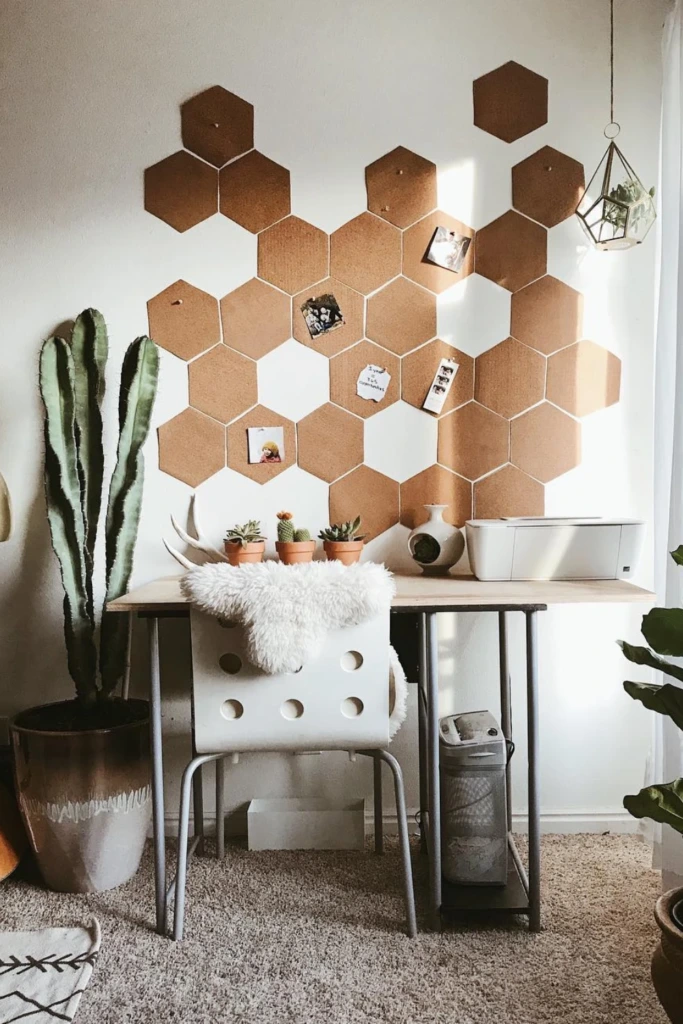
A hexagon cork wall offers a flexible alternative to traditional rectangular bulletin boards. Its geometric arrangement creates visual interest while providing separate spaces for different categories of information.
Purchase ready-made hexagonal cork tiles or cut the shapes from suitable cork sheets using a sharp craft knife and a template.
Arrange the pieces on the floor before installing them. Experiment with symmetrical honeycomb patterns, staggered rows, or an irregular cluster.
You can leave every tile natural or paint selected pieces to introduce contrast.
For organization, assign different hexagons to specific purposes, such as:
Weekly reminders and appointments
Inspirational quotes and photographs
Important documents and notes
Creative ideas and project plans
Mount the tiles using wall fixings appropriate for their weight and your wall surface. The modular design makes future expansion simple.
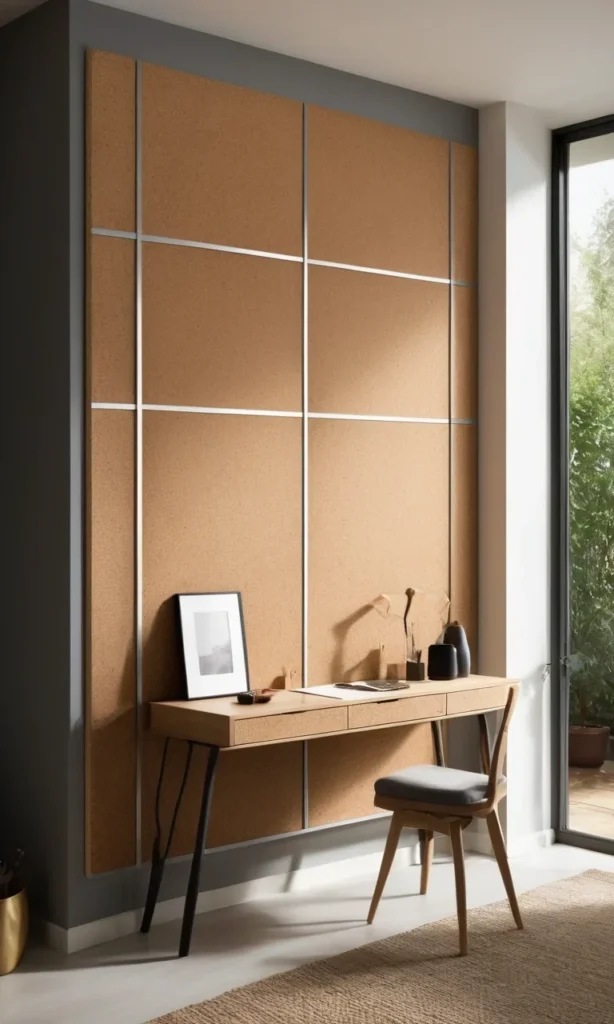
4. Large Cork Wall Panel
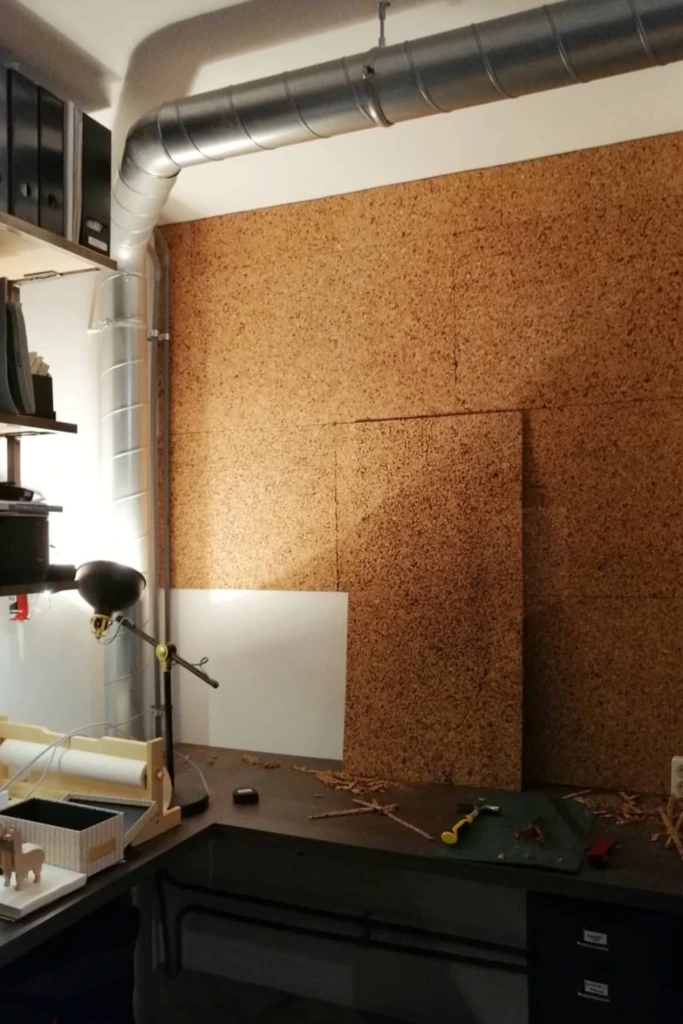
A large cork wall panel transforms an empty wall into a dedicated organization and inspiration area.
This design is particularly useful for home offices, studios, classrooms, and shared workspaces where multiple documents need to remain visible.
Measure the available wall space and cut a rigid plywood or MDF backing panel to the required dimensions. Attach cork sheets or tiles with an adhesive recommended for cork and the chosen backing.
For a polished appearance, install wooden trim around the perimeter. Natural oak, painted white wood, and dark-stained molding can create distinctly different styles.
A large board can accommodate project timelines, sketches, calendars, reference materials, and photographs without forcing everything into a small area.
Secure the backing to suitable wall anchors or structural supports, especially when building a substantial panel.
5. Vintage Frame Cork Board

A vintage frame cork board turns an ordinary pinboard into a decorative piece with timeless appeal.
Look for an ornate picture frame at a thrift store, flea market, or secondhand furniture shop. Frames with carved details, aged finishes, and decorative corners are especially suitable.
Remove the glass and existing artwork, then fit a cork panel inside the frame. If the frame has an unusual shape, create a paper template before cutting the cork.
You can preserve the original finish for an authentic vintage appearance or repaint the frame in antique gold, distressed white, or muted bronze.
Fill the finished display with postcards, family photographs, handwritten recipes, or treasured memorabilia.
This idea is particularly effective in cottage-style interiors, traditional bedrooms, and cozy reading areas.
6. Planner Vision Board
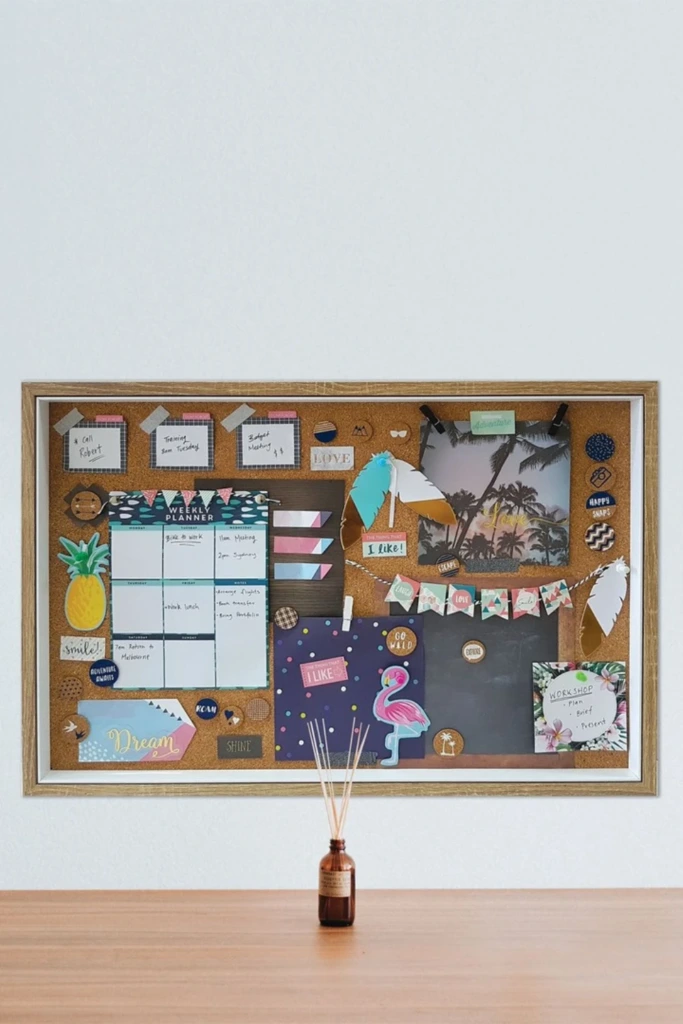
A planner vision board brings everyday responsibilities and long-term ambitions together in one convenient location.
Choose a medium or large cork board that provides enough room for planning materials without overwhelming your desk area.
Divide the surface into functional sections. Reserve one area for weekly tasks, another for important dates, and a third for images or statements representing your personal goals.
Use coordinating push pins, printed headings, and small paper labels to make the arrangement easy to understand.
Consider adding a miniature monthly calendar, motivational photographs, and a few measurable goals you want to accomplish.
Review the board regularly, replacing outdated reminders and updating your priorities. Keeping the information current makes the board genuinely useful rather than purely decorative.
7. Striped Fabric Cork Board
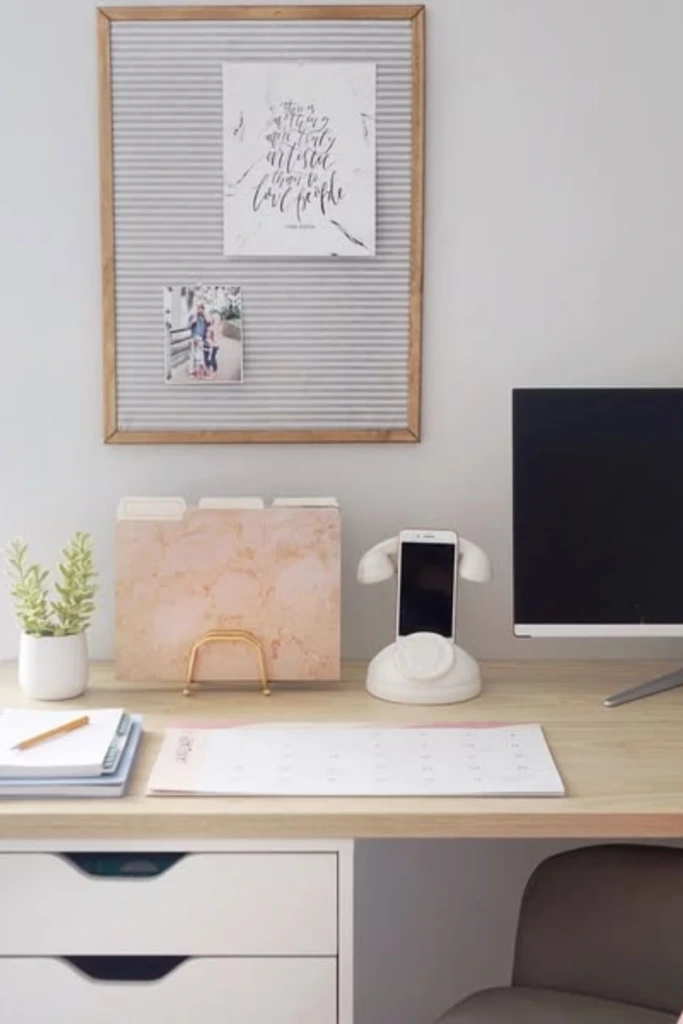
A striped fabric cork board is a straightforward way to introduce texture and pattern without painting the cork itself.
Choose lightweight cotton or linen with stripes that complement your room. Narrow stripes create a refined appearance, while wider stripes make a stronger visual statement.
Cut the fabric several inches larger than the cork board on every side. Lay it face down on a clean surface, position the board on top, and pull the material evenly around the edges.
Secure the fabric to the back using staples or another suitable fastening method. Keep the material smooth and avoid excessive tension that might distort the board.
Finish with a simple frame if desired.
Neutral stripes suit farmhouse and coastal interiors, while colorful patterns can brighten children's rooms or creative workspaces.
8. Kids’ Art Display Board
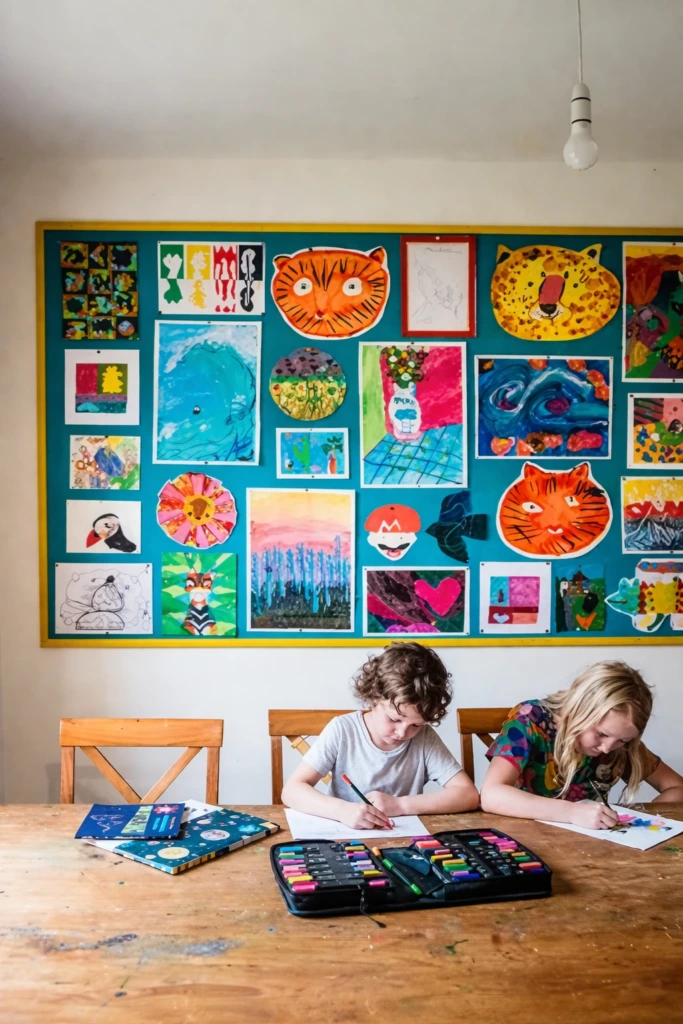
A dedicated cork board gives children's artwork a special place in the home while reducing clutter on refrigerators and countertops.
Choose a board large enough to accommodate drawings, paintings, school certificates, and seasonal crafts.
Decorate the frame with cheerful colors that coordinate with the playroom or bedroom. You can also personalize it with the child's name using painted wooden letters.
Install the board at a practical height, taking the child's age and reach into account.
For younger children, adults should handle sharp push pins. Alternatively, attach artwork using clips mounted securely to the board.
Encourage children to select their favorite creations for display and rotate the collection periodically.
This simple project celebrates creativity while teaching children how to organize and care for their belongings.
9. Calendar Command Center
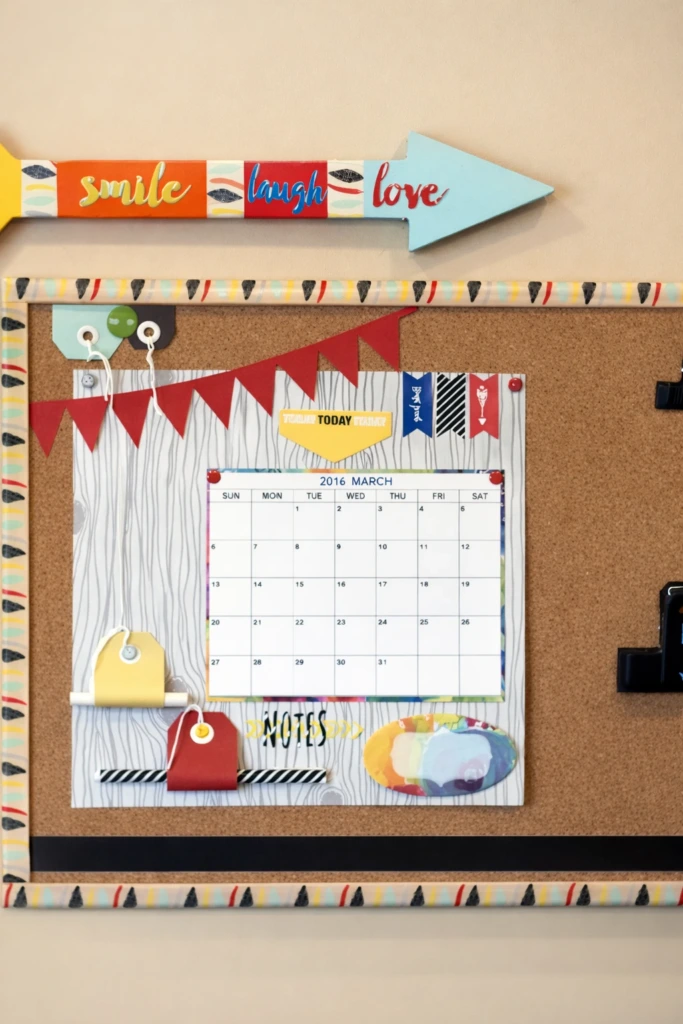
A calendar command center helps keep household activities, appointments, and responsibilities in one visible location.
Start with a sturdy cork board positioned in a frequently used area, such as the kitchen, hallway, or family workspace.
Place a monthly calendar prominently on the board and organize surrounding materials by purpose.
You might include school schedules, appointment reminders, grocery lists, meal plans, and invitations.
Color-coded pins or labeled sections can help family members quickly identify relevant information.
For additional convenience, attach a lightweight envelope or pocket to hold papers that don't need immediate attention.
The most effective command centers remain simple. Establish a routine for removing expired notices and updating the calendar so important information doesn't disappear beneath unnecessary paperwork.
10. Simple Cork Wall
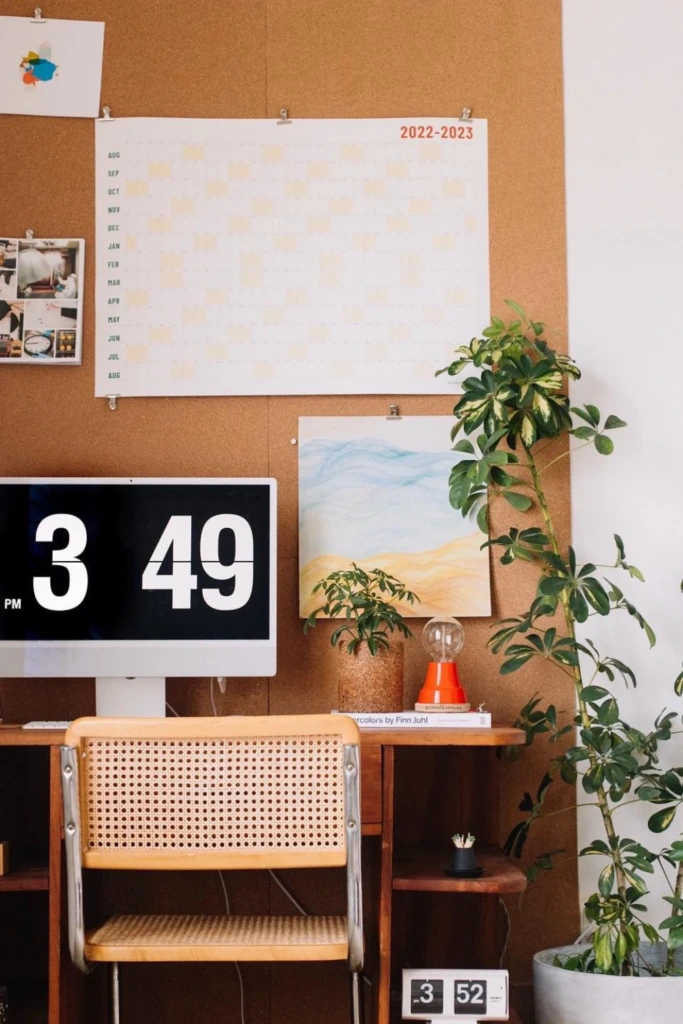
A simple cork wall embraces understated design while delivering everyday functionality.
Instead of adding elaborate decorations, allow the natural color and texture of cork to become part of the room's appearance.
Install a rectangular cork panel above a desk, alongside a bookshelf, or near a study area.
Use a limited selection of photographs, printed artwork, and essential notes. Arrange them with comfortable spacing so the display feels intentional.
Matching push pins can help create a cohesive look without requiring additional decorative materials.
This approach works particularly well in Scandinavian-inspired, contemporary, and minimalist interiors.
The uncluttered design also makes it easy to rearrange items as your needs change.
11. Natural Memory Board
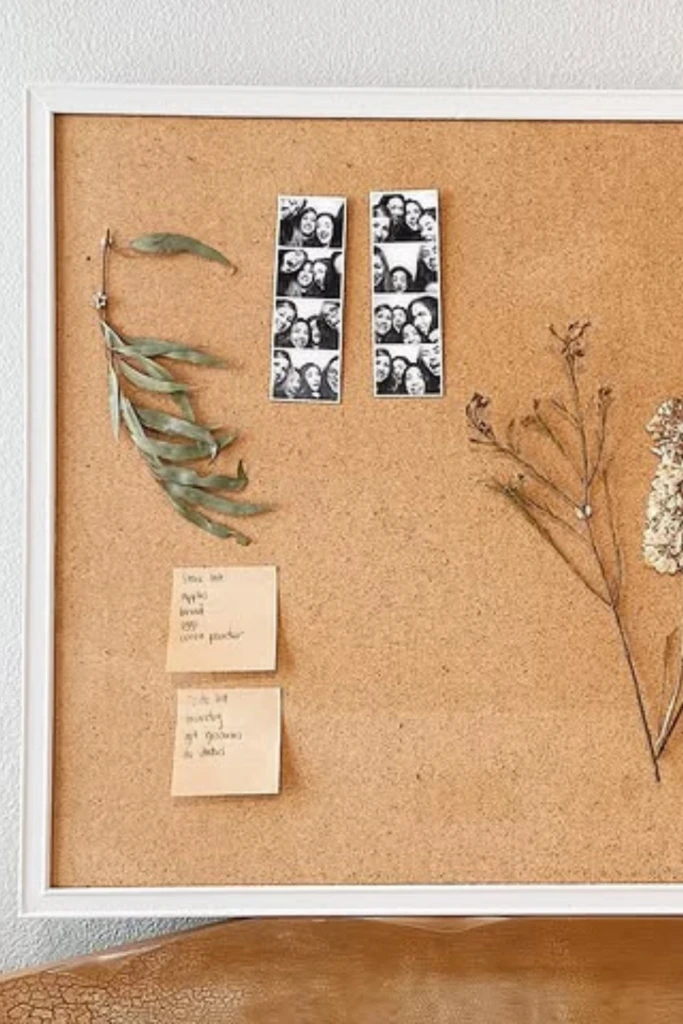
A natural memory board provides a warm, personal way to display meaningful photographs and small keepsakes.
Begin with untreated cork and a wooden frame that highlights the material's earthy appearance.
Gather items that tell a story, such as travel photographs, postcards, dried flowers, pressed leaves, ticket stubs, and handwritten messages.
Arrange larger photographs first, then fill selected gaps with smaller memorabilia.
For delicate botanical decorations, use lightweight clips or carefully positioned pins to prevent damage.
You can also add cotton twine, kraft paper labels, or small wooden embellishments to enhance the organic aesthetic.
Place the board somewhere you can appreciate it regularly, such as beside your bed or in a quiet reading corner.
12. Corner Cork Wall
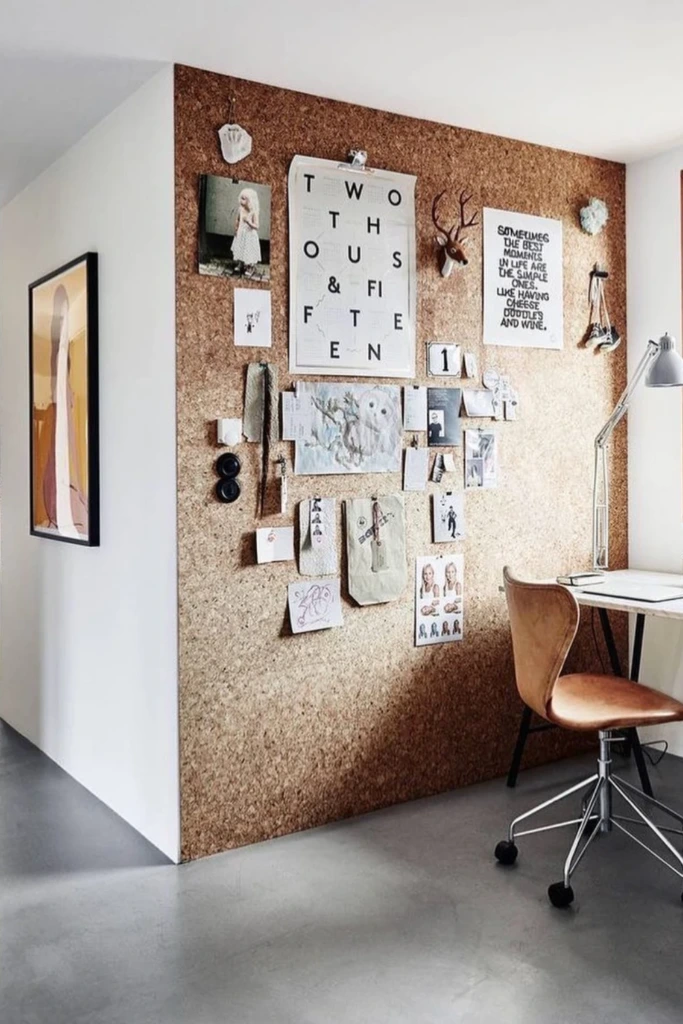
An unused corner can become a productive planning space with a wraparound cork board installation.
This design is especially valuable in compact home offices where wall space is limited.
Measure both adjoining walls and decide how far the cork panels should extend from the corner.
Use matching panels for a seamless appearance or different-sized sections to create a more dynamic arrangement.
Mount each panel securely against its own wall surface. For larger installations, rigid backing helps prevent bending and uneven edges.
The finished area can accommodate reference images, sketches, project notes, and schedules within easy reach of your desk.
For a cohesive look, use the same trim or edge treatment on both sections.
13. Art Supply Organizer
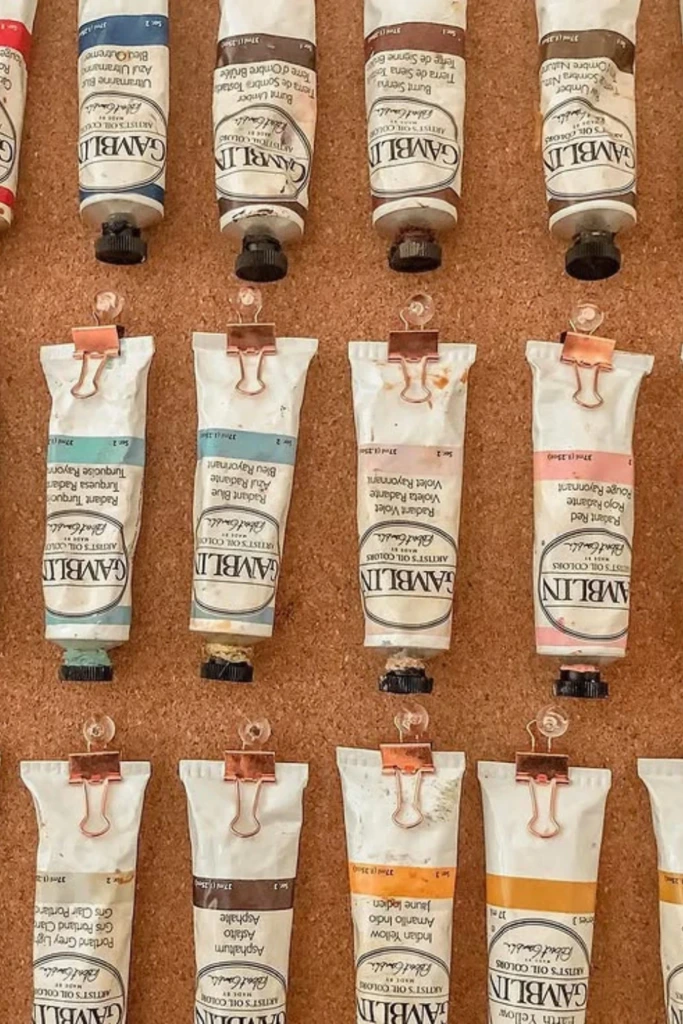
A cork board can help organize frequently used craft materials while keeping your work surface clear.
Choose a thick, well-supported board and position it near your crafting table.
Use small clips, lightweight holders, and appropriate hooks to display items such as embroidery thread cards, ribbon samples, paint color swatches, and frequently referenced templates.
Arrange supplies by type so you can locate them quickly during a project.
Avoid hanging heavy containers or sharp tools directly from ordinary push pins. Use wall-mounted hooks or separate storage for items that require stronger support.
A small section of the board can also hold works in progress, color combinations, and upcoming project ideas.
This combination of storage and inspiration makes the organizer useful for sewing, scrapbooking, painting, and other creative hobbies.
14. Wine Cork Board

A wine cork board offers an inventive way to reuse collected bottle corks and create a textured wall accessory.
Gather enough clean, dry corks to cover your chosen backing. Natural corks are generally easier to pin into than hard synthetic alternatives.
Select a deep wooden frame or shallow shadow box and remove the glass.
Arrange the corks inside the frame before applying adhesive. You can create vertical rows, horizontal sections, or alternating patterns for a basket-weave effect.
Once you're satisfied with the layout, secure the corks to a rigid backing using a suitable strong adhesive.
Allow the glue to cure completely before mounting the board.
The finished project looks particularly attractive in kitchens, dining rooms, and rustic entertaining spaces.
Use it to display recipes, grocery reminders, photographs, or small handwritten messages.
15. Oversized Playroom Cork Board
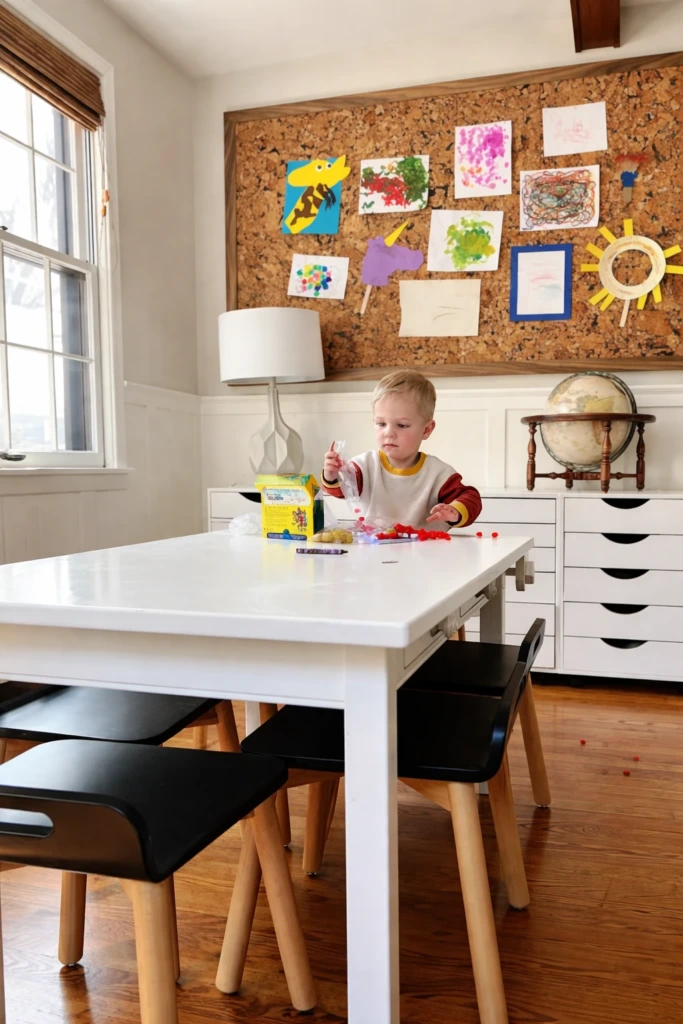
An oversized cork board can transform a playroom wall into an interactive gallery for children's creativity.
Choose a broad section of wall above an activity table or another suitable location.
Attach thick cork panels to a rigid backing and finish the edges with smooth wooden trim. Sand exposed corners and edges to eliminate rough surfaces.
Consider painting the trim in a bright color or matching it to the playroom furniture.
The generous display area can hold paintings, school projects, alphabet cards, educational activities, and seasonal decorations.
For younger children, use adult-managed pins or safer clip-based display methods.
An oversized board also makes it easier to organize artwork by theme, child, or project.
Refresh the display regularly to maintain interest and prevent excessive clutter.
16. Painted Cork Board
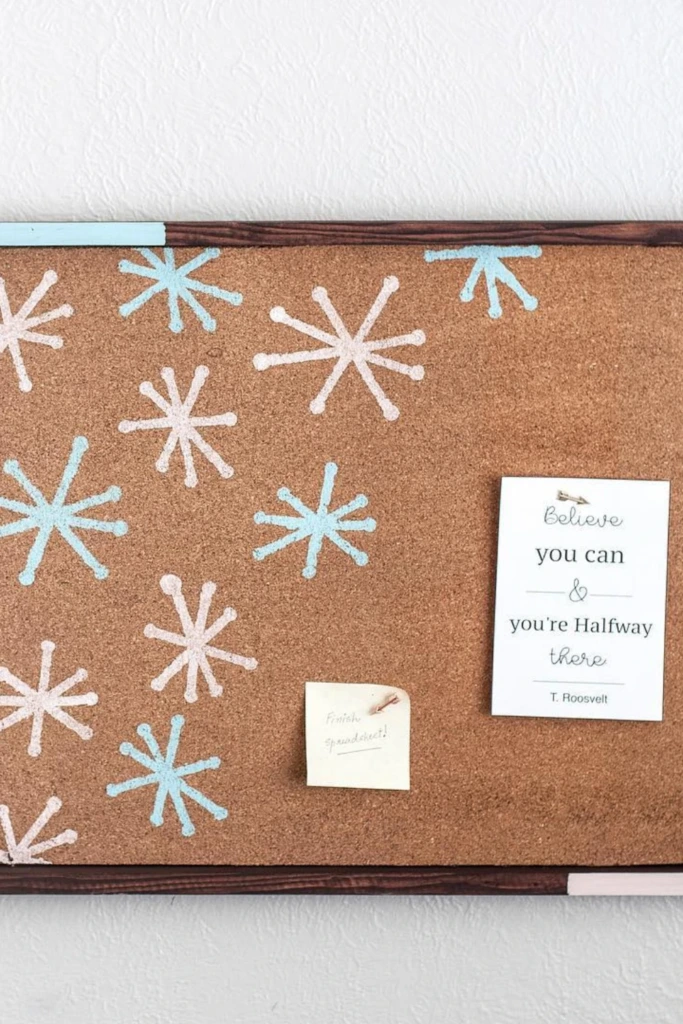
Painting a cork board is an inexpensive way to coordinate it with your existing decor.
Start with a clean, dry cork surface. Decide whether you want a full background color or a pattern that allows some natural cork to remain visible.
Popular design options include geometric blocks, diagonal stripes, polka dots, and abstract shapes.
Use painter's tape to establish crisp boundaries when creating straight lines.
Apply thin coats of acrylic paint with a brush or sponge. Heavy applications may clog the cork's pores and make pinning more difficult.
Allow each layer to dry before adding another color or removing the tape.
For a modern appearance, try combinations such as sage green and cream, navy and beige, or terracotta and blush.
A painted cork board can become an attractive focal point without sacrificing its organizational purpose.
17. Fabric-Covered Cork Board
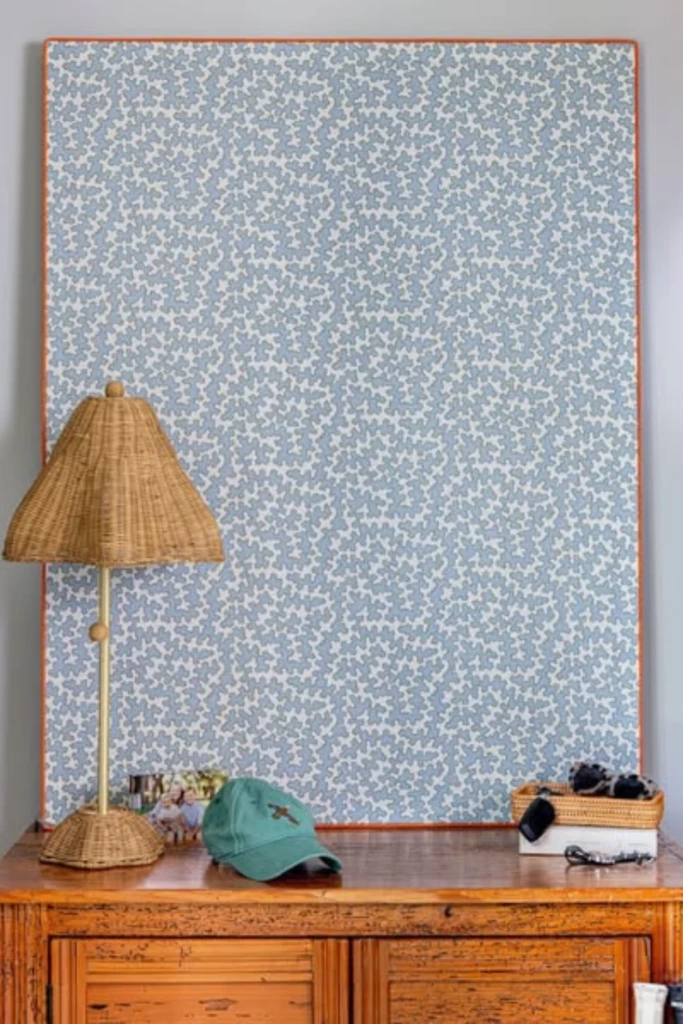
A fabric-covered cork board allows you to coordinate your organization space with curtains, bedding, upholstery, or other decorative textiles.
Unlike a striped design, this project can incorporate almost any lightweight pattern, including florals, checks, botanical prints, or subtle geometric motifs.
Measure the board and cut your chosen fabric with enough extra material to wrap around the edges.
Smooth the fabric across the front and secure it behind the backing, working from the center outward to minimize wrinkles.
Pay particular attention to the corners, folding them neatly to avoid bulky layers.
A decorative frame can conceal the fabric edges and provide a professional-looking finish.
Before completing the project, check that push pins pass through the material and grip the cork securely.
This design works beautifully in bedrooms, home offices, sewing rooms, and personalized study areas.
18. Mood Board Wall
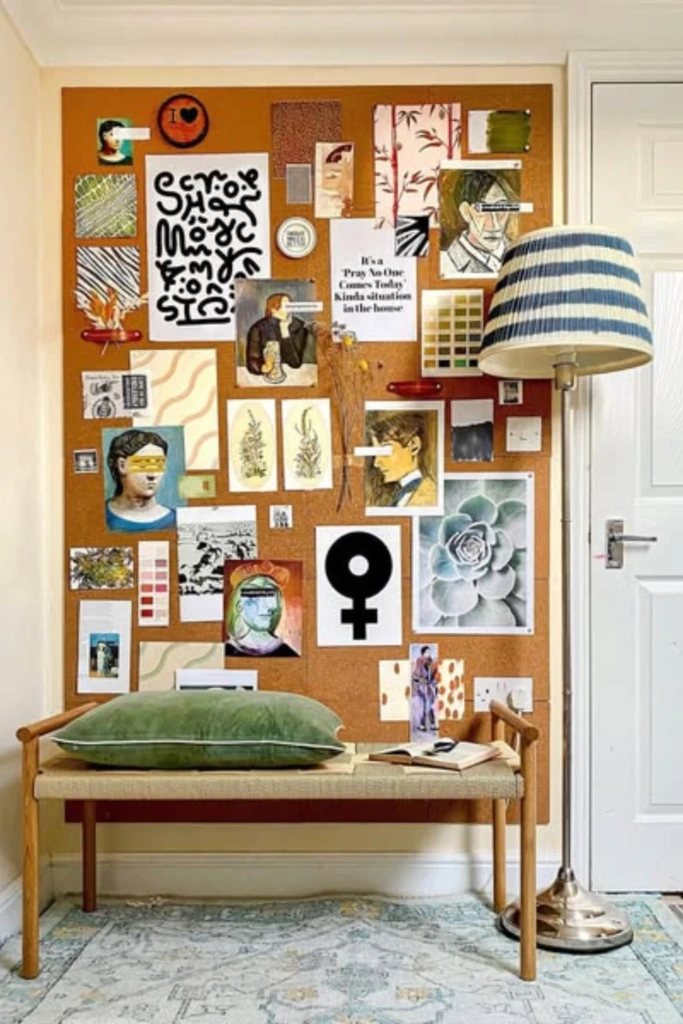
A mood board wall provides an evolving visual collection of ideas, styles, and creative inspiration.
It's particularly useful for interior designers, artists, writers, fashion enthusiasts, and anyone developing a personal project.
Start with a generous cork surface that allows room for future additions.
Collect materials that reflect your current interests, such as magazine cutouts, photographs, fabric swatches, sketches, color palettes, and typography samples.
Arrange related elements into loose groups rather than pinning everything randomly.
For example, an interior decorating mood board might feature paint colors, furniture photographs, textile samples, and lighting inspiration.
Allow the arrangement to evolve as your ideas become clearer.
A mood board doesn't need to look finished immediately. Its value comes from helping you explore possibilities and identify connections between different ideas.
19. How to Stop a Cork Board From Warping
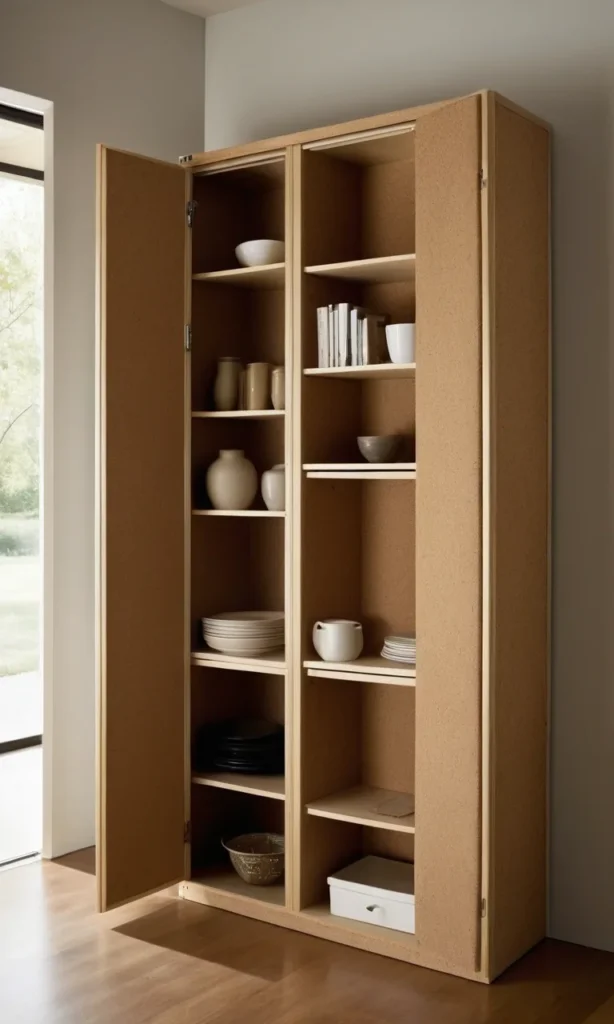
Warping is a common concern when working with thin cork sheets, particularly on larger DIY projects.
Cork can bend or curl when it lacks adequate support, experiences uneven moisture exposure, or is attached using unsuitable adhesive.
The most reliable prevention method is to install cork over a flat, rigid backing.
Plywood and MDF are practical choices because they provide consistent support across the surface. Select a thickness appropriate for the board's dimensions and weight.
Before assembly, allow the cork and backing materials to adjust to the room's temperature and humidity.
Apply a compatible adhesive according to the manufacturer's instructions, spreading it consistently across the surface. Avoid excessive water-based glue, which may introduce unnecessary moisture.
Position the cork carefully and press it flat while the adhesive cures. If using weights, distribute them evenly and protect the cork surface from impressions.
For large installations, secure the backing firmly to the wall using appropriate fasteners.
Avoid placing cork boards in consistently damp environments or directly against surfaces affected by moisture.
These precautions help maintain a flat, attractive board that remains functional over time.
What is the easiest way to stop a cork board from warping?
The simplest solution is to attach the cork to a sturdy backing, such as plywood or MDF.
Use an adhesive suitable for both materials and apply it evenly. Allow the assembly to dry on a flat surface before hanging it.
Keeping the board away from excessive moisture and major temperature fluctuations can also reduce the likelihood of distortion.
For an existing warped board, replacing a weak backing may provide a more lasting solution than attempting to flatten the cork alone.
Can I cover cork with fabric or wallpaper and still use push pins?
Yes, cork boards can remain functional beneath lightweight fabric or thin decorative wallpaper.
The important factor is ensuring that push pins can penetrate the covering and enter the cork deeply enough to stay secure.
Cotton fabric, lightweight linen, and thin adhesive paper are generally suitable options.
Avoid thick upholstery materials, foam padding, or heavily textured coverings that interfere with pin placement.
Test your selected material on a small section before covering the entire board.
How thick should cork be for a pin board?
For many everyday pin boards, cork approximately 6–12 mm thick provides a practical starting point, depending on the length of the pins.
Thicker cork generally offers better pin retention and allows repeated use without immediately contacting the backing.
Thin decorative cork rolls may require additional layers to function effectively as bulletin boards.
If the cork is mounted over wood or MDF, select pins short enough to avoid reaching or damaging the underlying wall.
For heavily used boards, investing in thicker, good-quality cork can improve durability.
What can I put on a cork board?
A cork board can display a wide range of lightweight items, making it useful for organization, decoration, and creative projects.
Common examples include photographs, calendars, appointment reminders, shopping lists, schoolwork, postcards, inspirational quotes, fabric samples, and handwritten notes.
You can also use it to organize project schedules, display artwork, or collect ideas for future activities.
Choose attachments based on the cork's thickness and the board's construction. Heavy objects should have separate, properly anchored support.
20. A Few Things to Check Before You Start
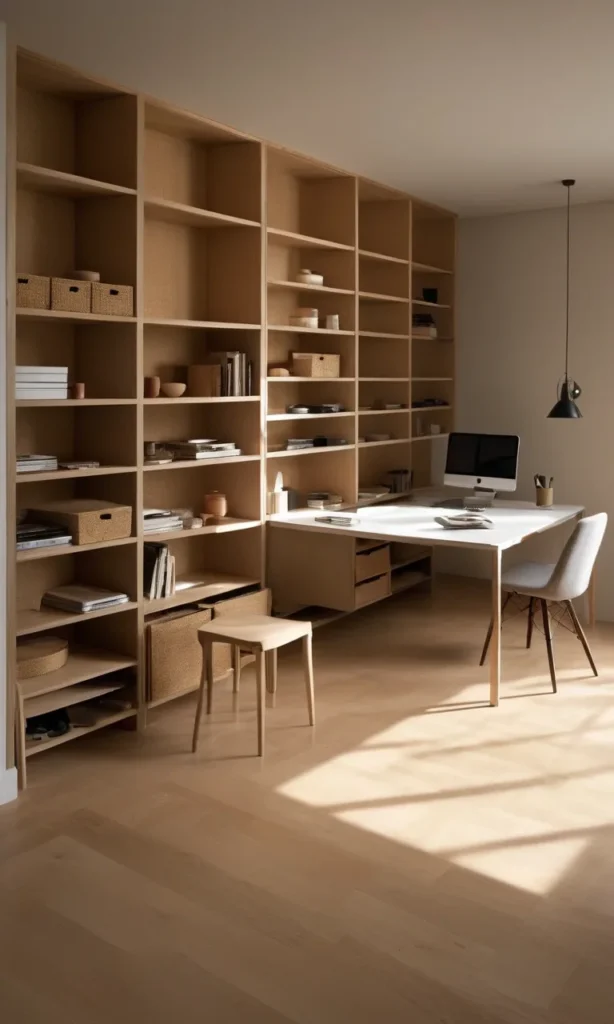
A successful DIY cork board begins with choosing materials that suit its intended purpose.
First, determine the board's size and location. A small framed design may work perfectly beside a desk, while a family planning area could require a much larger surface.
Next, evaluate the cork thickness. Decorative projects that rarely receive new pins can use lighter materials, but frequently updated boards benefit from thicker cork.
Pay attention to the backing. Thin cardboard may be sufficient for a very small, lightweight display, but plywood or MDF is preferable for larger projects that need long-term stability.
Adhesive selection also matters. Some glues contain solvents that may be unsuitable for certain backing materials or decorative finishes. Follow product instructions and work in a ventilated area when necessary.
If you plan to paint or cover the cork, test the finish before applying it across the entire surface. Make sure the finished material remains easy to pin into.
Finally, consider installation safety. Choose appropriate screws, anchors, or mounting hardware for the wall material and the completed board's weight.
For children's spaces, pay particular attention to sharp pins, loose decorations, and accessible mounting hardware.
Planning these details in advance can save materials, prevent avoidable problems, and produce a more durable result.
21. More DIY Ideas
If you enjoy creating practical decorations for your home, there are plenty of other beginner-friendly projects worth exploring.
DIY Room Decor Ideas: Create personalized wall decorations, handmade accessories, and affordable accents that reflect your style.
DIY Fireplace TV Wall Ideas: Explore ways to combine entertainment storage, decorative shelving, and attractive wall finishes.
DIY Ring Holder Ideas: Make compact jewelry organizers using materials such as clay, wood, and decorative dishes.
DIY Patchwork Sweatshirt Ideas: Give older clothing a fresh appearance with fabric scraps, creative stitching, and personalized patterns.
A DIY cork board is more than a place to pin reminders. With thoughtful materials and a little creativity, it can become a functional feature that enhances your room's appearance.
Whether you prefer a floral frame, a modern geometric layout, or an oversized inspiration wall, choose a design that fits your available space and daily routine.
Start with a sturdy foundation, personalize the details, and allow your board to change as your interests and organizational needs develop.