25 DIY Furniture Renovation Ideas for 2026
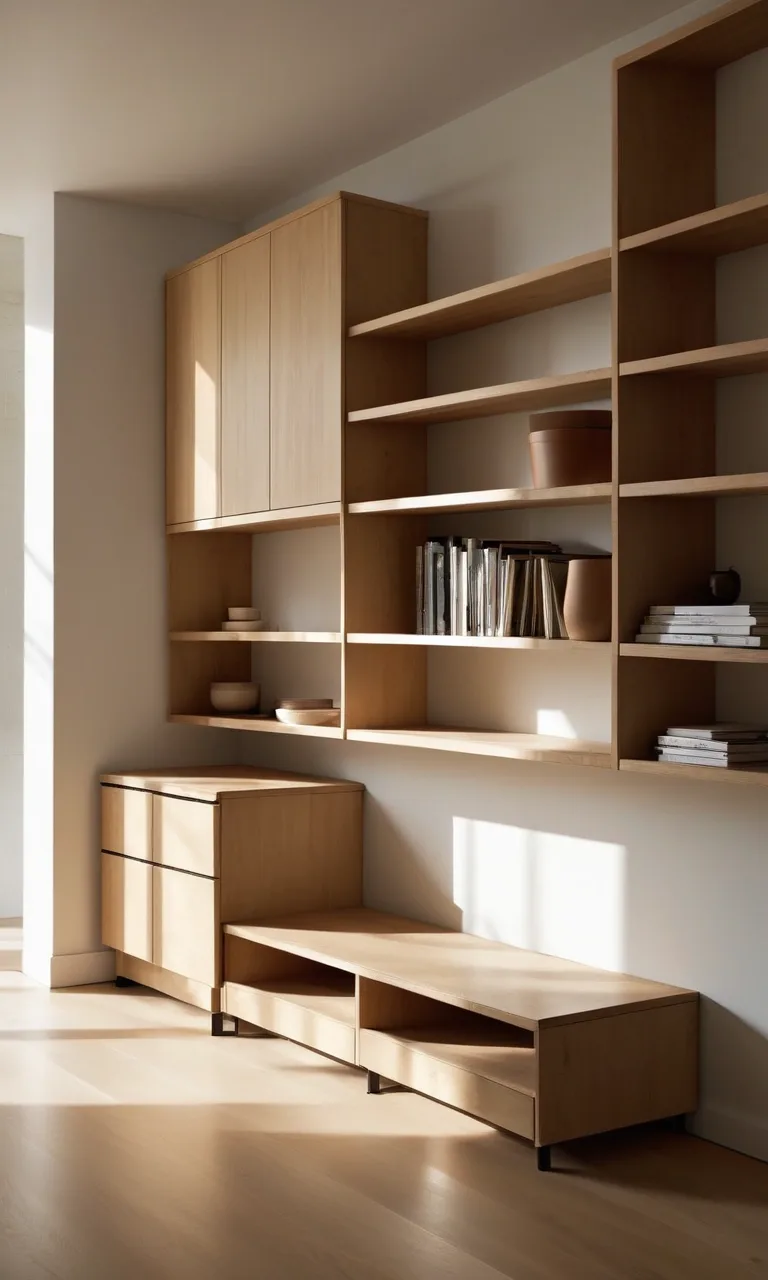
Old furniture doesn't always need replacing. Sometimes, a fresh coat of paint, updated handles, or a little creative thinking can turn an outdated piece into something beautiful and functional.
DIY furniture renovation is a practical way to refresh your home without spending a fortune. Whether you're working with a thrift store dresser, an inherited cabinet, or a scratched wooden table, there are plenty of ways to give it a completely different appearance.
The best part is that many furniture makeovers require only basic tools and affordable materials. You don't need professional woodworking skills to achieve an attractive finish.
These 25 DIY furniture renovation ideas offer inspiration for transforming everyday furniture into stylish pieces that complement your home.
How to start renovating furniture?
Before renovating furniture, examine its condition and identify what needs improvement. Check for loose joints, damaged surfaces, peeling veneer, or missing hardware. Repairing these issues first creates a stronger foundation for your makeover.
Next, decide whether you want to paint, stain, refinish, or modify the furniture. Your choice should depend on the material, existing finish, and overall style you're trying to achieve.
Clean the piece thoroughly using a suitable furniture cleaner to remove dirt, grease, and polish residue. Once dry, lightly sand surfaces where appropriate, repair imperfections with wood filler, and apply primer if your chosen paint requires it.
For older painted furniture, test for lead before sanding or disturbing the existing coating. Work in a ventilated area and follow the safety instructions for your products.
Finally, apply thin, even coats of your chosen finish, allowing sufficient drying time between applications. Careful preparation and patience usually make the biggest difference in the final result.
1. Blush Modern Dresser
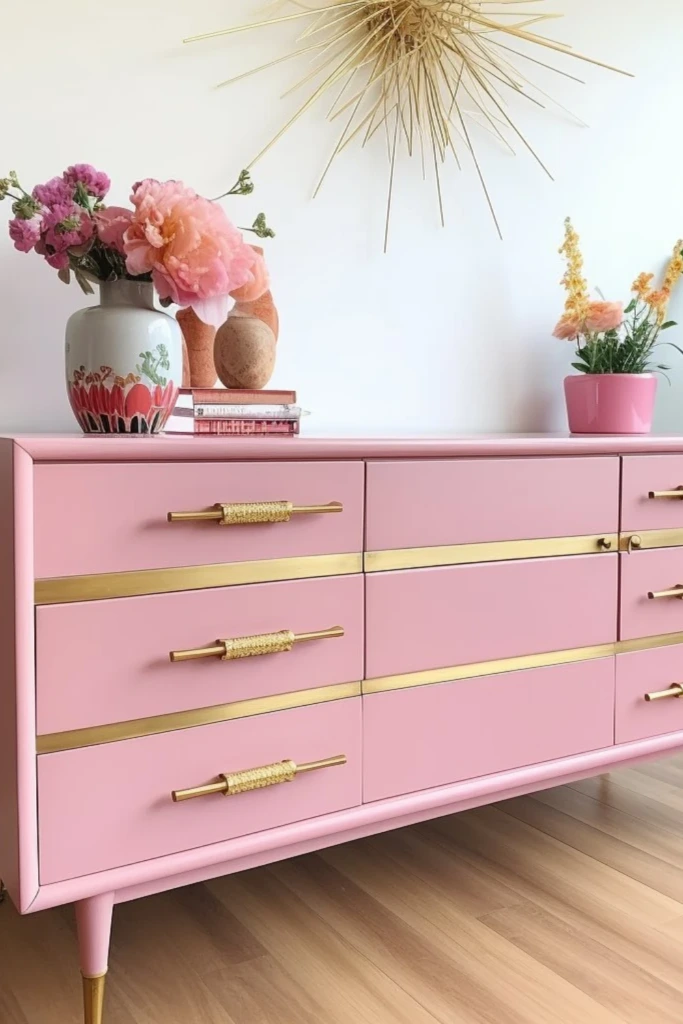
A blush-colored dresser can bring a gentle, contemporary touch to a bedroom without making the space feel overly decorative.
Choose a dusty pink or muted rose furniture paint and apply it over a properly prepared surface. For extra visual interest, incorporate narrow metallic accents along the drawer fronts or edges.
Replace outdated handles with brushed brass pulls to create a refined contrast. This combination works especially well with light walls, neutral bedding, and natural wood accessories.
For a smooth appearance, use a quality foam roller on flat sections and a small brush around corners and decorative details.
2. Dark Classic Sideboard
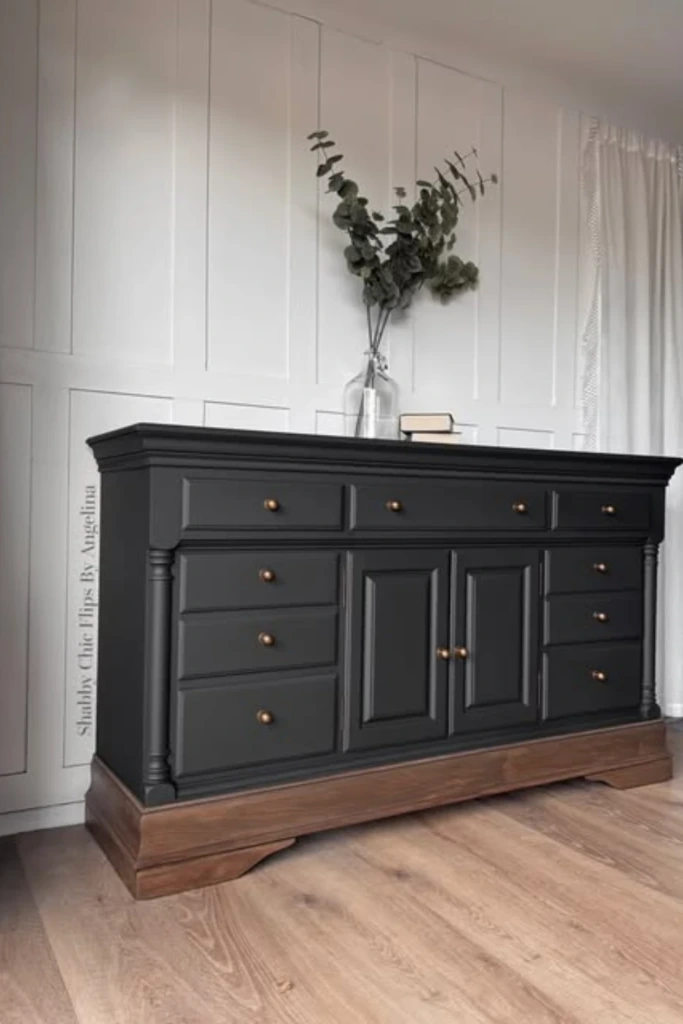
An old sideboard can become an elegant focal point with a dramatic dark finish.
Deep charcoal, espresso, and soft black are excellent choices for furniture with traditional proportions. These shades highlight the overall shape while making decorative details appear more defined.
Consider leaving the top or lower supports in their original wood finish to introduce warmth. Antique brass handles or simple metal knobs can complete the transformation.
Before painting, fill noticeable scratches and sand repaired areas smooth. Dark finishes can reveal surface imperfections under direct lighting, so careful preparation is particularly important.
3. Natural Wood Reset
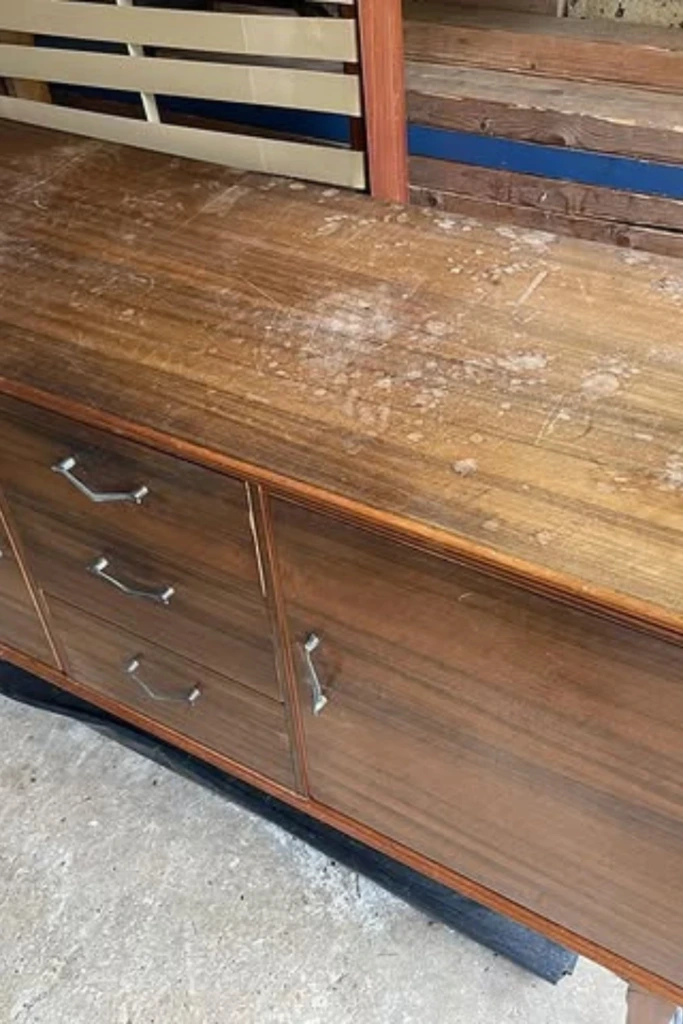
If a wooden dresser or cabinet has attractive grain hidden beneath a damaged finish, restoring its natural appearance may be more rewarding than painting it.
Begin by identifying whether the furniture is solid wood or veneered. Remove the existing coating using a suitable refinishing method, taking care not to damage thin veneer.
Once the surface is prepared, apply a wood stain that complements the grain. Honey oak, natural walnut, and medium brown tones can create a warm, timeless appearance.
Protect the finished surface with a compatible clear coating, such as water-based polyurethane. A satin sheen provides gentle reflection without making the furniture look excessively glossy.
4. Soft White Refresh
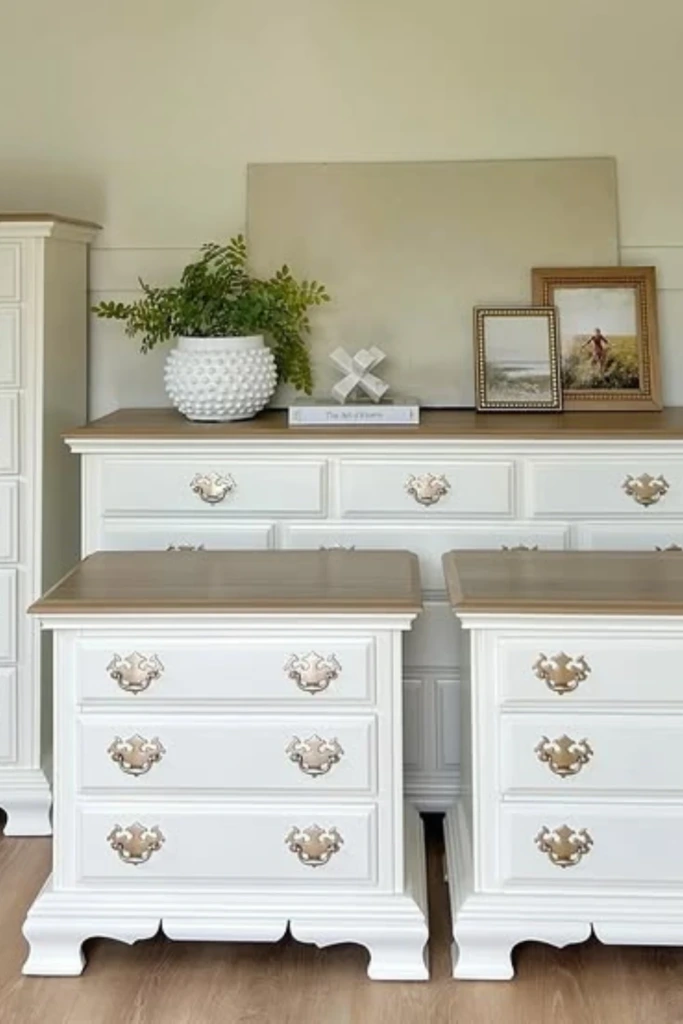
White furniture can brighten a room and help older pieces blend into modern interiors.
For a welcoming appearance, select an ivory, cream, or warm off-white shade rather than an extremely bright white. These softer colors pair beautifully with wooden floors and neutral decor.
A useful approach is to paint the main furniture body while preserving the natural wood on the top surface. This adds contrast and makes the renovation feel more intentional.
If you're updating several pieces, using similar handles and finishes can create a coordinated look even when their original designs differ.
5. Cabinet Color Flip
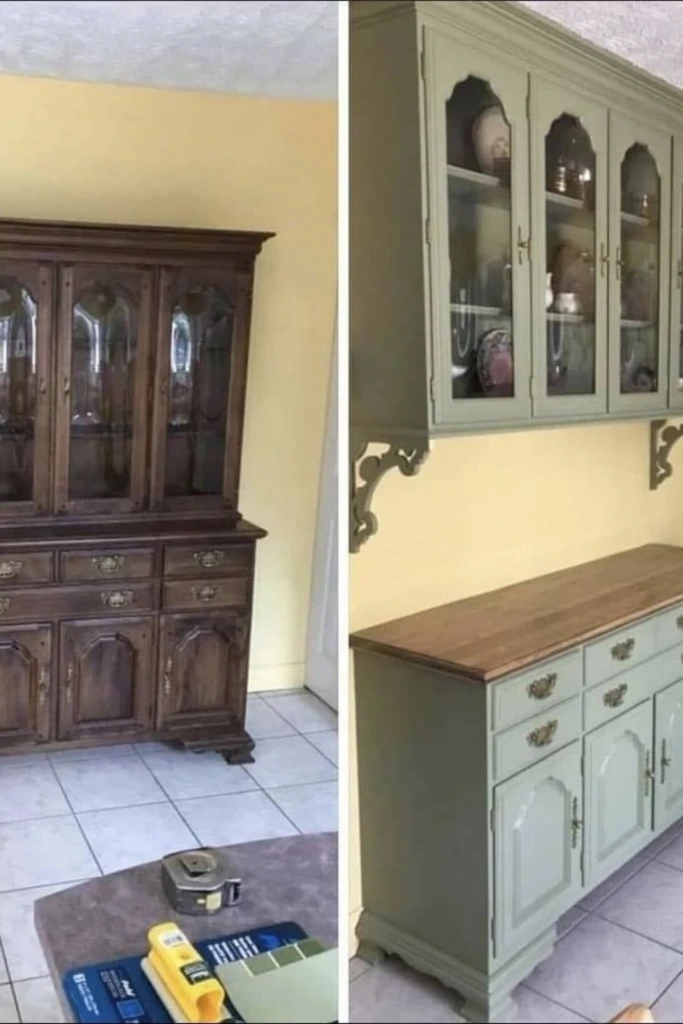
A bulky cabinet can feel much lighter after a thoughtful color change.
Sage green, muted olive, and warm gray are versatile options for transforming older storage furniture. They introduce subtle color without dominating the room.
Paint the cabinet frame and doors while keeping selected wooden surfaces exposed for contrast. Existing handles can be cleaned and reused if they're in good condition.
If the cabinet has removable upper sections, check the connections before reassembly and secure tall furniture to the wall when necessary to prevent tipping.
This renovation works particularly well for dining cabinets, kitchen storage units, and vintage hutches.
6. Soft Green Balance
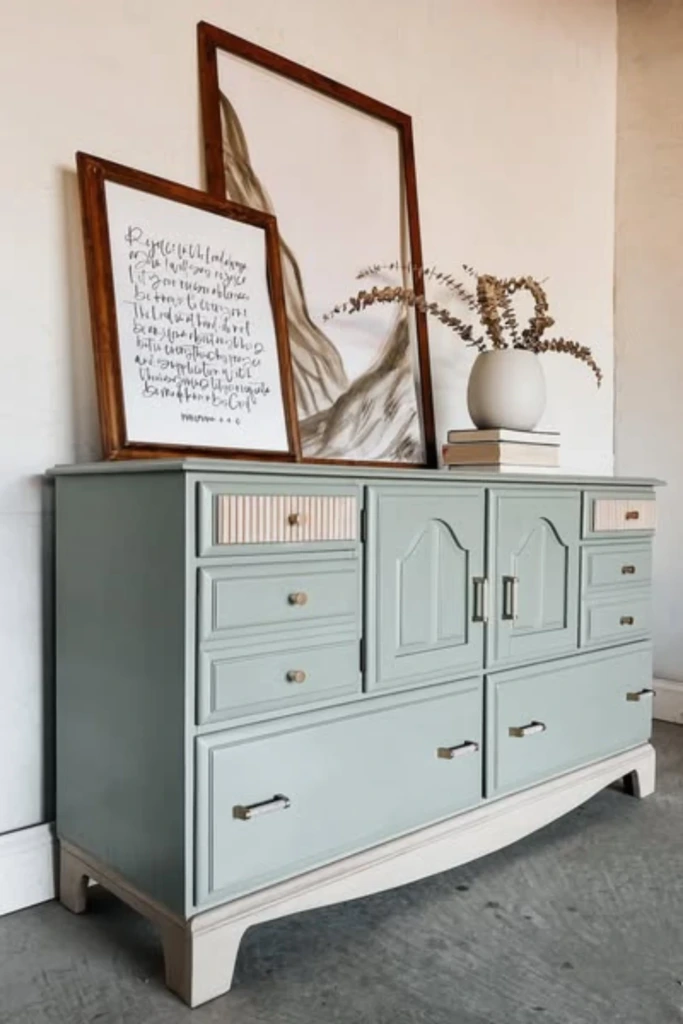
Soft green furniture introduces a relaxing, nature-inspired element into a room.
Colors such as eucalyptus, pale sage, and gray-green work well on dressers, bedside tables, and entryway cabinets. They coordinate easily with beige, cream, white, and natural timber.
For added definition, consider painting the furniture frame in a slightly lighter shade than the drawer fronts.
Slim black or brushed metal handles provide a clean finishing detail. Keeping the accessories understated allows the color to remain the main attraction.
This is a great option for anyone who wants something more interesting than plain neutral furniture without choosing a bold statement color.
7. Light Wood Modern
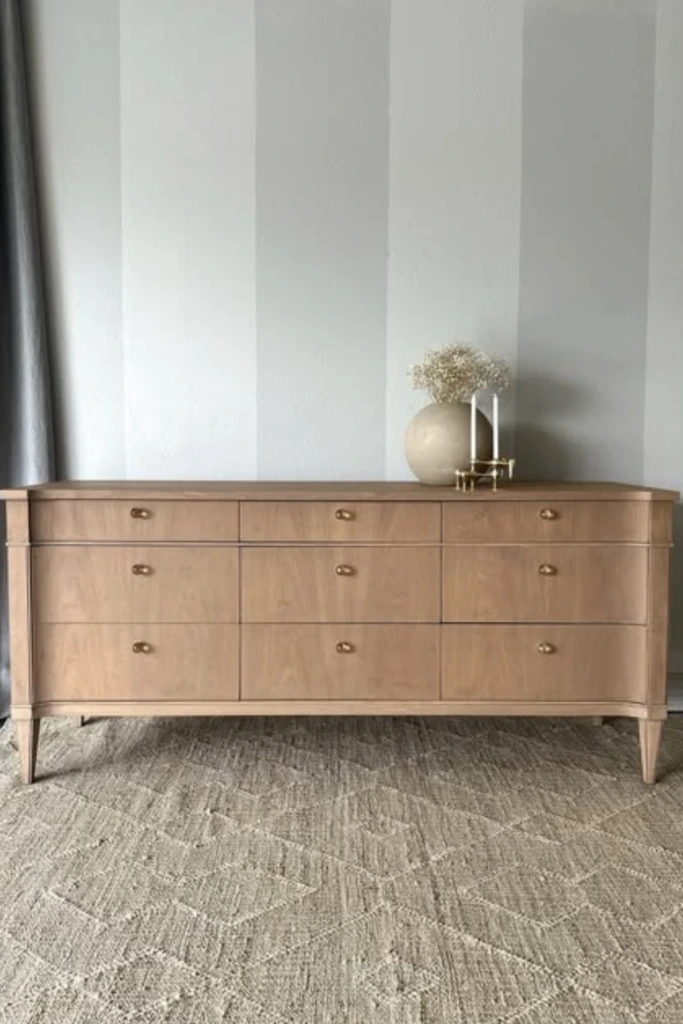
Light wood finishes can make older furniture feel fresh, simple, and contemporary.
Start with a suitable wooden piece that has an appealing shape. If it has a dark or orange-toned coating, carefully remove the old finish before evaluating the natural wood underneath.
A pale oak stain, subtle whitewash, or clear protective finish can create a lighter appearance, depending on the wood species.
Avoid excessive sanding, especially on veneered surfaces. Always test stains in a hidden area because different woods absorb color differently.
Finish the renovation with minimal hardware or simple wooden knobs for a clean, Scandinavian-inspired look.
8. Matched Set Upgrade
Mismatched bedroom furniture can look coordinated without buying an entirely new set.
Choose a consistent paint color for your dresser, bedside tables, and other storage pieces. Warm taupe, muted gray, or soft beige are flexible choices.
Matching drawer pulls help connect furniture with different shapes and sizes. If the pieces have exposed legs, maintaining a similar wood tone can create another shared design element.
You don't have to make every detail identical. A consistent palette and hardware style are often enough to make separate furniture pieces feel like they belong together.
9. Bold Black Anchor
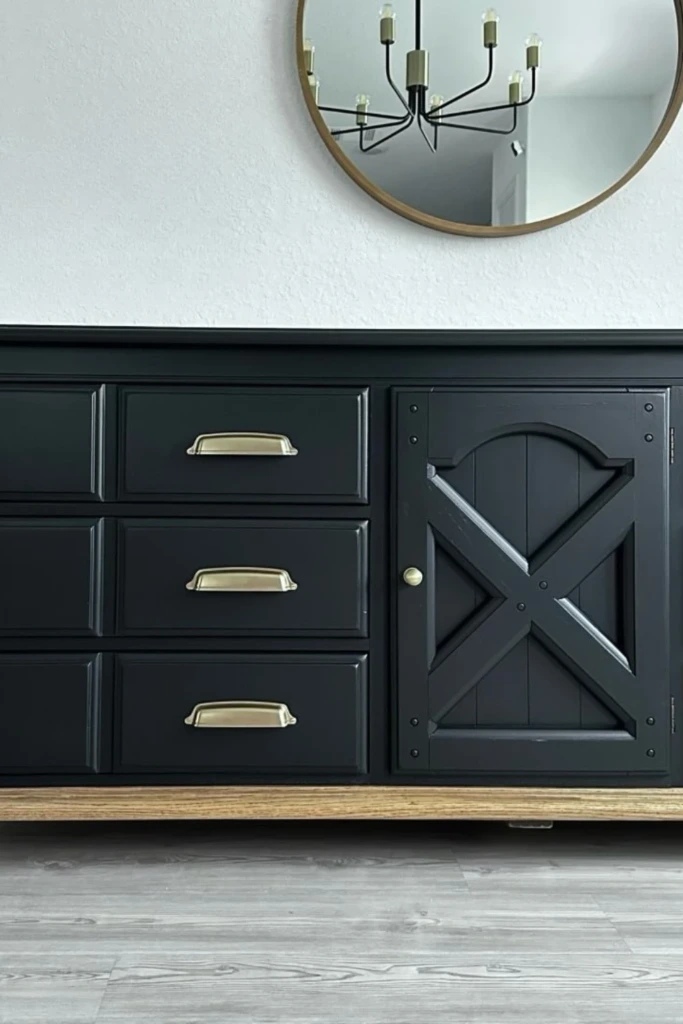
A black furniture makeover can add contrast and sophistication to an otherwise light room.
This approach works especially well on wide dressers, console tables, and substantial storage cabinets.
Choose a durable furniture paint with a matte or satin sheen. Matte finishes create a subdued appearance, while satin surfaces are generally easier to wipe clean.
To keep the design visually balanced, incorporate natural wood accents or warm metallic handles.
Position the finished furniture against a lighter wall or near soft furnishings to create contrast without making the room feel overly dark.
10. Two-Tone Storage Stack
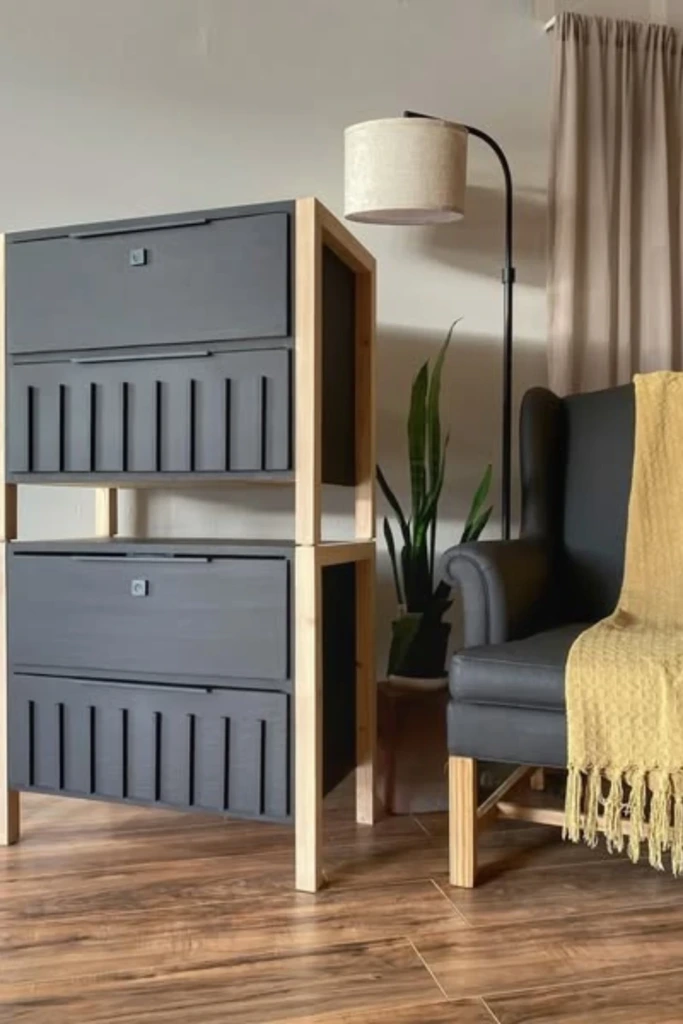
Combining painted surfaces with exposed wood can transform an ordinary storage unit into something distinctive.
One option is to retain the natural finish on the cabinet frame while painting the drawer fronts in a complementary color.
Muted gray, dusty blue, and soft green work beautifully with light or medium-toned wood.
Prepare each surface according to its intended finish, and use painter's tape to maintain neat boundaries between painted and unpainted areas.
This design is particularly useful for compact storage furniture because it adds character without requiring complicated construction.
11. Hardware Makes It
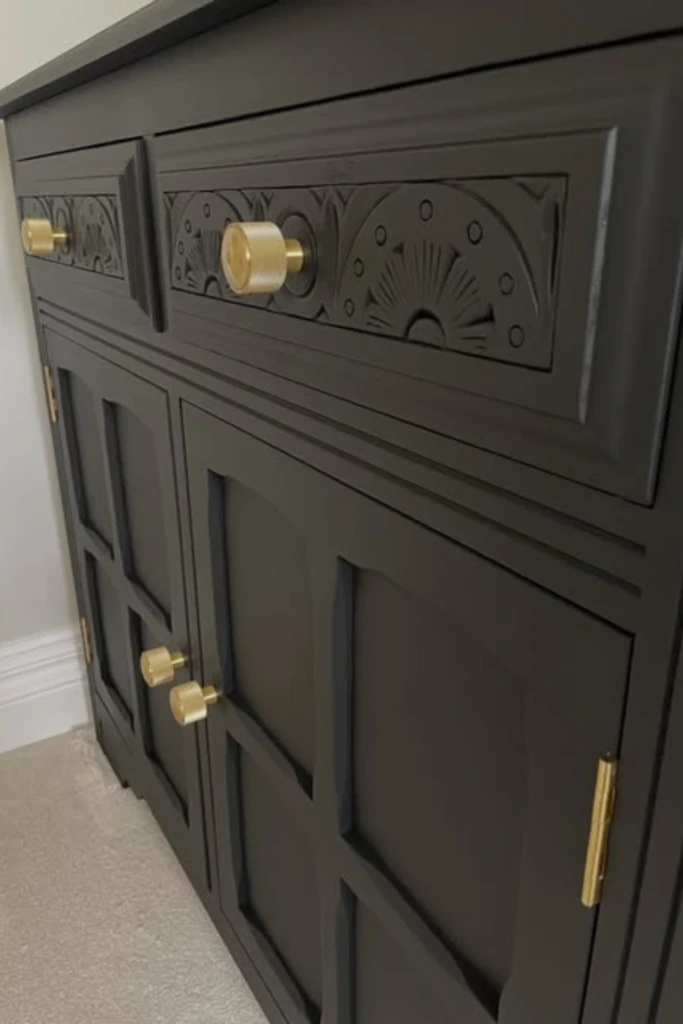
Sometimes, changing the handles is enough to make furniture look completely different.
Old wooden knobs and dated metal pulls can be replaced with modern hardware in brass, matte black, brushed nickel, or bronze.
Measure the distance between existing screw holes before purchasing replacements. Choosing hardware with matching hole spacing can save you from filling and drilling new holes.
For a more dramatic makeover, combine new handles with a fresh painted finish.
Oversized pulls can look striking on large drawers, while smaller knobs are usually better suited to narrow doors and compact furniture.
12. Veneer Surface Fix
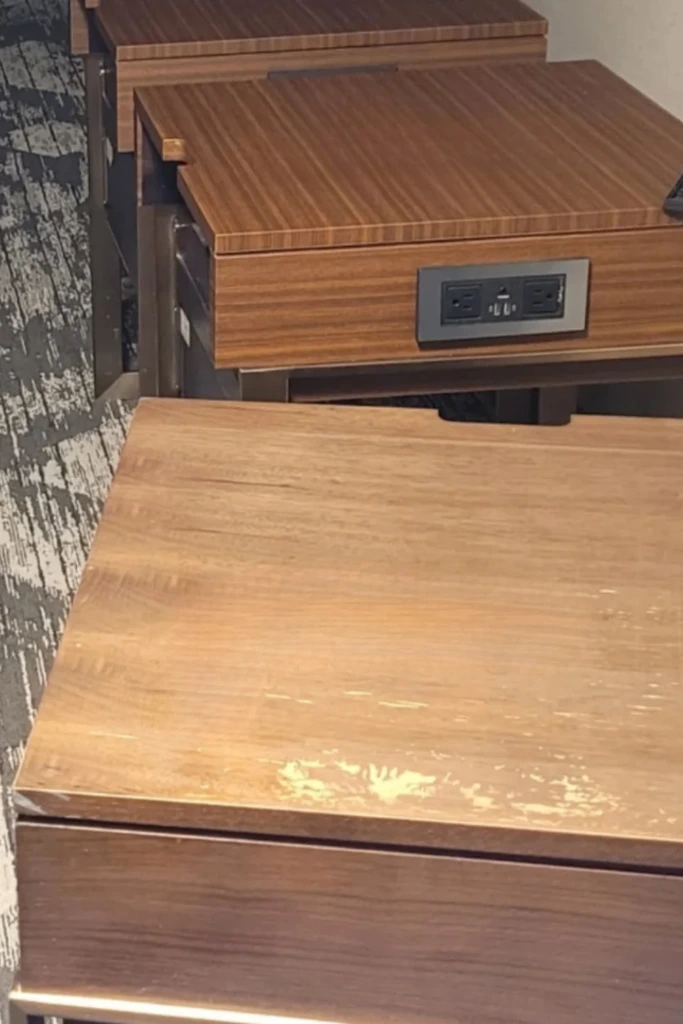
Damaged veneer doesn't necessarily mean a piece of furniture is beyond repair.
If the veneer is lifting but remains intact, it may be possible to secure it with an appropriate wood adhesive and clamps. Small missing sections can sometimes be patched with matching veneer.
For severely damaged surfaces, replacing the veneer may provide a more attractive result than repeated filling and painting.
Carefully prepare the underlying surface before applying new material. Once attached, trim the edges neatly and finish the surface according to the veneer manufacturer's recommendations.
Because veneer is thin, aggressive sanding can permanently damage it. Gentle preparation is essential for a successful renovation.
13. Bar Cabinet Glow
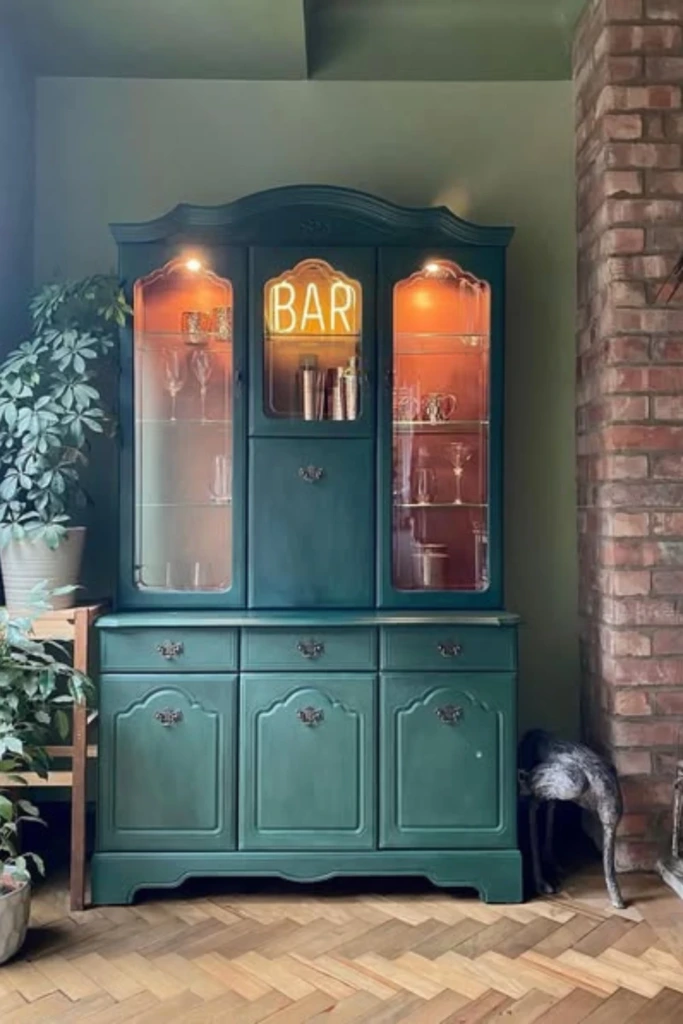
An unused cabinet can become a stylish home bar or display station with a few creative improvements.
Begin by refreshing the exterior with a sophisticated color such as forest green, navy, or deep burgundy.
Inside, install battery-powered LED lights or low-voltage lighting designed for furniture use. Warm lighting can make glass shelves, decorative bottles, and serving accessories stand out.
Consider adding a removable tray, glassware organizers, or decorative wallpaper along the back panel.
The result is a functional storage piece that also adds atmosphere to a dining room or entertaining area.
14. Textured Patina Finish
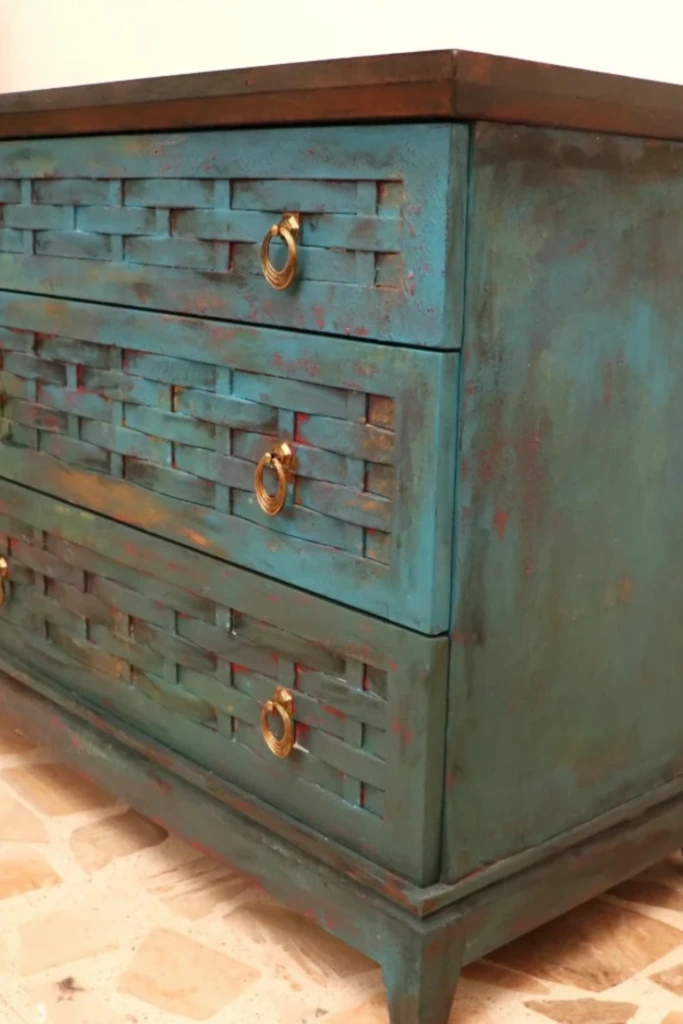
A textured paint finish can give plain furniture an aged, artistic appearance.
Start with a base coat in a rich color such as muted turquoise, olive green, or smoky blue.
After the first layer dries, use a nearly dry brush or sponge to introduce small amounts of a second color. Concentrate on edges, corners, and raised details to create natural-looking variation.
Work gradually so the effect develops in controlled layers rather than appearing randomly splattered.
A compatible protective topcoat can help preserve the finish, especially on furniture that receives regular use.
This technique suits rustic, eclectic, and vintage-inspired interiors.
15. Minimal Matte Calm
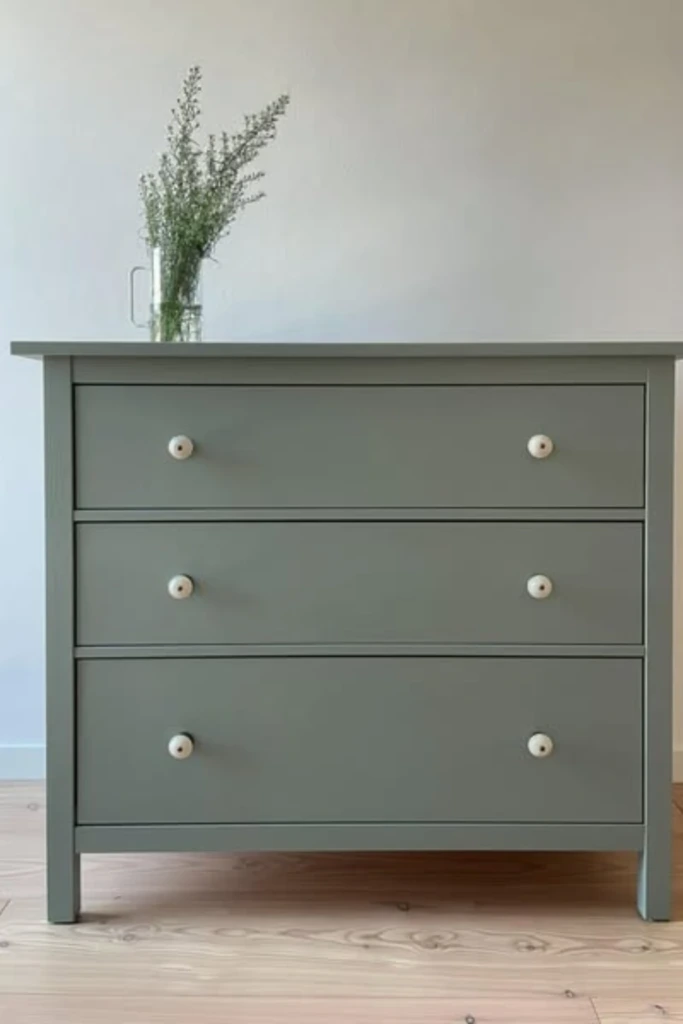
A matte furniture finish is ideal when you want a piece to complement the room rather than attract immediate attention.
Neutral shades such as mushroom, stone, oatmeal, and warm gray create a subtle, sophisticated appearance.
Select furniture paint formulated for the material and desired sheen. Use thin coats and follow the recommended drying and curing times.
Simple hardware, concealed pulls, or handles painted in a matching color can maintain the minimalist effect.
For frequently handled furniture, choose a washable matte product or compatible protective coating that offers adequate durability.
16. Carved Detail Highlight
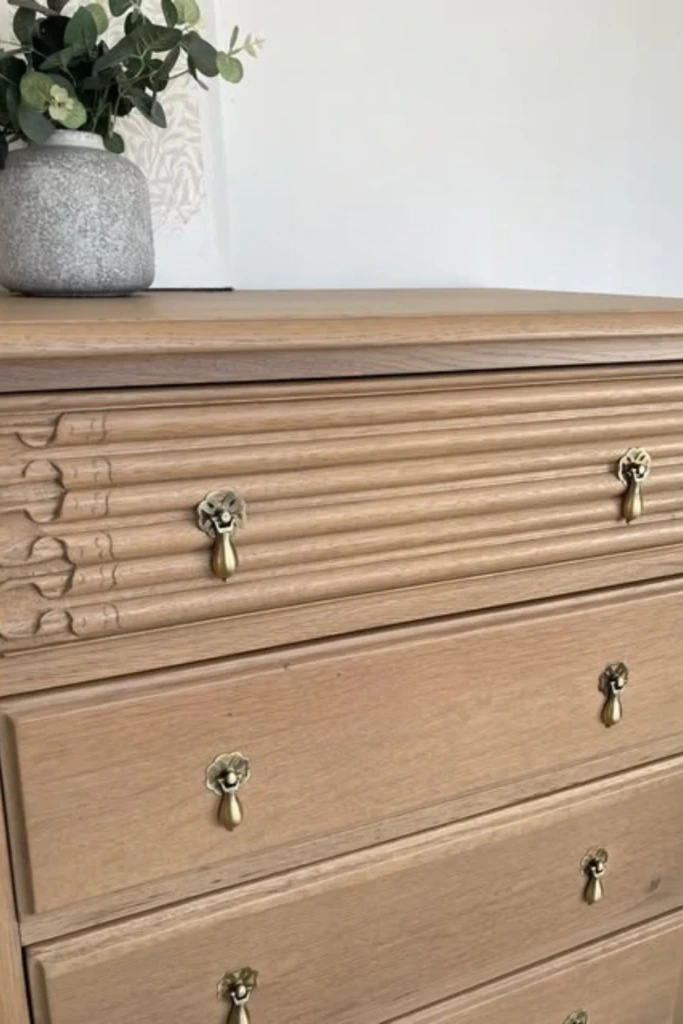
Furniture with carved patterns deserves a renovation that celebrates its craftsmanship.
Rather than covering intricate designs with thick layers of paint, consider restoring the original wood finish or using a transparent stain.
Clean carved areas carefully with a soft brush to remove accumulated dust. When refinishing, use appropriate tools and techniques that preserve the shape of the details.
A clear protective coating can enhance the natural wood grain while allowing shadows to emphasize the carving.
Keep replacement hardware simple so it doesn't compete with the decorative workmanship.
This approach is particularly attractive on antique-style cabinets, vintage dressers, and traditional wooden chests.
17. Vintage Black Lift
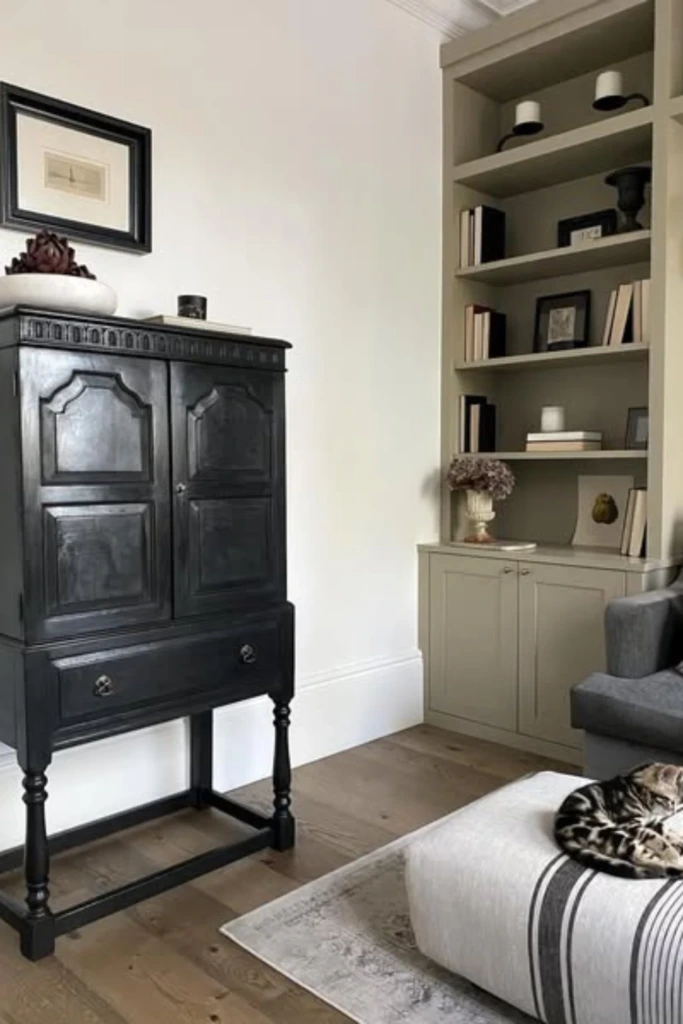
Older furniture with a heavy silhouette can look more contemporary when its proportions are adjusted.
Painting a vintage cabinet black creates a bold appearance, while appropriately sized raised legs can introduce visual space underneath.
Before changing the legs, inspect the furniture's construction. New supports must be strong enough to carry the cabinet and its contents, and they should attach to structurally sound areas.
Choose legs that complement the furniture's overall proportions rather than simply selecting the tallest available option.
Finish with understated hardware and a satin protective coating for a polished look.
For tall or top-heavy pieces, additional stability measures and wall anchoring may be necessary.
18. Bold Color Carving
Decorative furniture can become a statement piece when finished in a vibrant color.
Rich emerald, midnight blue, terracotta, and deep plum can bring carved details into focus.
Apply paint carefully around raised patterns using a suitable detail brush. Avoid allowing excess paint to collect inside grooves, where it can obscure the original design.
If the furniture has a wooden top in good condition, leaving it natural can create an appealing contrast.
Complete the makeover with simple hardware that supports the overall design without drawing attention away from the carved features.
19. Full Color Transformation
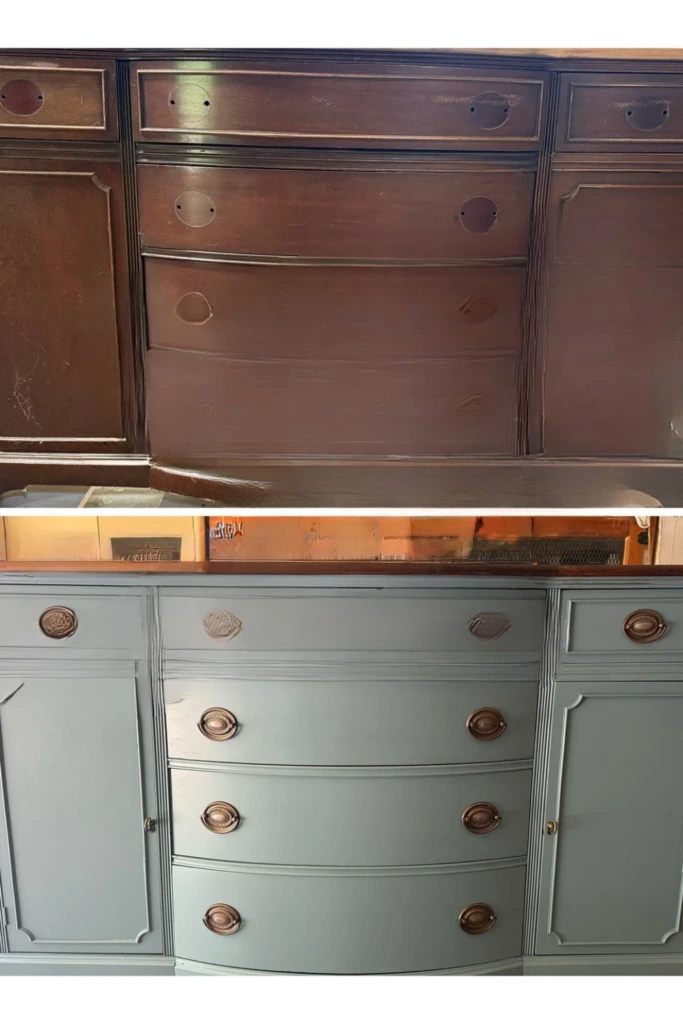
A complete color change is one of the most effective ways to update furniture with an outdated finish.
Start by choosing a shade that complements the surrounding room. Dusty blue, clay, olive, and muted cream are attractive options for many furniture styles.
Remove handles and drawers where practical, then clean and prepare every surface thoroughly.
Use a suitable primer when necessary, particularly over glossy finishes, stain-prone woods, or surfaces with poor paint adhesion.
Apply multiple thin coats instead of one heavy layer. Once the paint has cured sufficiently, reinstall the hardware and check that drawers and doors operate smoothly.
A well-executed color transformation can make familiar furniture feel entirely new.
20. Wallpaper Drawer Pop
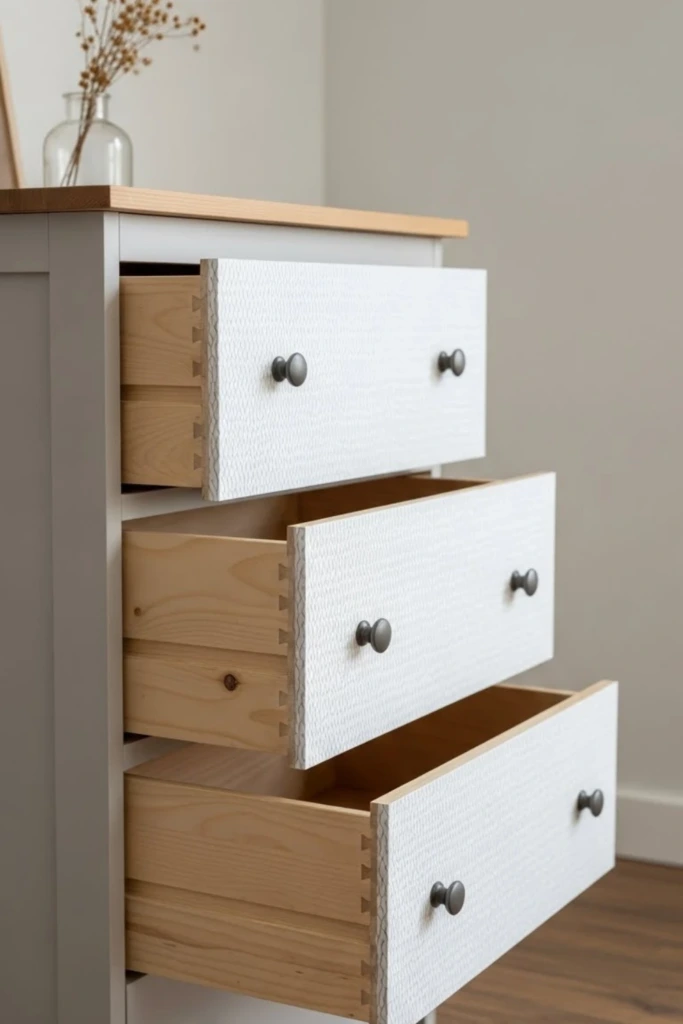
Decorating drawer interiors is an easy way to add personality without changing the furniture's exterior.
Peel-and-stick wallpaper works well for lining dresser drawers, cabinet backs, and small storage compartments.
Choose a pattern that complements the furniture color. Botanical prints, geometric designs, and subtle stripes are all attractive possibilities.
Measure each section carefully before cutting the wallpaper. Apply it to a clean, dry surface and smooth out air bubbles as you work.
For drawers that hold clothing or delicate items, select a smooth, nonabrasive material and make sure all edges are firmly attached.
This small decorative upgrade can make everyday storage feel more thoughtful and personalized.
21. Leg Swap Upgrade
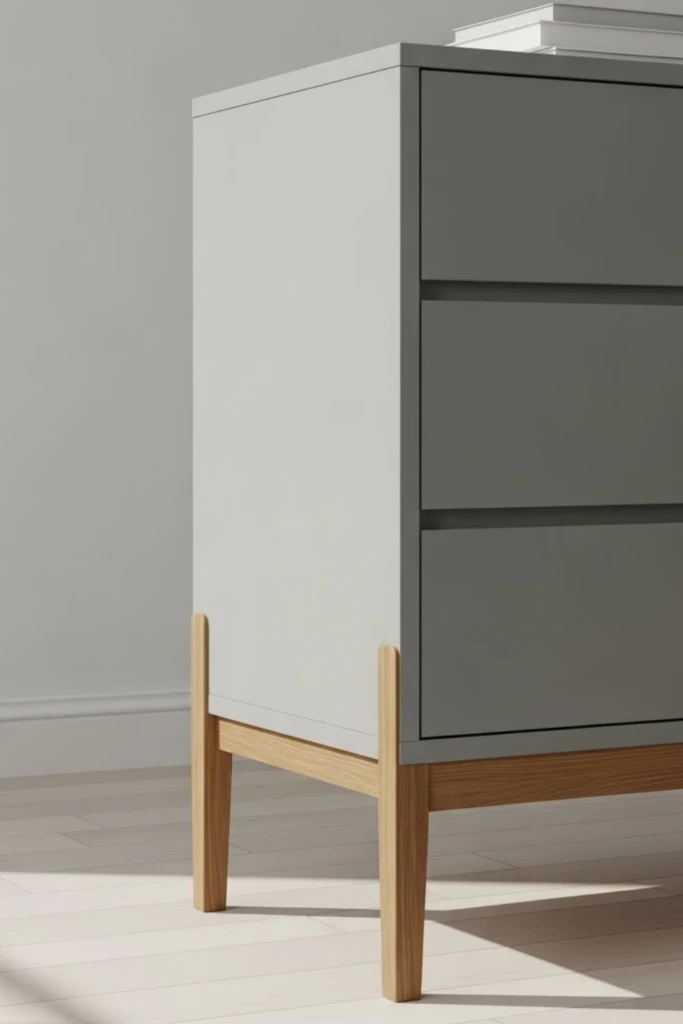
Replacing furniture legs can change both the appearance and practical height of a piece.
Tapered wooden legs can create a mid-century modern look, while simple metal supports work well with industrial or contemporary furniture.
Before purchasing replacements, examine how the existing legs are attached and determine whether the frame can accommodate a different style.
Use mounting plates or other hardware specifically designed for the furniture's construction and weight.
Check that the finished piece remains level and stable. Taller legs alter the center of gravity, so avoid modifications that make heavy furniture more likely to tip.
A carefully planned leg replacement can give an ordinary cabinet a lighter, more modern silhouette.
22. Open Shelf Conversion
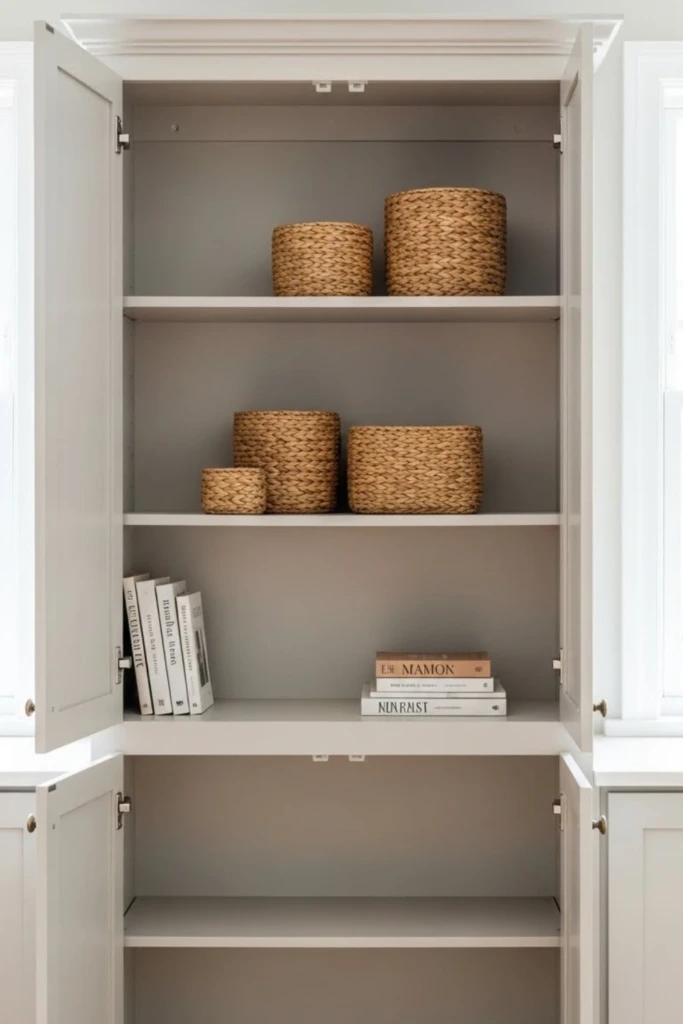
Removing cabinet doors can create accessible storage and give bulky furniture a more open appearance.
This renovation works well on sturdy cabinets, bookshelves, and traditional hutches with attractive interior compartments.
After removing the doors, fill unwanted hinge holes with suitable wood filler. Sand the repaired areas and repaint the interior if needed.
Consider using a contrasting color or decorative backing to make the shelves more visually interesting.
Arrange books, baskets, ceramics, and everyday essentials in a way that leaves some open space.
Keep heavier items on lower shelves and secure tall units to the wall to improve stability.
23. Two-Color Blocking
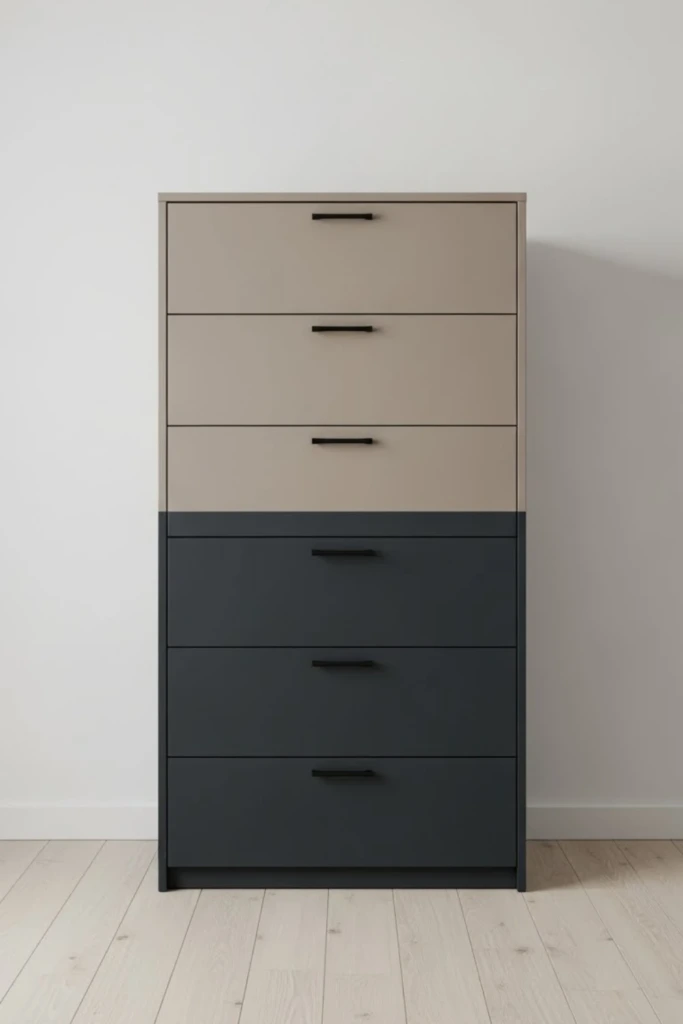
Color blocking introduces a modern graphic element to otherwise ordinary furniture.
Choose two complementary shades and divide the furniture into distinct sections. For example, a tall dresser could feature a warm beige upper portion and a muted olive lower portion.
Use a level and painter's tape to establish a straight dividing line.
For a more cohesive appearance, select colors with similar undertones or combine one statement shade with a neutral.
Allow the first color to dry adequately before masking and applying the second.
This technique works especially well on wardrobes, cabinets, and dressers with broad, flat surfaces.
24. Fabric Panel Insert
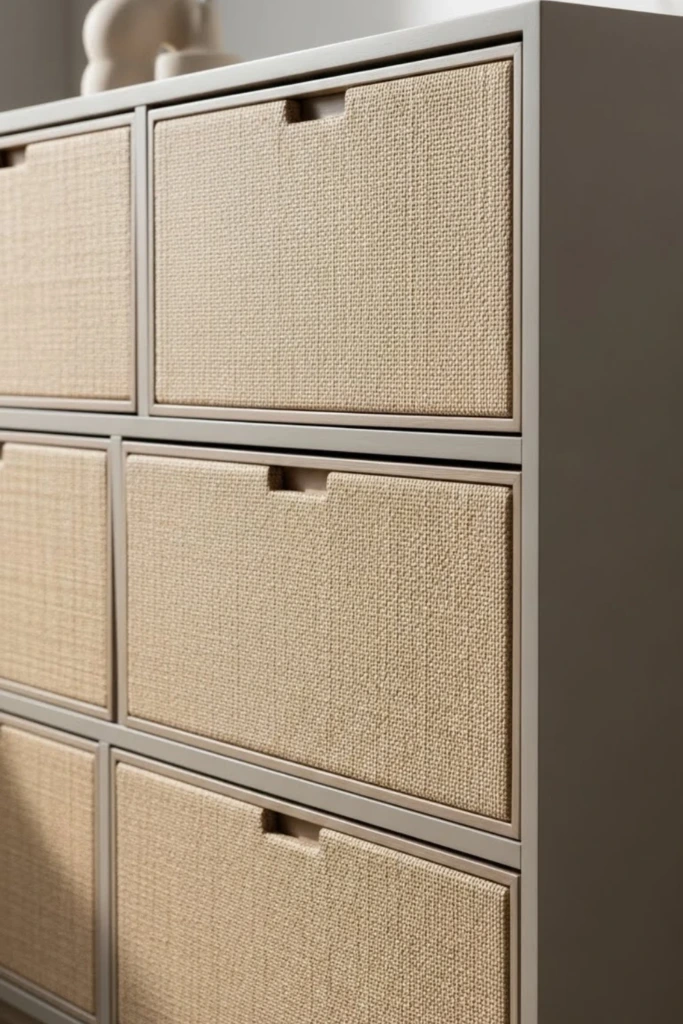
Adding fabric or cane inserts can introduce texture and soften the appearance of wooden furniture.
Cabinet doors with removable center panels are particularly suitable for this type of renovation.
Depending on the design, replace the existing panel with woven cane, decorative mesh, or tightly stretched fabric.
Secure the new material from the inside using an appropriate frame or fastening method. Make sure the insert is properly supported and won't interfere with hinges or nearby shelves.
Neutral linen can create a relaxed look, while cane webbing adds a natural, vintage-inspired touch.
For kitchen or bathroom furniture, consider moisture-resistant materials that are easier to clean.
25. Matte Wax Finish
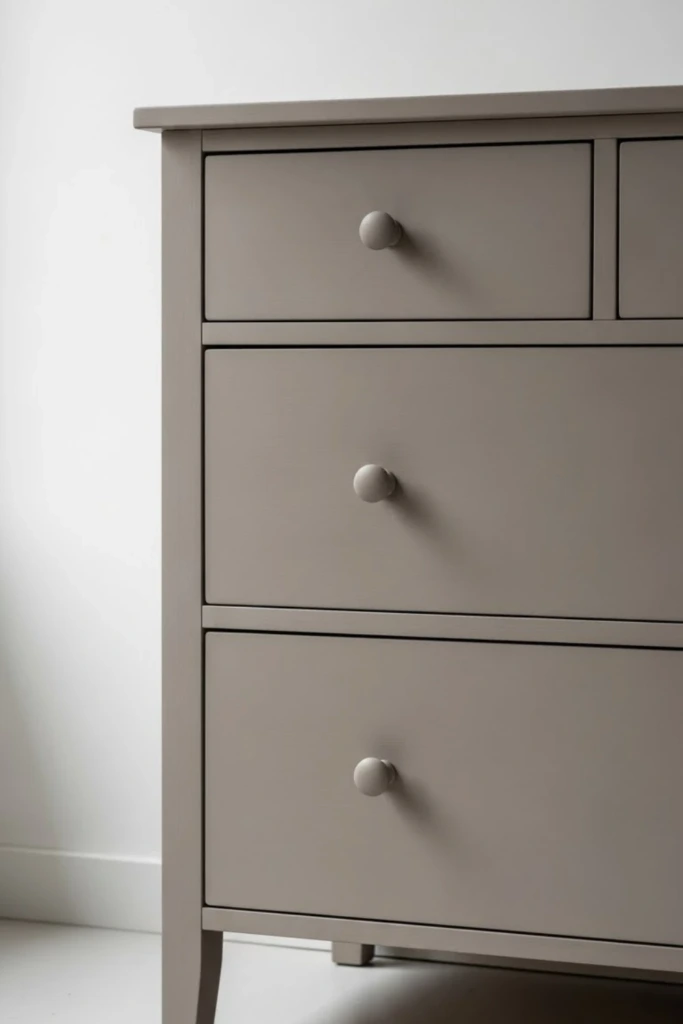
Furniture wax can create a soft, low-sheen finish that feels particularly appropriate for vintage and rustic furniture.
It is commonly used over compatible chalk-style paints to enrich the color and provide a degree of surface protection.
After the paint has dried according to the manufacturer's instructions, apply a thin layer of wax with a lint-free cloth or wax brush.
Remove excess product and buff gently if the instructions call for it.
Wax generally offers less resistance to water, heat, and heavy wear than many modern clear coatings, making it better suited to decorative furniture and lower-traffic surfaces.
Follow the recommended curing period before placing objects on the finished piece.
How to turn old furniture into something new?
Transforming old furniture begins with identifying which features are worth keeping and which need improvement.
A sturdy dresser may only require fresh paint and new handles, while a scratched wooden table might benefit from refinishing. Cabinets can be updated with decorative panels, replacement legs, or improved interior storage.
Start by repairing structural damage and cleaning the furniture. Then choose one or two changes that will make the biggest difference to its appearance and usefulness.
Whenever possible, preserve quality materials and original details, particularly on valuable antiques or collectible furniture.
With appropriate preparation, even a relatively simple makeover can extend the useful life of an older piece.
Can I paint over furniture without sanding?
Yes, certain furniture surfaces can be painted without conventional sanding, but proper cleaning and preparation are still important.
Some specialty furniture paints and bonding primers are designed to adhere to previously finished surfaces. However, their performance depends on the underlying material, coating condition, and product instructions.
Remove grease, dust, and wax residue before painting. Test adhesion in a discreet area, especially when working with laminate, glossy coatings, or unknown finishes.
Light scuff sanding often improves adhesion, although it isn't suitable for every surface. Avoid dry sanding old coatings that may contain lead until they have been tested.
For the most durable result, choose a paint system appropriate for the furniture material and allow the finish to cure fully before heavy use.
DIY furniture renovation doesn't have to involve expensive equipment or complicated techniques. Small improvements, thoughtful colors, and careful finishing can make a remarkable difference. By choosing projects that suit your furniture's condition and your skill level, you can create practical, attractive pieces that continue serving your home for years.