Make Your Own Closet Shoe Rack Like a Pro
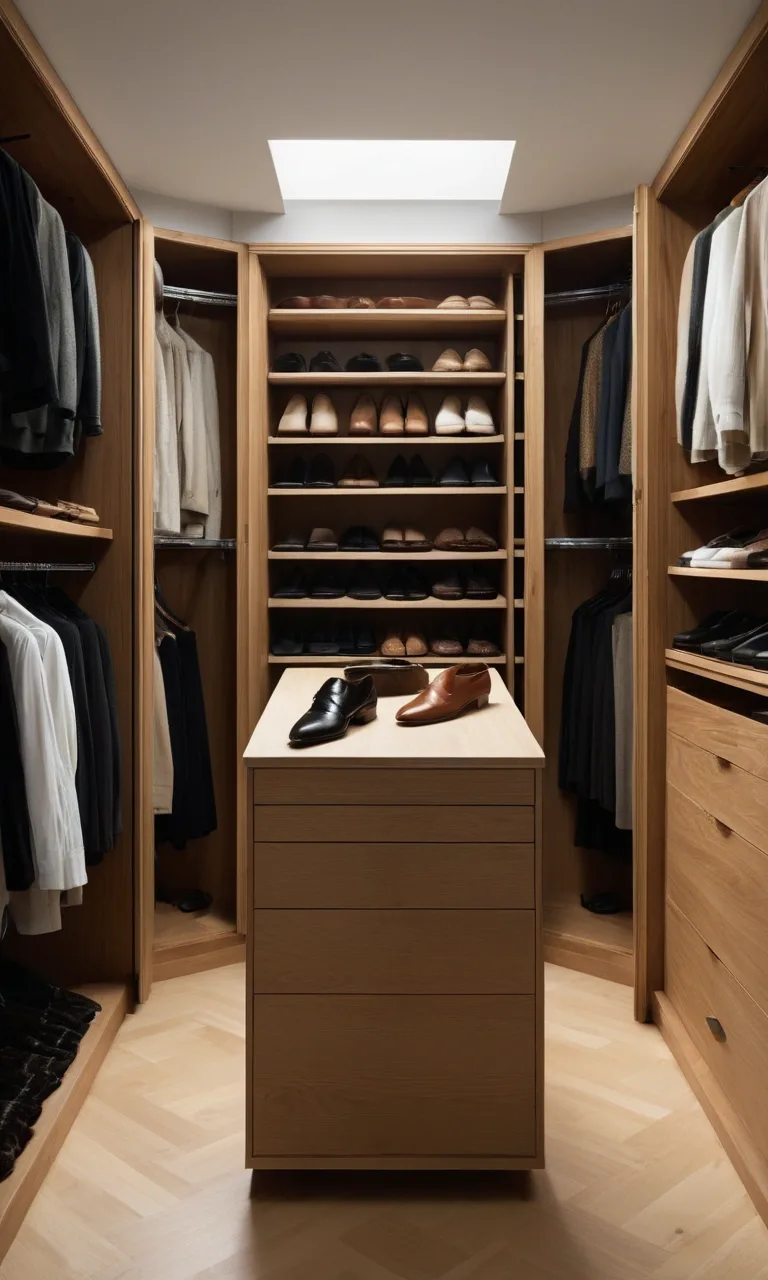
A crowded closet can make even a simple morning routine frustrating. Shoes end up piled together, favorite pairs disappear underneath others, and valuable floor space becomes difficult to use.
Building a DIY closet shoe rack is a practical way to solve these problems without spending a fortune on expensive storage systems. You can customize the dimensions, choose materials that suit your budget, and create an organizer that fits your closet.
Whether you have a narrow wardrobe or a spacious walk-in closet, a homemade shoe rack can help keep footwear organized, protected, and within easy reach.
With basic woodworking supplies and a little planning, you can build a sturdy storage solution that makes your closet more functional.
Why You Need a DIY Closet Shoe Rack
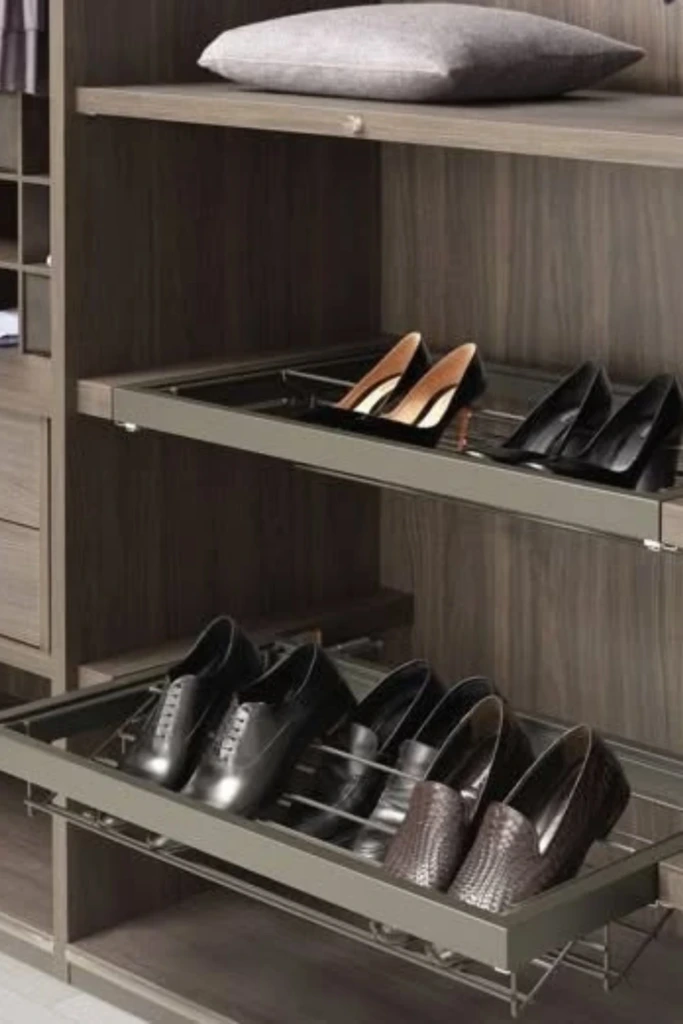
A homemade shoe organizer offers several advantages over keeping footwear in piles or relying on ready-made storage units.
Better organization: Give every pair a designated spot so you can find shoes quickly.
Efficient storage: Use available vertical space instead of covering the entire closet floor.
Custom dimensions: Build shelves that accommodate your closet's exact measurements.
Affordable materials: Choose economical lumber or repurpose suitable wood from previous projects.
Improved shoe care: Reduce unnecessary crushing and scuffing by separating footwear.
Personalized appearance: Select finishes and shelf arrangements that complement your closet.
Another benefit is flexibility. You can create taller compartments for boots, shorter sections for flats, or wider shelves for sneakers.
A well-planned rack can also make regular closet cleaning easier because shoes no longer need to be moved from scattered piles.
Tools and Materials You’ll Need
Preparing your supplies before construction helps prevent interruptions and measurement mistakes.
Most basic wooden shoe organizers can be assembled using common household tools. If you do not own cutting equipment, many lumber suppliers offer board-cutting services.
Tools:
Gather the following equipment for measuring, cutting, and assembling your rack:
Measuring tape: For determining closet dimensions and marking lumber.
Pencil: For identifying cutting points and shelf locations.
Spirit level: To check that shelves sit evenly.
Power drill: For making pilot holes and installing fasteners.
Hand saw or circular saw: For cutting boards to the required lengths.
Screwdriver: For securing the wooden components.
Clamps: For holding pieces in position during assembly.
Safety glasses: To protect your eyes from sawdust and flying debris.
A sanding block is also useful for finishing smaller areas and removing splinters.
Materials:
The amount of lumber required depends on the size and style of your organizer.
For a straightforward wooden rack, consider these supplies:
Plywood or solid wood boards: For creating the horizontal storage surfaces.
1×2 wooden battens: To support the shelves along the side panels.
Wood screws: Select lengths appropriate for the thickness of your materials.
Wood adhesive: For reinforcing suitable joints.
Medium- and fine-grit sandpaper: For preparing smooth surfaces.
Paint, stain, or clear finish: For protecting the wood and improving its appearance.
Non-slip shelf lining: For keeping footwear from shifting.
Furniture feet or protective pads: For preventing scratches on the closet floor.
Choose reasonably straight, dry lumber without major cracks or warping. If using plywood, a thickness of approximately 3/4 inch is a practical starting point for many small shelving projects.
Measure Your Closet the Right Way
Accurate measurements determine whether your finished rack fits comfortably and functions as intended.
Measure the intended installation area before purchasing or cutting materials.
Measurement
What to Check
Width
Available horizontal space between walls, trim, or existing organizers
Depth
Distance from the back wall to the nearest door or obstruction
Height
Clearance beneath hanging clothes or existing closet shelves
Obstacles
Baseboards, hinges, vents, outlets, and uneven flooring
Shelf spacing
Vertical room needed for different types of footwear
For everyday shoes, approximately 7–9 inches of clear vertical space may be sufficient. High-top sneakers, ankle boots, and taller footwear generally require additional clearance.
Measure your largest shoes as well. A shelf that accommodates sandals might be too shallow for larger sneakers.
Leave a little installation clearance rather than designing the rack to fit tightly against every surrounding surface.
Choose a Shoe Rack Design That Fits Your Space
The ideal shoe rack depends on your closet layout, footwear collection, and available construction tools.
Some designs emphasize visibility, while others prioritize compact storage or easy installation.
Here are three practical approaches worth considering.
Slanted Shelf Rack (Best for reach-in closets)
An angled shoe rack displays footwear on slightly tilted shelves, making individual pairs easier to identify.
This arrangement works particularly well in closets where you view shoes from the front rather than directly above.
A gentle slope of around 10–15 degrees can improve visibility without making the shelves excessively steep.
Install a narrow retaining strip along the lower front edge of each shelf to keep shoes from slipping forward.
Slanted shelving is especially useful for sneakers, flats, and everyday casual footwear. However, it may not be the most efficient choice for tall boots or unusually bulky shoes.
Cubby-Style Rack (Best for deep or corner closets)
Cubby organizers divide the storage area into individual rectangular compartments.
Each opening can hold a pair of shoes or several smaller items, depending on its dimensions.
This design is useful when you want a structured appearance and prefer keeping different footwear categories separate.
You can customize the compartments by making some wider for athletic shoes and others taller for ankle boots.
For a cohesive look, use matching wood panels and maintain consistent spacing between dividers.
When building a large cubby organizer, include appropriate backing, bracing, or other structural reinforcement to prevent the unit from shifting sideways.
No-Drill Modular Rack (Best for renters and small closets)

A removable shoe organizer is a convenient alternative when permanent installation is not possible.
Stackable storage cubes, freestanding crates, and hanging fabric organizers can create additional storage without drilling into closet walls.
You can rearrange the components whenever your footwear collection changes.
For a simple modular arrangement, place sturdy crates side by side or stack compatible units according to their manufacturer's instructions.
Avoid stacking unstable containers too high, and keep heavier shoes near the bottom.
This approach is particularly suitable for temporary living spaces or closets that need flexible organization.
Step-by-Step: Build a Basic Wooden Shoe Rack
A three-tier wooden rack is a manageable beginner project that provides useful storage without requiring complicated joinery.
For this example, build a freestanding unit approximately 30 inches wide, 12 inches deep, and 30 inches tall.
Using 3/4-inch plywood, the design requires two side panels measuring 30 × 12 inches and three shelves measuring 28 1/2 × 12 inches. The shelves fit between the side panels, giving the completed rack a total width of 30 inches.
This size can accommodate roughly 9–12 pairs of compact shoes, depending on their actual width.
Step 1: Cut the wood
Begin by transferring your planned dimensions onto the lumber.
Cut the two vertical panels and three horizontal shelves, checking each measurement before making the cut.
Prepare six short support battens, each approximately 10–11 inches long, to fit along the inside faces of the side panels beneath the shelves.
Sand the cut edges lightly to remove splinters and rough sections.
If you are using a powered saw, secure the material properly and follow the tool's safety instructions.
Step 2: Mark shelf positions
Lay the side panels next to each other on a flat surface.
Mark the height of each shelf, allowing enough vertical clearance for your shoes.
For example, you could position the shelf surfaces approximately 3, 13, and 23 inches above the floor. This leaves a useful open area above the upper shelf.
Use a square and level to transfer the marks accurately across both panels.
Remember that the thickness of the shelves affects the actual usable height between them.
Consistent markings help prevent uneven shelves and assembly problems.
Step 3: Attach support strips
Position a wooden support batten beneath each marked shelf location.
Apply a small amount of wood glue if desired, then secure the battens to the side panels with suitable screws.
Drill pilot holes first, especially near the ends of narrow wooden strips.
Choose screws that provide adequate grip without passing through the outside faces of the side panels.
Make sure each pair of supports is installed at exactly the same height.
For additional strength, use properly sized corner brackets or another suitable structural fastening method.
Step 4: Add the shelves
Stand the side panels upright and position the shelves between them.
Rest each shelf on its corresponding supports, checking that its edges sit flush and the structure remains square.
Secure the shelves using appropriate screws through the side panels or supports, depending on your construction method.
Clamps can help hold everything steady while you work.
Avoid overtightening screws, particularly when working with plywood or softer lumber.
Once the shelves are attached, check that the overall structure is square. Add a properly fitted back brace or rigid backing panel to resist sideways movement.
Step 5: Check for stability
Place the assembled rack on a firm, level floor and inspect every connection.
Gently test whether the unit rocks, twists, or shifts when pressure is applied.
If it feels unstable, check the joints and add appropriate bracing rather than relying only on tightening screws.
Sand any remaining rough spots and apply your preferred finish.
Allow paint, stain, or protective coating to cure according to the manufacturer's instructions before storing footwear.
If the rack is tall, narrow, or accessible to children, secure it to suitable wall framing with an appropriate anti-tip restraint.
Finally, arrange your shoes on the shelves, keeping heavier footwear on the lower levels.
How Many Pairs Will It Hold? (With Sizing Table)
Storage capacity depends on the rack's usable shelf width, the number of levels, and the size of your footwear.
A pair of slim flats generally requires less space than bulky running shoes or winter boots.
As a planning guide, allow approximately 8–10 inches of horizontal shelf width per pair of average adult shoes, although actual requirements vary.
Shoe Capacity Estimate Table
The following figures provide approximate capacities for different closet widths.
Closet Width
Slanted Shelf Rack (3 shelves)
Cubby Rack (3 rows)
Crate/Modular Setup
24 inches
6–9 pairs
6 compartments
4–8 pairs
36 inches
9–12 pairs
9 compartments
6–12 pairs
48 inches
12–15 pairs
12 compartments
8–16 pairs
These estimates assume that the shelf construction does not significantly reduce usable width. Cubby capacity also depends on whether each compartment is designed for one pair.
For a more accurate estimate, arrange several pairs side by side and measure their combined width before finalizing the design.
If your collection includes boots or oversized footwear, consider dedicating one shelf to those items rather than making every compartment the same height.
Common Mistakes and How to Fix Them
Even a simple woodworking project can develop problems when measurements or structural details are overlooked.
Here are some common issues and practical ways to address them.
Uneven shelves: Check the support markings on both side panels. Reposition any supports that were installed at different heights.
Unstable construction: Inspect the joints and add a back brace or rigid backing if the rack twists sideways. Use suitable wall anchoring where needed.
Cracked wooden pieces: Drill correctly sized pilot holes and avoid placing screws too close to board edges.
Bending shelves: Use thicker material, reduce the unsupported span, or install additional reinforcement beneath longer shelves.
Incorrect overall dimensions: Compare the finished measurements with the available closet space before installation. Adjust components only when doing so will not compromise structural strength.
Insufficient shoe clearance: Test shelf spacing using your tallest everyday footwear before permanently attaching all the supports.
Shoes sliding forward: Install a small front lip or use a textured shelf liner.
Moisture buildup: Let damp footwear dry before storing it, and maintain airflow around the organizer.
Another frequent oversight is forgetting about closet doors. Make sure drawers, sliding doors, and hinged doors can operate freely after the rack is installed.
Taking time to check these details during assembly can prevent frustrating adjustments later.
Final Thoughts
Building your own closet shoe rack is a practical home improvement project that can make a noticeable difference in everyday organization.
A simple wooden organizer gives shoes a dedicated place, helps reduce clutter, and allows you to make better use of otherwise wasted closet space.
The key is choosing a design that suits your available room, measuring carefully, and using materials strong enough for your intended storage needs.
Whether you prefer angled shelves, individual cubbies, or a flexible modular arrangement, the finished rack should make your footwear easier to access and maintain.
With thoughtful planning and careful assembly, you can create a useful closet storage solution that fits your space and serves you for years.