
Easiest Way to Make Jeopardy Game DIY for 2026
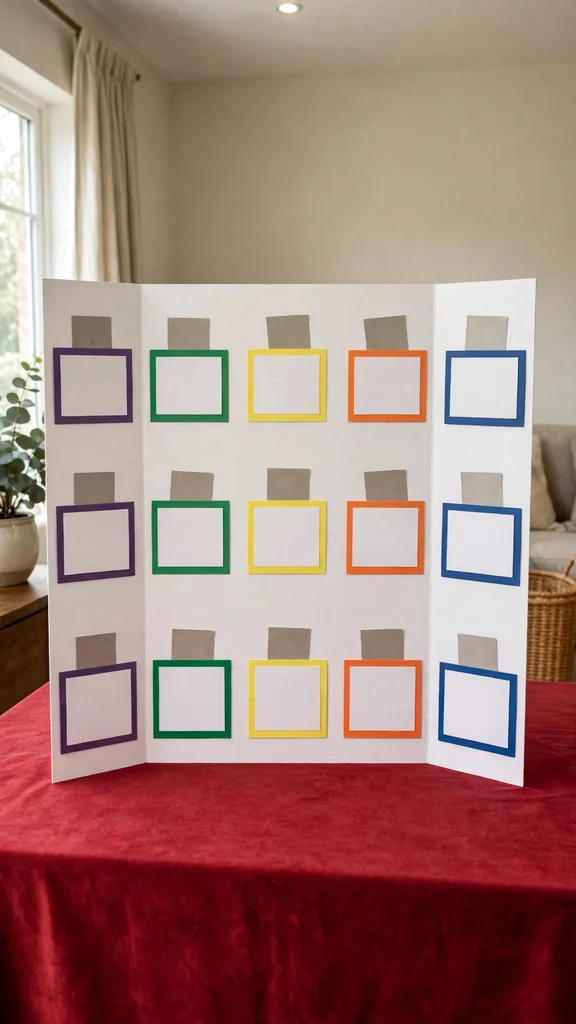
Making your own Jeopardy game is an entertaining way to turn an ordinary gathering into a friendly competition. Whether you’re organizing a birthday party, preparing a classroom review activity, or planning family game night, a homemade trivia board can keep everyone involved while testing their knowledge.
The best part about a Jeopardy game DIY project is that you don’t need expensive supplies or complicated equipment. With a few basic craft materials, interesting trivia questions, and a little creativity, you can build a colorful game board that works for almost any occasion.
You can also create a digital version using PowerPoint if you prefer playing on a television or projector. This guide explains both methods, from preparing the board to organizing the final round.
Jump to section (3)
Jeopardy Game DIY
A homemade Jeopardy-style game combines trivia questions, different categories, and a points system that rewards players for answering correctly. Participants select clues based on their preferred topics and difficulty levels, making each round exciting and unpredictable.
You can customize the game for children, teenagers, or adults by changing the questions and categories. Educational topics work particularly well in classrooms, while movies, music, sports, and general knowledge are excellent choices for parties.
What materials are needed to make the game?
Before creating your game board, gather the supplies you’ll need. Most materials are inexpensive and may already be available at home.
- Large poster board, foam board, or sturdy cardboard
- Colorful markers or permanent pens
- Ruler for measuring straight lines
- Index cards or small pieces of construction paper
- Double-sided tape, glue, or removable adhesive
- Scissors for cutting cards
- Stopwatch, kitchen timer, or smartphone timer
- Notebook or whiteboard for recording scores
- Small rewards or prizes, if desired
For a reusable board, consider laminating the cards or attaching them with hook-and-loop dots. This allows you to replace questions without rebuilding the entire game.
1. Prepare the Game Board
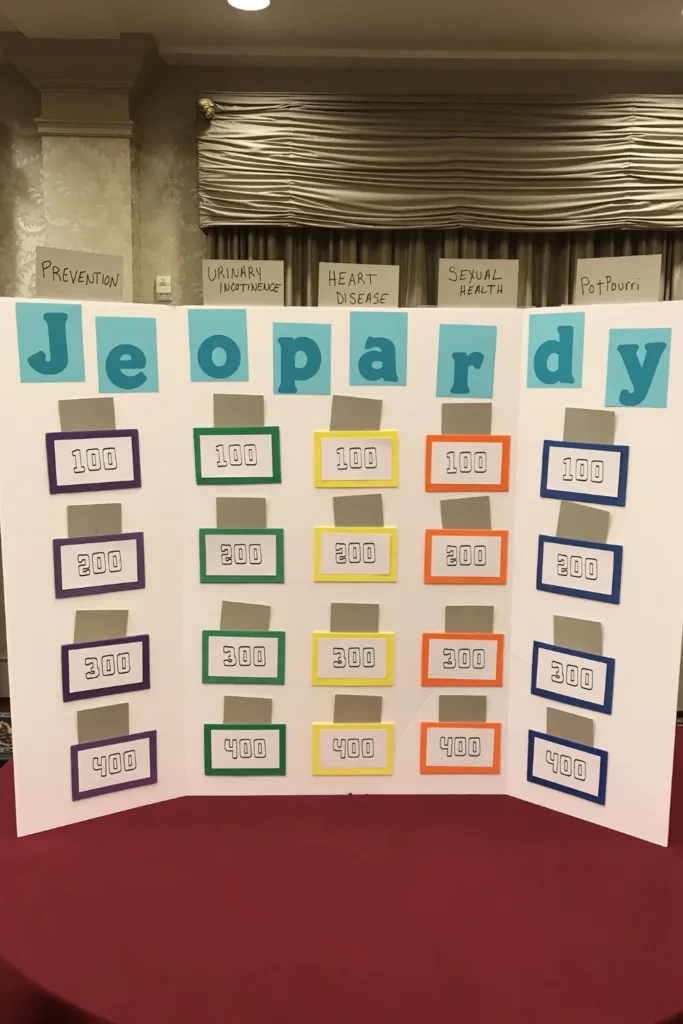
Begin by choosing a large piece of cardboard or poster board that everyone can see from their seats. A sturdy surface makes the board easier to display and prevents it from bending during gameplay.
Use a ruler to create five vertical columns and five horizontal rows for the clues. Leave additional space across the top for the category headings.
Choose five categories that suit your players. For example, you might include Science, History, Movies, Animals, and Geography.
Assign increasing point values to the rows, starting with 100 points and ending with 500 points. Lower-value clues should generally be easier, while higher-value clues should require more knowledge.
For a traditional television-inspired appearance, use a dark blue background with bold white or yellow lettering. Make the text large enough to read from across the room.
2. Create the Question Cards
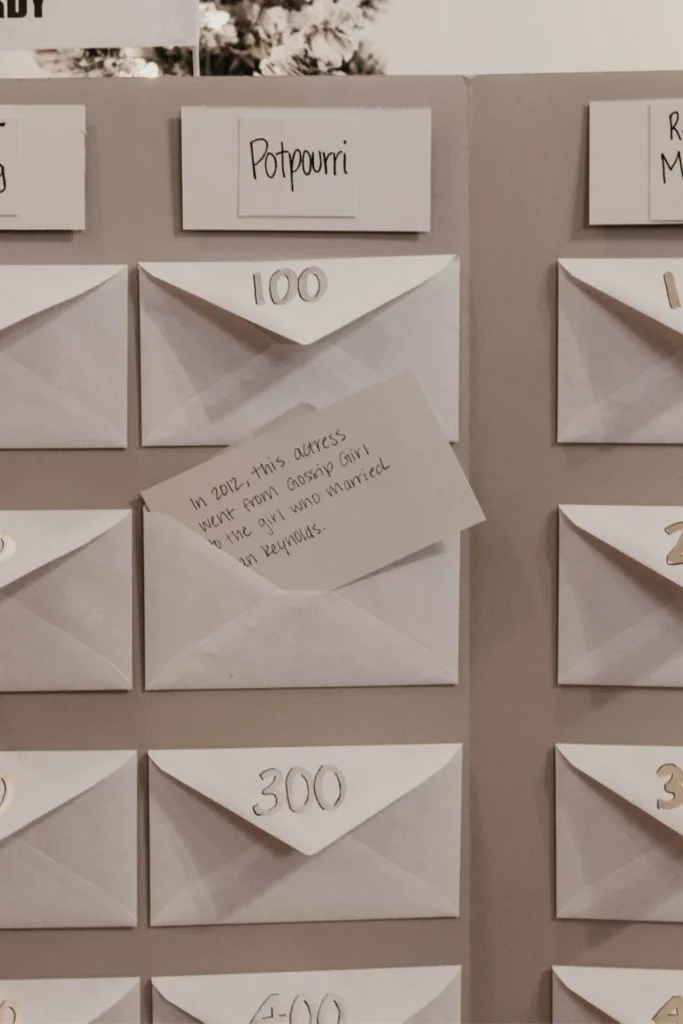
Once the board is ready, prepare 25 clue cards, with five clues for each category.
Write the clue on one side of each card and the correct response on the other. Keep the information organized so the host can quickly check answers without revealing them to players.
For example, a Geography clue worth 100 points could read: This country is home to the Eiffel Tower. The expected response would be: What is France?
Increase the difficulty as the point values rise. Simple facts work well for beginner questions, while more challenging clues can involve historical events, scientific concepts, or lesser-known information.
Attach the cards to their designated positions using removable tape or reusable adhesive. Keep the clue text hidden until someone selects that square.
You can also place the clue cards in numbered envelopes if you want to create a more surprising reveal.
3. Set Up the Game Area

Choose a comfortable location with enough room for participants to see the board and hear the host.
Position the game board against a wall, on an easel, or on a large table. Make sure the category names and point values remain visible throughout the game.
Arrange chairs so everyone faces the board. If you’re expecting a large group, divide participants into teams to encourage cooperation and reduce waiting time.
Place a scoreboard nearby where points can be updated after each clue.
A smartphone timer works well for controlling response times. Giving players approximately five to ten seconds to answer can keep the game moving, although younger children may benefit from extra time.
For an additional game-show atmosphere, use handheld bells or simple buzzers. If those aren’t available, players can raise their hands or call out their team names.
4. Explain the Rules
Before starting, explain how players earn points, select clues, and respond.
The host reveals a clue from the category and point value chosen by the controlling player or team. Players then attempt to give the correct response.
To follow the familiar Jeopardy format, participants should phrase their responses as questions. For example, if the clue describes the largest planet in our solar system, the response should be, What is Jupiter?
A correct response adds the clue’s value to the player’s score. An incorrect response deducts that amount.
You can allow other players to attempt the same clue after an incorrect response. Decide in advance whether participants must use buzzers, raise their hands, or take turns.
For younger children, consider removing point deductions to keep the activity encouraging.
Make sure everyone understands the rules before the first clue is revealed so disagreements don’t interrupt the game.
5. Play the Game
Select the first participant or team through a quick drawing, coin toss, or simple trivia question.
The chosen player picks a category and point value. The host reads the corresponding clue aloud, and eligible players have an opportunity to respond.
After the clue is resolved, update the scoreboard and remove or cover that square so it cannot be selected again.
For a traditional-style game, the player who responds correctly gains control of the next selection.
Encourage participants to choose a mixture of easy and difficult clues. Higher-value questions can help trailing teams catch up, but they also carry greater risk when incorrect answers result in deductions.
Keep the pace steady by limiting long discussions between questions. If players are working in teams, allow a short consultation period before they submit their response.
Continue until every clue has been used or the allotted playing time has ended.
6. Final Jeopardy
A final round creates an exciting finish, especially when several players have similar scores.
Prepare one challenging clue that hasn’t appeared during the main game. Announce its category before revealing the actual clue.
Each eligible player or team secretly chooses how many points to wager. Under traditional-style rules, players with positive scores can wager up to their current total.
After collecting the wagers, reveal the final clue and give participants approximately 30 seconds to write their responses.
When time expires, check each answer. Add the wager to the score for a correct response or subtract it for an incorrect one.
The player or team with the highest final score wins.
For a casual children’s version, you can allow every team to participate and use a fixed bonus amount instead of wagers. This makes the ending simpler while preserving the excitement.
7. Prizes
Small rewards can make a homemade Jeopardy game feel even more memorable.
You don’t need to spend much money to recognize the winning team. Choose prizes that match the age group and occasion.
For children, consider stickers, colorful pencils, mini notebooks, or homemade certificates. Teenagers may enjoy snacks, novelty accessories, or small gift cards.
For adults, inexpensive trophies, personalized certificates, or the opportunity to choose the next game-night activity can be entertaining rewards.
You can also recognize participants with creative awards such as Best Teamwork, Most Creative Answer, or Trivia Champion.
If you’re organizing a classroom activity, consider using nonmaterial rewards such as special classroom privileges or recognition on a display board.
The main goal is to celebrate participation and make everyone feel included, regardless of their final score.
How to Make a DIY Jeopardy Game in PowerPoint?

PowerPoint offers a convenient alternative to a physical game board. It allows you to create interactive slides, reveal clues on a large screen, and move between questions using clickable links.
This method is especially useful for classroom lessons, office activities, virtual gatherings, and events where participants need to see the game on a projector.
Here’s how to build your own interactive presentation.
1. Design an opening slide
Open Microsoft PowerPoint and start a blank presentation.
Create a welcome slide featuring your game title, such as “Family Trivia Challenge” or “Classroom Jeopardy Night.”
Choose an eye-catching background and add a large Start Game button using a shape.
You can connect this button to your main game board by selecting the shape, opening the Insert tab, choosing Link, and linking it to the appropriate slide.
2. Build the main game board
Add a new slide and insert a table with five columns and six rows. The top row will display your categories, while the remaining five rows will contain point values.
Enter your chosen category names across the top.
Below each heading, add point values of 100, 200, 300, 400, and 500.
Use contrasting colors to make the numbers easy to read. A deep blue background paired with bright lettering creates a recognizable quiz-show appearance.
Adjust the table dimensions so the board fills most of the slide without making the text feel crowded.
3. Choose a Jeopardy-style template
If you want to save design time, look for a PowerPoint trivia game template that includes a board layout and separate clue slides.
Templates can be helpful because they often contain coordinated colors, slide designs, and navigation elements.
However, you don’t need a premade template to create a functional game. A simple presentation with tables, text boxes, and hyperlinks can work just as well.
If you download a template, check that it’s compatible with your version of PowerPoint and that its usage terms suit your needs.
4. Add clue and answer slides
Create a separate slide for every clue on your board.
For a five-category game with five point levels, you’ll need 25 clue slides. You can also make corresponding answer slides if you want to reveal correct responses separately.
Use large text and avoid overcrowding the screen.
For example, a Science clue might say: This process allows plants to turn sunlight into chemical energy. The correct response would be: What is photosynthesis?
You can place the answer on a separate slide or reveal it using an animation.
Add a Return to Board button to the relevant slides so you can navigate back without scrolling through the presentation.
5. Connect the point values to their clues
Return to the main board and select the first point value.
Open Insert, choose Link, and select the option to link to a place in the current presentation. Choose the slide containing the matching clue.
Repeat this process for each point value until every square leads to its correct question.
Then connect each Return to Board button to the main game slide.
For a more polished experience, you can create updated copies of the board with completed squares hidden. This prevents players from accidentally selecting clues that have already been answered.
Alternatively, the host can maintain a separate checklist of used clues.
6. Test the presentation before playing
Launch the slideshow and click through several point values to verify that the hyperlinks open the correct slides.
Check whether the Return to Board buttons work properly.
Make sure all text remains readable on the screen you’ll use during the actual game.
If you’ve included animations, sound effects, or transitions, confirm that they play smoothly.
Test the presentation in slideshow mode rather than relying only on the editing view. This helps you identify navigation problems before participants arrive.
It’s also useful to keep a separate answer key and scoreboard, since a basic PowerPoint presentation won’t automatically calculate player scores.
7. Save and share your game
When everything is working, save the presentation as a PowerPoint file so you can edit the questions for future events.
You can also share the file with teachers, friends, coworkers, or family members who want to host their own trivia competitions.
For remote gatherings, display the presentation through a screen-sharing platform and have one person act as the host.
If you’re planning to reuse the game, keep an untouched copy of your original template. You can then replace categories and clues without rebuilding the hyperlinks and slide layouts every time.
Conclusion
Creating a Jeopardy game DIY project is a simple and affordable way to bring learning, laughter, and friendly competition into any gathering. A handmade cardboard board offers a fun craft activity, while a PowerPoint version provides a convenient digital experience.
By choosing engaging categories, organizing questions by difficulty, and establishing clear rules, you can create a game that works for almost any age group or occasion. Add a memorable final round and a few small prizes, and your homemade trivia challenge can become a favorite activity for family nights, classrooms, and parties throughout 2026.