21 Concrete Molds DIY Ideas for 2026
Concrete is a surprisingly versatile material for creative home projects. With the right mold, an ordinary cement mixture can become a decorative accessory, a useful household item, or an eye-catching garden feature. Its natural texture works beautifully with modern, rustic, industrial, and minimalist styles.
Making your own concrete molds gives you the freedom to experiment with shapes, patterns, colors, and finishes. You can reuse containers you already have, build custom forms from wood, or work with flexible silicone molds to produce more intricate designs. Whether you are new to DIY crafts or an experienced maker, concrete offers plenty of opportunities to create something distinctive without relying on mass-produced decor.
1. Cement Candle Holders

Concrete candle holders offer a simple way to introduce understated, industrial-inspired decor into your home. Their solid appearance and neutral colors complement everything from contemporary coffee tables to rustic dining arrangements.
You can create different designs using silicone molds, sturdy plastic containers, paper tubes, or nested cups. Place a smaller form inside the larger one to leave an opening for the candle, making sure it remains centered while the mixture sets.
Once the concrete has cured, remove the mold carefully and smooth any rough edges with suitable sandpaper. Leave the holder in its natural gray finish, paint it in a muted color, or add decorative details for a personalized look. Always choose a design that accommodates the candle securely and keeps the flame away from combustible materials.
2. Geometric Planter
A faceted concrete planter brings architectural detail to an otherwise simple plant display. Its angled surfaces create interesting shadows throughout the day, making even a small succulent look like part of a carefully designed arrangement.
Build a polygon-shaped mold from rigid plastic or coated panels, ensuring the joints are tight enough to prevent leakage. To create a planting cavity, position a smaller container inside the mold before pouring the concrete. A slightly asymmetrical shape can give the finished piece a contemporary artistic appearance.
Keep the planter in its natural finish or introduce pale pink, sage green, or warm beige through a compatible concrete pigment. Add drainage holes or use a removable nursery pot inside the planter to prevent excess water from collecting around the roots.
3. Textured Tabletop
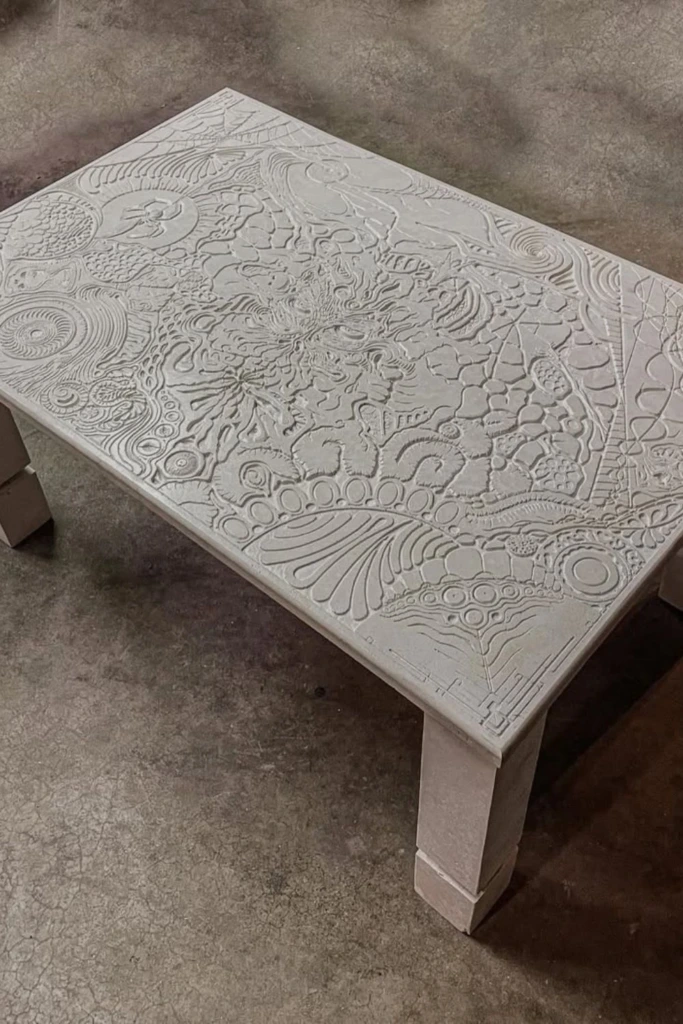
A patterned concrete tabletop can turn a functional surface into a decorative focal point. Raised floral motifs, abstract impressions, and repeating geometric designs give the material more character than a plain, flat finish.
Create the pattern using a textured liner, a suitable relief mat, or a custom-designed mold. Place the patterned surface where it will transfer cleanly into the concrete, then pour the mixture evenly to minimize air pockets and inconsistencies.
This technique works well for small side tables, garden tables, and decorative furniture panels. Once the concrete has cured, apply a compatible sealer suited to its intended use. For a larger tabletop, plan the thickness and structural support carefully because concrete can become extremely heavy.
4. Bulb Base Lamp

A sculptural concrete lamp base combines practical lighting with the visual appeal of handmade design. Rounded contours, unusual silhouettes, or contrasting black splatter patterns can make the base stand out on a bedside table or home office desk.
Use a stable mold with enough room for the desired shape, and plan the electrical components before pouring. If the design requires a cable channel or mounting hardware, position the appropriate inserts during casting rather than attempting to drill blindly through the finished piece.
After curing, sand the surface where necessary and apply a matte sealer for a refined appearance. Pair the base with a compatible lamp holder and shade. Electrical connections should use properly rated components, with wiring and installation handled safely and in accordance with applicable electrical requirements.
5. Fruit Mold Tiles
Vintage kitchen molds can inspire decorative concrete pieces featuring embossed fruit shapes. Apples, pears, citrus fruits, and other familiar motifs bring a playful, nostalgic quality to handmade home accessories.
Look for sturdy molds with well-defined details that can transfer into the concrete. Apply an appropriate release agent before filling the mold, then gently tap the sides to help release trapped air. Smaller castings are particularly suitable for experimenting with different pigments and surface finishes.
Use the finished pieces as decorative coasters, garden markers, shelf accents, or wall ornaments. If you intend to use them as coasters, add protective pads underneath and remember that concrete may absorb moisture unless properly sealed.
6. Patterned Pavers
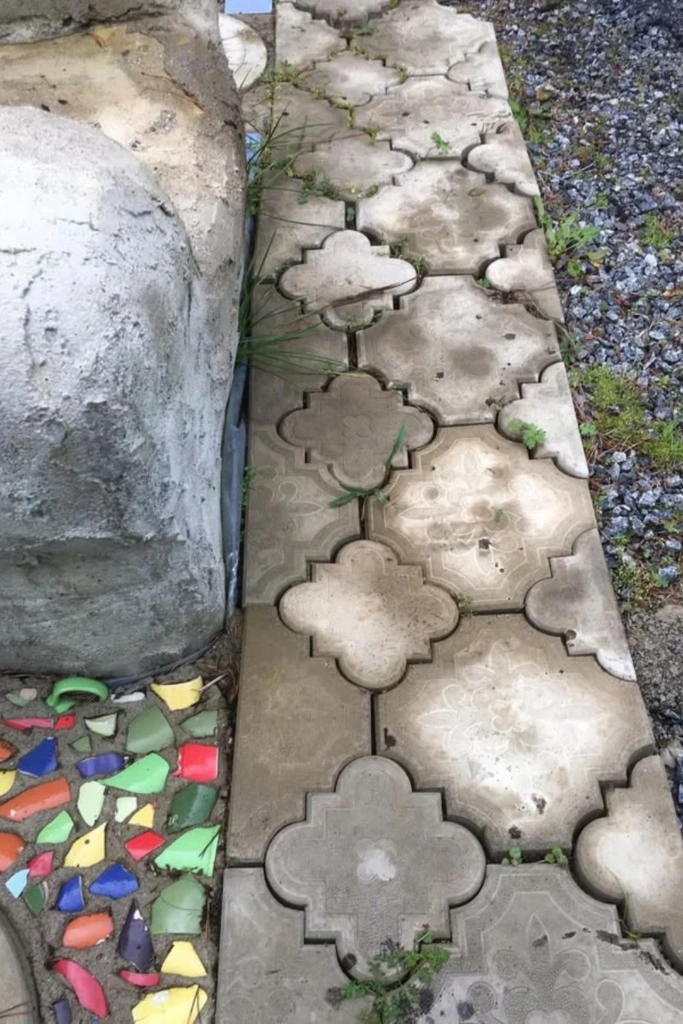
Decorative concrete pavers can give a garden path or patio border a more distinctive appearance. Moroccan-inspired motifs, repeating floral patterns, and ornamental borders provide visual interest while allowing you to create a coordinated outdoor layout.
Choose molds designed for paving applications and make sure every piece has a consistent thickness. Prepare a stable, well-drained base before installing the pavers, and arrange the patterns in advance to establish the direction and spacing of the walkway.
For a traditional appearance, use natural gray concrete. For a warmer garden design, select compatible mineral pigments or incorporate several complementary shades. Outdoor pavers must be suitable for their intended loading and weather conditions, and the finished surface should remain reasonably level to reduce tripping hazards.
7. Concrete Tray

A shallow concrete tray is an approachable project for anyone interested in minimalist home accessories. Its clean outline and subtle texture make it useful for displaying candles, jewelry, small decorative objects, or dried botanical arrangements.
Create a rectangular or oval mold from a sturdy container, then use a smaller insert to form the recessed center. Keep the base thick enough to resist cracking without making the tray unnecessarily heavy.
Once the piece has cured, smooth the rim and corners for a more comfortable finish. You can preserve the raw concrete look or add a pigment that complements your furniture. Small felt pads underneath help protect delicate surfaces, while a suitable sealer makes routine cleaning easier.
8. Curved Bench Mold

A curved concrete bench creates a striking combination of furniture and sculpture. Its flowing profile softens the material's naturally rigid appearance, making it an interesting addition to a landscaped garden, covered patio, or contemporary interior.
Building this type of mold requires more planning than making a small planter. Plywood, flexible mold liners, and accurately cut acrylic components can help form the intended curves, provided they are strong enough to withstand the pressure of wet concrete.
Pay particular attention to the mold's bracing, seams, and internal supports. A bench must be designed to carry the weight of people safely, so its thickness, reinforcement, and supporting structure should be appropriate for the intended span and load. For a substantial seating project, professional structural guidance is worthwhile.
9. Whimsical Steppers

Decorative stepping stones add personality to garden paths while creating a practical route through planted areas. Dragonflies, paw prints, flowers, and other playful impressions can make a simple walkway feel more personal.
Use reusable stepping-stone molds with enough depth to create durable pieces. Press a suitable design into the surface or use a patterned insert before the concrete sets. You can also arrange decorative stones or other compatible materials on the surface, provided they are securely embedded.
Let the stones cure properly before moving them into position. Install them on a firm, level base so they do not rock underfoot, and space them according to a comfortable walking stride. For an especially cohesive garden, repeat a single motif or alternate several related patterns.
10. Diamond Planter
A diamond-shaped concrete planter offers a more angular alternative to traditional round pots. Its sharply defined faces create a sculptural effect that pairs particularly well with succulents, aloe, and other compact plants.
A custom mold with triangular or polygonal panels can produce the faceted exterior. Assemble the pieces carefully so the corners align, then position an inner form to establish the planting space. Because pointed corners can be fragile, avoid making the walls excessively thin.
A natural cement finish suits industrial interiors, while a compatible pigment can introduce charcoal, sand, or muted pastel tones. Place a nursery pot inside if you want easier plant maintenance, or incorporate a suitable drainage arrangement when casting a permanent planter.
11. Cube Molds
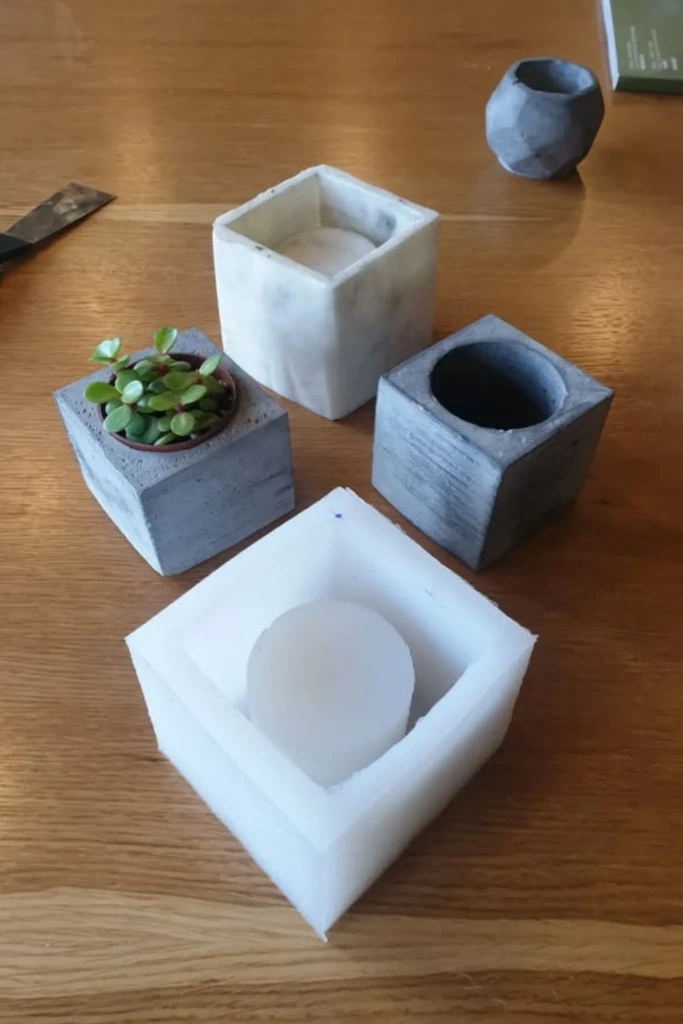
Cube-shaped molds are an excellent starting point for small concrete projects because their simple geometry is easy to customize. The same basic form can produce candle holders, miniature planters, desk organizers, and decorative blocks.
Silicone molds are convenient when you want easy removal, while rigid plastic forms work well for straightforward shapes. To create a hollow vessel, use a smaller cube or rectangular insert to form the interior cavity, keeping the walls reasonably even.
Make several pieces in different sizes to create a coordinated collection. White, charcoal, and natural gray finishes work especially well together, although subtle pigments can make the set more distinctive. Smooth the edges after curing and add protective pads whenever the objects will sit on finished furniture.
12. Glass Inlay Block
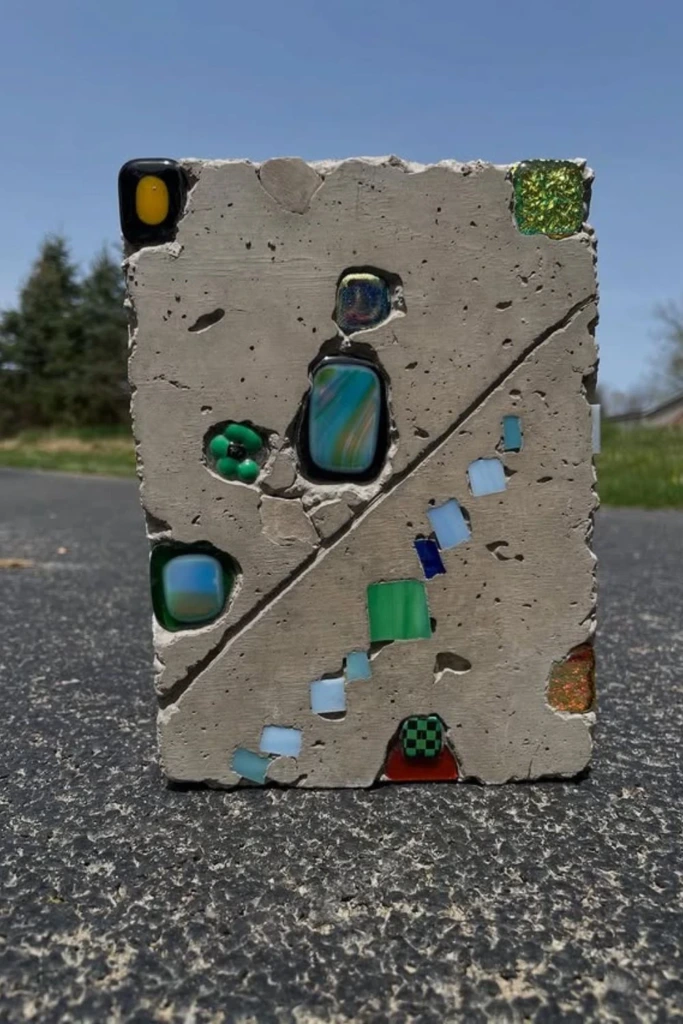
Combining concrete with colored glass creates a decorative block that plays with texture, color, and reflected light. Clear fragments, translucent glass pieces, and polished decorative stones can produce striking patterns against the material's matte surface.
Arrange the glass inside a suitable mold before pouring, positioning the pieces so the intended faces will remain visible. Pour slowly and work carefully around the inserts to reduce trapped air. Depending on the design, you may need to expose the glass by gently finishing the cured surface.
These blocks work well as garden ornaments, decorative accents, or components in a larger art installation. Use glass intended for decorative casting, handle sharp fragments carefully, and avoid treating an ordinary decorative block as a load-bearing construction element unless it has been engineered for that purpose.
13. Sculptural Triangle
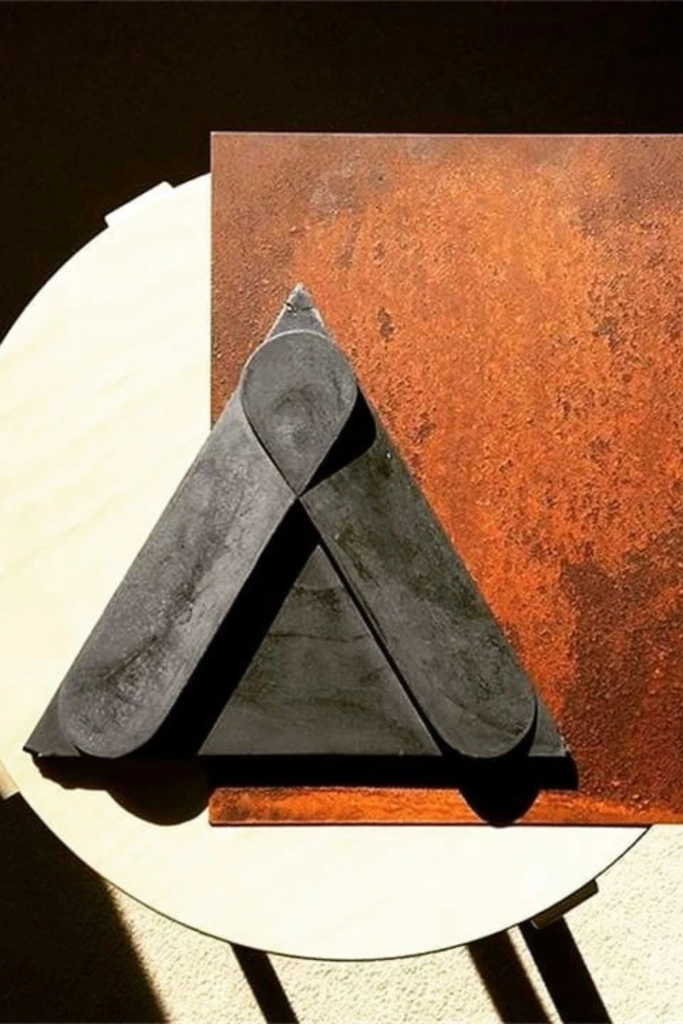
A triangular concrete sculpture brings a bold, architectural quality to a shelf, tabletop, or display wall. Its clean lines and unusual proportions can make a small handmade object feel like a piece of contemporary gallery art.
Create the form using accurately cut panels or a reusable geometric mold. Depending on the design, the finished sculpture might feature a solid triangular profile, an open center, or a combination of angled faces and curved transitions.
A matte charcoal finish emphasizes the shape, while pale gray or off-white concrete gives it a softer appearance. Sand visible edges carefully and seal the surface if the piece will be handled frequently. For wall-mounted versions, use an appropriate mounting method that accounts for the weight of the concrete.
14. Pendant Light

A molded concrete pendant shade can introduce an industrial accent into a kitchen, dining area, or modern living space. Rounded dome shapes, visible surface pores, and subtle color variations create a distinctive contrast with warm interior lighting.
Use a purpose-built mold that produces an even shade with adequate space for the intended lighting hardware. Plan the opening, cable route, and suspension attachment before casting so that the finished piece can be assembled without compromising its strength.
Concrete is heavy, so the ceiling attachment and suspension system must be rated for the complete fixture's weight. Use compatible electrical components and a light source appropriate for the fixture's design and temperature requirements. Have a qualified electrician handle any installation that requires fixed wiring.
15. Candle Holders

Minimalist concrete candle holders are easy to adapt to different interior styles, from Scandinavian-inspired rooms to contemporary dining spaces. Cylinders, short pillars, and grouped geometric shapes can all be produced using simple molds.
Choose a mold that creates a stable base and a centered opening suitable for the candle you plan to use. A removable inner insert helps maintain a consistent cavity, while careful tapping during pouring can reduce visible air bubbles.
After the concrete has cured, refine the edges and apply a compatible finish if desired. Display several holders together for a coordinated arrangement, or combine them with wood and ceramic accessories for contrast. Make sure candles fit securely, remain upright, and have sufficient clearance from surrounding combustible materials.
16. Gold Accent Decor
Gold details can give a concrete accessory a more luxurious appearance without hiding its natural texture. A metallic rim, a narrow gold line, or carefully placed decorative foil creates an appealing contrast with the muted gray surface.
Cast a vase, small decorative vessel, or sculptural holder using a suitable mold. Once the piece has cured and its surface is clean and dry, apply a compatible adhesive or decorative coating according to the product instructions. Metallic paint is another option when working with intricate shapes or edges.
Keep the gold detailing restrained if you prefer a modern look. A few metallic accents can be enough to highlight the object's contours and make it suitable for a dining table, console, or handmade gift collection. Use a topcoat compatible with both the concrete sealer and the metallic finish when additional protection is needed.
17. Ring Cones

Concrete ring cones provide a neat way to store jewelry while doubling as decorative vanity accessories. Their tapered or pyramid-like shape keeps rings visible and easy to reach, while the solid material gives the holder a clean, contemporary appearance.
Use a small geometric mold with a tapered interior profile, or build a simple form from coated panels. Keep the tip sufficiently rounded or reinforced to reduce the risk of chipping, and make sure the base is broad enough to prevent the holder from tipping over.
Natural gray concrete creates an understated look, while white, terracotta, or charcoal finishes offer different styling options. Once the surface has cured, smooth any sharp edges and add a protective finish if desired. Place the cone on a tray or dresser where it can organize everyday jewelry without taking up much room.
18. Faceted Lamp Base
A faceted concrete lamp base combines angular geometry with the weight and texture of cast cement. Tall polygonal forms, sloping sides, and contrasting colors can give the finished lamp a strong visual presence without requiring elaborate decoration.
Prepare a mold with accurately aligned panels to achieve crisp edges and consistent proportions. If you want a two-tone effect, use compatible pigments in separate pours or apply a suitable decorative finish after curing. Plan the electrical opening and hardware placement before filling the mold.
The completed base can work well on a console, bedside table, or reading desk. Pair it with a simple shade to keep attention on the sculptural shape. Ensure the base is stable enough for the chosen shade and that all electrical fittings are compatible with the fixture.
19. Square Base Lamps

Square concrete lamp bases are a practical choice for anyone who prefers simple shapes and balanced proportions. Their straight edges complement rectangular furniture, while the textured surface adds interest to an otherwise understated lighting design.
A box-shaped mold made from rigid plastic or sealed panels is usually sufficient for a basic base. Position any mounting insert and cable channel before pouring, and keep the bottom level so the finished lamp sits securely on a table.
After curing, smooth the corners and apply a finish suited to the room's style. A natural gray base pairs nicely with linen or cotton shades, while darker concrete works well with light-colored fabric. Use properly rated lamp hardware, and ensure the completed fixture is stable and safely wired.
20. Modern Bust Mold

A concrete bust introduces a sculptural, artistic element into home decor. Human silhouettes, abstract facial features, and botanical details can transform a simple cast object into an expressive accent for a bookcase, sideboard, or display shelf.
Detailed busts are best made with flexible silicone molds because they can capture fine contours and release intricate shapes more easily than rigid forms. Pour the concrete slowly, following the mold manufacturer's instructions, and work it into recessed details to minimize air pockets.
Once the piece has cured, remove it carefully to protect delicate features. A natural finish emphasizes the sculpted texture, while a compatible pigment can create a softer or more dramatic effect. For larger busts, consider the object's weight and stability before choosing a display location.
21. Trough Planter
A long concrete trough planter is ideal for displaying several small plants in one continuous arrangement. Its narrow rectangular shape makes good use of windowsills, balconies, patios, and other areas where a round pot might waste valuable space.
Build a rectangular mold with reinforced sides and a removable inner form to establish the planting cavity. Keep the wall thickness consistent and allow sufficient room for the plants' roots. Longer troughs need particular attention to reinforcement and handling because the finished concrete can be heavy and vulnerable to bending stresses.
Plant the trough with herbs, compact succulents, or a coordinated selection of seasonal greenery. Include drainage holes or use individual nursery pots inside the container to manage excess water. A natural concrete finish complements leafy plants beautifully, while a compatible exterior sealer can help protect the surface when the planter is used outdoors.