23 Mop And Broom Storage Ideas for 2026
Keeping your cleaning supplies organized can be surprisingly difficult, especially when long broom handles, bulky mop heads, and dustpans compete for limited space. Without a proper storage system, these everyday essentials quickly make laundry rooms, kitchens, and closets feel cluttered.
The good news is that you don't need a large utility room or expensive custom cabinets to keep everything organized. A few well-placed hooks, wall-mounted holders, or clever cabinet solutions can make a noticeable difference.
Whether you're working with a tiny apartment, a narrow closet, or a spacious laundry room, these 25 mop and broom storage ideas will help you save space, protect your cleaning tools, and make household chores more convenient.
Where Do People Store Their Brooms and Mops?
Brooms and mops are commonly kept in laundry rooms, kitchen cupboards, utility closets, garages, and small spaces behind doors. The ideal location depends on how frequently you clean, the available storage space, and whether your tools need time to dry.
For everyday convenience, choose a spot that's easy to reach without moving other household items. Wall-mounted organizers are particularly useful because they free up floor space and prevent long handles from falling over.
Wet mops should always be allowed to dry thoroughly before being placed in enclosed storage. Keeping cleaning equipment separate from food, clothing, and personal belongings also helps maintain a more hygienic home.
1. Cabinet Door Storage
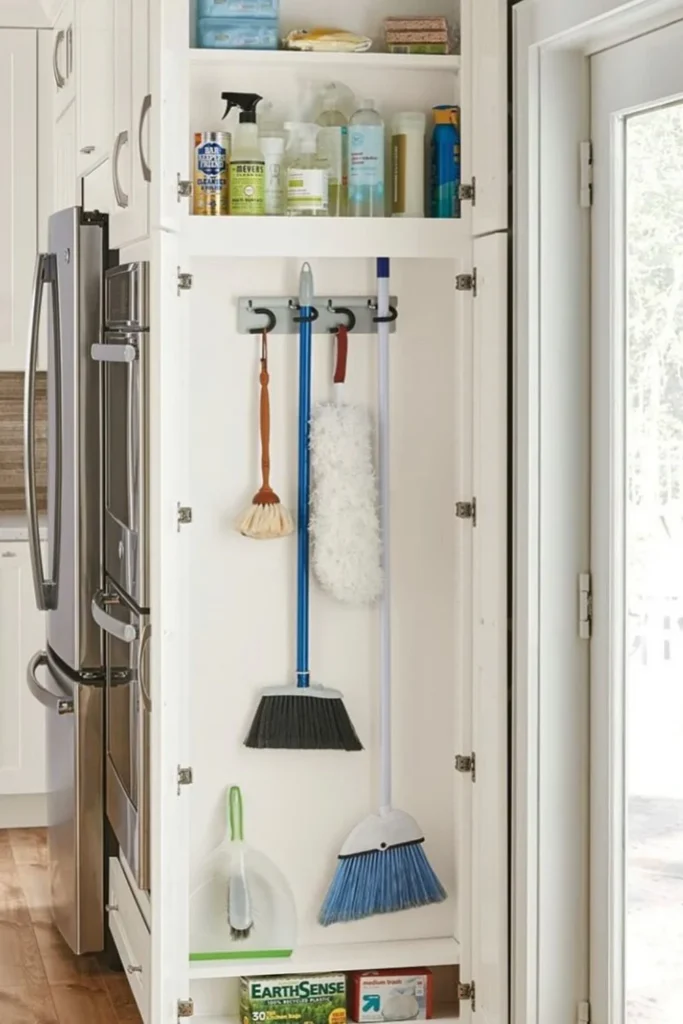
The inside of a cabinet door can provide valuable storage without changing the appearance of your room. Install lightweight broom clips or individual hooks to hold frequently used cleaning tools securely.
This solution works particularly well in tall laundry cabinets or dedicated cleaning cupboards. Before installing anything, check that the handles won't interfere with shelves when the door closes.
Choose low-profile organizers and suitable mounting hardware to prevent damage to the cabinet. Store damp mop heads outside the cabinet until completely dry.
2. Wall Grip Rack
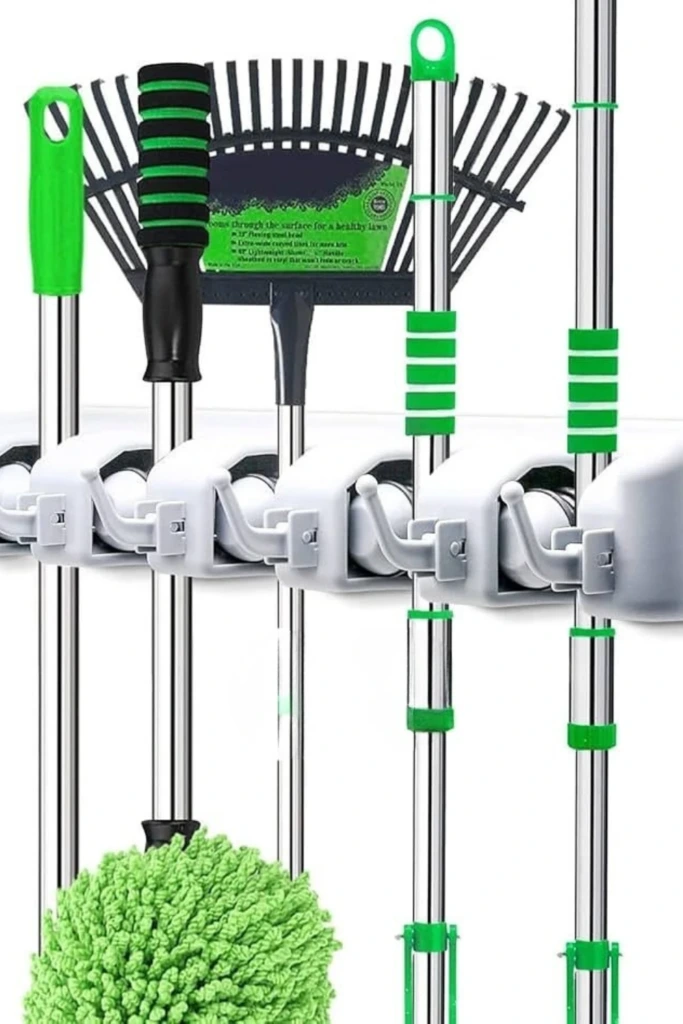
A wall-mounted grip rack is one of the simplest ways to organize several long-handled cleaning tools in one location.
These organizers typically feature spring-loaded or rubber-lined grips that hold handles securely while allowing easy removal.
Install the rack on a sturdy wall in your laundry room, garage, or utility area. Leave enough distance between holders to accommodate different broom and mop heads.
For added convenience, choose a model with small hooks for dustpans, brushes, or cleaning cloths.
3. Laundry Wall Slot
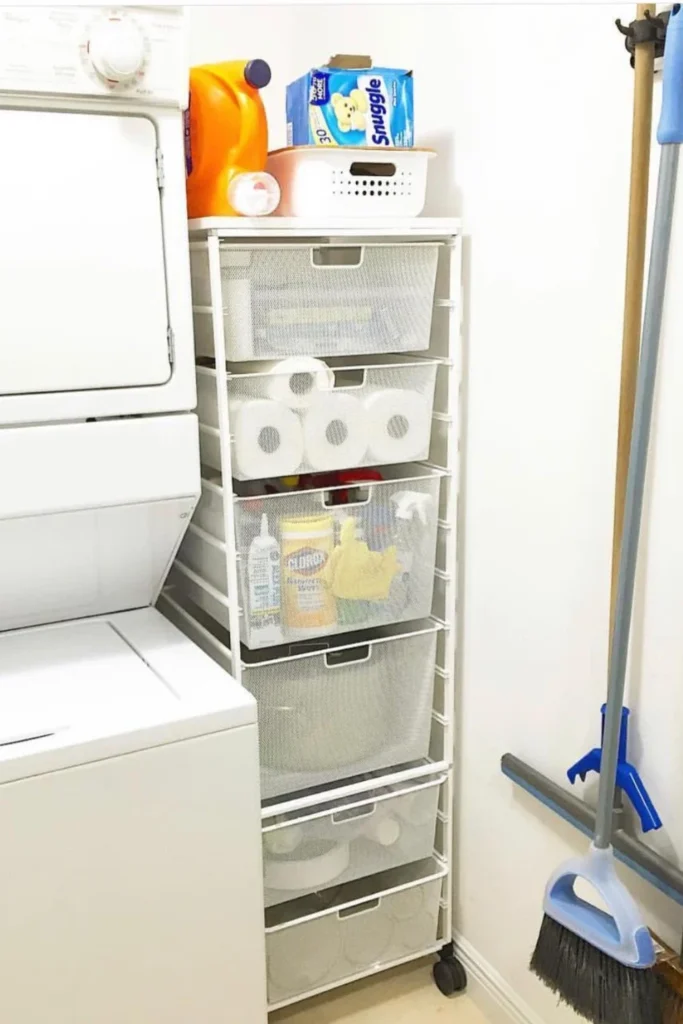
The narrow wall space beside a washing machine can become a practical storage area for cleaning equipment.
A slim vertical holder allows you to store a broom or mop without occupying valuable floor space. This arrangement is especially helpful in compact laundry rooms where cabinets and appliances leave little room for additional furniture.
Measure the available width before purchasing an organizer, and make sure the tools can be removed without hitting the washing machine.
Keep electrical outlets, hoses, and appliance ventilation areas unobstructed.
4. Utility Closet Wall
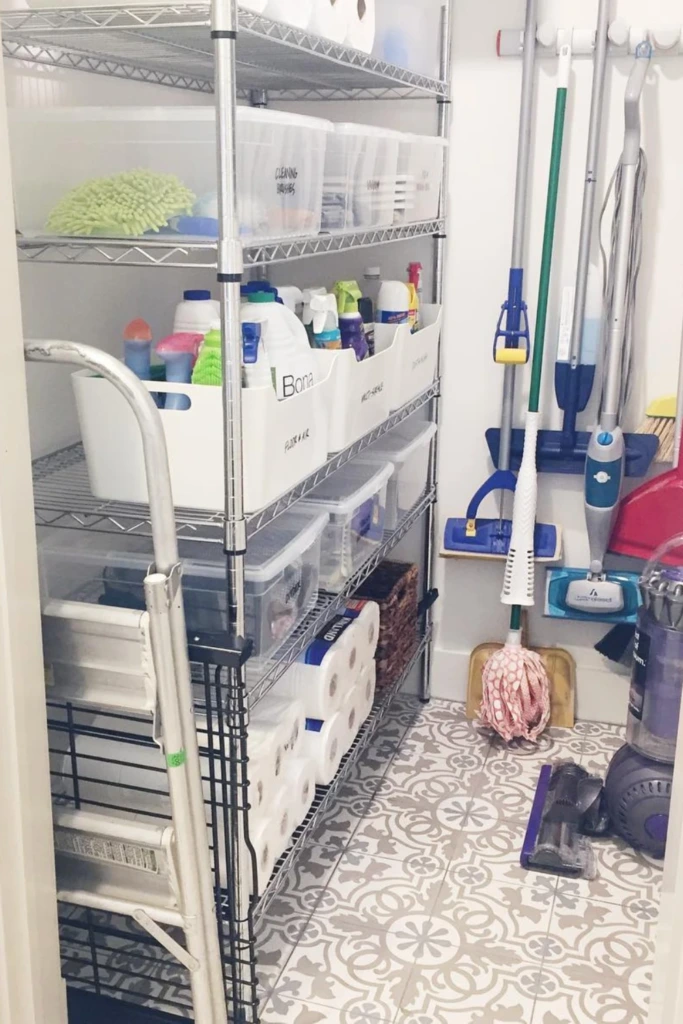
A utility closet becomes much easier to manage when cleaning tools have dedicated positions along the wall.
Instead of allowing brooms and mops to lean against shelves, install a horizontal mounting rail with several adjustable holders.
Position the rail where handles remain accessible without blocking cleaning products or storage containers.
You can also add a small basket for sponges, gloves, and replacement mop pads. This creates a convenient cleaning station where essential supplies stay together.
5. Tall Cabinet Hideaway
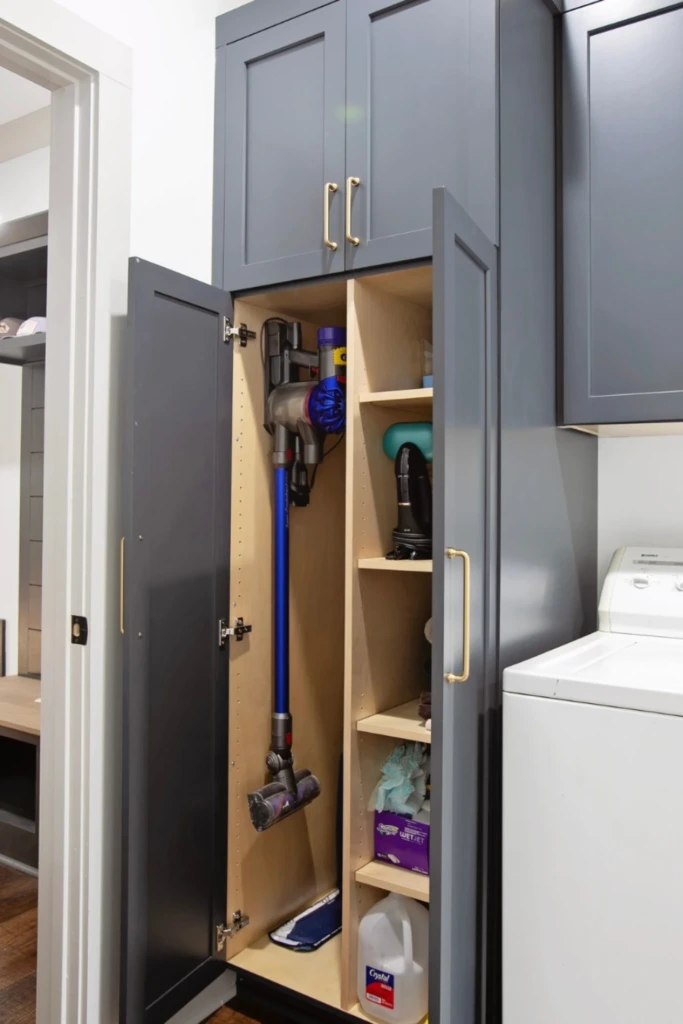
A full-height cabinet offers an attractive solution for homeowners who prefer keeping cleaning equipment out of sight.
Dedicate one vertical section to brooms, mops, and dusters. Use wall clips or interior hooks to prevent tools from tipping over when the cabinet opens.
Adjustable shelving can accommodate cleaning products, spare cloths, and other supplies alongside the long-handled equipment.
For the best results, choose a cabinet with adequate ventilation and avoid storing wet cleaning tools inside.
6. Shelved Closet Center
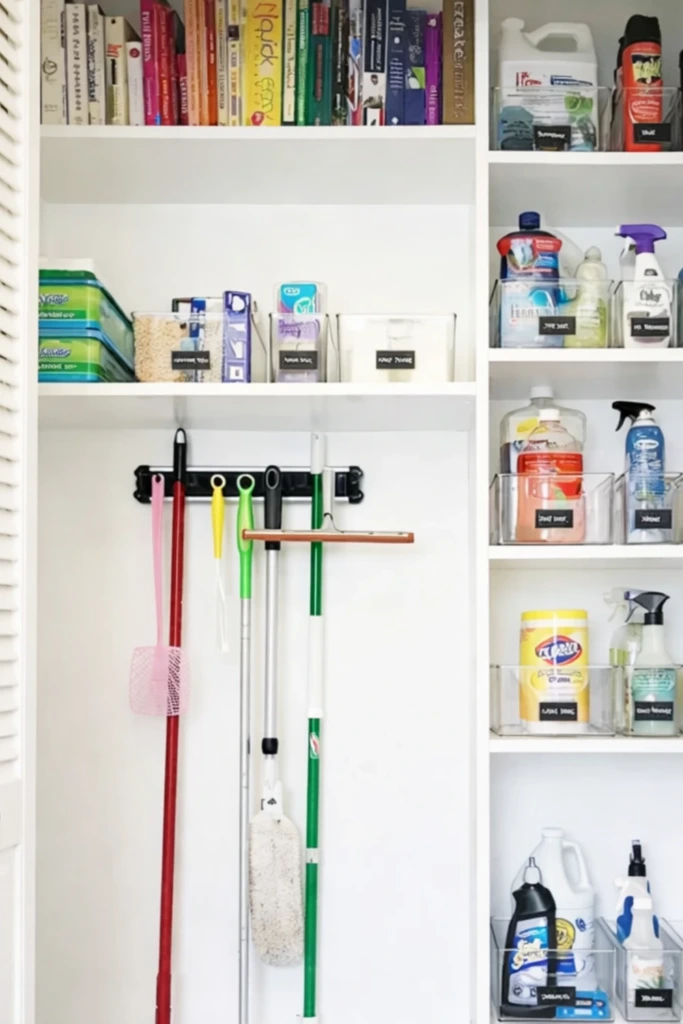
A closet with shelves on either side may have enough open space in the middle to create a dedicated cleaning-tool section.
Install a narrow organizer or a few sturdy hooks between the shelving units to hold brooms and mops vertically.
Use nearby shelves for lightweight supplies, such as microfiber cloths, cleaning brushes, and spare dustpan bags.
Keeping tall tools in the center makes them easier to retrieve without disturbing items stored around them.
7. Small Closet Zone
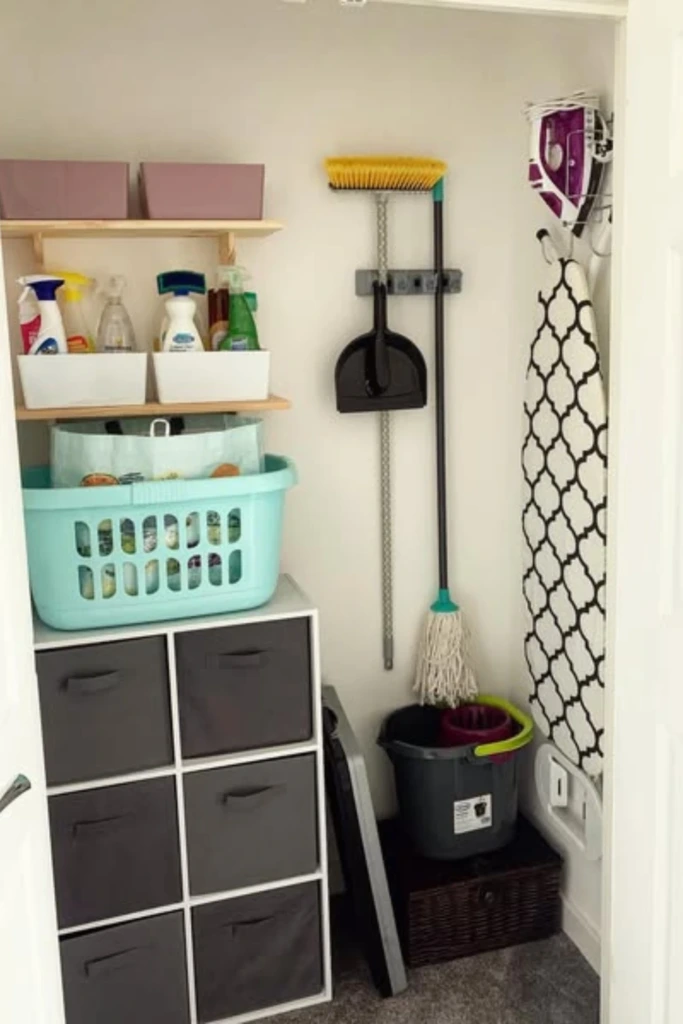
Even a compact closet can accommodate cleaning equipment when its interior is organized carefully.
Choose one side wall for a short broom rack or a series of individual hooks. This leaves the main closet area available for other household essentials.
Place a washable tray beneath the storage area to collect loose dirt from dry cleaning tools.
If the closet also contains clothing or linens, consider keeping cleaning products in a separate compartment to avoid accidental spills or contamination.
8. Pull-Out Pantry
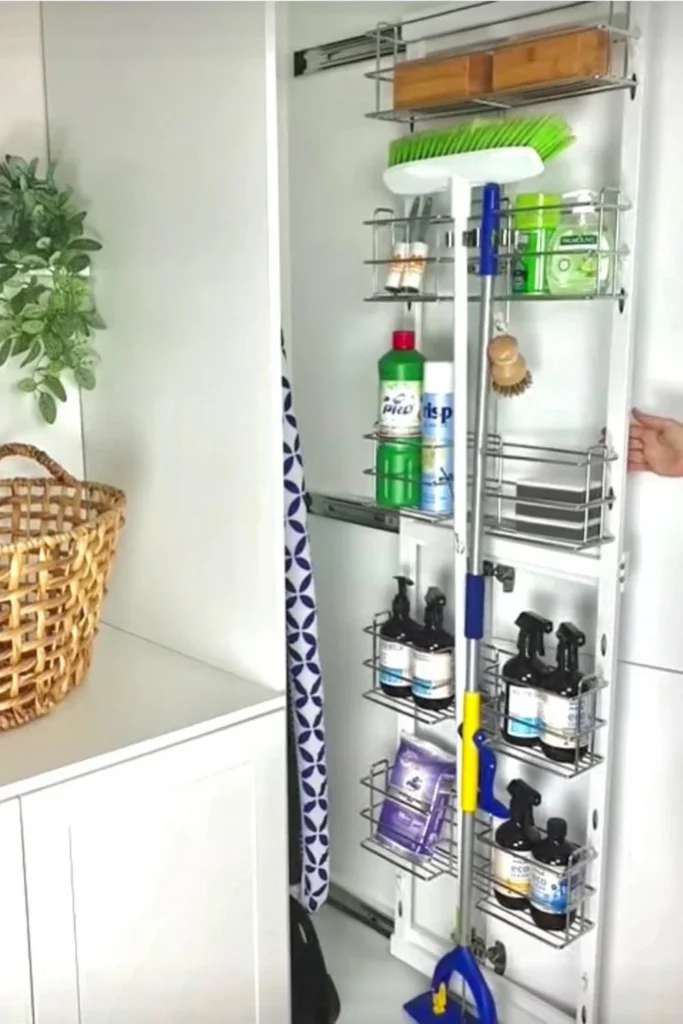
A pull-out pantry-style unit provides convenient access to cleaning equipment stored inside deep cabinetry.
This design uses sliding hardware to bring the contents forward, making it easier to retrieve long handles from otherwise awkward spaces.
A tall pull-out organizer can include holders for brooms, a compartment for a dustpan, and small baskets for cleaning accessories.
Choose heavy-duty slides rated for the loaded cabinet, and keep household chemicals separated from food storage areas.
9. Multi-Tool Rail
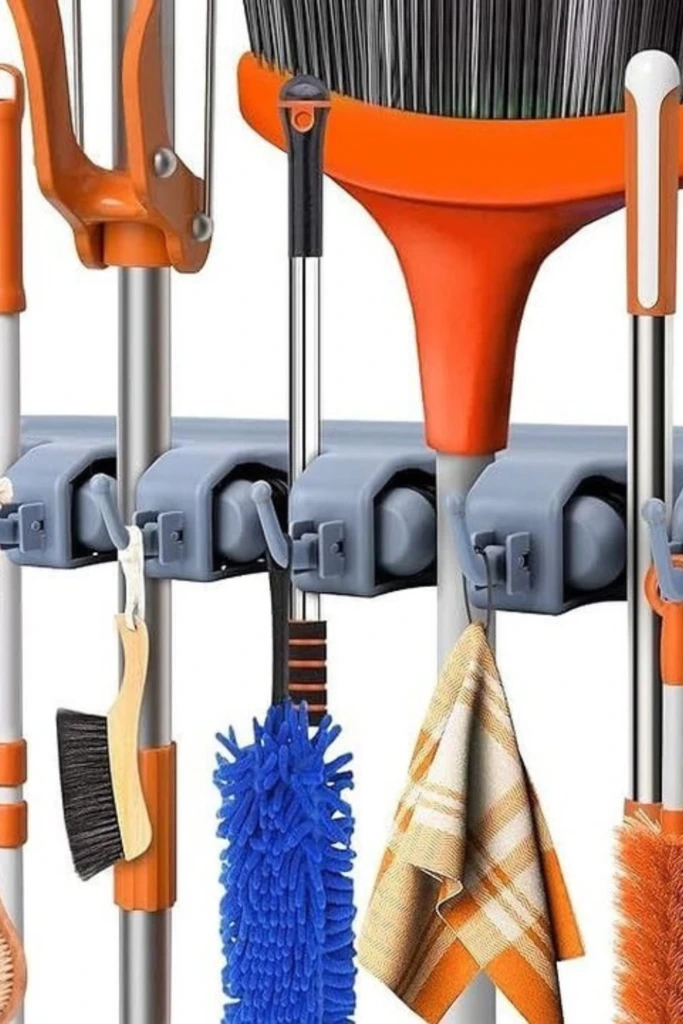
A multi-tool rail keeps several cleaning essentials organized along a single wall.
Unlike individual hooks, a rail offers a consistent arrangement that can accommodate brooms, mops, brushes, and other handled tools.
Some designs combine gripping mechanisms with movable hooks, allowing you to customize the layout.
Install the rail at a comfortable height and arrange frequently used items toward the most accessible end.
This setup works especially well for households that use multiple cleaning tools throughout the week.
10. Pantry Cabinet Slot
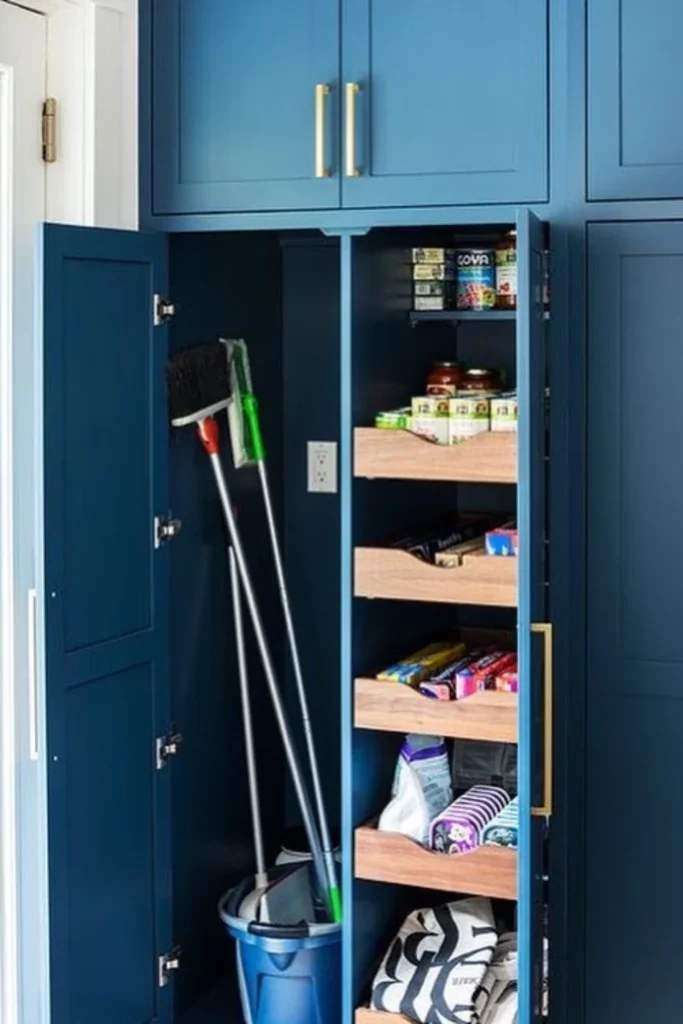
A narrow compartment inside a tall pantry cabinet can be repurposed for broom and mop storage.
The key is creating enough vertical clearance for handles while leaving sufficient space for wider cleaning heads.
A simple divider can separate cleaning tools from other stored items, while a small hook keeps a dustpan attached to the side panel.
If the pantry contains food, use a fully separated cleaning compartment and never store leaking or open chemical products beside groceries.
11. Garage Tool Strip

Garages often have plenty of unused wall space, making them ideal for storing larger cleaning equipment.
Install a durable tool strip designed to support the weight and handle sizes of your brooms, outdoor brushes, and heavy-duty mops.
Arrange tools according to their purpose, keeping outdoor cleaning equipment separate from supplies used inside the house.
A garage organizer can also accommodate squeegees, long-handled scrubbers, and other maintenance accessories.
Choose moisture-resistant materials if your garage experiences humidity or temperature fluctuations.
12. Slim Cabinet Side
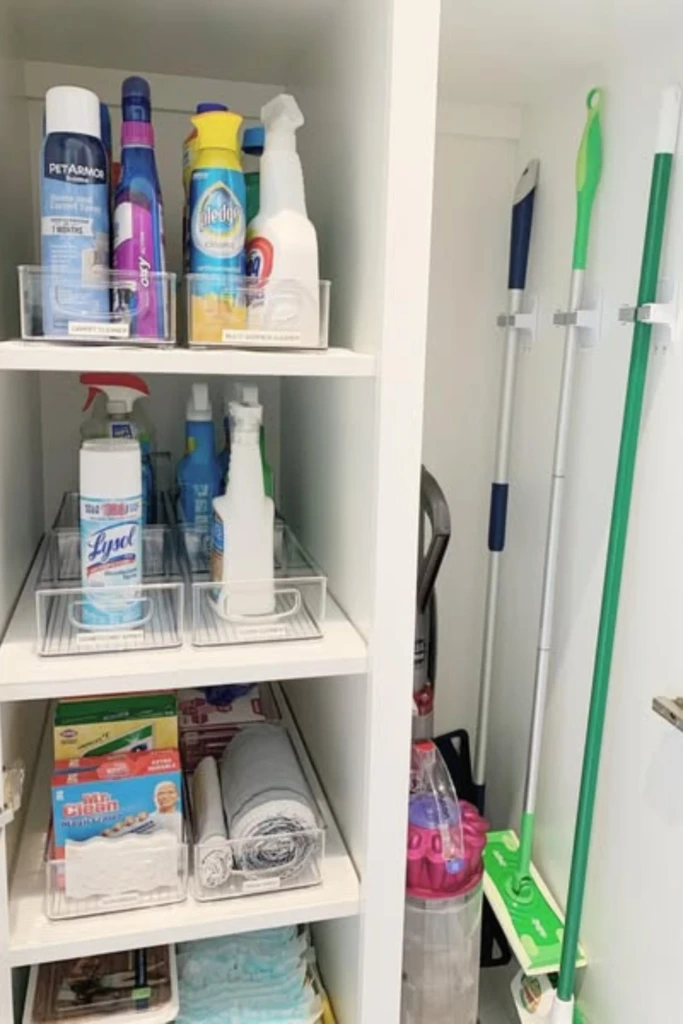
The narrow interior side of a cabinet can hold cleaning tools without requiring a complete storage redesign.
Attach compact broom clips to the cabinet wall, positioning them so the handles don't interfere with shelves or door hinges.
This approach is particularly useful in cabinets with unused vertical gaps beside fixed shelving.
Select holders that fit your tool handles securely, and use appropriate screws or cabinet-safe mounting methods.
A small adjustment like this can make previously wasted space functional.
13. Bathroom Wall Line
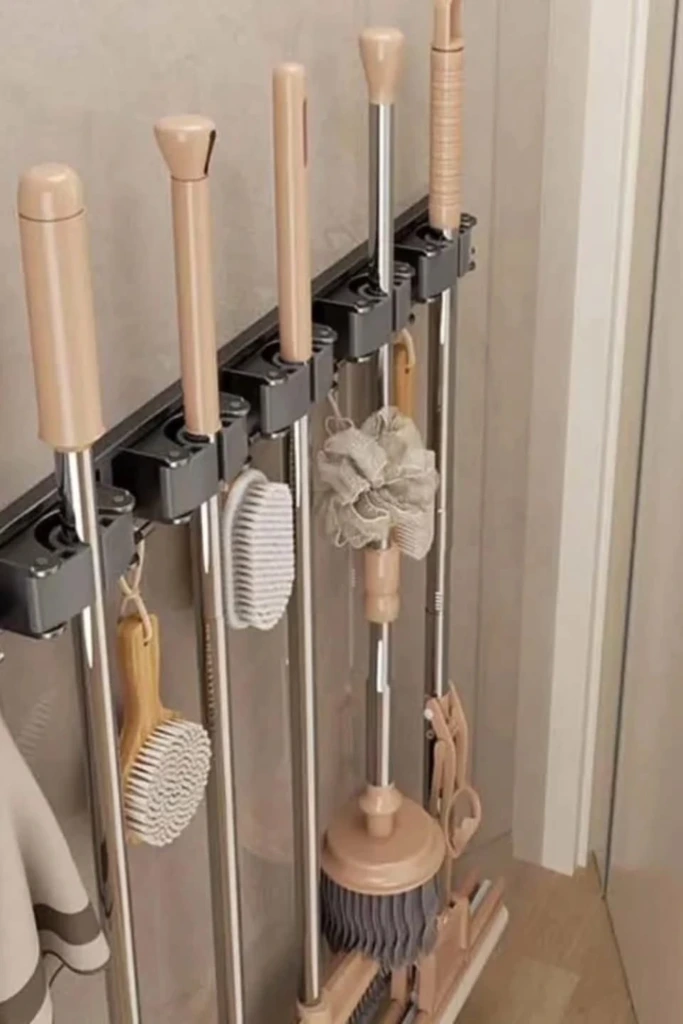
Bathrooms can benefit from a dedicated wall organizer for cleaning tools used specifically in that room.
Mount a slim holder behind the door, beside a utility cupboard, or along an unused wall section.
Keeping bathroom cleaning equipment separate from kitchen supplies helps reduce the risk of transferring dirt between areas.
Choose rust-resistant hardware that can withstand moisture, and allow mop heads and brushes to dry fully between uses.
Avoid positioning the organizer where it could obstruct movement or create a tripping hazard.
14. Shiplap Wall Mount
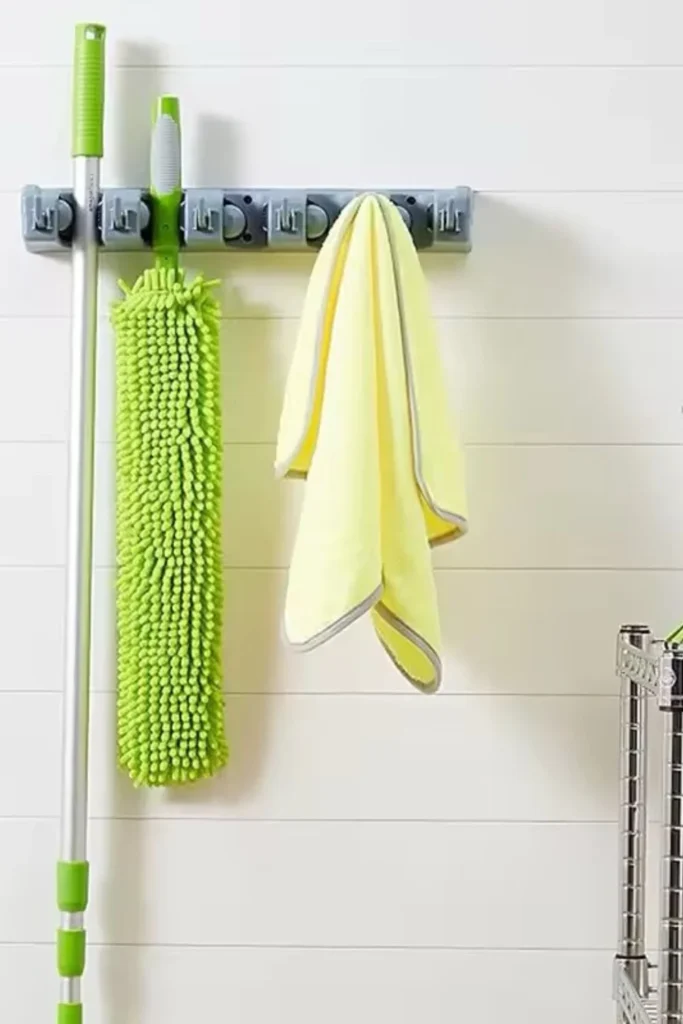
A broom holder mounted against shiplap or decorative wall paneling can combine practical storage with a neat, coordinated appearance.
Choose a compact rail in a finish that complements the surrounding room, such as matte black, brushed metal, or natural wood.
For a secure installation, fasten the organizer into wall studs or suitable structural backing rather than relying on thin decorative panels alone.
This idea works particularly well in farmhouse-style laundry rooms and mudrooms where functional storage is part of the overall design.
15. Closet Wall Stack
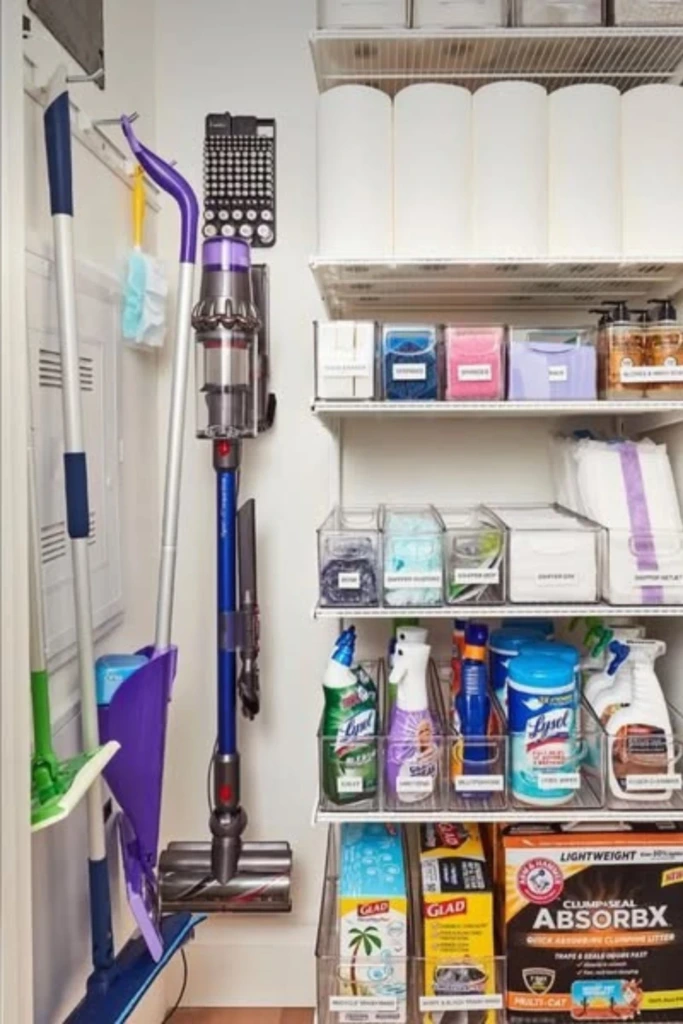
Closets with multiple shelves often have unused vertical strips along their side walls.
These narrow areas can support a series of broom clips arranged at different heights.
Staggering the holders can help prevent bulky mop heads and broom bristles from overlapping.
Keep heavier cleaning tools lower when practical, and reserve higher positions for lightweight dusters or small accessories.
This arrangement makes efficient use of closet walls while preserving shelf space for other supplies.
16. Built-In Utility Bay
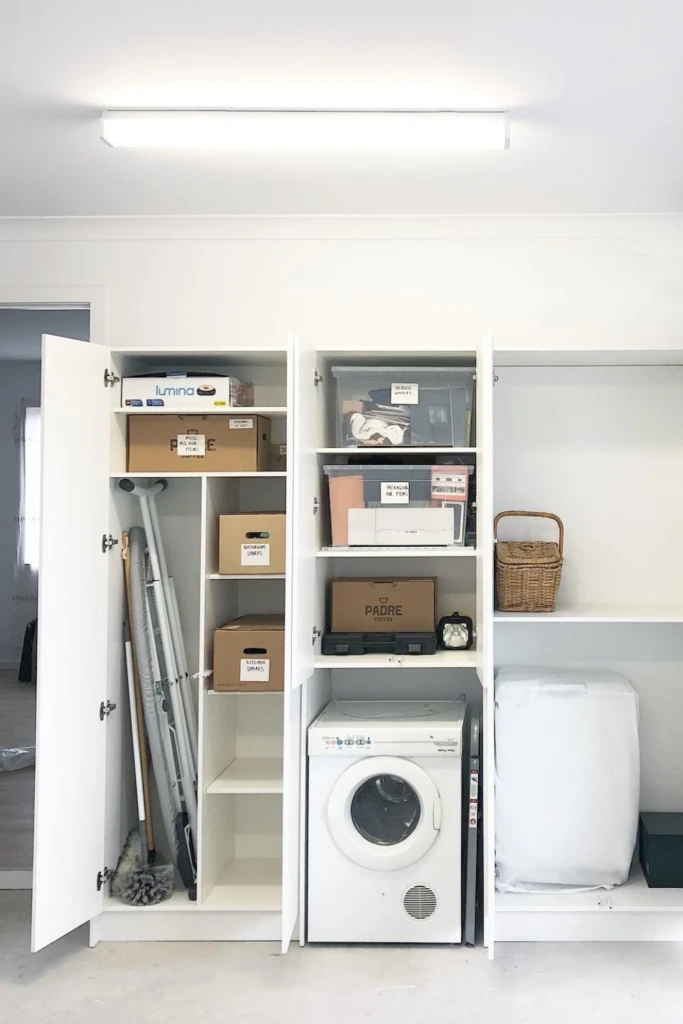
A built-in utility bay provides a permanent storage solution for homes with dedicated laundry or cleaning areas.
Design a tall, narrow compartment specifically for brooms, mops, and other long-handled tools.
Include adjustable clips, a washable base, and a nearby shelf for cleaning accessories.
If the compartment has doors, consider ventilation openings to reduce trapped moisture.
A built-in design can be especially useful during a renovation because the storage dimensions can be planned around the cleaning equipment you already own.
17. Pantry Door Tower
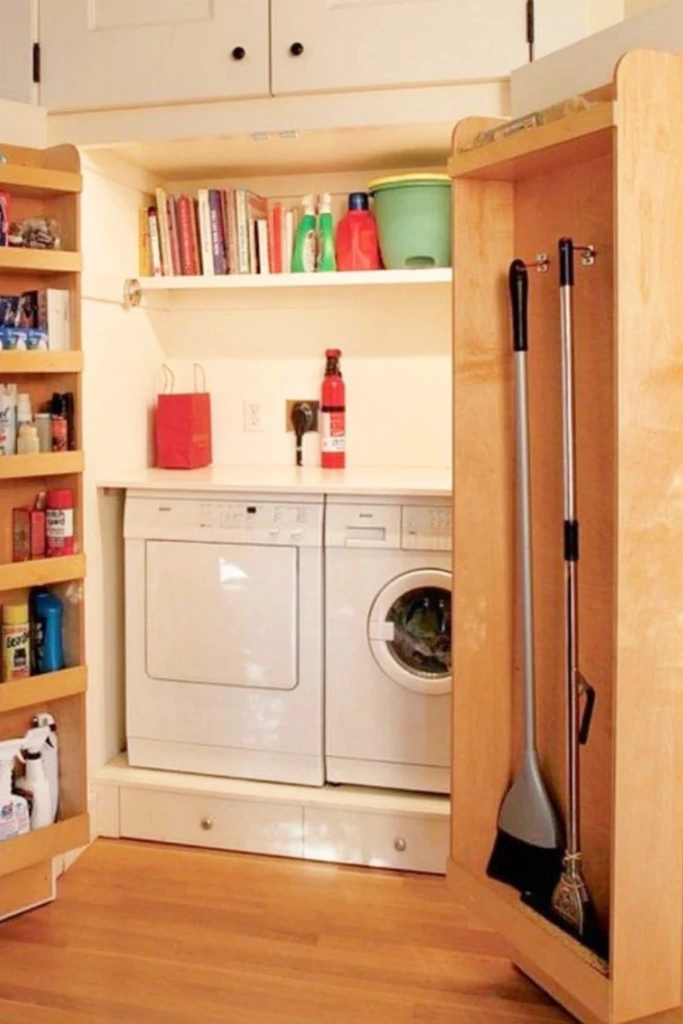
A tall pantry-style door can become a compact cleaning-tool organizer with the addition of vertical holders.
Install several slim clips along the inside surface, allowing broom and mop handles to sit close to the door.
Before mounting the holders, check the door's weight capacity and confirm that the tools won't strike the cabinet shelves.
Lightweight cleaning equipment is best suited to this arrangement.
For improved stability, consider using multiple mounting points rather than relying on a single hook for each tool.
18. Pantry Wall Hooks
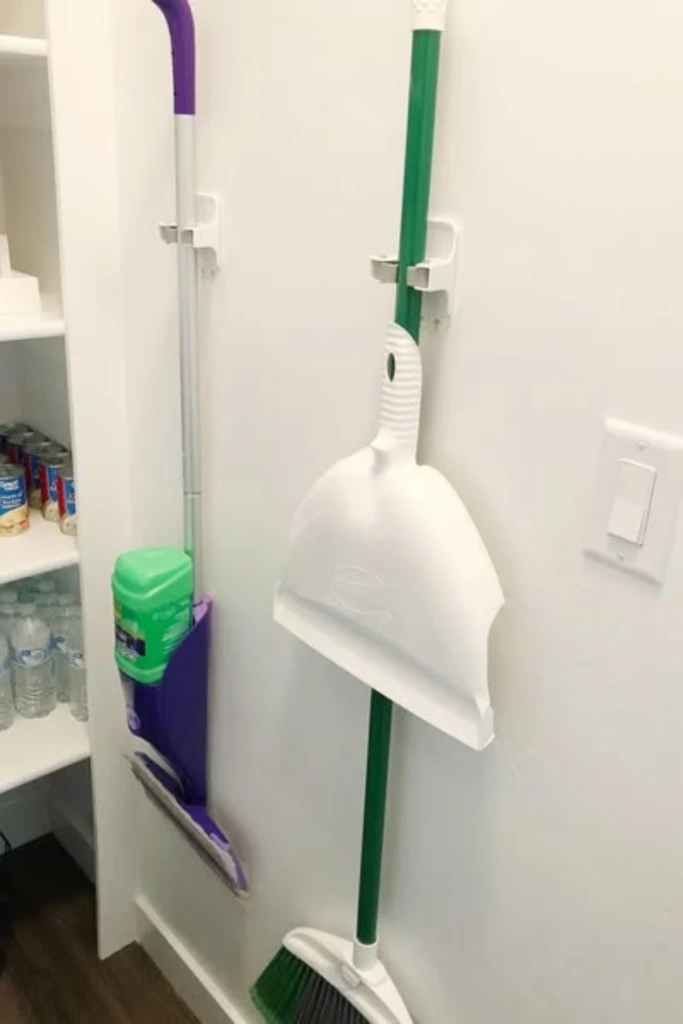
Individual wall hooks offer an affordable and flexible alternative to larger storage racks.
Install hooks along an unused pantry or utility wall, adjusting their positions to suit the length and shape of each cleaning tool.
Brooms with hanging holes can be suspended directly, while tools without loops may require clips or added hanging straps.
Leave enough clearance beneath the hooks to keep broom bristles from being compressed against the floor.
For convenience, place the most frequently used equipment within comfortable reach.
19. Narrow Cabinet Slot
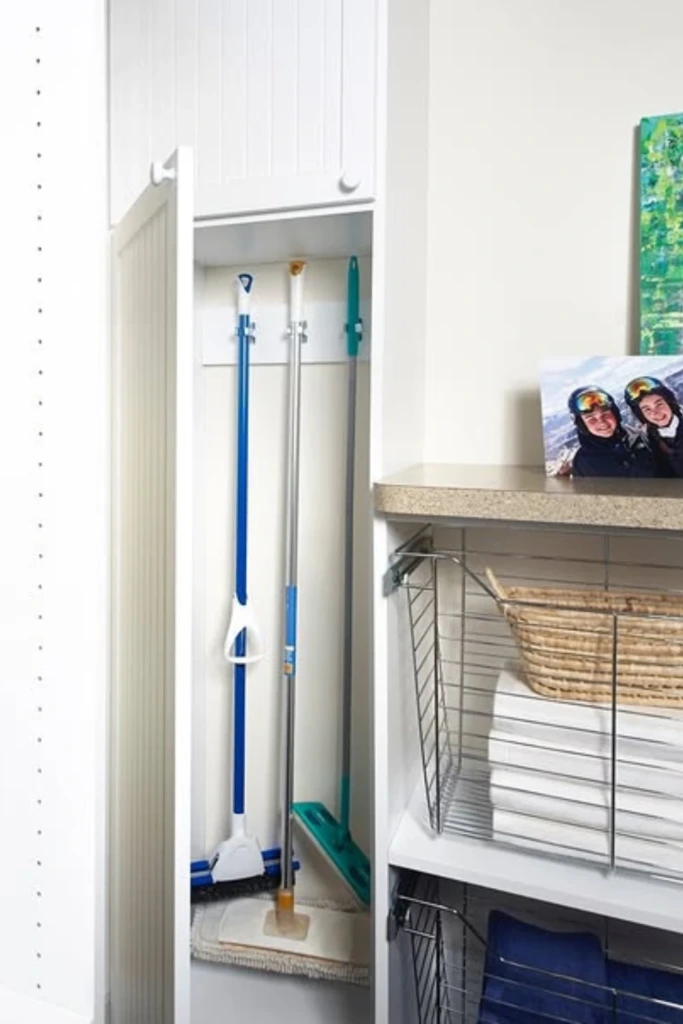
A slim gap between cabinets can provide a surprisingly useful home for long-handled cleaning supplies.
If the space is tall enough, install a narrow organizer or create a dedicated vertical compartment.
This solution is particularly effective in kitchens and laundry rooms where standard cabinets leave small unused sections.
Measure the widest part of each cleaning tool, not just the handle, before deciding whether the gap is suitable.
A removable tray at the bottom can make cleaning the compartment easier.
20. Entryway Clip Rail
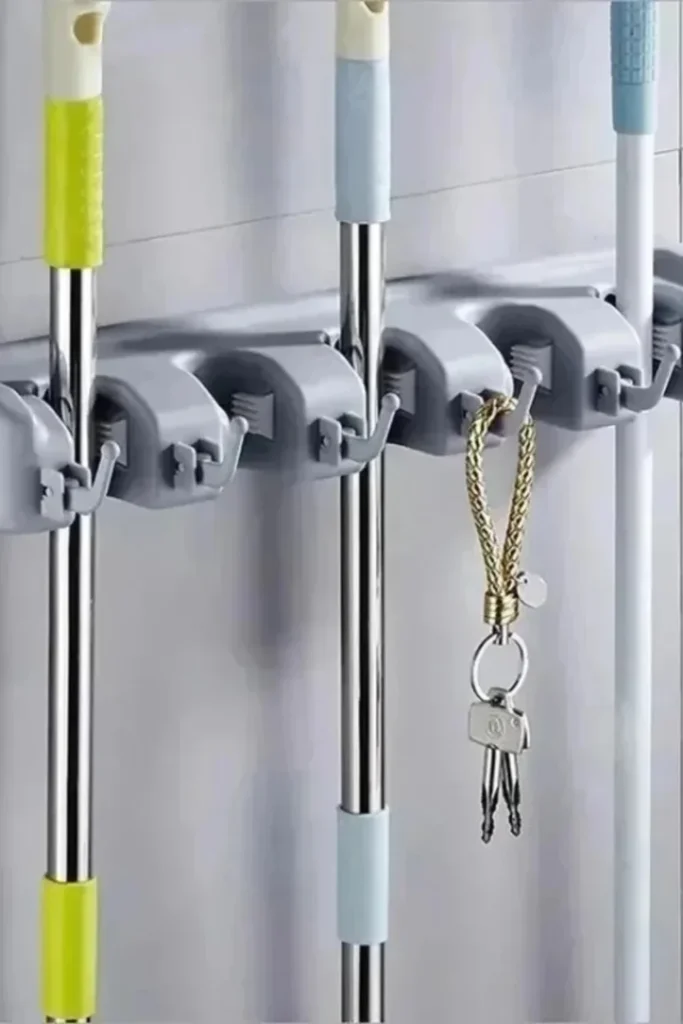
An entryway or mudroom clip rail keeps cleaning tools close to areas where dirt is frequently brought indoors.
Mount a compact rail on an unused wall, preferably near a utility cabinet or other household storage.
This location works well for entrance brooms, dustpans, and tools used to clean patios or doorsteps.
Choose a position that doesn't interfere with coats, shoes, or everyday movement through the entryway.
Matching the organizer's finish to existing hooks and hardware can help the storage area look intentional rather than crowded.
21. Modular Clip System
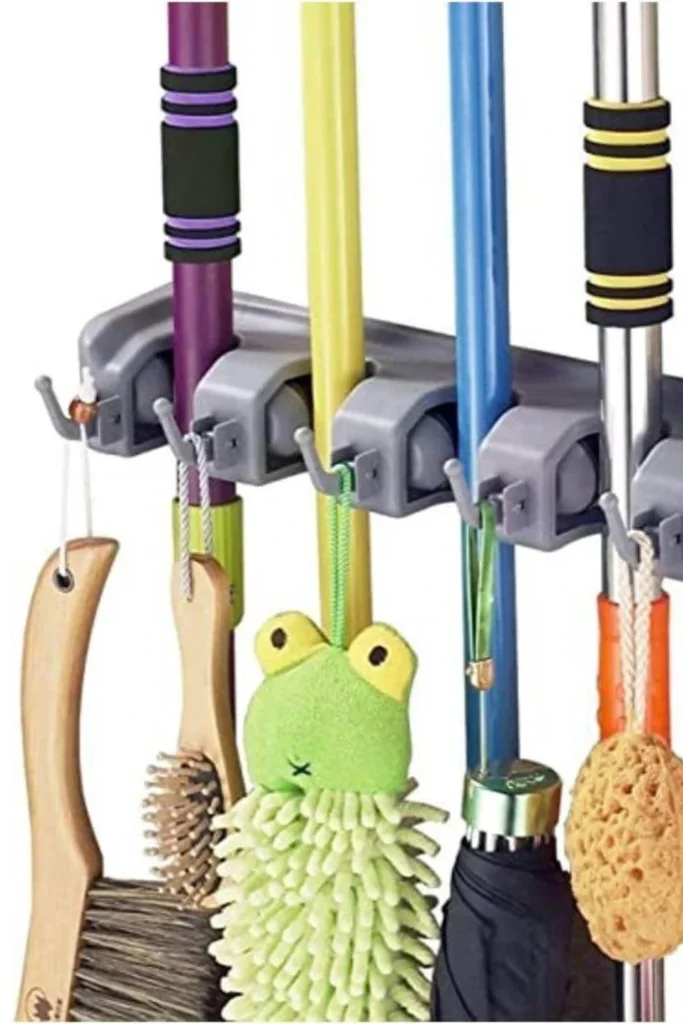
A modular clip system is ideal for households whose cleaning equipment changes over time.
Instead of using one fixed rack, install separate clips that can be repositioned or expanded as needed.
This flexibility allows you to accommodate different handle sizes, add new tools, or rearrange the storage area without replacing the entire organizer.
Modular systems are particularly practical in garages, utility rooms, and shared cleaning spaces.
Look for durable components with reliable mounting hardware and a suitable weight rating.
22. Full Utility Cabinet
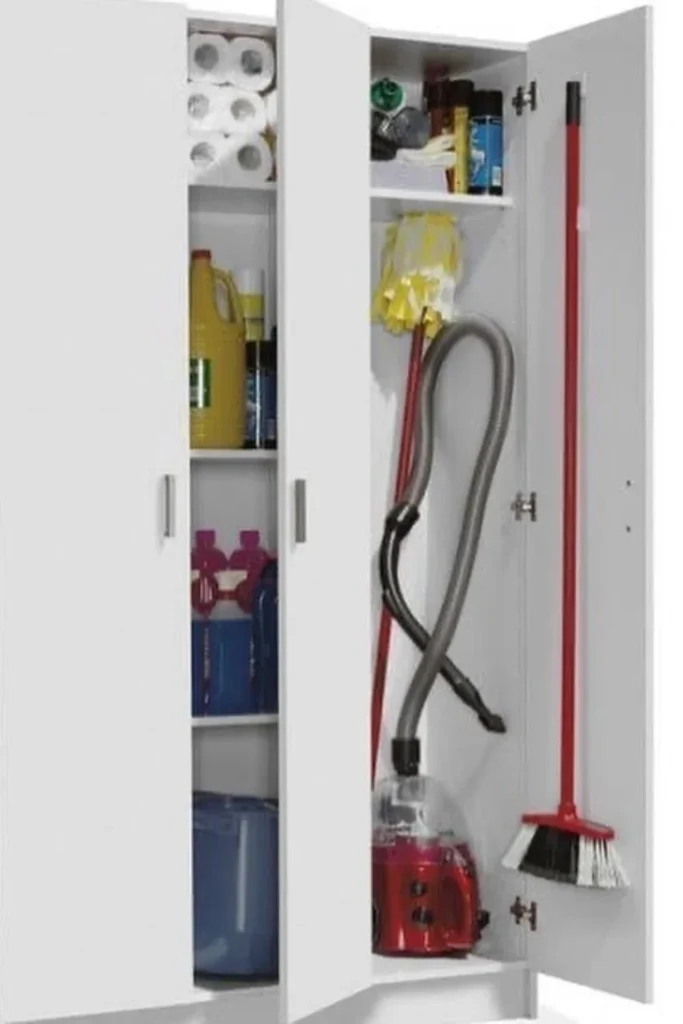
A dedicated utility cabinet brings cleaning equipment, accessories, and household supplies together in one organized location.
Choose a tall cabinet with enough clearance for long handles and adjustable shelves for smaller items.
Use clips or hooks to secure brooms and mops, while baskets help organize gloves, brushes, and cleaning cloths.
Store chemicals in their original labeled containers, away from children and pets, and avoid placing incompatible cleaning products together.
A cabinet with a ventilated compartment for dry tools can provide convenient storage without leaving equipment visible throughout the room.
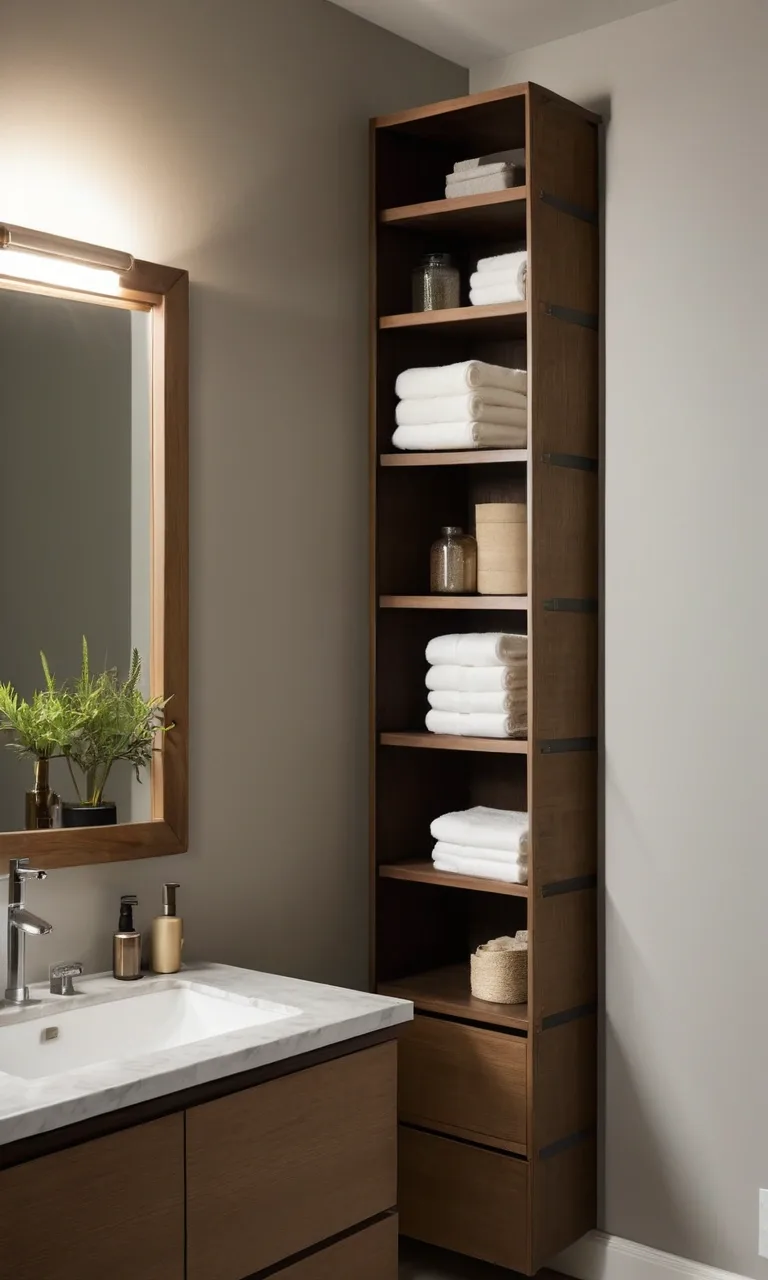
23. Open Utility Tower
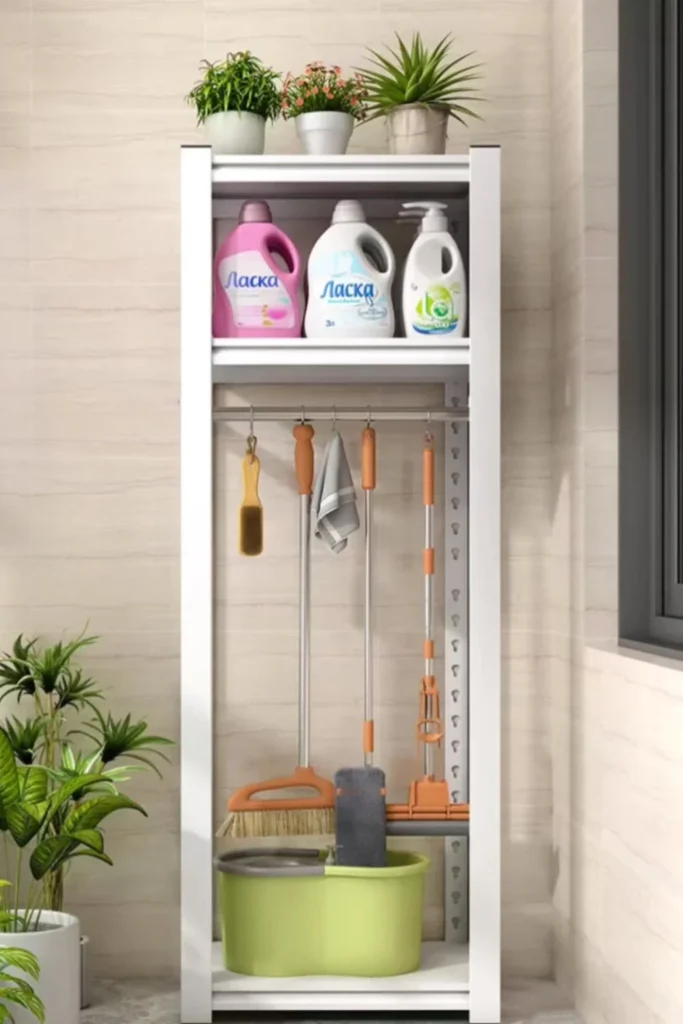
An open utility tower offers easy access to cleaning supplies without requiring cabinet doors.
Choose a narrow shelving unit with enough height for long-handled tools, then add side-mounted clips or hooks.
Use lower shelves for buckets and storage baskets, keeping frequently used accessories at a comfortable height.
Because the design remains open, it can provide better airflow around recently cleaned equipment.