29 Craft Room Organization Ideas for 2026
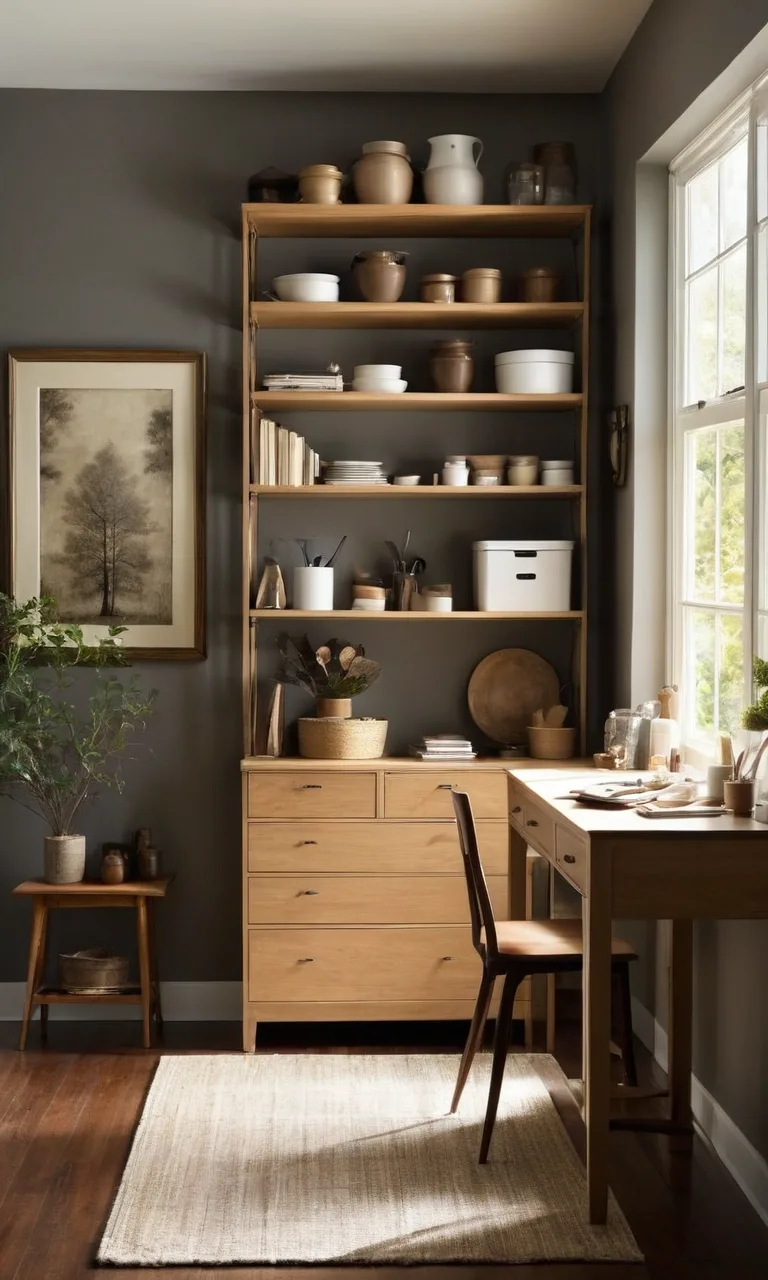
A well-organized craft room can make every creative project more enjoyable. Whether you love painting, sewing, scrapbooking, or making handmade decorations, having a dedicated place for your supplies helps you work comfortably without constantly searching for materials.
The challenge is finding enough storage for everything from tiny beads and buttons to large paper collections and bulky equipment. Fortunately, you don't need an enormous room or expensive furniture to create a functional crafting space.
These 27 craft room organization ideas offer practical ways to manage supplies, use available space efficiently, and create a workspace that feels inviting. With a few thoughtful changes, even a small crafting corner can become an organized and inspiring place to create.
1. Smart Ideas for Storing Supplies
Organizing craft supplies starts with understanding which materials you use most frequently. Everyday essentials such as scissors, brushes, adhesives, and markers should stay close to your work surface, while occasional-use supplies can be stored in cabinets or higher shelves.
Transparent containers make it easier to identify materials without opening multiple boxes. Wall shelves, divided drawers, and hanging organizers can also free up valuable desk space.
Consider separating supplies by activity, material, or color, depending on how you prefer to work. A simple storage system that matches your crafting habits will be much easier to maintain over time.
2. Industrial Shelf Wall
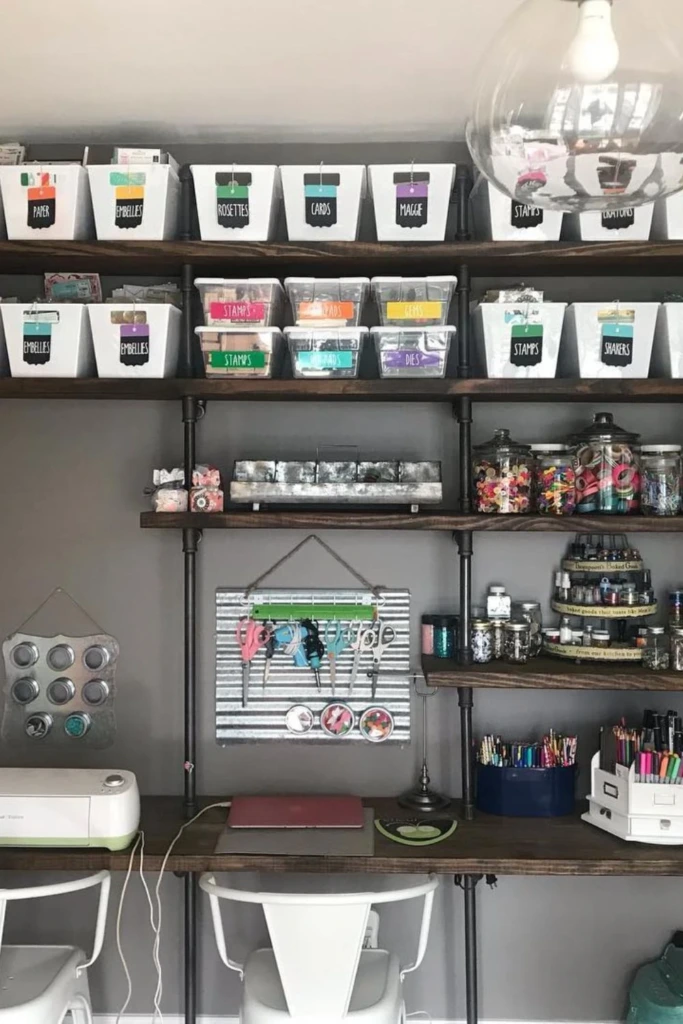
An industrial-style shelving wall provides generous storage while giving your craft room a modern, creative appearance. Combining sturdy wooden shelves with metal brackets creates a practical arrangement for organizing materials of different sizes.
Use the upper shelves for lightweight containers, decorative pieces, and supplies you don't need daily. Keep frequently used tools and materials at a comfortable reaching height.
Small labeled boxes can hold stamps, crafting accessories, and miscellaneous items. For a coordinated appearance, choose containers in similar colors or materials.
Secure the shelving properly to the wall and place heavier supplies on lower levels to keep everything stable and accessible.
3. Thread Rack Display
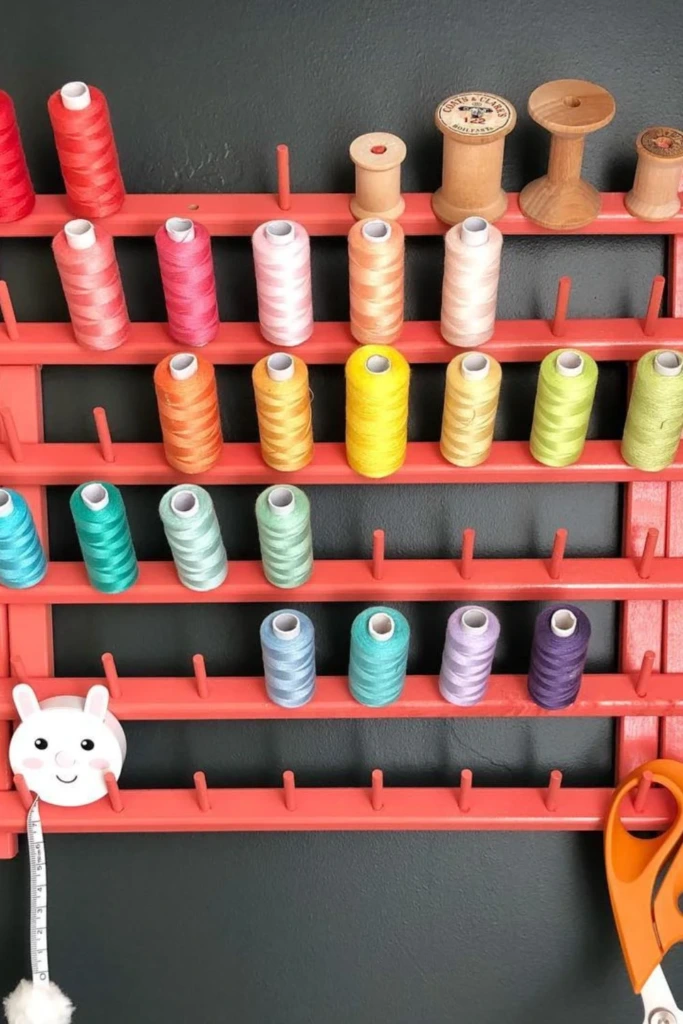
A dedicated thread rack is an excellent addition to any sewing or embroidery workspace. Instead of keeping spools in crowded drawers, arrange them on a wall-mounted holder where individual colors are easy to identify.
Organizing thread by shade, thickness, or type makes choosing the right spool much quicker. It also helps you notice when a frequently used color is running low.
Position the rack near your sewing machine, away from prolonged direct sunlight that could fade thread colors. A painted wooden frame can add personality while keeping your sewing supplies beautifully organized.
4. Clear Jar Storage
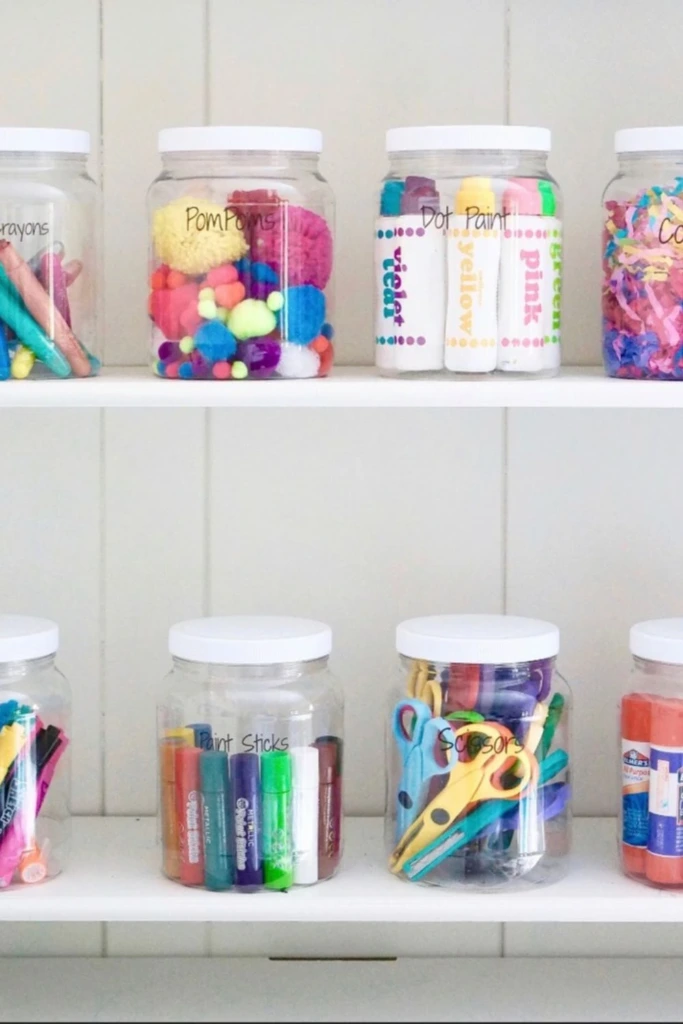
Clear jars offer an affordable way to manage small crafting materials without hiding them from view. They work particularly well for pom-poms, buttons, beads, decorative stones, and other lightweight accessories.
Choose containers with wide openings so you can comfortably reach inside. Matching jars create a consistent appearance, while simple labels make it easier to distinguish similar-looking materials.
Arrange them on a shelf or inside a cabinet according to how often you use their contents. For heavier supplies or rooms used by children, shatter-resistant plastic containers are a safer alternative to glass.
5. Labeled Plastic Bins
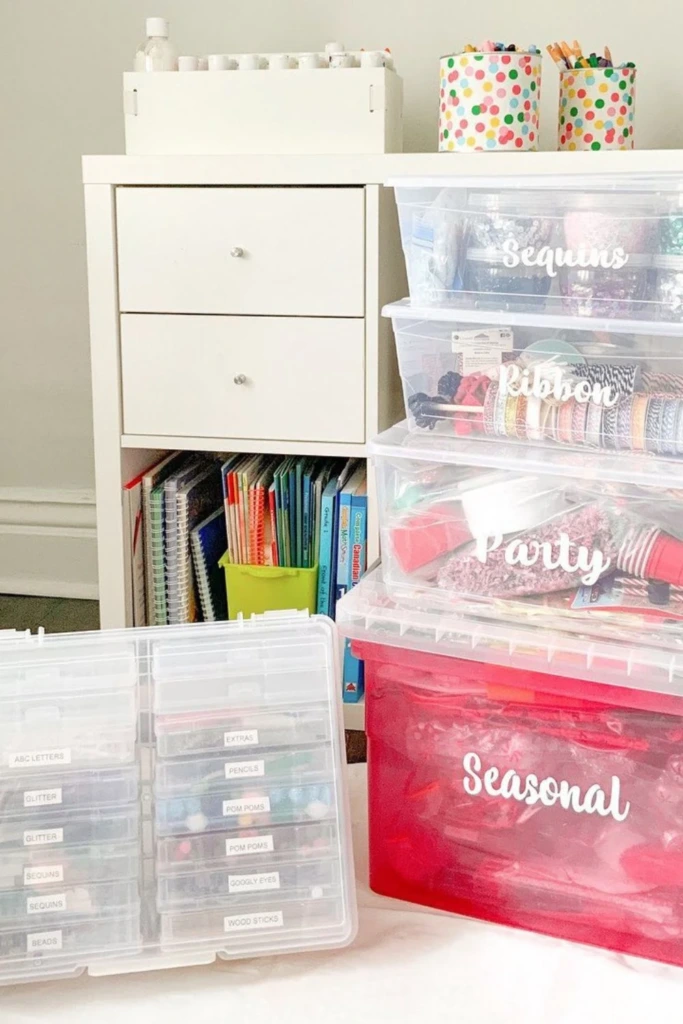
Plastic storage bins are useful for keeping larger craft collections separated and protected. They can accommodate fabric scraps, seasonal decorations, paper supplies, ribbons, and unfinished projects.
Assign each container a specific category and label it clearly on the front. This prevents unrelated materials from getting mixed together and makes cleanup much simpler.
Stackable bins are especially helpful when floor space is limited. Choose sizes that fit your shelving and avoid filling them so heavily that they're difficult to lift.
Keeping a little extra room inside each bin also makes it easier to add new supplies without reorganizing everything.
6. Quilt Ladder Rack
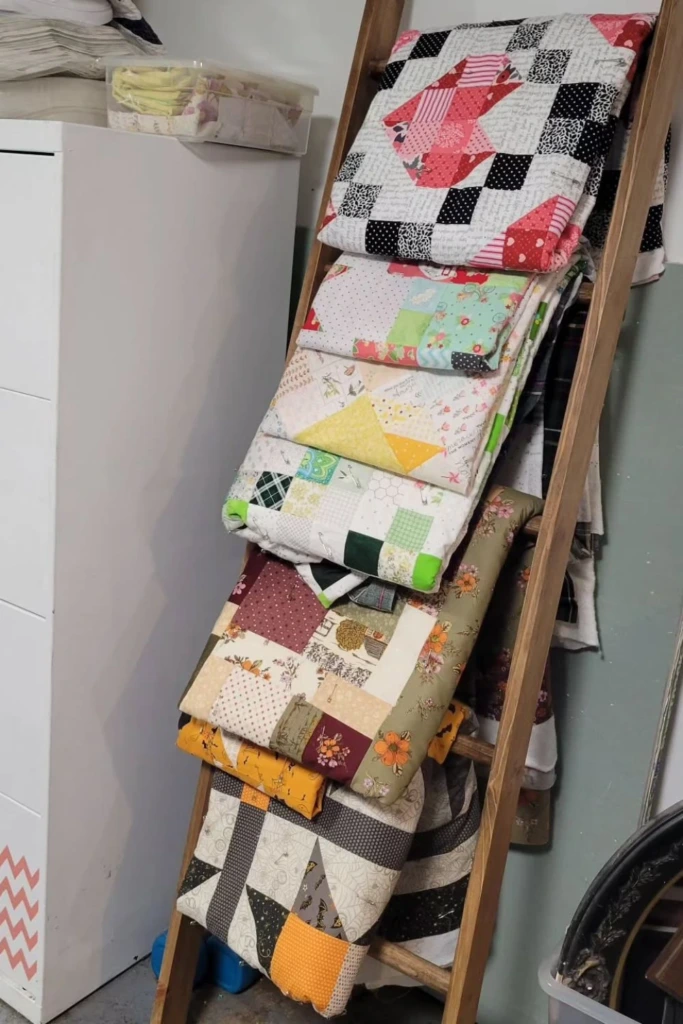
A wooden ladder rack creates an attractive storage solution for quilts, blankets, and finished textile projects. Draping folded pieces across separate rungs keeps them visible while adding warmth and texture to the room.
This arrangement is particularly useful for displaying completed work that you want to enjoy rather than store away.
Choose a ladder with smooth, clean surfaces to prevent delicate fabrics from snagging. Position it against a stable wall where it won't interfere with movement around your crafting area.
For valuable or long-term quilt storage, consider breathable fabric bags or acid-free storage materials instead of leaving pieces exposed to dust and sunlight.
7. Ribbon Box Storage
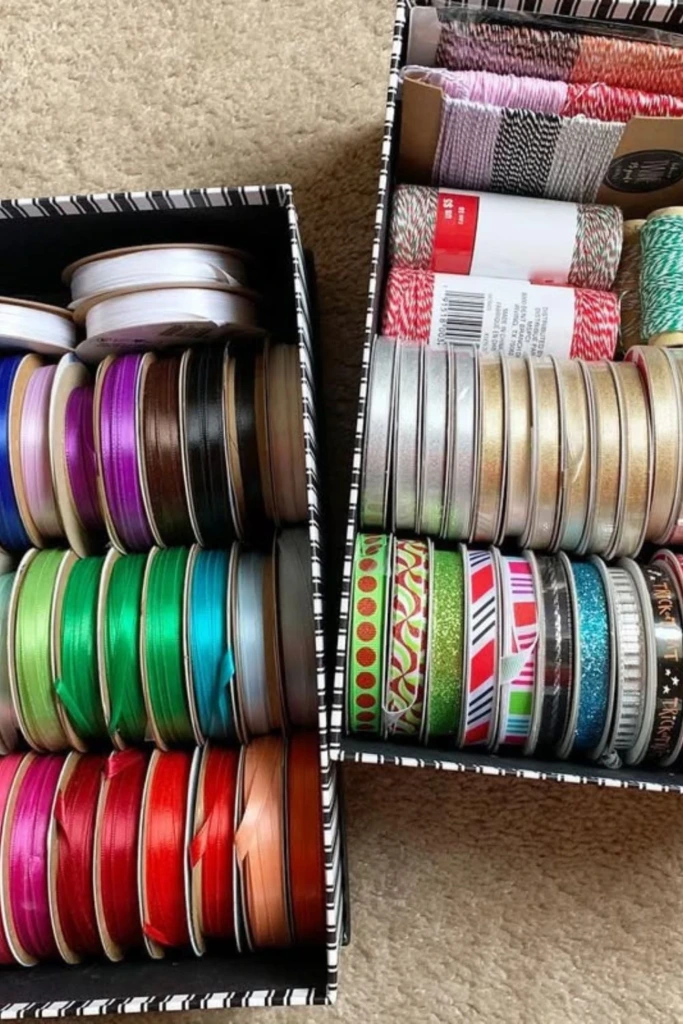
Ribbon collections can become difficult to manage when spools roll around inside drawers. Shallow storage boxes provide a straightforward solution by keeping different ribbon styles together in one place.
Separate ribbons by width, color, or material, and position the spools so their ends remain easy to locate.
For partially used ribbons, secure loose ends with a small piece of removable tape or a reusable spool clip. This helps prevent tangles without damaging the material.
Place the boxes on open shelves or inside drawers near your gift-wrapping or decorating station.
8. Colorful Craft Desk
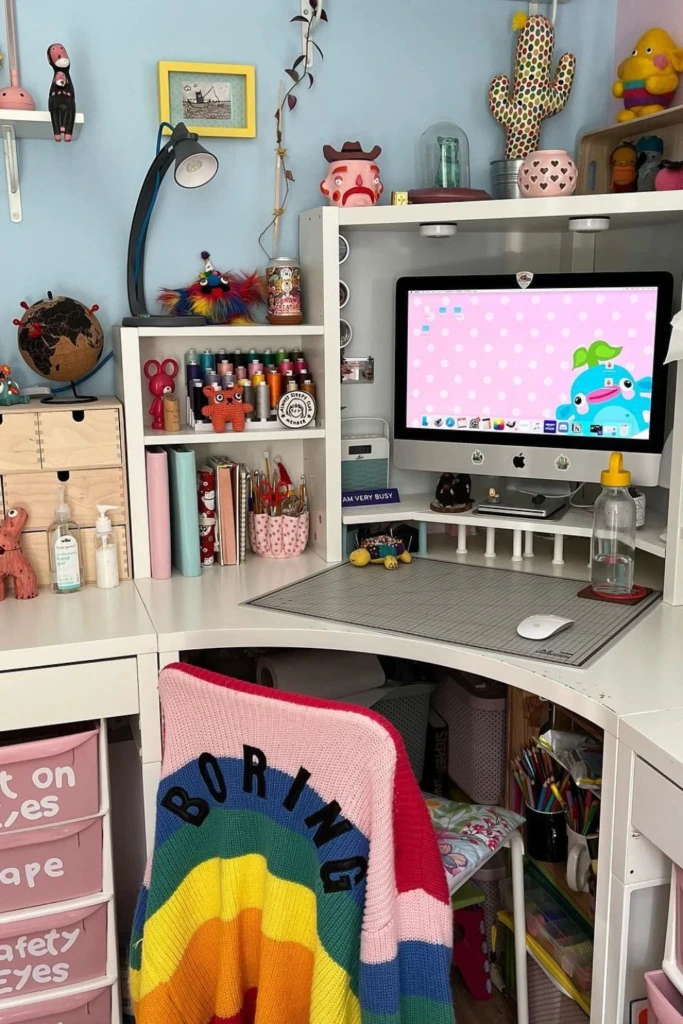
A colorful craft desk can make your workspace feel cheerful while providing an organized home for everyday supplies. Start with a comfortable work surface and add small storage units that suit the crafts you enjoy.
Desktop drawers can hold clips, adhesives, stickers, and other frequently used accessories. Nearby cubbies provide additional space for notebooks, tools, and materials.
Introduce color through organizers, artwork, or decorative accessories rather than overcrowding the desk itself.
Most importantly, leave enough clear surface area for cutting, assembling, and working on projects. A visually appealing desk should still be practical to use.
9. Sleek Rail System
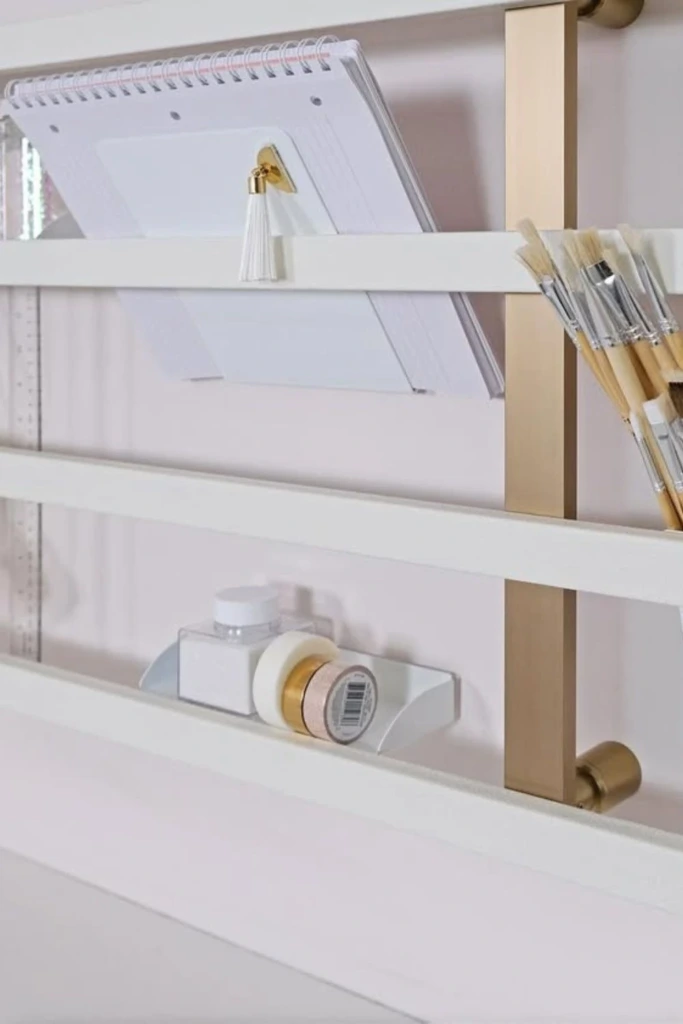
Wall-mounted rails are a clever option for craft rooms with limited countertop space. They allow you to arrange hanging containers, hooks, and small baskets along an otherwise unused section of wall.
Install rails above your desk to hold brushes, pens, scissors, and lightweight crafting accessories.
The biggest advantage is flexibility. You can reposition containers whenever your storage needs change without replacing the entire system.
Choose rails and attachments designed to work together, follow their weight limits, and make sure the installation is secure before adding supplies.
10. Ribbon Scraps Jar
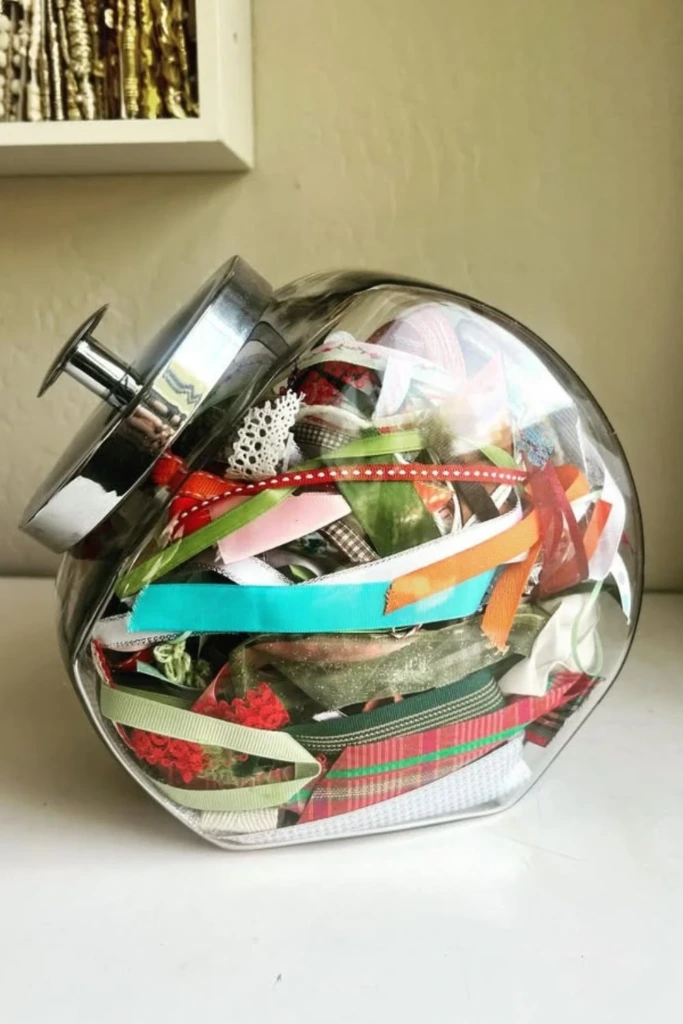
Short ribbon pieces often accumulate after gift wrapping, sewing, and decorative projects. Rather than throwing away usable leftovers, collect them in a transparent container.
A wide-mouth jar makes it easy to add scraps and browse through different colors and patterns.
Keep longer pieces loosely rolled or folded to reduce tangling. Smaller offcuts can be used for handmade cards, bookmarks, tags, and miniature decorations.
If your collection grows too large, divide scraps into separate containers based on length or material. This keeps the system useful rather than creating another cluttered storage spot.
11. Hanging Shelf Hooks
A compact wall shelf with hooks provides two types of storage in one convenient location. The shelf can support small containers and decorative supplies, while the hooks underneath hold lightweight tools and hanging accessories.
This design works particularly well for jewelry-making areas where chains, cords, and necklaces can easily become tangled.
Use individual hooks to separate materials, and reserve the shelf for bead containers, small trays, or commonly used tools.
Install the unit near your crafting table but high enough that hanging objects won't interfere with your work.
12. Ink Pad Storage
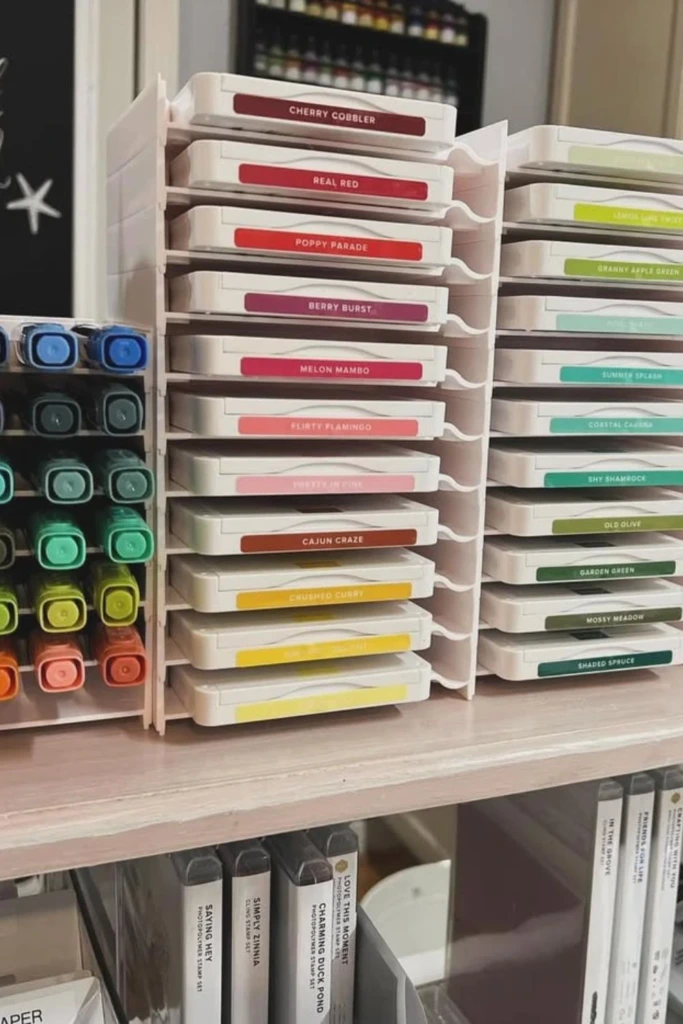
Stamping and card-making enthusiasts can benefit from a dedicated organizer for ink pads. A divided shelf or purpose-built rack allows you to separate different colors and keep the collection easy to browse.
Arrange pads by color family or ink formulation, such as pigment, dye, or specialty ink. Labels on the visible edges can help you identify shades without removing every pad.
Follow the manufacturer's storage instructions, since some ink pads have specific orientation recommendations.
Keeping inks away from excessive heat and direct sunlight can also help maintain their quality.
13. Paint Drawer Inserts
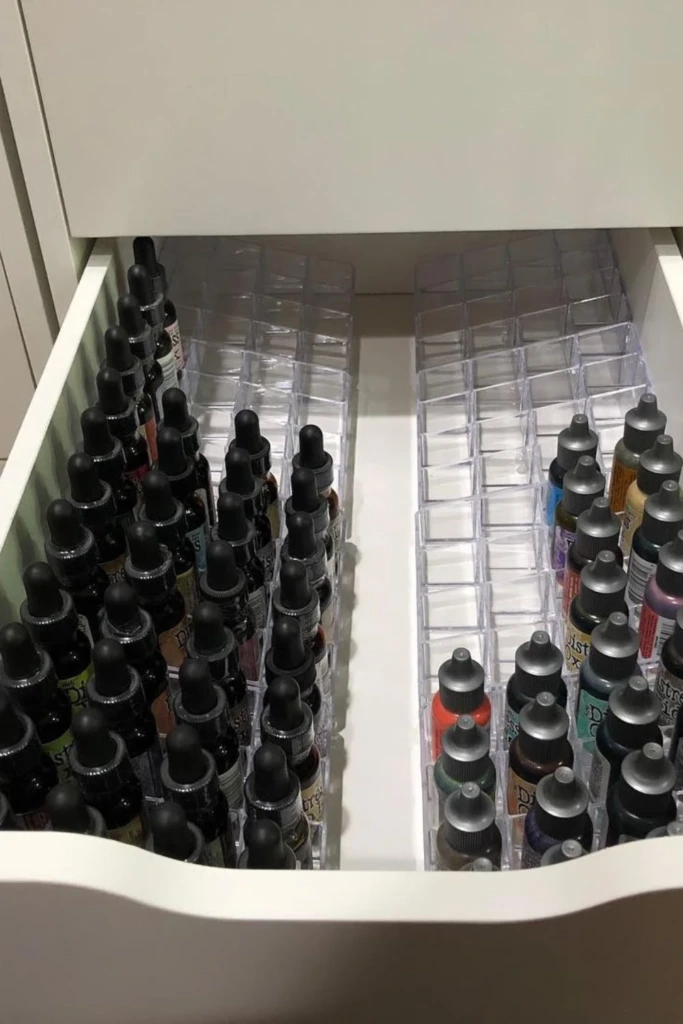
Drawer inserts are ideal for controlling collections of small paint bottles, ink containers, and crafting mediums.
Instead of allowing containers to shift around whenever you open a drawer, use adjustable dividers to create individual sections.
Group supplies according to paint type, color, or project use. Make sure containers are tightly closed and stored in the orientation recommended by their manufacturers.
A wipeable drawer liner adds protection against minor leaks and makes cleanup easier.
Before buying new inserts, measure the drawer's interior dimensions and the height of your tallest bottles to ensure everything fits comfortably.
14. Jar Wall Storage
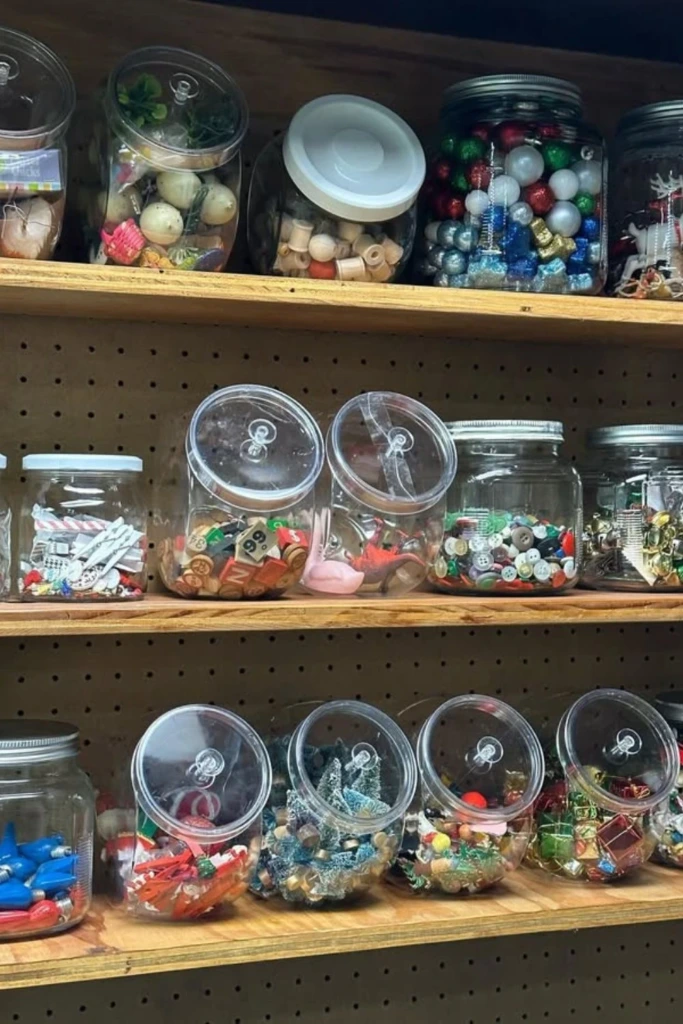
A wall of organized jars can turn ordinary craft materials into an attractive storage feature. Open shelving filled with transparent containers works especially well for buttons, beads, clips, and decorative embellishments.
Choose containers that fit securely on the shelves and arrange them in a way that allows easy access.
You might group jars by material on one shelf and by color on another. This creates a display that is both practical and visually interesting.
Avoid placing heavy glass jars on narrow or unstable shelves. If you prefer angled containers, use holders specifically designed to prevent them from rolling or falling.
15. Paper File Shelf
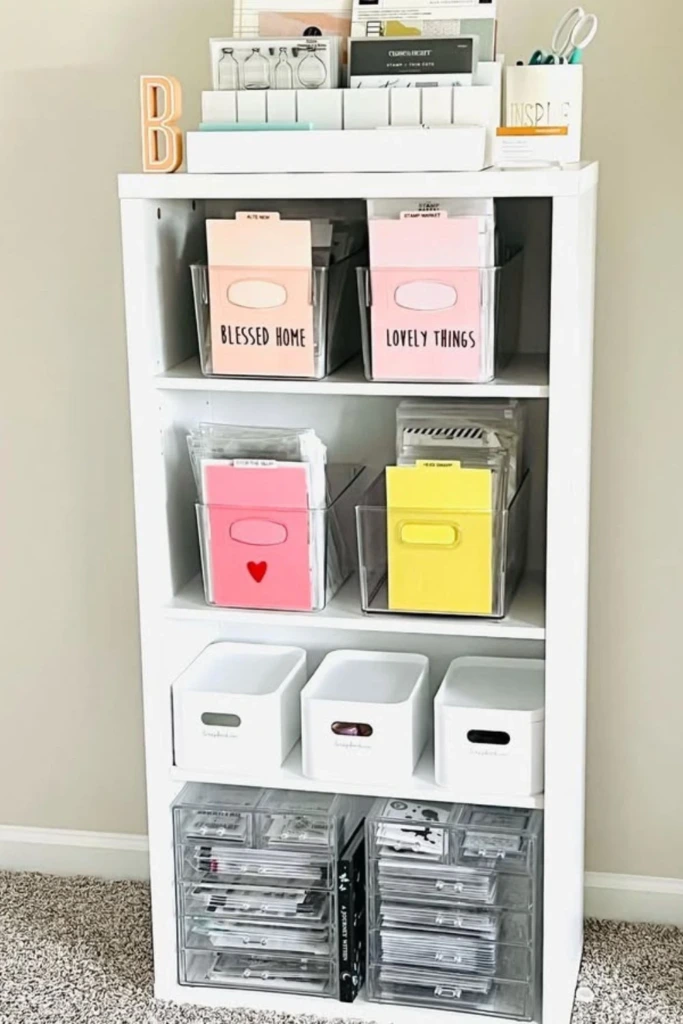
Paper crafting often involves managing different sheet sizes, colors, and textures. A vertical filing shelf helps separate these materials while keeping them easy to browse.
Use labeled folders or upright organizers for cardstock, patterned paper, templates, and project documents.
Store delicate or oversized sheets in appropriately sized holders so they don't bend or curl. Heavier paper collections should sit on sturdy lower shelves.
You can also dedicate individual sections to current projects, making it easier to gather everything you need before starting a crafting session.
16. Rolling Craft Cart
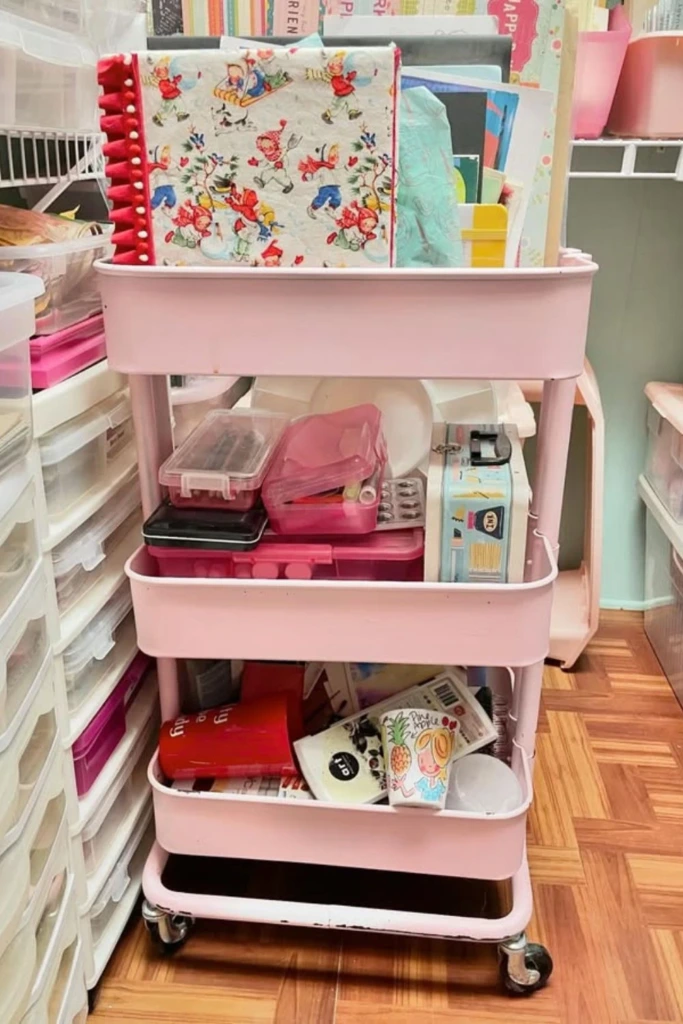
A rolling cart offers flexible storage that can move wherever you're working. It's especially helpful when you use a shared table or regularly switch between different crafting activities.
Organize the top tier with your most frequently used tools. Reserve the middle section for materials related to active projects and the bottom for larger or heavier supplies.
Small baskets and dividers prevent loose items from shifting when the cart moves.
Choose a model with locking wheels if you want it to remain stationary while working. When you're finished, the cart can be moved beside a cabinet or into an unused corner.
17. All-in-One Station
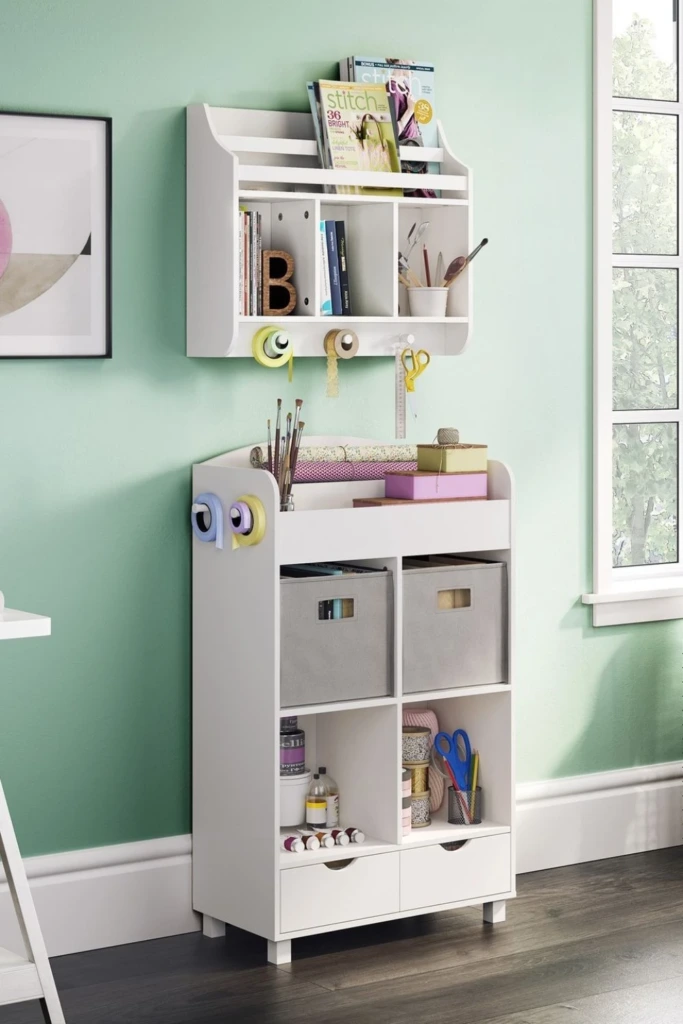
An all-in-one craft station combines several storage functions into a single organized area. It's a practical choice for small rooms, apartments, or multipurpose spaces.
Look for a compact cabinet or workstation with a combination of drawers, shelves, and open compartments.
Keep related materials together so you can complete a project without repeatedly moving between different storage areas.
A wall organizer above the station can provide additional space for lightweight tools and reference materials.
The goal is to create a self-contained crafting area that supports your hobbies without taking over the entire room.
18. Storage Bench Cubes
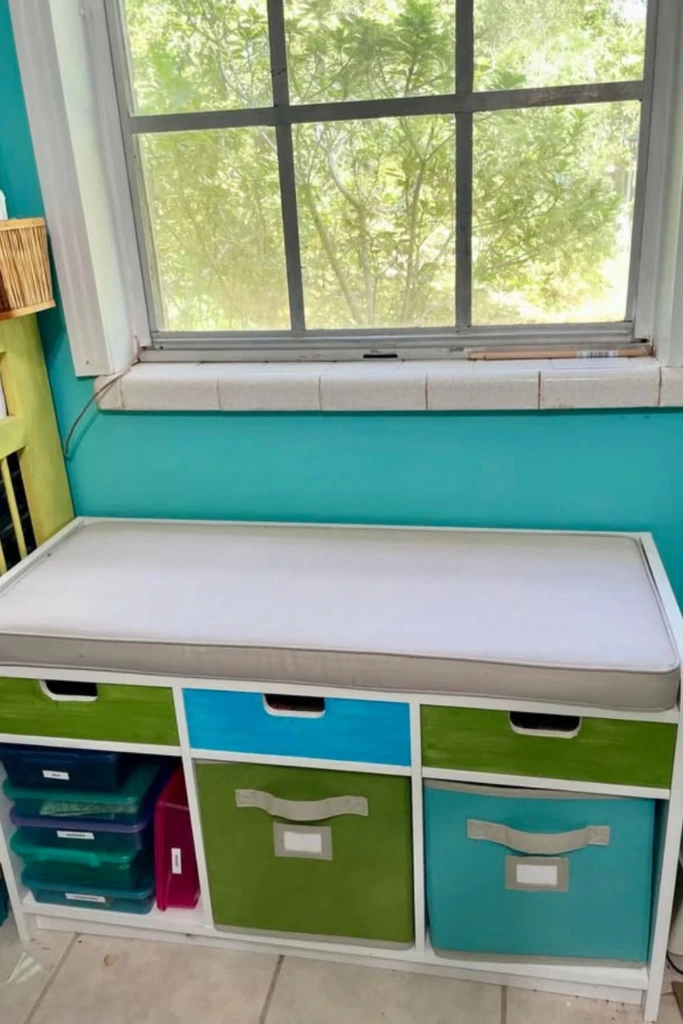
A storage bench combines comfortable seating with hidden compartments for craft supplies. It works especially well beneath a window or along an unused wall.
Cube compartments can hold baskets filled with yarn, fabric, paper, or seasonal materials. Choose removable bins so you can carry supplies directly to your worktable.
A cushioned top creates a convenient place to sit while planning projects or browsing through materials.
If you're building or purchasing a storage bench, confirm that it's designed to support seated weight. Avoid overfilling compartments so baskets remain easy to remove.
19. Color-Coded Jars
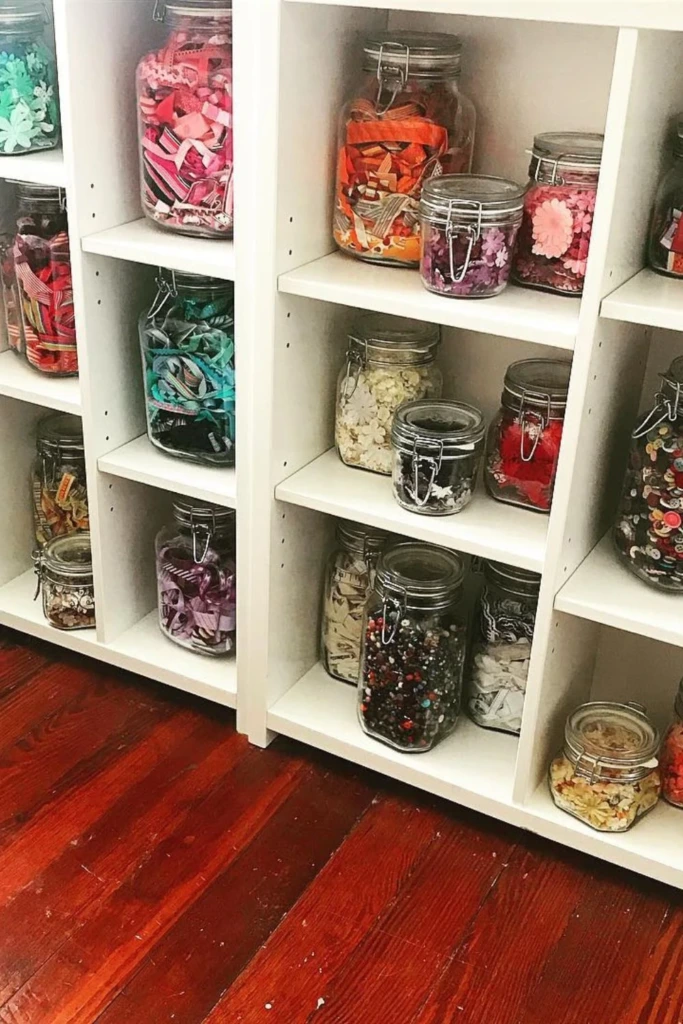
Sorting craft materials by color creates an organized display that can also inspire new projects.
Use transparent jars to separate buttons, beads, pom-poms, and other small embellishments into individual color groups.
Place similar shades next to each other for a coordinated appearance. This makes it easier to compare colors when planning handmade decorations or mixed-media artwork.
However, color sorting isn't ideal for every material. If you regularly need a particular size or type, consider labeling jars with both details.
A storage system should help you find supplies quickly, not simply look attractive.
20. Pin Display Board
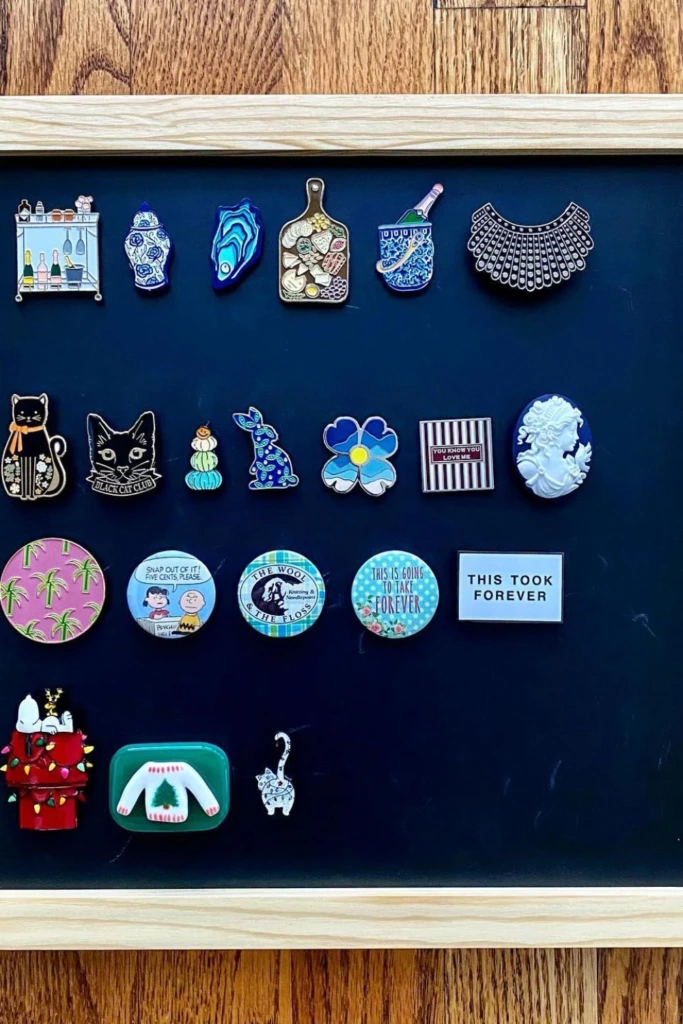
A framed display board provides a dedicated home for enamel pins, decorative badges, and brooches.
Cover a corkboard or padded backing with fabric, then arrange your collection in rows or small themed groups.
A contrasting background helps colorful pins stand out while turning the display into personalized wall decor.
Choose a backing material thick enough to hold the pins securely, and keep sharp points protected.
For valuable collectibles, consider a covered display case that reduces dust exposure and prevents accidental handling.
21. Vintage Display Cabinet
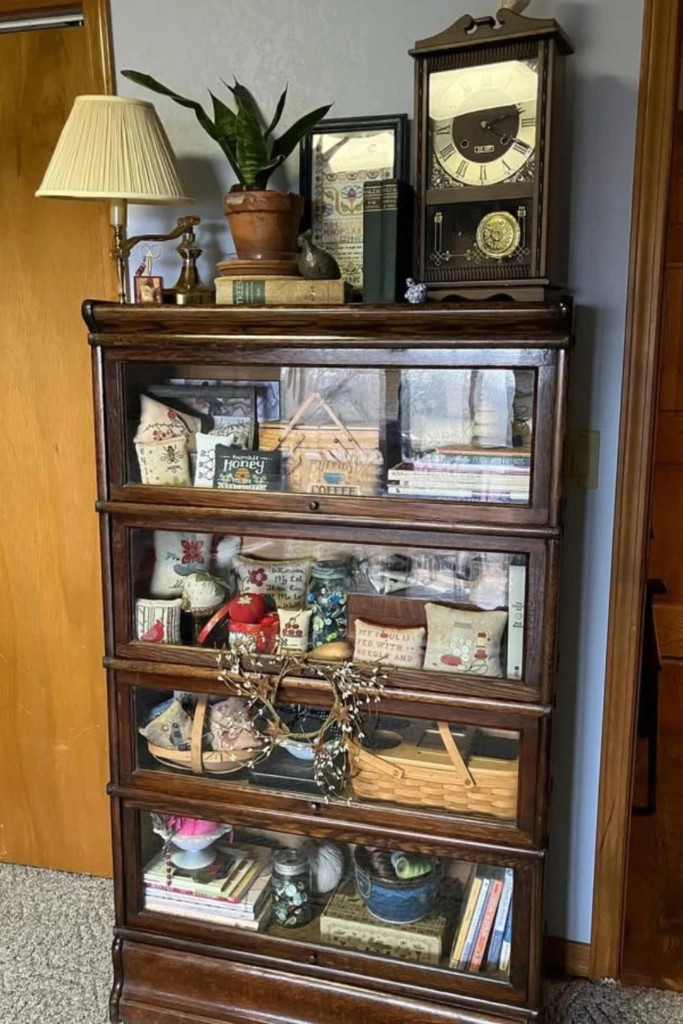
A vintage cabinet adds character to a craft room while providing enclosed storage for treasured materials and finished projects.
Glass-front doors allow you to see the contents without leaving everything exposed to dust.
Use the shelves for fabric bundles, craft books, decorative containers, and completed handmade pieces. Small baskets can conceal less attractive supplies while maintaining an orderly appearance.
If you're restoring an older cabinet, check for rough surfaces, loose hardware, and peeling finishes before storing delicate materials.
A well-maintained secondhand cabinet can become a beautiful focal point without requiring custom-built storage.
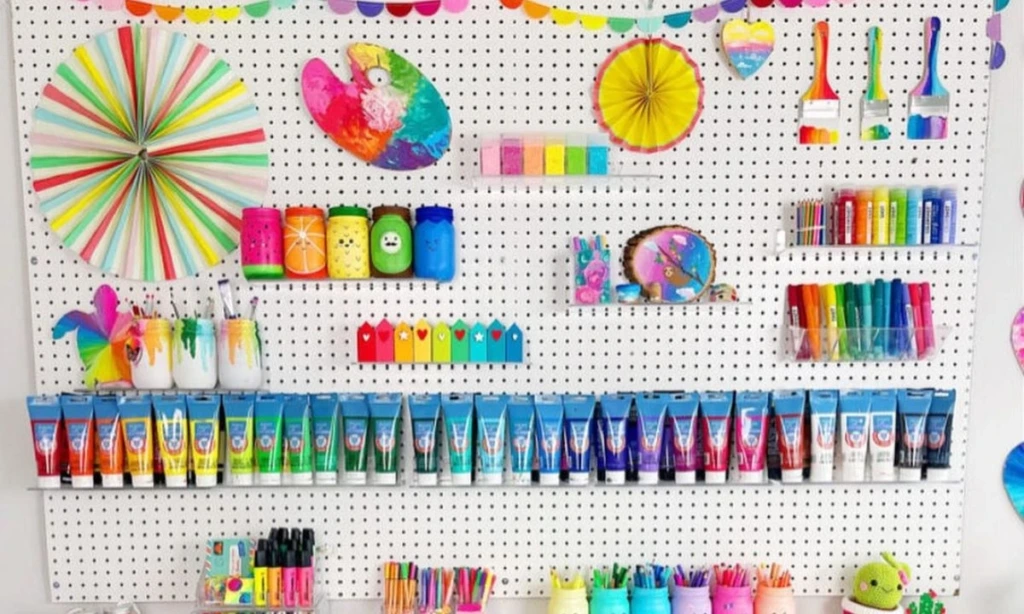
22. Pegboard Wall
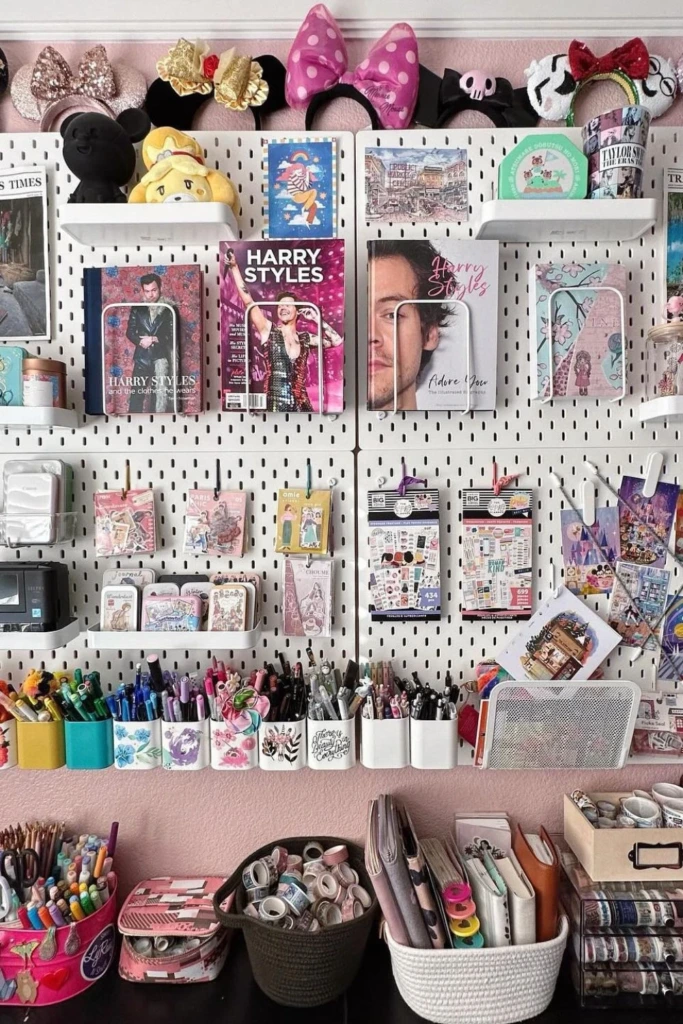
A pegboard is one of the most adaptable craft room organization solutions because you can customize it around your tools.
Install hooks, small baskets, shelves, and holders to accommodate scissors, rulers, tape, brushes, and lightweight supplies.
Arrange frequently used tools at eye level and place less essential accessories higher up.
As your hobbies change, you can rearrange the attachments without redesigning the room.
For a polished appearance, paint the pegboard to complement your workspace and leave a little empty space between groups of tools. This makes individual items easier to see and retrieve.
23. Cabinet Bin System
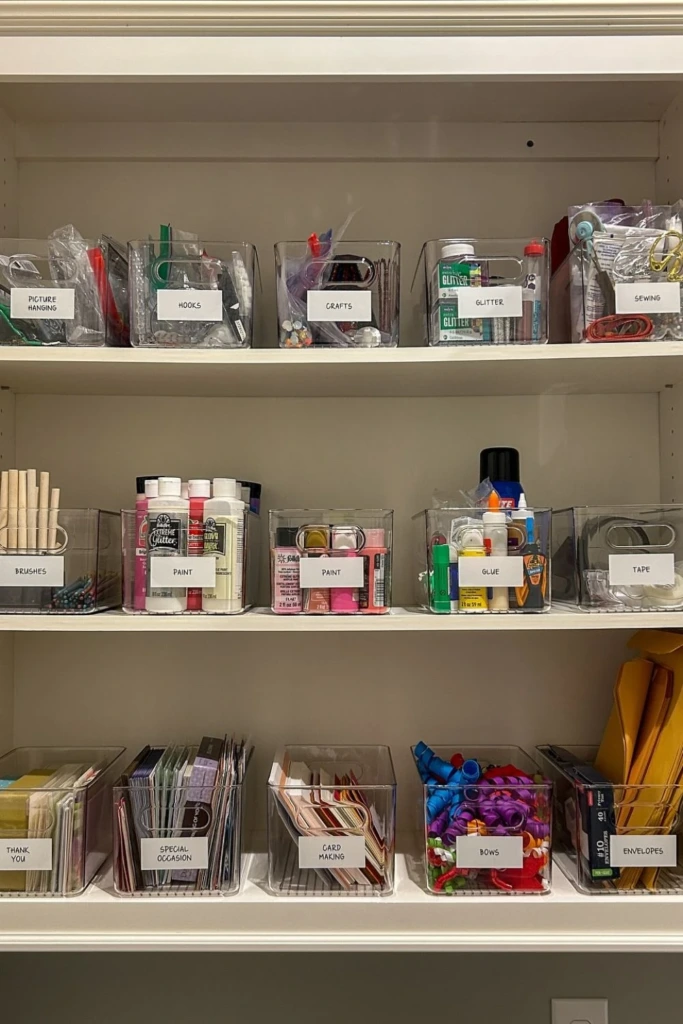
If you prefer a calm, uncluttered craft room, a cabinet filled with organized bins can keep supplies out of sight while maintaining easy access.
Divide materials into categories such as painting, sewing, paper crafting, and decorative accessories.
Choose containers that fit the cabinet dimensions without wasting shelf space. Front-facing labels are particularly useful when bins are stacked or placed on deep shelves.
Store heavier materials at the bottom and reserve upper sections for lightweight items.
Review the contents periodically to remove dried-out products, unusable scraps, and unnecessary duplicates.
24. Drawer Tray Organizers
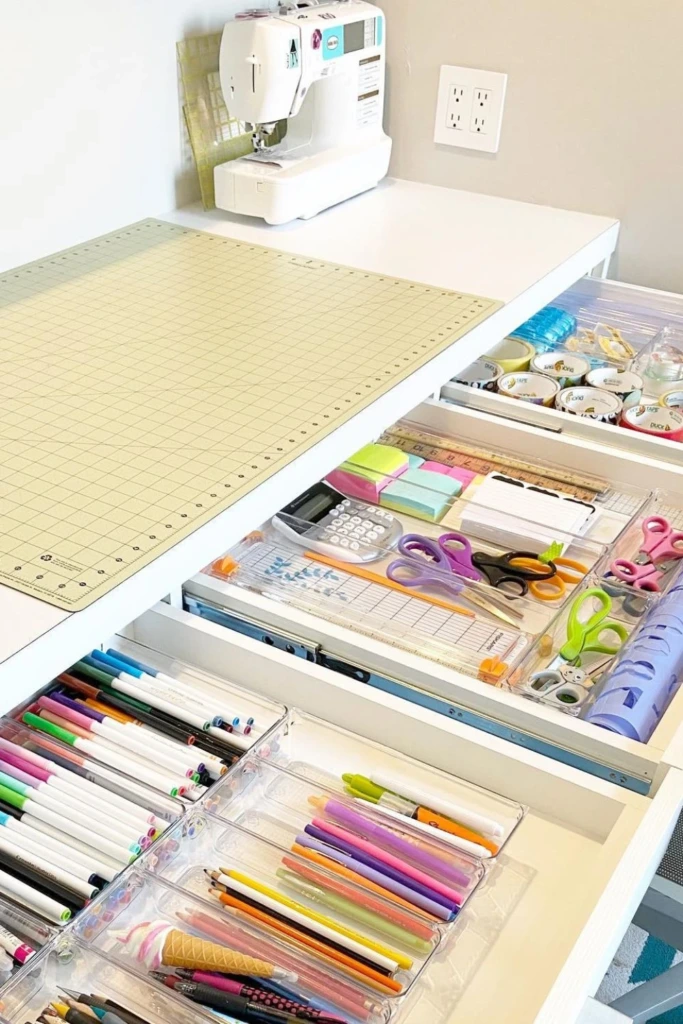
Drawer trays prevent small tools from becoming mixed together and difficult to locate.
Use divided inserts to separate pens, scissors, rulers, clips, adhesive refills, and other desk essentials.
Adjustable organizers are especially useful because compartment sizes can be changed as your collection grows.
Keep items you use together in neighboring sections. For example, measuring tools can share a drawer with pencils and marking accessories.
Avoid overcrowding compartments. When every item has enough space, it's easier to return supplies to their proper place after crafting.
25. Yarn Shelf Display
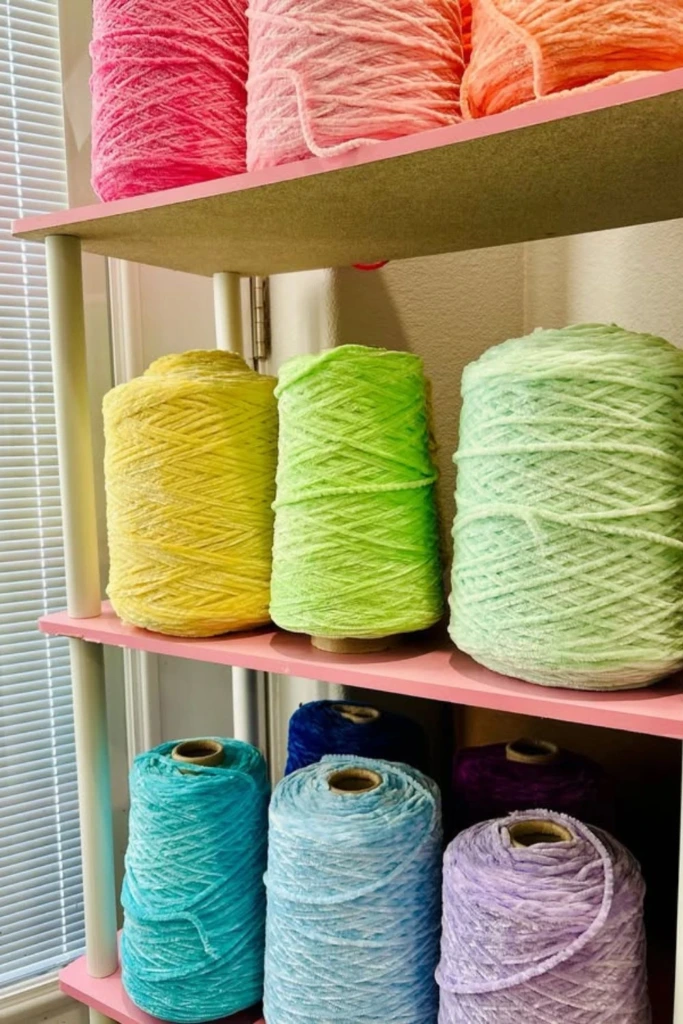
Open shelves can provide attractive storage for yarn collections while making different colors and textures easy to compare.
Arrange skeins or cones by fiber type, weight, or color, depending on how you select yarn for projects.
Keep yarn loosely organized rather than compressing it into tightly packed stacks. This helps preserve its shape and makes individual skeins easier to remove.
Protect your collection from prolonged sunlight, dust, and moisture. For yarn stored over longer periods, breathable or appropriately sealed containers may be more suitable than open shelving.
A dedicated yarn display can make planning knitting and crochet projects much more convenient.
26. Paper Drawer Dividers
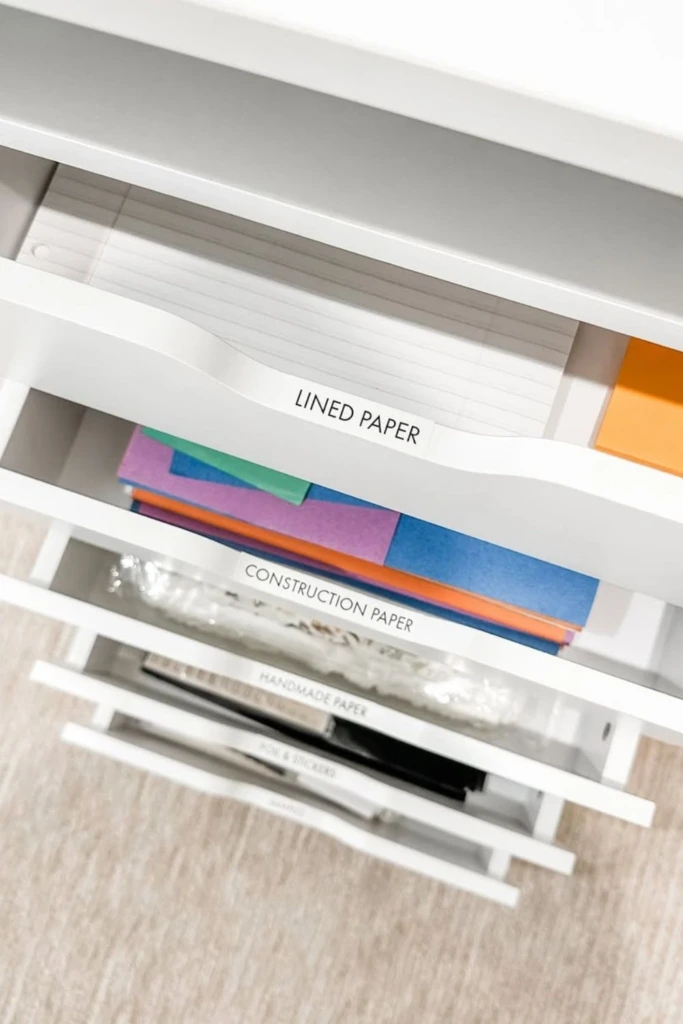
Divided drawers are a useful option for storing different types of crafting paper in one cabinet.
Separate construction paper, handmade sheets, specialty cardstock, and patterned paper into clearly marked sections.
Use smooth dividers that won't catch or tear delicate edges. Whenever possible, store paper flat and fully supported to prevent bending.
Organize sheets by size first if your collection includes several formats. You can then separate colors or finishes within each size category.
This arrangement makes it easier to locate the right material without disturbing the rest of your collection.
27. Paper Shelf Stacker
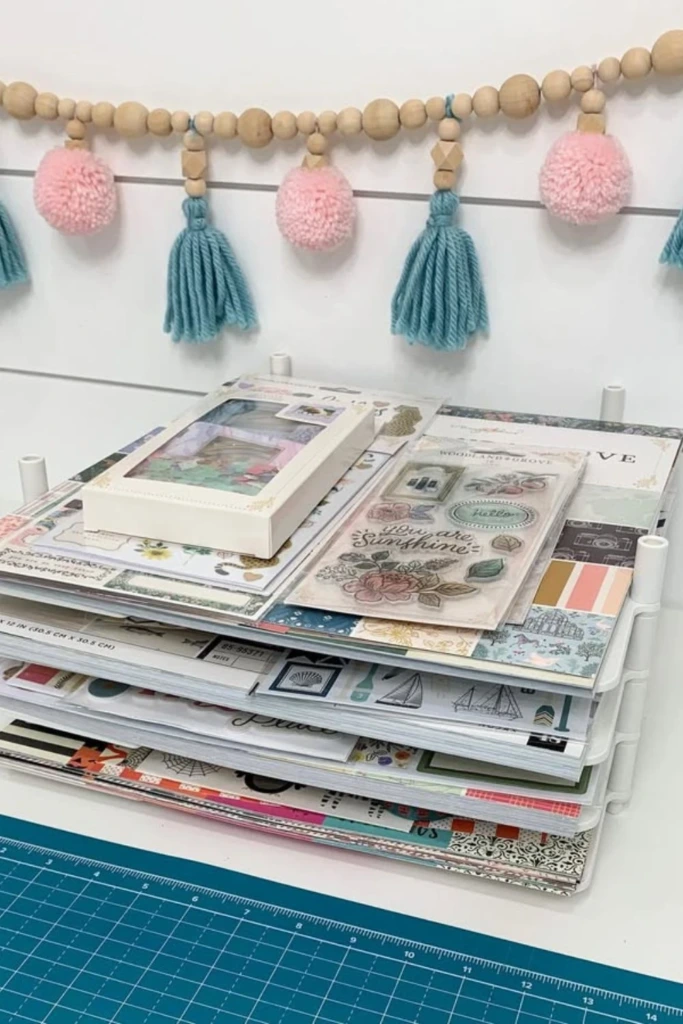
A paper stacker with multiple horizontal compartments is ideal for scrapbook enthusiasts and anyone who regularly works with large sheets.
Assign each compartment to a particular paper size, collection, or project theme.
Keeping sheets flat helps reduce curled corners and unwanted creases. Open-front compartments also allow you to browse your collection without removing large stacks.
Place frequently used papers near the middle of the unit for comfortable access.
For delicate or archival materials, use acid-free protective sleeves and keep the shelving away from damp areas and direct sunlight.
28. Pink Tool Organizer
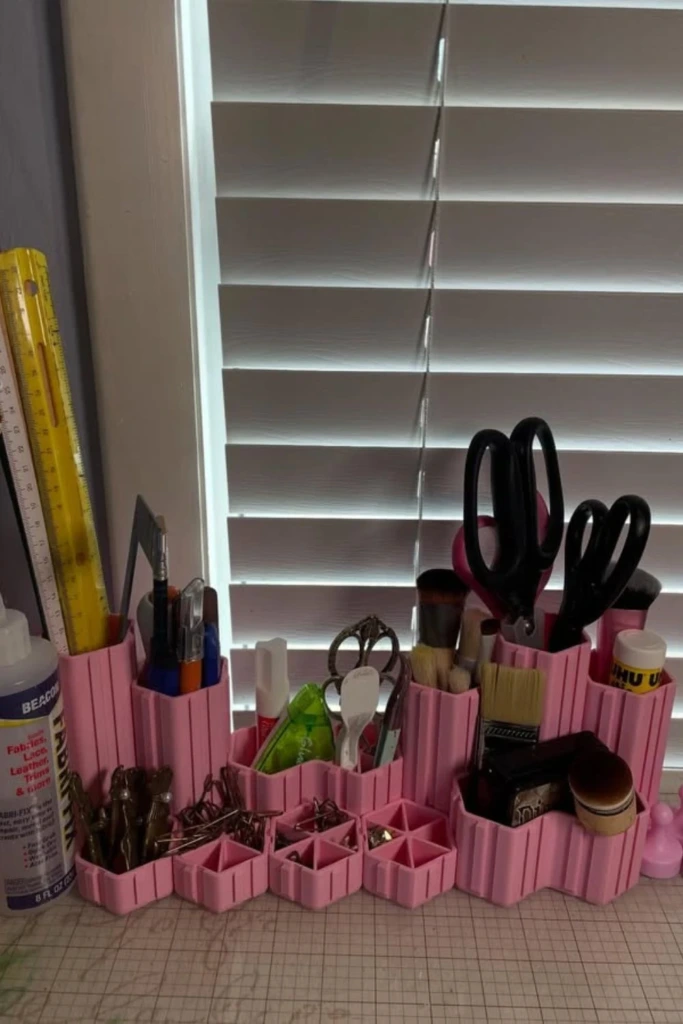
A pink desktop organizer adds a playful touch to your crafting area while keeping essential tools conveniently arranged.
Choose a holder with several compartments for scissors, markers, brushes, pencils, and other accessories.
Taller sections are useful for long tools, while shallow compartments work well for clips, erasers, and small accessories.
Position the organizer near the edge of your desk so it doesn't interrupt your main work area.
Although pink creates a cheerful look, the same idea works with any color that complements your room. The most important feature is a practical layout that keeps your favorite tools easy to reach.
29. Love this idea? Save it for later.
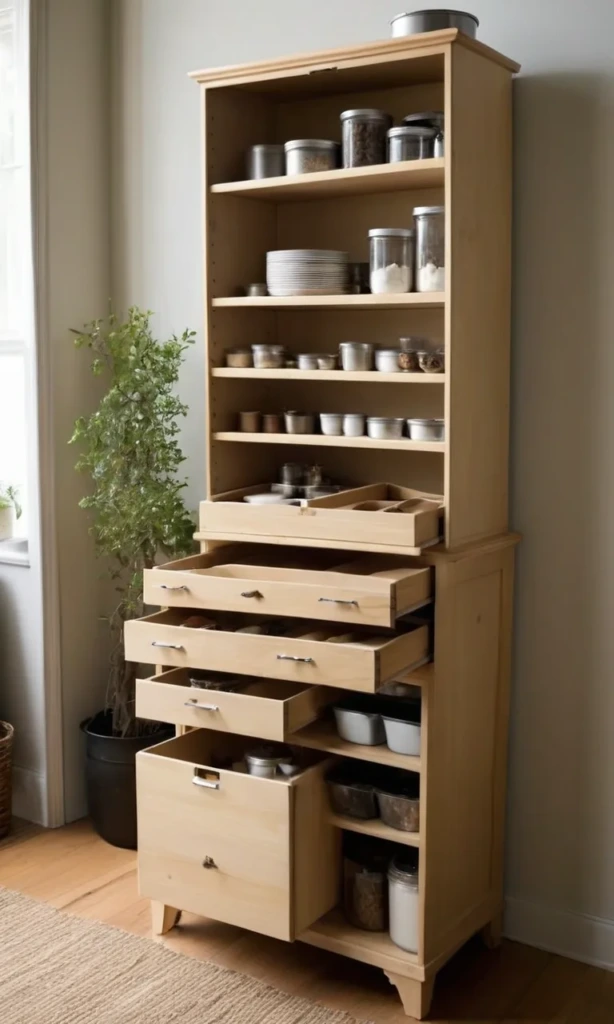
Creating an organized craft room doesn't require a complete makeover. Small improvements, such as adding drawer dividers, labeling containers, or installing a pegboard, can make a noticeable difference in how comfortably you work.
Start with the area that causes the most frustration, whether it's overflowing paper drawers, tangled ribbons, or a crowded desk. Once that section is organized, move on to the next.
Save these craft room organization ideas for your next workspace refresh, and choose the solutions that best suit your supplies, available space, and creative routine.