20 Refrigerator Organization Ideas That Actually Work in 2026
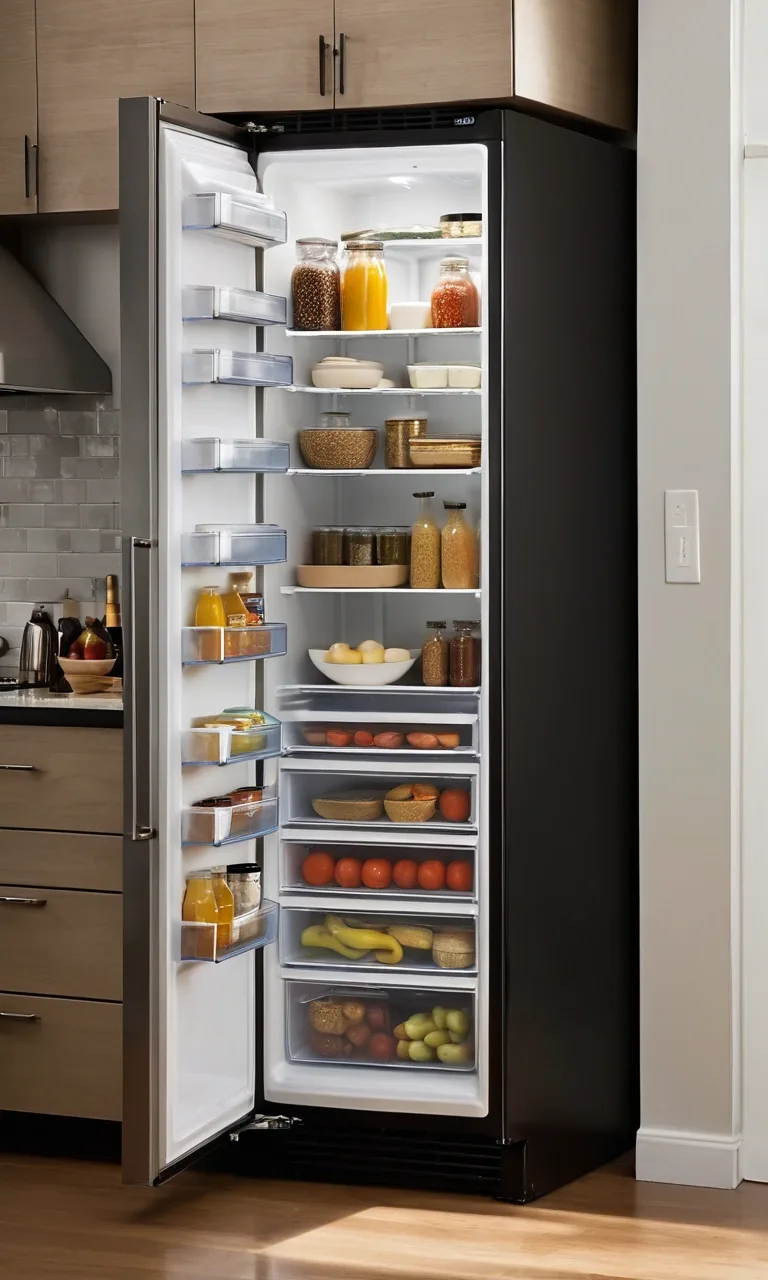
A well-organized refrigerator makes everyday cooking easier, helps you keep track of groceries, and reduces the chances of throwing away food you forgot you had. When containers are stacked randomly and ingredients are hidden behind bottles, even a recently cleaned fridge can become cluttered again within days.
The good news is that you don't need a new refrigerator or an expensive collection of organizers to make a difference. A few practical storage solutions, consistent habits, and clearly defined spaces can transform your fridge into a functional part of your kitchen.
Whether you're managing groceries for a large family or trying to make a small refrigerator work harder, these ideas can help you create a setup that's easy to maintain.
Why Your Fridge Always Feels Messy?
Refrigerators often become disorganized because groceries are put wherever space is available rather than in designated locations. As new items arrive, older ingredients get pushed aside, leftovers become difficult to find, and partially used products accumulate.
A better approach is to organize your refrigerator around the way you shop, cook, and eat. Give frequently used ingredients accessible positions, group similar foods together, and leave enough room for cold air to circulate.
You can also make your system easier to maintain by choosing storage solutions that fit your existing shelves instead of filling every available inch with containers.
1. Use Clear Bins to Group Similar Items
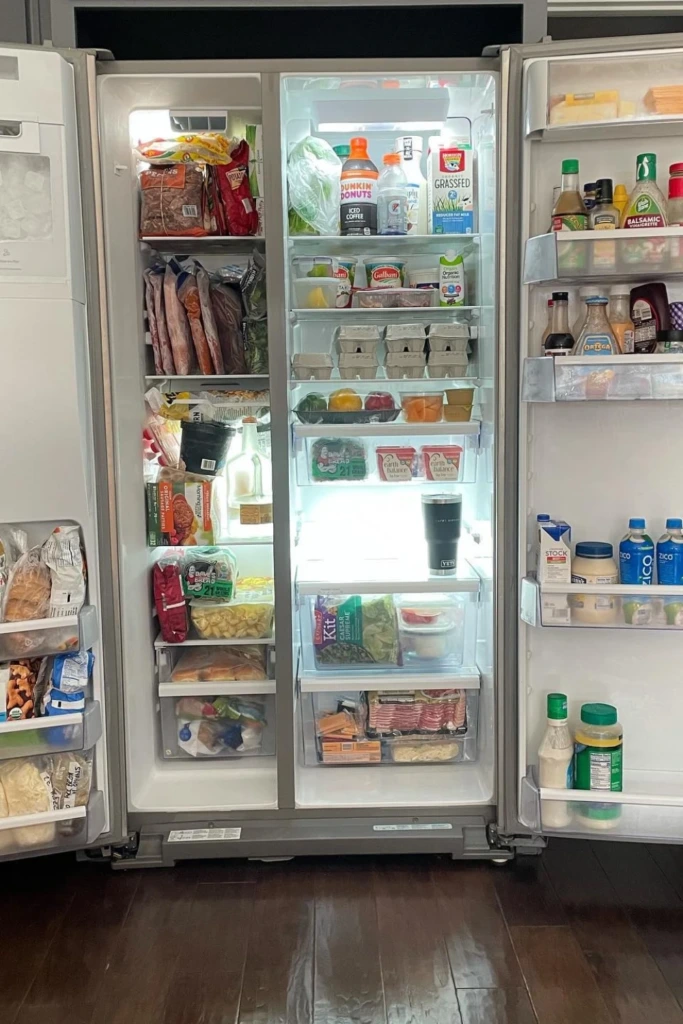
Transparent storage bins make it easier to locate ingredients without moving everything around. They are especially useful in shared refrigerators, where different family members may have different snacks, drinks, and meal ingredients.
Assign each bin a purpose, such as breakfast foods, dairy products, packaged snacks, or ready-to-eat ingredients. Keeping related items together also makes grocery restocking more straightforward because you can quickly see what needs replacing.
Choose containers that fit comfortably on your shelves and can be removed for cleaning. Avoid overcrowding them, since tightly packed food can be difficult to access and may obstruct airflow.
2. Divide Produce by Type for Easy Access
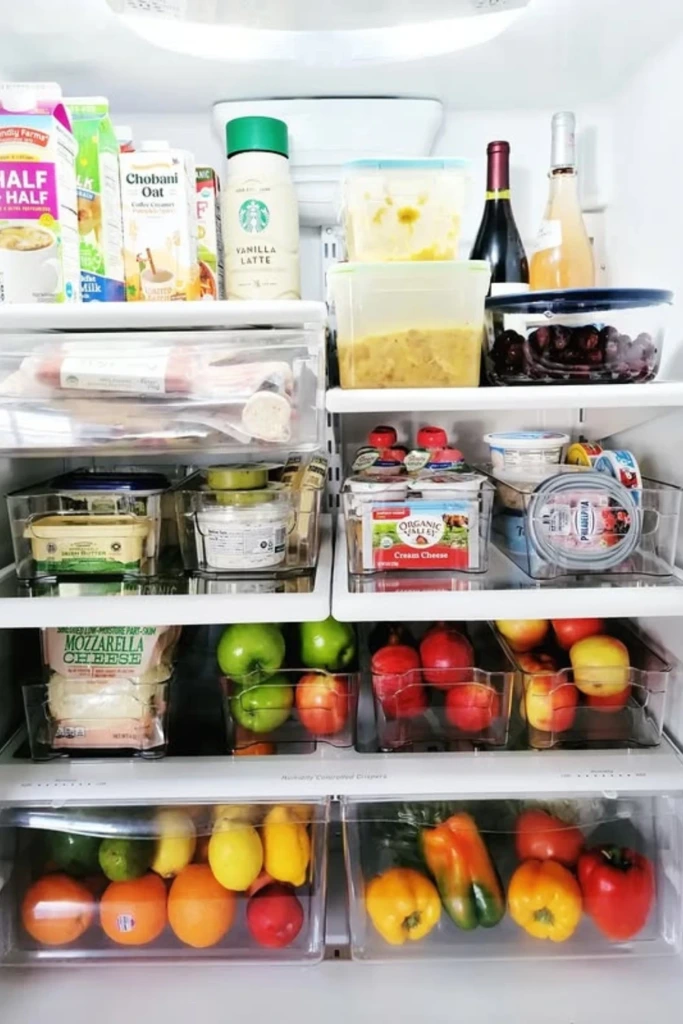
Keeping fruits and vegetables in separate groups makes your refrigerator easier to navigate and helps prevent delicate ingredients from being crushed beneath heavier produce.
You might keep apples and citrus fruits together in one designated area while storing peppers, cucumbers, and other vegetables separately. However, the best arrangement also depends on how individual foods should be stored.
Some fruits, including apples and pears, release ethylene gas, which can accelerate ripening in sensitive produce. Separating ethylene-producing fruits from susceptible vegetables can help certain ingredients stay in good condition longer.
Use appropriately sized containers or the refrigerator's crisper drawers, and avoid washing produce before storage unless it will be dried thoroughly or the specific food benefits from washing in advance.
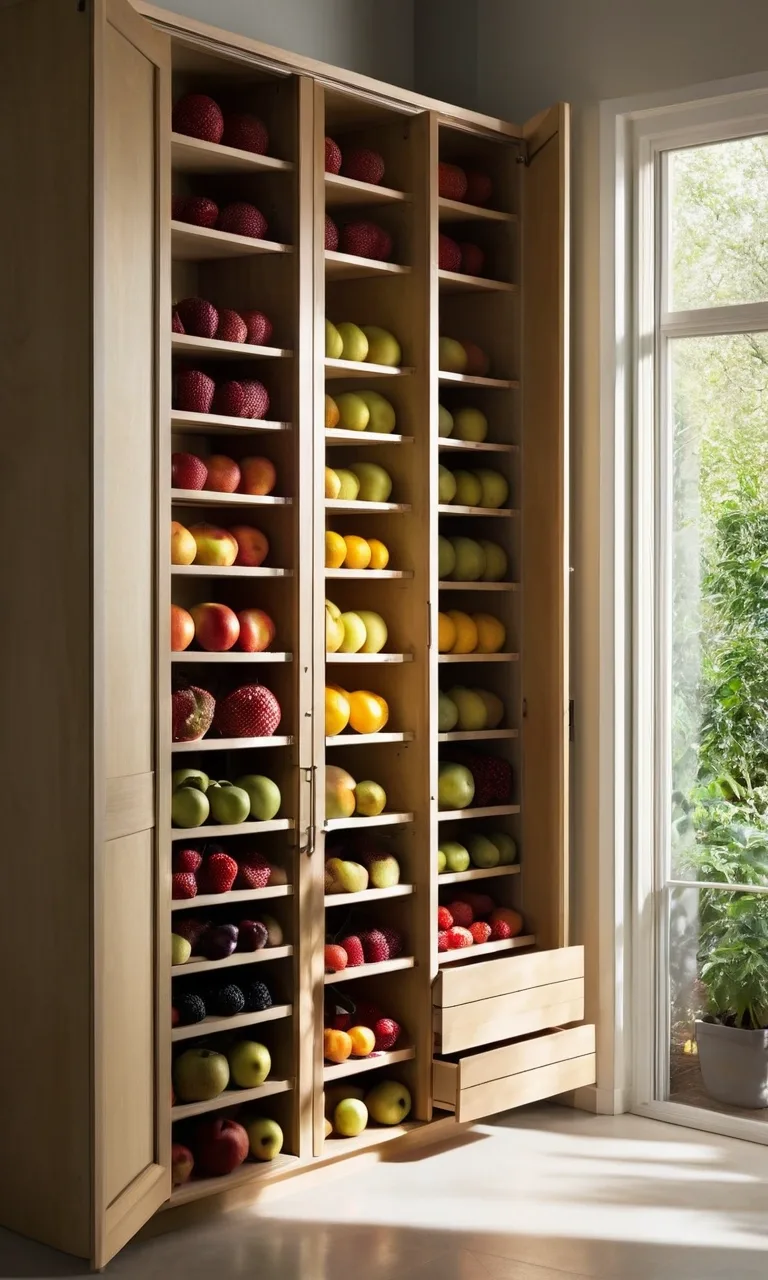
3. Store Produce in Pull-Out Bins
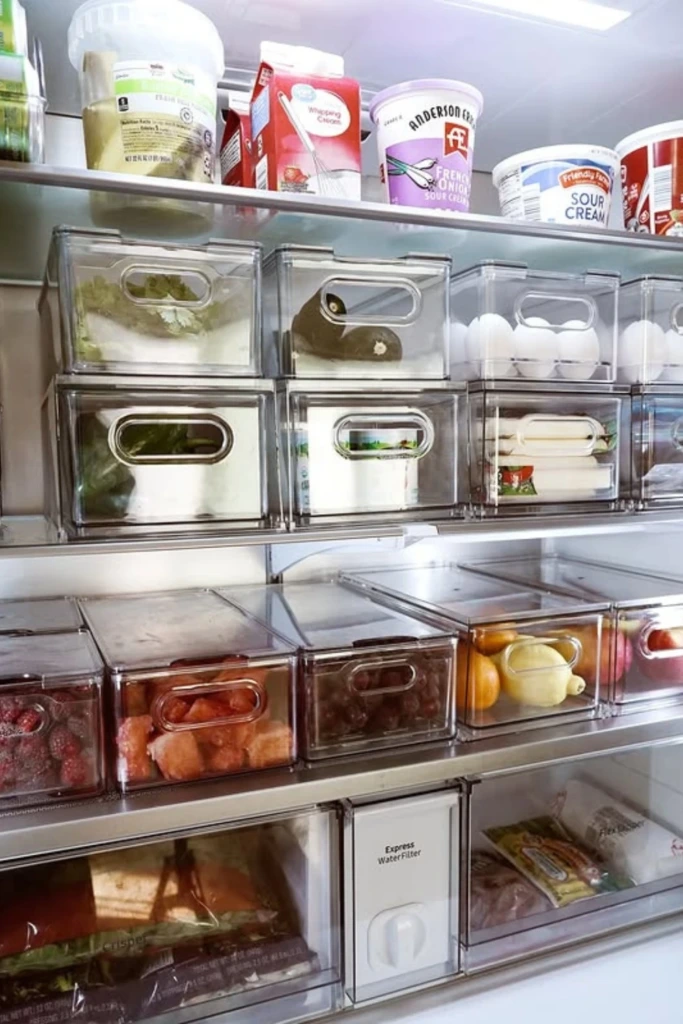
Pull-out bins make deep refrigerator shelves more practical by allowing you to bring ingredients forward instead of reaching behind other containers.
Small drawers can be useful for berries, citrus fruits, leafy greens, and other items that are easily overlooked. They also make it easier to remove an entire group of ingredients when preparing a meal.
Before buying additional drawers, measure your available shelf space and check whether the containers will interfere with the refrigerator door or existing shelves. Keep delicate produce in suitable storage conditions, and use ventilation or moisture control appropriate to each food.
The goal is to improve visibility without trapping excess moisture or making the refrigerator too crowded.
4. Use Glass Jars for Freshness
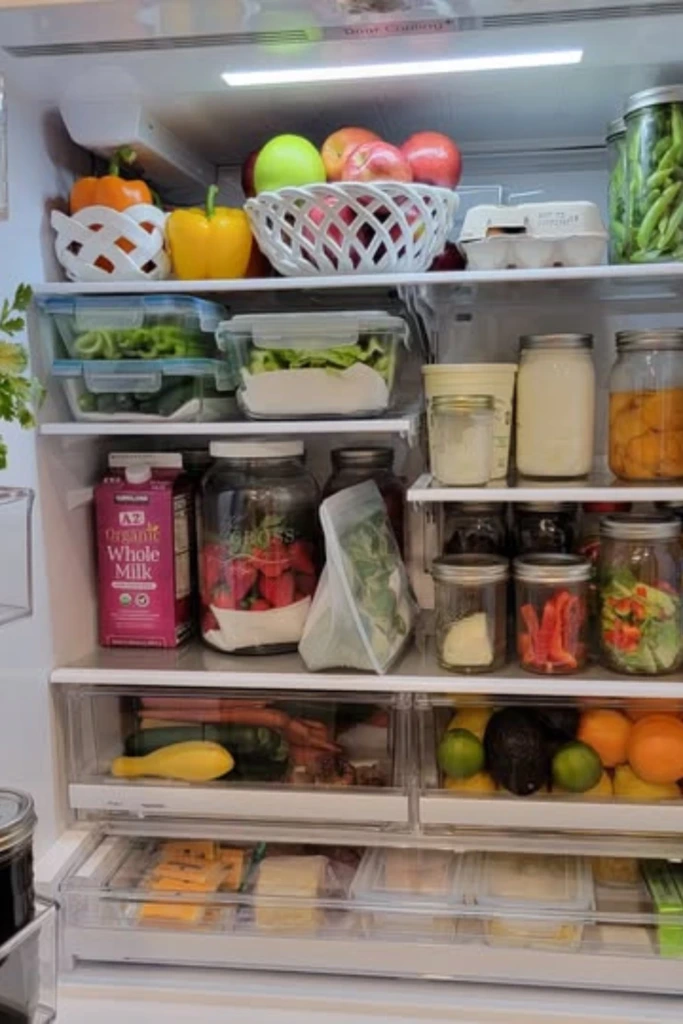
Glass jars offer a reusable way to store suitable foods while keeping their contents visible. They work well for homemade sauces, certain prepared ingredients, chopped vegetables, and leftovers that fit comfortably inside.
Choose jars with secure lids, clean them thoroughly, and allow washed produce to dry when appropriate before storing it. Transparent sides make it easier to identify what you have, while a consistent collection of jars can help reduce visual clutter.
Remember that glass containers do not automatically extend the shelf life of every food. Freshness depends on proper refrigeration, moisture levels, cleanliness, and how the food was prepared.
For hot leftovers, use shallow, food-safe containers to help them cool quickly, and refrigerate them promptly rather than leaving them at room temperature until completely cold.
5. Add a Lazy Susan for Jars
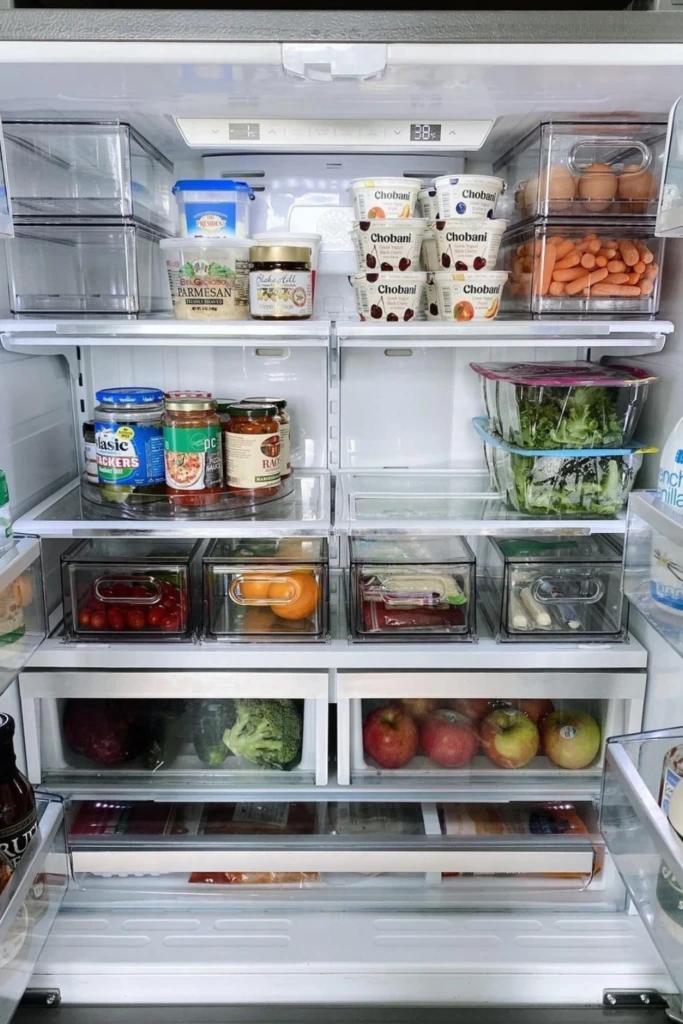
A rotating turntable is a convenient solution for shelves filled with small jars and bottles. Instead of moving several items to reach the one at the back, you can simply rotate the organizer until the desired product comes into view.
Use one for dressings, sauces, spreads, or other regularly used condiments. A model with a raised edge can help keep bottles from slipping off as the platform turns.
Measure the shelf before purchasing a turntable, especially if your refrigerator has narrow compartments or low clearance between shelves.
Avoid placing tall, heavy bottles on an unstable organizer. Keep frequently used products within easy reach and check expiration dates regularly so older items don't remain hidden behind newer purchases.
6. Label Door Shelves by Category
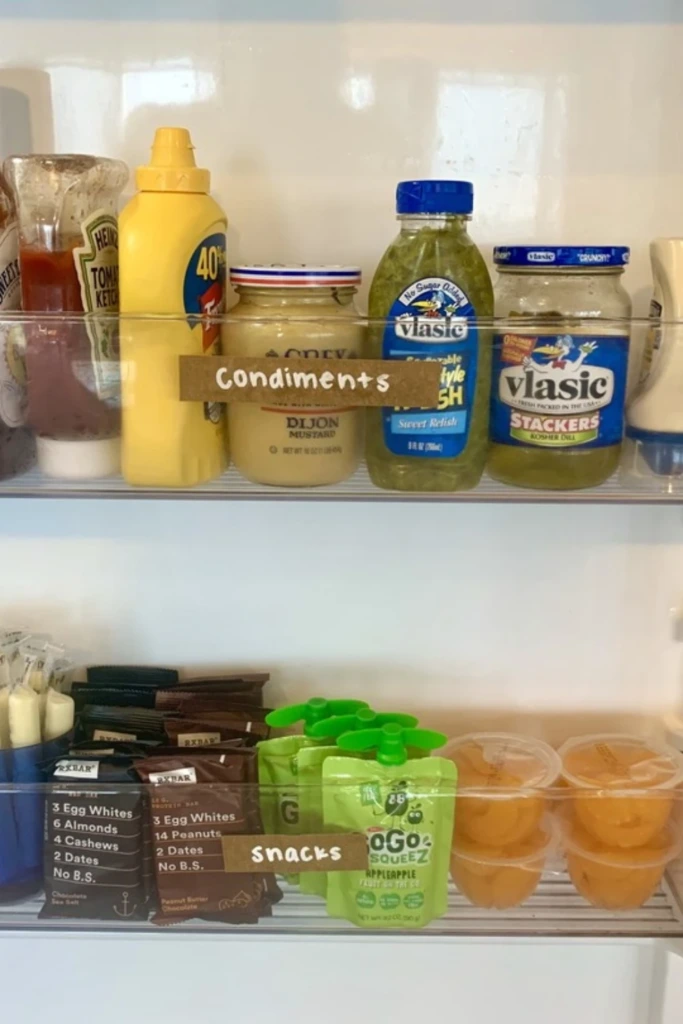
Labels can make refrigerator storage more intuitive, particularly when several people use the same appliance.
Assign door compartments to suitable categories such as condiments, sauces, or other frequently accessed products. Clear labels help everyone understand where items belong and make it easier to return them to their designated spots.
You can use removable labels, washable markers on suitable containers, or small adhesive tags that withstand refrigerator conditions.
Keep food safety in mind when arranging the door. Refrigerator doors experience greater temperature fluctuations than the interior, so reserve them for products that tolerate those changes, such as many condiments. Store milk, eggs, and other highly perishable foods in the colder interior rather than relying on the door shelves.
7. Add Shelf Liners for Easy Cleanup
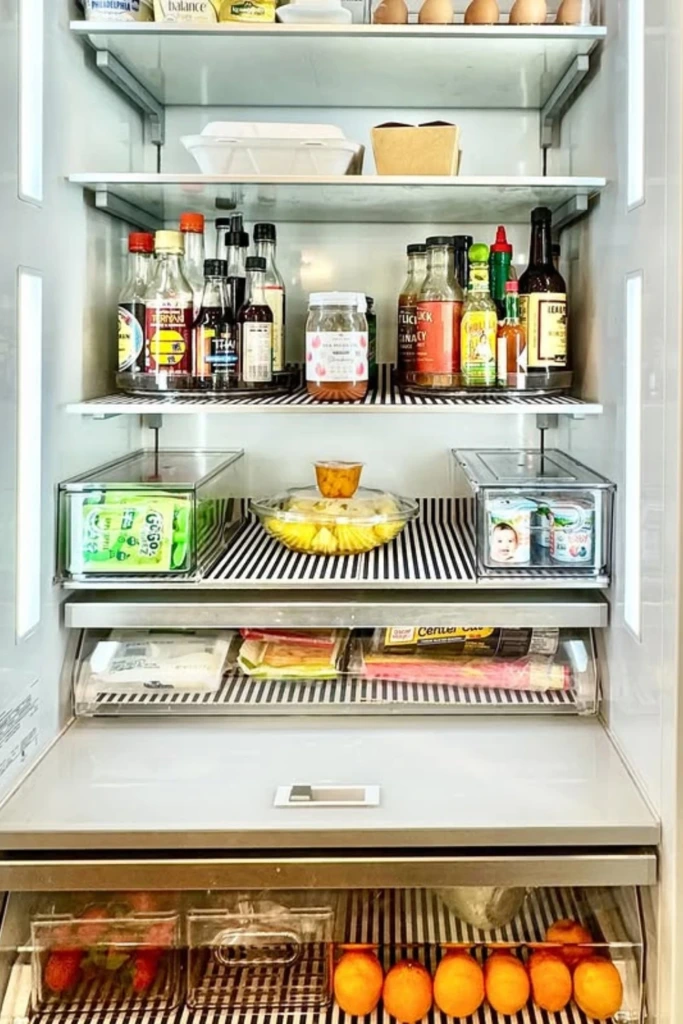
Removable shelf liners can simplify routine refrigerator cleaning by catching small drips and crumbs before they spread across a larger area.
Choose liners that are designed for refrigerator use, fit the shelves properly, and can be washed easily. Cut them to size without covering ventilation openings or interfering with shelf supports.
When spills occur, remove the affected liner, clean it according to its care instructions, and dry it before putting it back. Wipe the shelf beneath it as needed so moisture and food residue don't collect underneath.
Liners are optional rather than essential, but they can be helpful for busy households that frequently store sticky sauces, juice containers, and prepared foods.
8. Prep Meals in Clear Containers
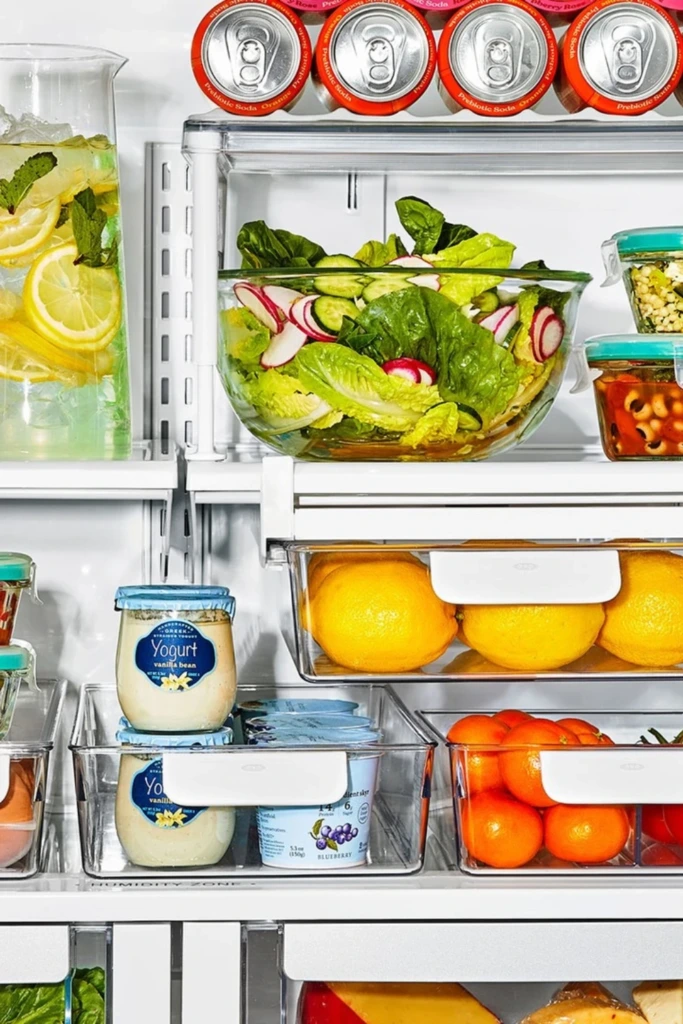
Preparing some ingredients ahead of time can make weekday meals quicker and help you use groceries before they spoil.
Store suitable prepared foods in transparent, food-safe containers with secure lids. Cooked grains, ready-to-eat meals, washed ingredients that have been dried properly, and leftover portions can all benefit from clearly visible storage.
Choose containers that stack safely and fit your shelves without blocking airflow. Write the preparation date on leftovers so you can identify older food at a glance.
For food safety, refrigerate perishable cooked foods within two hours, or within one hour when the surrounding temperature exceeds 90°F (32°C). Keep the refrigerator at 40°F (4°C) or below, and generally use refrigerated leftovers within three to four days unless reliable food-specific guidance says otherwise.
9. Keep Drinks on a Dedicated Shelf
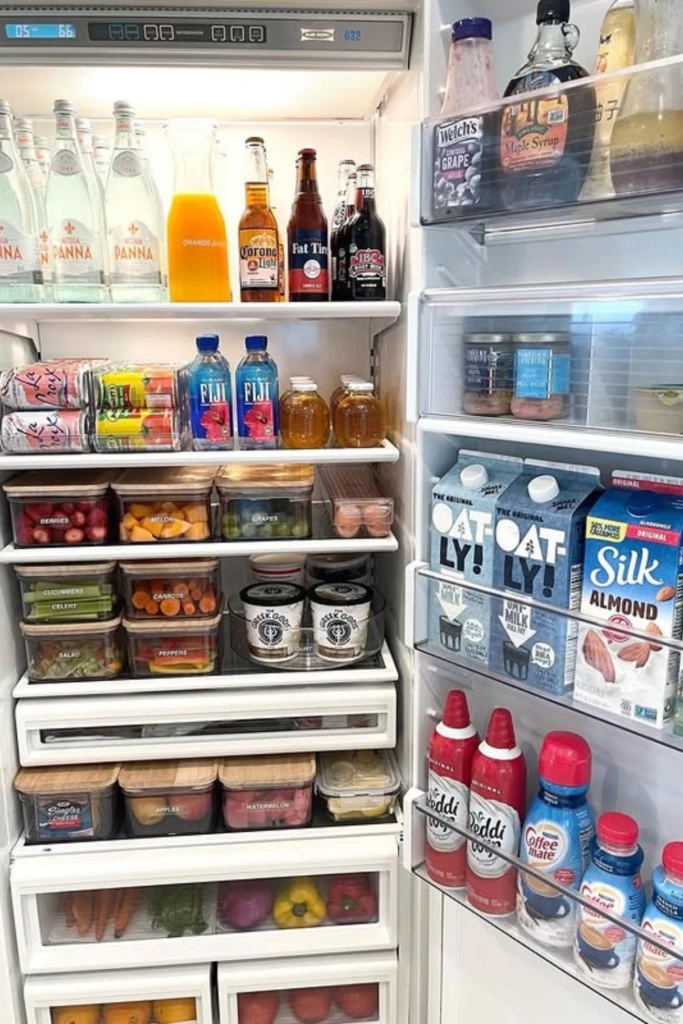
Bottles, cans, juice cartons, and water containers can quickly take over valuable refrigerator space when they are scattered across several shelves.
Create a designated beverage area where drinks can stand securely without blocking other ingredients. Bottle organizers and can dispensers may help keep smaller containers together, while a shallow bin can hold individual drinks that family members reach for throughout the day.
Consider how often you use each beverage when choosing its position. Everyday drinks should be easy to reach, while occasional-use bottles can occupy less convenient spaces.
Avoid overloading shelves with heavy glass bottles, and leave sufficient room around stored items for cold air to circulate.
10. Use Bins to Separate Each Food Group
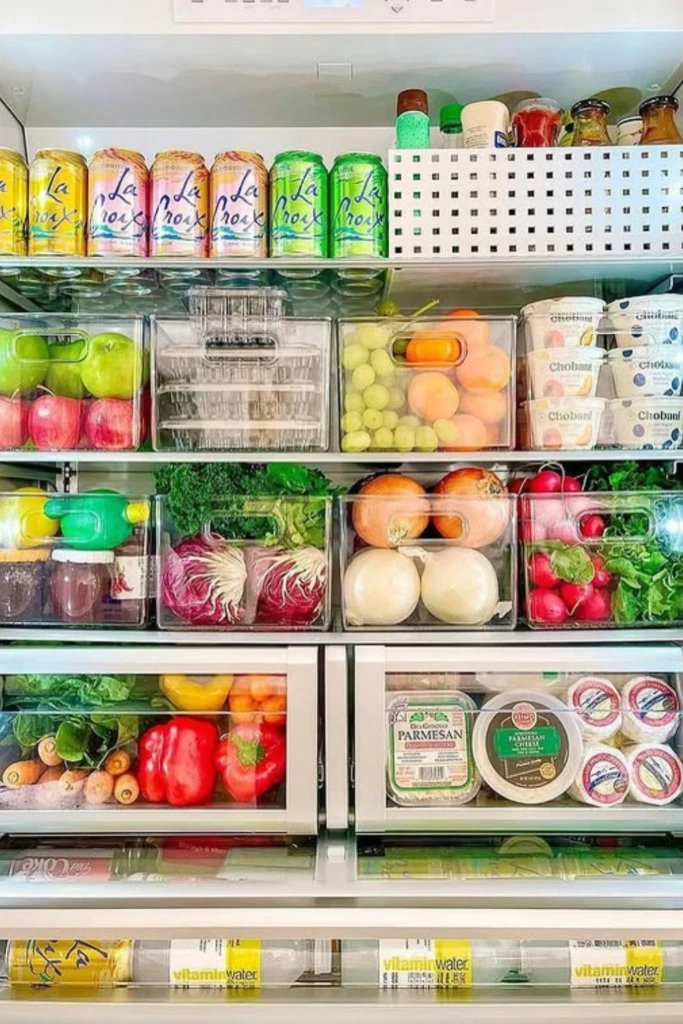
Giving different food groups their own storage areas creates a refrigerator that's easier to navigate and maintain.
For example, one container might hold packaged dairy products, another could hold washed vegetables, and a third might be reserved for snacks or ready-to-eat ingredients. Separate sections help prevent smaller items from disappearing behind larger packages.
Use food-safe bins that are easy to clean and remove. Clear designs are particularly useful because you can check their contents without opening each container.
Keep raw meat, poultry, and seafood securely contained on the lowest shelf to prevent juices from dripping onto other foods. Ready-to-eat items should remain above raw animal products, and produce should be stored in appropriate conditions.
11. Switch to Mason Jars for Bulk Storage
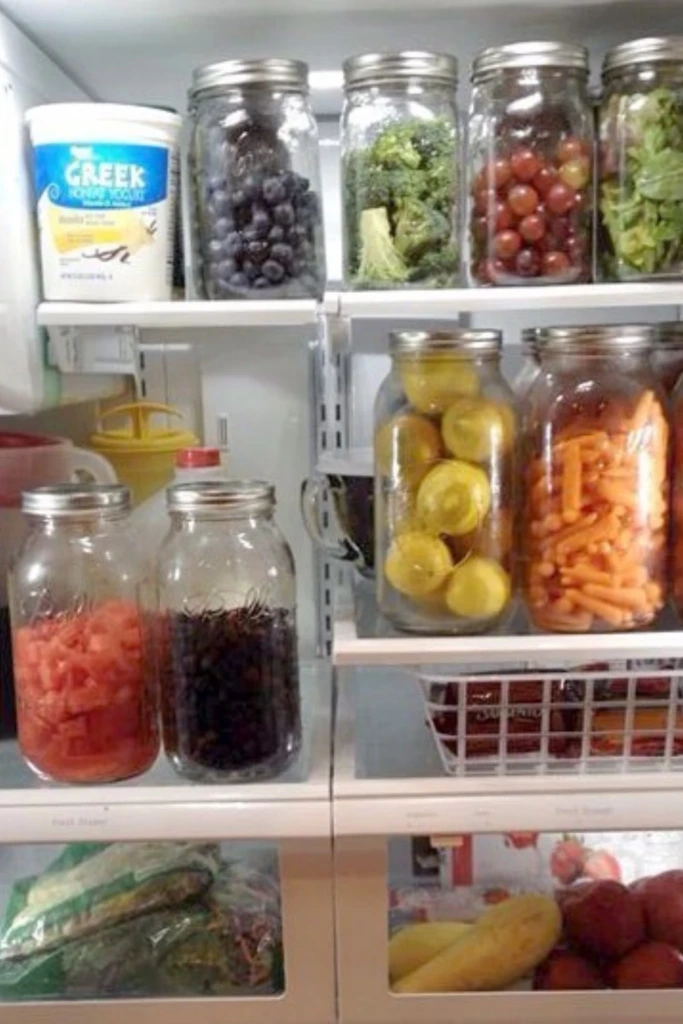
Wide-mouth mason jars can be useful when you prepare ingredients in advance or purchase certain foods in larger quantities.
Their transparent sides make contents easy to identify, and their reusable design can help reduce reliance on disposable packaging. Depending on the food, they may be suitable for berries, chopped vegetables, homemade dressings, and prepared ingredients.
Choose jar sizes that match your usual portions so you don't have to repeatedly open a large container to use a small amount.
Wash jars thoroughly before use, use lids appropriate for the food being stored, and avoid packing produce while it is excessively wet. Leave enough space for foods that need room and avoid filling jars so tightly that ingredients become crushed.
Remember that transferring food into a jar doesn't eliminate the need to follow appropriate refrigeration and storage-time recommendations.
12. Mix Jars and Bins for a Balanced System
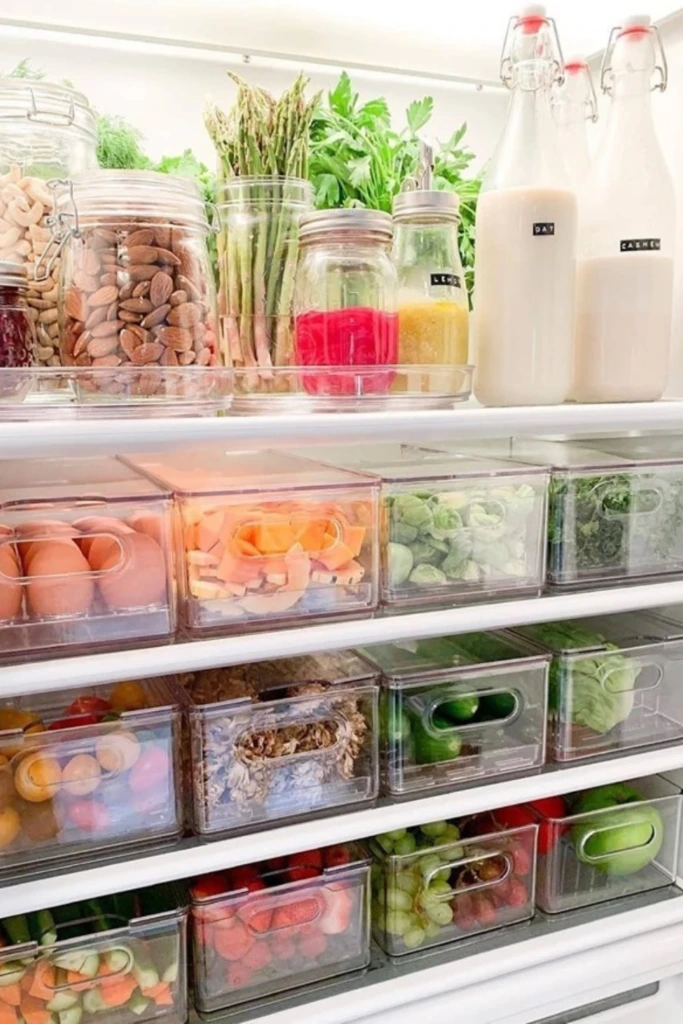
A combination of jars and storage bins often works better than relying on a single type of organizer.
Use jars for suitable sauces, dressings, prepared ingredients, and other foods that benefit from secure containers. Reserve bins for grouped packages, snacks, and produce that you want to access together.
This combination provides flexibility while keeping the refrigerator visually consistent. You can also use stackable containers in areas with sufficient vertical clearance and smaller bins on shelves where space is limited.
Avoid buying a complete matching set before evaluating your actual storage needs. Start with the items that regularly become disorganized, then add containers only where they solve a specific problem.
13. Keep Condiments in Small Bins
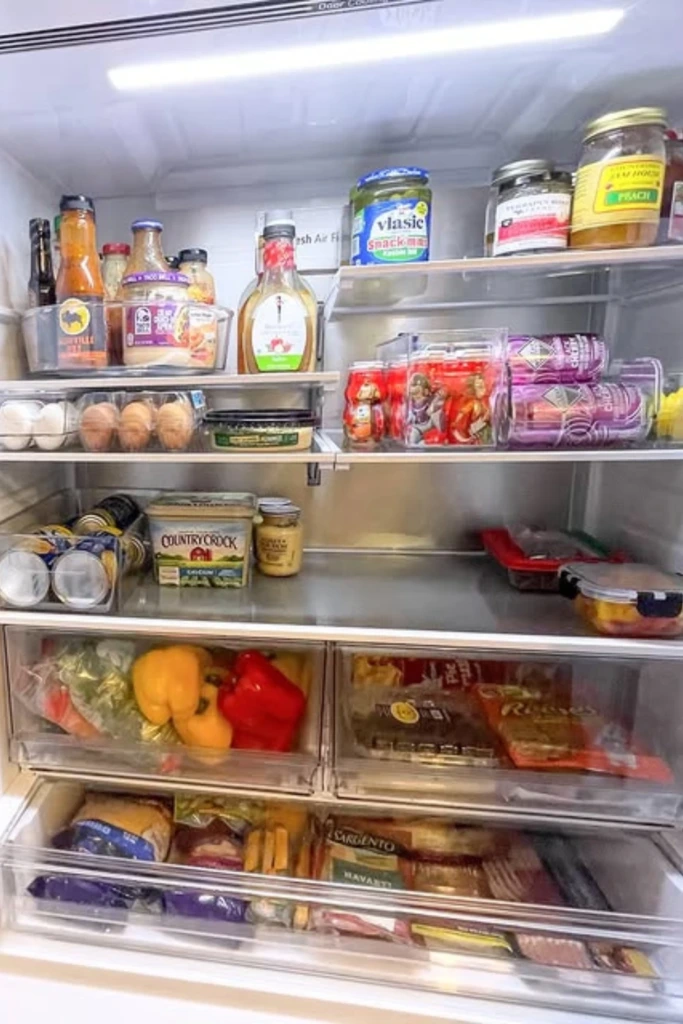
Sauces, dressings, dips, and spreads can easily spread across several shelves, making it difficult to locate the bottle you need.
A shallow bin provides a dedicated home for these products and allows you to move several containers at once. You can separate everyday condiments from occasional-use sauces or create a small section for ingredients used in cooking.
Choose a container with enough room for different bottle shapes and a base that is easy to wipe clean. A transparent design helps you identify nearly empty bottles before making another grocery purchase.
Check dates and storage instructions on opened products, since different condiments have different refrigeration requirements. Discard items that show signs of spoilage or have been stored improperly.
14. Use Color-Coded Lids to Stay Organized
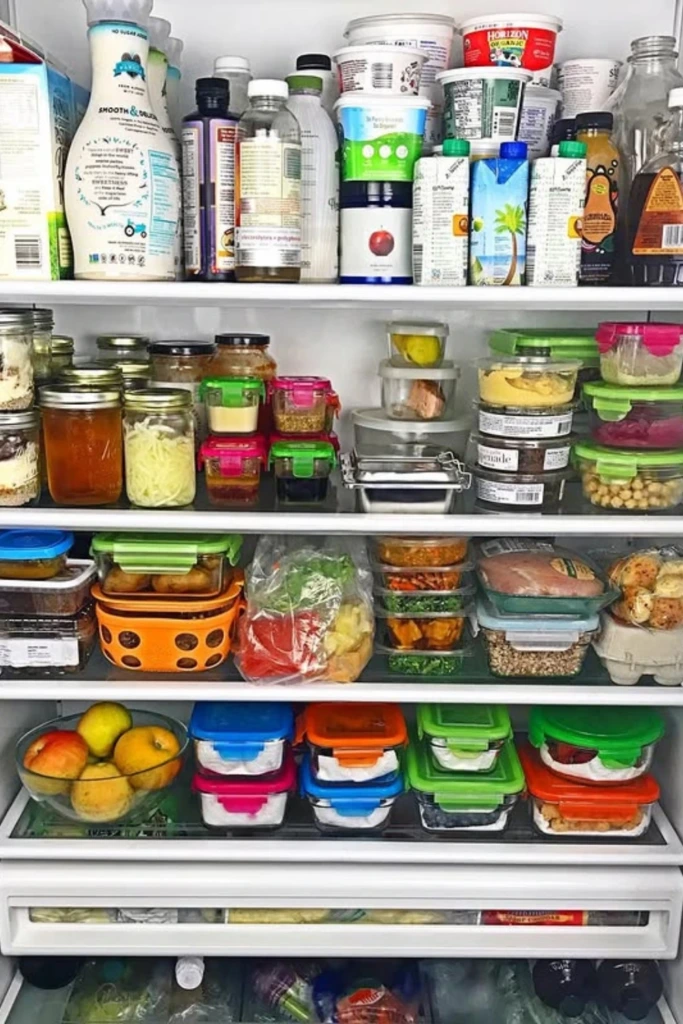
Color-coded container lids offer a quick visual way to distinguish different types of stored food.
For example, you could use one color for lunch portions, another for family leftovers, and a third for prepared ingredients. A consistent color scheme makes it easier to find what you need without reading every label.
This approach is especially useful when preparing several meals at once or organizing food for multiple household members.
Keep in mind that color alone cannot identify a food's preparation date or confirm whether it remains safe to eat. Add a written label with the contents and date whenever the information matters, and choose lids that seal securely.
15. Use Matching Containers for a Uniform Look
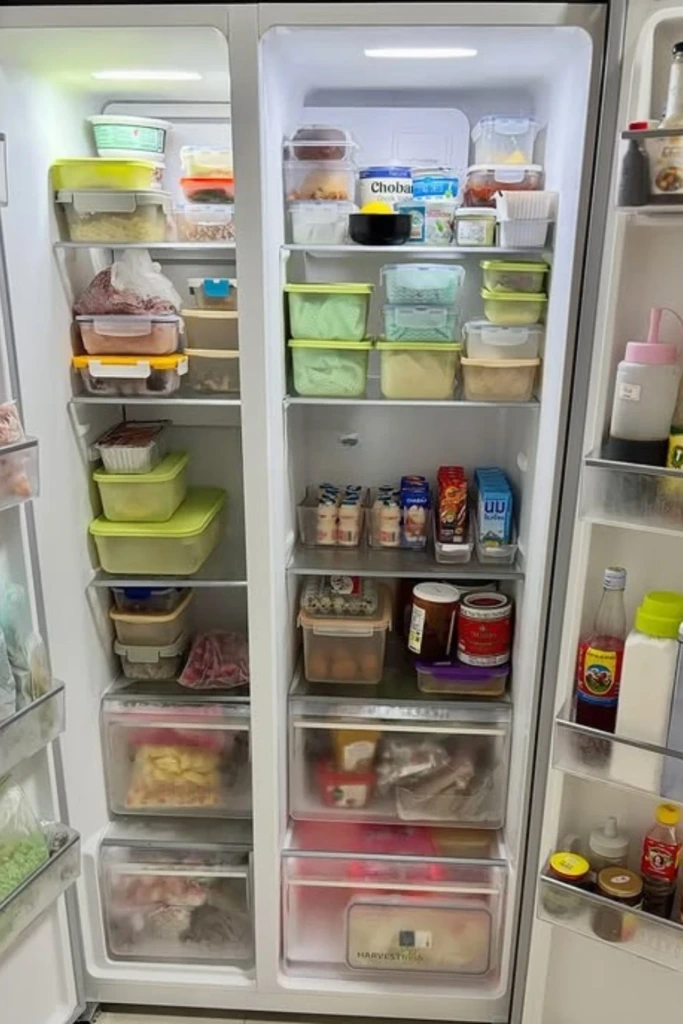
Matching containers create a consistent appearance and can make it easier to arrange items efficiently. When their dimensions are similar, they are often simpler to stack and fit together than a collection of unrelated packages.
Look for containers with secure lids, practical shapes, and sizes that suit the foods you typically store. Rectangular designs can make efficient use of shelf space, while smaller containers are useful for individual portions.
Before replacing all your existing storage, check whether your current containers already meet your needs. You can create a tidy system by grouping similar sizes together and reserving new purchases for genuine storage gaps.
A uniform appearance is helpful, but easy cleaning, safe materials, and convenient access should come first.
16. Stack Produce in Clear Mini Bins
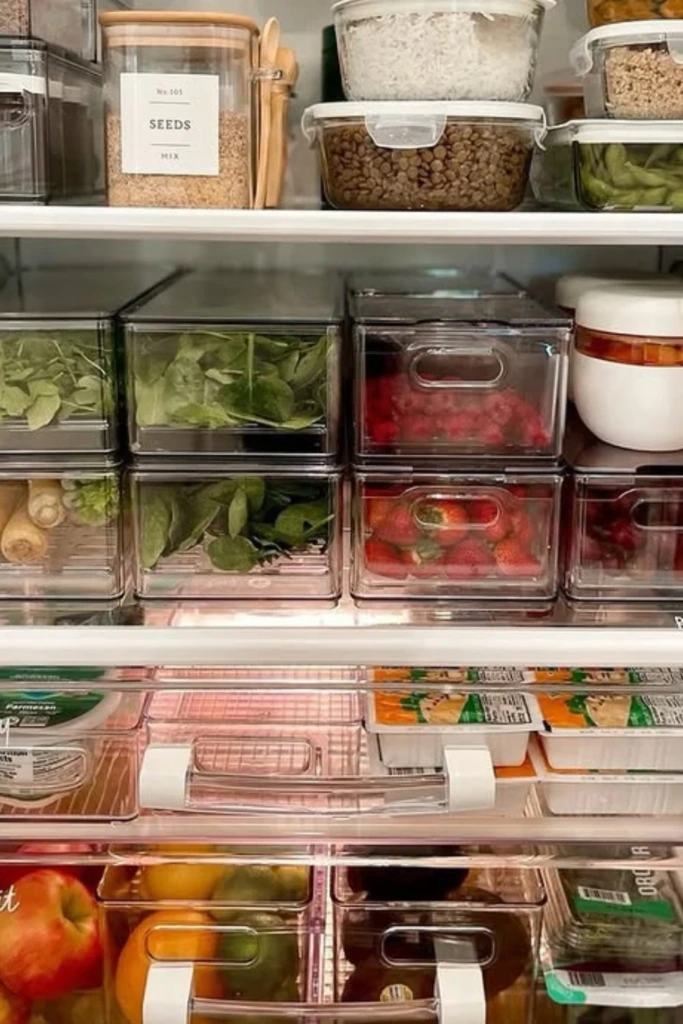
Small transparent bins can keep delicate produce organized without requiring a large drawer for every type of ingredient.
Use separate containers for items such as berries, spinach, herbs, or smaller vegetables when their storage needs are compatible. Grouping similar foods also makes it easier to see what needs to be eaten soon.
Arrange the bins so the items you use most frequently are easiest to reach. Avoid stacking containers too high or placing heavy items on delicate produce.
Pay attention to moisture as well. Some vegetables benefit from humid storage, while berries often deteriorate faster when moisture accumulates. Keep produce dry when appropriate, remove spoiled pieces promptly, and clean the containers regularly.
17. Create a Leftovers Zone
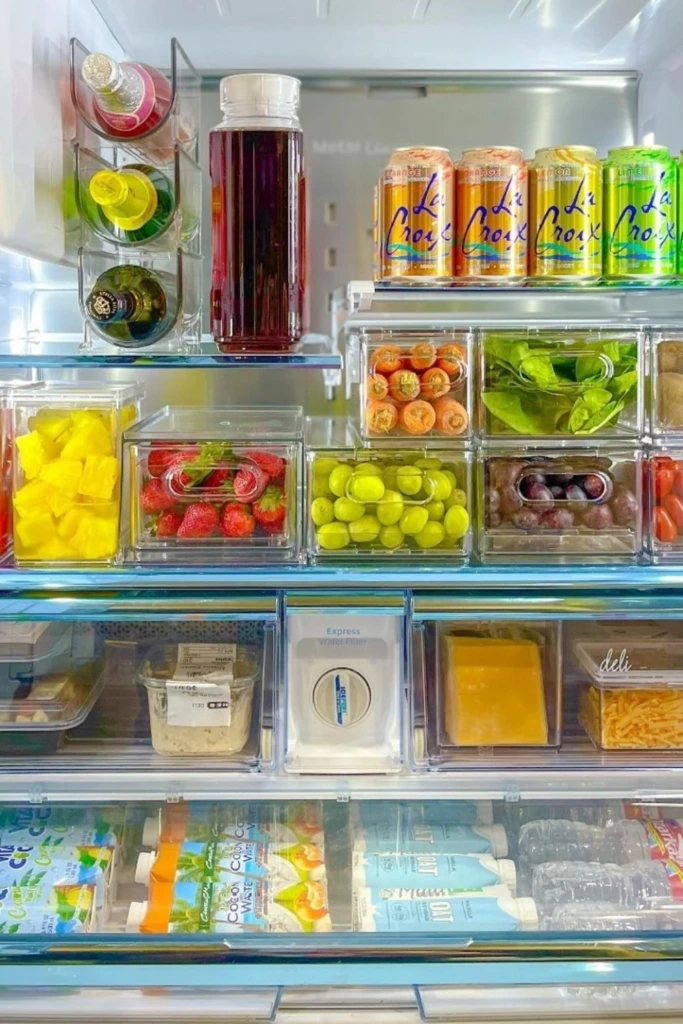
A dedicated leftovers area helps prevent cooked food from being forgotten behind new groceries.
Choose a clearly visible shelf or a suitable bin where you keep refrigerated meal portions and other prepared foods. Place older items toward the front so they're easier to notice and prioritize.
Label containers with their contents and preparation dates. This is particularly helpful when several meals are stored at once or when family members share responsibility for using leftovers.
Make checking this area part of your daily routine before planning another meal. Use leftovers within recommended storage periods, and discard food that has been stored too long or whose safety is uncertain.
A designated leftovers zone can also help you plan meals around ingredients you already have, reducing unnecessary grocery purchases.
18. Label Every Bin for Clarity
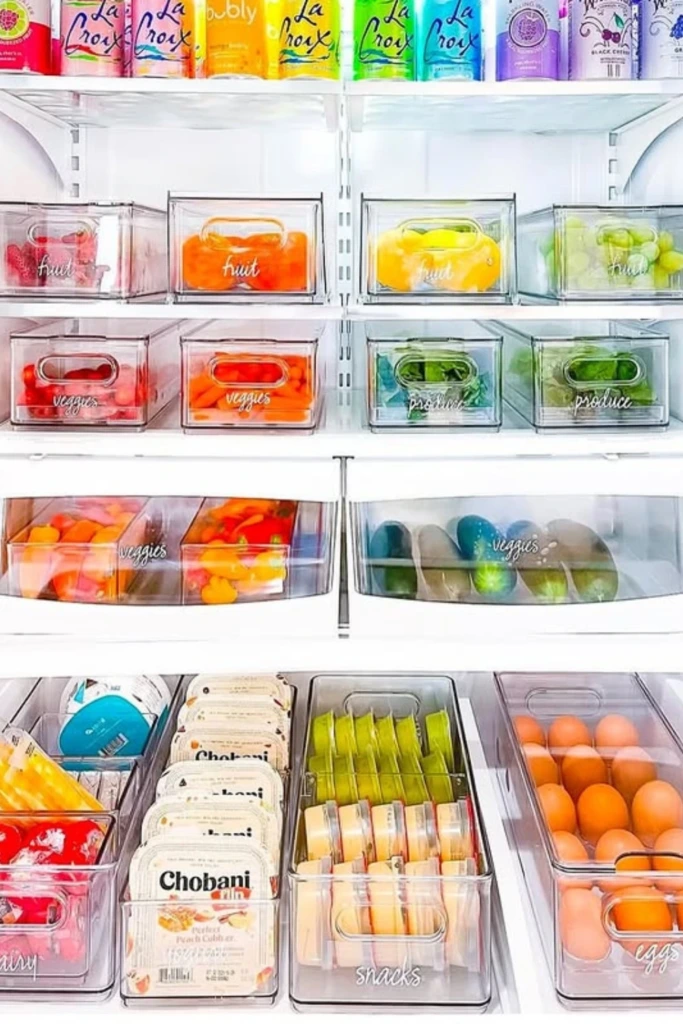
Clear labels make an organizing system easier to follow, even when someone else puts away the groceries.
Use short descriptions such as "Snacks," "Produce," "Breakfast," or "Ready to Eat" to identify each container's purpose. If several bins look alike, labels prevent people from moving items into the wrong section.
Removable labels are convenient because refrigerator arrangements often change as shopping habits and household needs evolve. Choose materials that remain readable in cold, occasionally damp conditions.
For perishable foods, consider adding dates alongside category labels. This provides useful information about when something was prepared or opened rather than simply showing where it belongs.
Keep the labeling system simple. A few well-defined categories are generally easier to maintain than an elaborate system that requires constant attention.
19. Add Clip-On Shelf Baskets
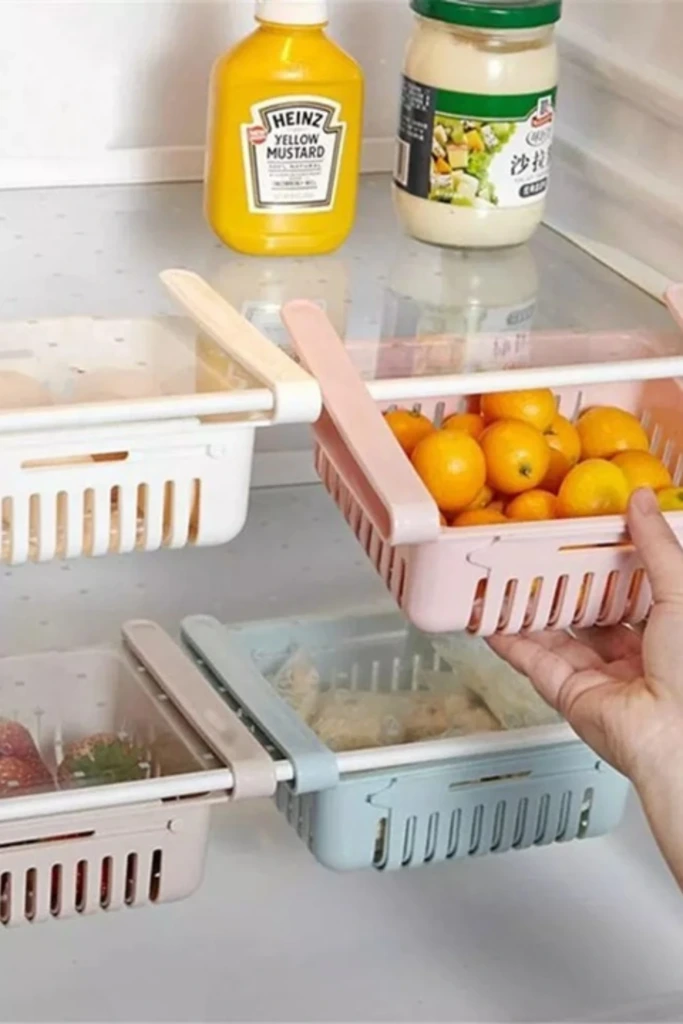
Clip-on baskets can create additional storage space beneath suitable refrigerator shelves. They are especially useful in compact refrigerators where the main shelves fill up quickly.
Depending on the design, these baskets may hold lightweight packaged snacks or small items that would otherwise occupy valuable shelf space.
Before installing one, confirm that it is compatible with your shelf thickness, supports the intended weight, and leaves enough room for items stored underneath. Avoid placing heavy jars or fragile glass containers in a basket that isn't designed to support them.
Make sure the added organizer doesn't interfere with the door, block important airflow openings, or make cleaning difficult.
If your refrigerator already feels cramped, first remove expired products and unnecessary packaging. Better use of existing space may be more effective than adding another accessory.
20. Organize Freezer Drawers by Category
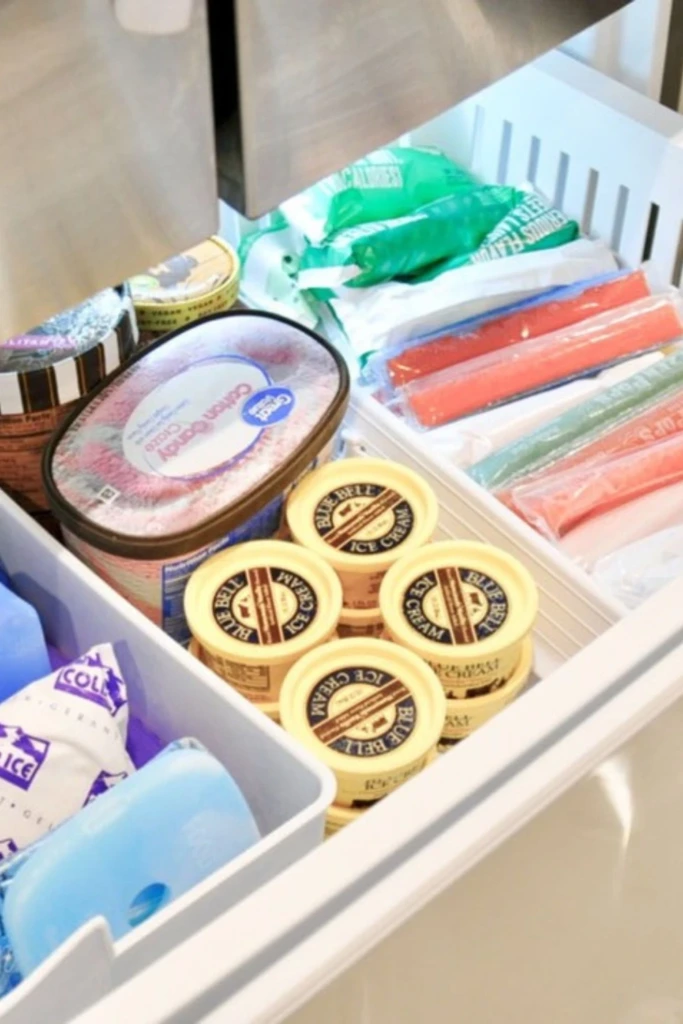
Freezer drawers are easier to use when frozen foods have designated locations instead of being piled together.
Create separate sections for vegetables, meat, prepared meals, desserts, and other items your household regularly uses. Small freezer-safe bins or dividers can keep packages upright and prevent smaller products from disappearing beneath larger ones.
Label containers with their contents and freezing dates, particularly when food has been removed from its original packaging. Keep older items accessible so you can use them before newer purchases.
Freeze food in appropriate airtight packaging to help reduce freezer burn, and avoid overfilling drawers in ways that obstruct their movement or interfere with airflow.
Maintaining an inventory of frozen foods can also make meal planning easier. A quick check before grocery shopping helps you avoid buying ingredients you already have.
How often should I clean my refrigerator?
A quick weekly check is a practical way to keep your refrigerator clean and organized. Wipe up spills when they occur, remove spoiled food, and check for ingredients that need to be used soon.
A more thorough cleaning every few months can help prevent lingering odors and accumulated residue. If spills are frequent or raw food leaks, clean the affected area immediately rather than waiting for your next scheduled cleaning.
For a deep clean, remove the food and detachable shelves or drawers, following the manufacturer's instructions. Wash removable parts with warm, soapy water and clean the interior with a suitable food-safe cleaning method. Dry the surfaces before returning the food.
Use the opportunity to review dates, reorganize containers, and confirm that your refrigerator maintains a temperature of 40°F (4°C) or below. Regular maintenance makes it easier to keep the appliance hygienic without having to tackle a major mess later.
What is the best way to keep produce fresh in the fridge?
The most effective approach depends on the type of fruit or vegetable, since different produce requires different levels of humidity, airflow, and moisture control.
Use crisper drawers according to your refrigerator's instructions. Higher-humidity settings are generally suitable for many leafy vegetables, while lower-humidity settings often work better for ethylene-producing fruits. Keep ethylene-sensitive produce, such as lettuce, away from strongly ethylene-producing fruits when practical.
Store produce in appropriate bags or containers, and avoid trapping excess water around delicate ingredients. Paper towels may help absorb moisture in some containers, but replace them when damp and don't use them as a substitute for suitable storage conditions.
Wash produce when appropriate and dry it thoroughly if excess moisture could encourage spoilage. Some items keep better unwashed until use, so follow food-specific storage guidance when necessary.
Finally, check your refrigerator regularly, remove spoiled pieces, and keep frequently used produce visible. Good storage habits, consistent temperatures, and timely use generally make a greater difference than purchasing expensive organizers.