26 DIY Christmas Ornaments Ideas for 2026

Christmas decorating feels more meaningful when your tree reflects your personality, memories, and creativity. Instead of buying another set of mass-produced decorations, you can make ornaments that match your favorite colors, complement your home, and bring a personal touch to your holiday celebrations.
Homemade Christmas ornaments can be surprisingly affordable, especially when you use leftover fabric, paper, buttons, natural materials, or decorations you already own. Some projects take only a few minutes, while others offer a relaxing afternoon of crafting with family and friends.
Whether you prefer rustic woodland decorations, elegant neutral designs, colorful candy-inspired pieces, or nostalgic handmade keepsakes, these DIY Christmas ornament ideas offer plenty of inspiration for your holiday tree.
Can I Make My Own Christmas Ornaments?
Absolutely! You can create beautiful Christmas ornaments with basic crafting supplies and very little experience. Materials such as felt, yarn, cardstock, wooden slices, air-dry clay, ribbons, and clear baubles are excellent starting points.
Begin with a simple design that suits your skill level. For example, wrap yarn around a small ring to make a miniature wreath, decorate a wooden disc with paint, or fill a transparent ornament with artificial greenery. More detailed projects can incorporate stitching, miniature figures, layered paper, or decorative beads.
Making your own decorations also gives you control over the colors, shapes, and textures throughout your tree. Reusing household materials can help reduce waste and keep costs manageable, while personalized ornaments make thoughtful gifts and memorable family keepsakes.
1. Mini Yarn Wreath Ornaments

Mini yarn wreaths are an easy way to introduce soft textures and traditional greenery to your Christmas tree. You only need small rings, green yarn, craft glue, and a few decorative accents.
Wrap the yarn evenly around each ring until the base is completely covered. Secure the ends with glue, then decorate the wreath with tiny beads, miniature bells, ribbon bows, or small artificial berries. Finish with a hanging loop made from thin ribbon or twine.
Choose forest green for a classic holiday appearance, or experiment with cream, burgundy, and dusty pink for a more contemporary design. These lightweight ornaments look especially attractive when placed among warm white tree lights.
2. Felt Mountain Ornaments
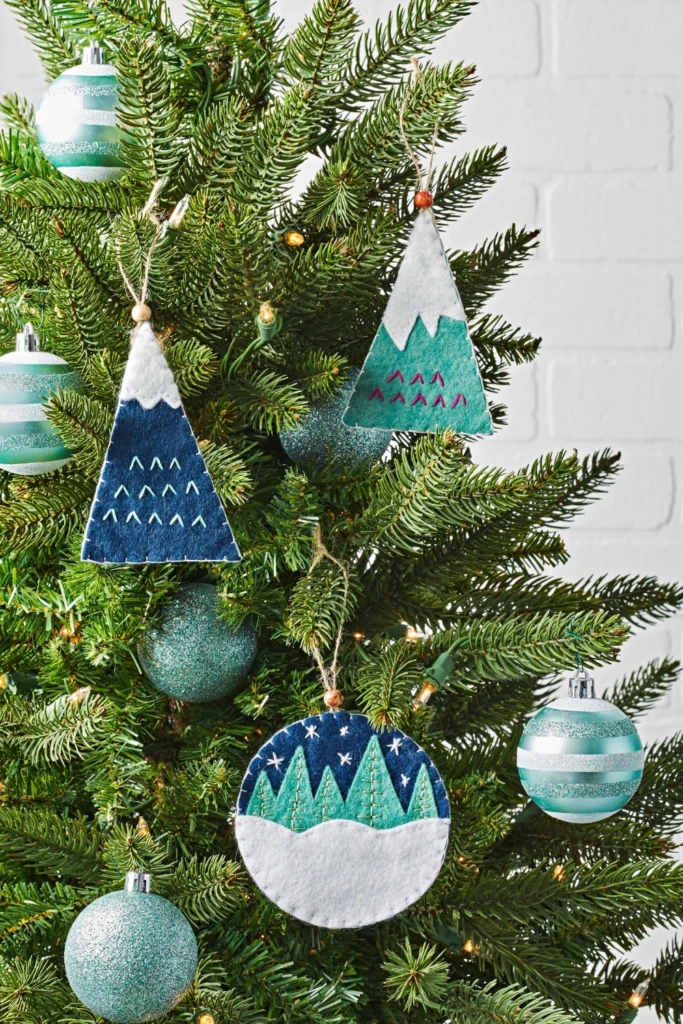
Bring a peaceful winter landscape to your tree with felt mountain ornaments. Their simple geometric shapes work particularly well in Scandinavian, minimalist, and nature-inspired holiday decorating schemes.
Cut mountain silhouettes from blue, teal, gray, or white felt. Layer contrasting pieces to create snowy peaks, then secure them with fabric glue or a few simple stitches. You can add embroidered lines, tiny stars, or a small moon to give each mountain scene its own character.
Attach a loop of twine or narrow ribbon for hanging. Using several shades of blue and white creates the impression of distant mountain ranges, while a single-color design produces a clean, modern finish.
3. Mop Yarn Santa Ornaments
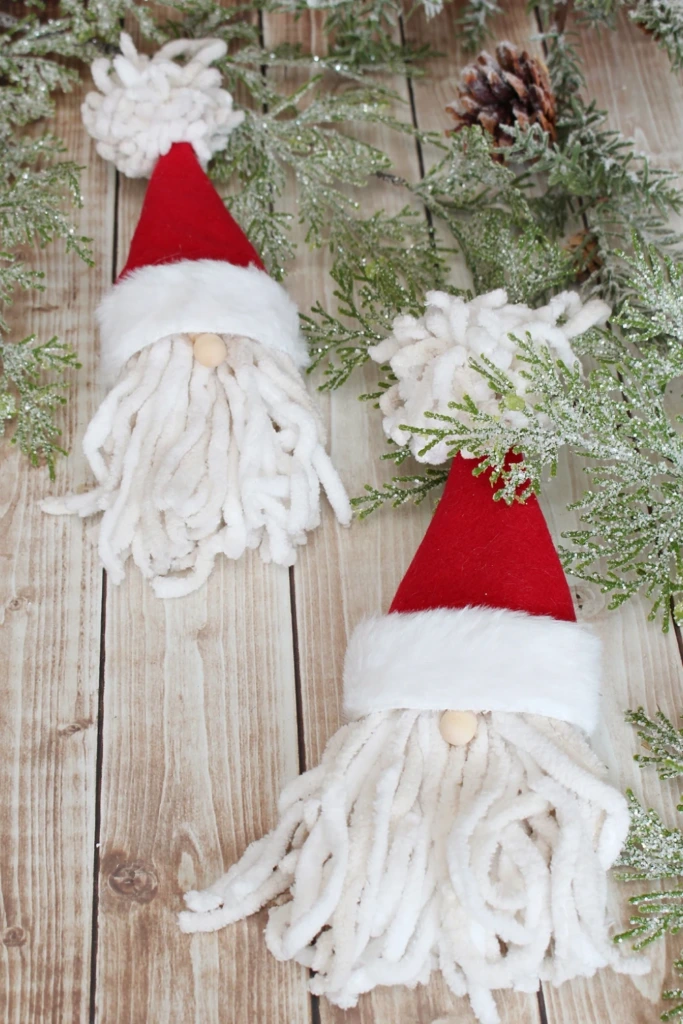
These cheerful Santa ornaments combine fluffy yarn beards with simple wooden faces to create a charming addition to a traditional Christmas tree.
Cut white mop yarn or thick cotton strands into manageable lengths and attach them beneath a wooden bead to form Santa's beard. Add small facial details using paint or a fine-tip marker, then create a pointed hat from red felt. A strip of white felt around the hat and a tiny pom-pom complete the design.
Glue the components securely and attach a hanging loop before displaying the ornament. You can vary the beard length, hat shape, and facial expression to make every Santa slightly different.
These decorations are particularly appealing for family crafting sessions, although young children should have adult assistance when using hot glue or small embellishments.
4. Bark Slice Wreath Ornaments
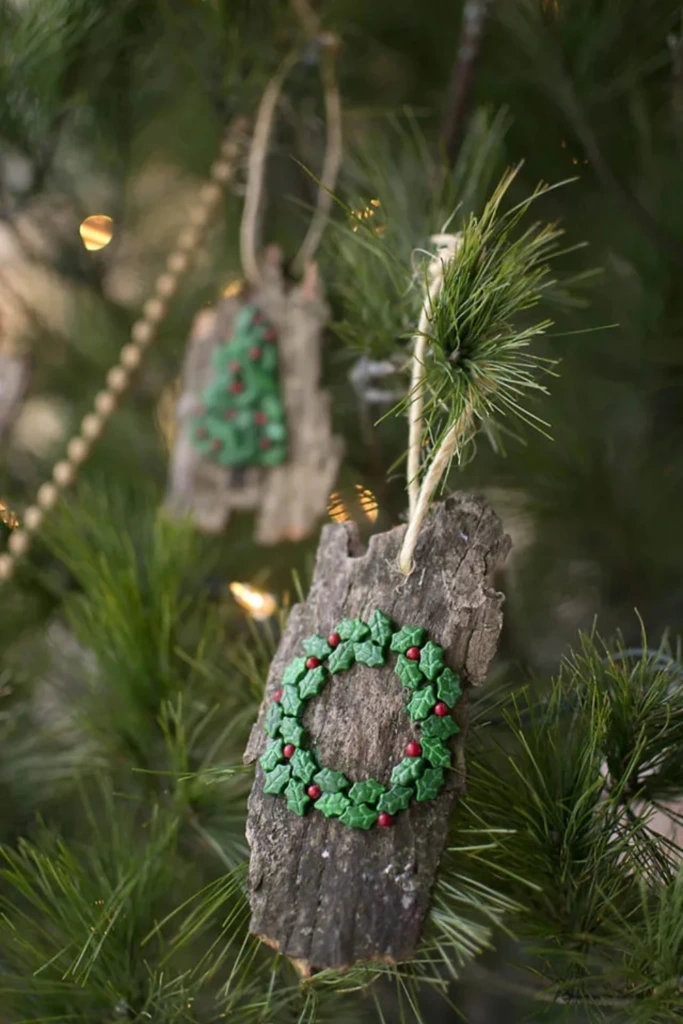
If you enjoy natural Christmas decorations, bark slice ornaments offer a woodland-inspired alternative to shiny store-bought baubles. Their irregular surfaces and earthy colors give the tree a relaxed, handmade appearance.
Start with clean, dry bark pieces or prepared wood slices. Attach a miniature wreath made from faux greenery, green clay, painted beads, or small artificial leaves. You can also arrange tiny wooden pieces into a simple evergreen tree shape.
Secure a jute loop to the back for hanging. Leave the bark in its natural state for a rustic finish, or add a light coating of white paint to suggest a dusting of snow.
Group these ornaments with pinecones, wooden beads, and warm golden lights to create a coordinated woodland theme.
5. Folded Paper Pinecone Ornaments
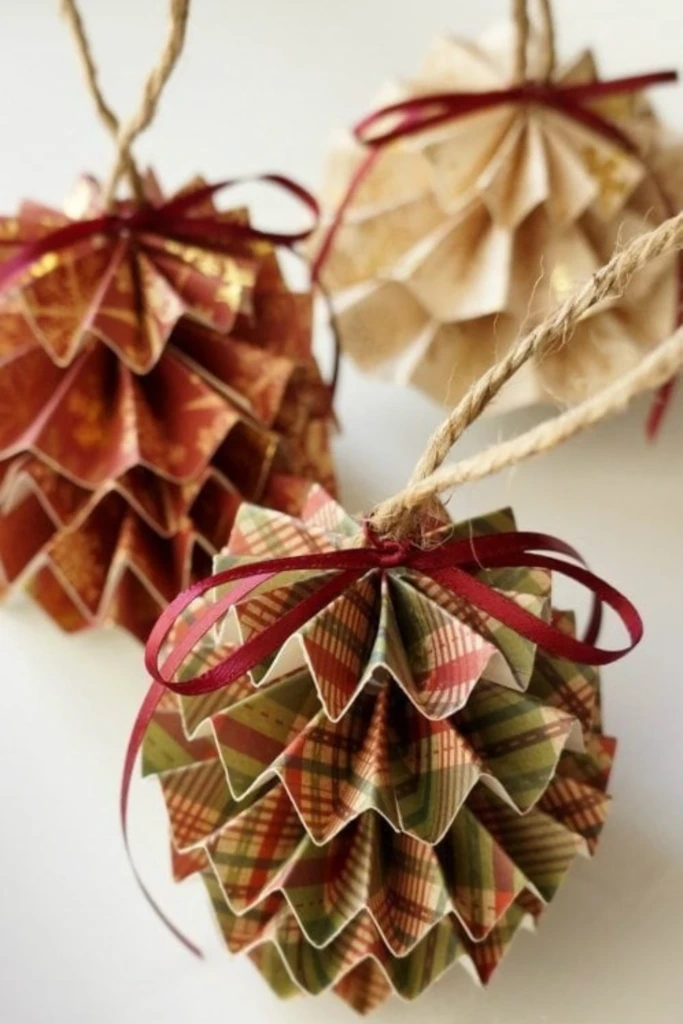
Paper pinecones are a creative way to turn decorative paper into dimensional Christmas ornaments. They offer the look of natural pinecones without requiring collected branches or complicated crafting equipment.
Choose patterned cardstock, scrapbook paper, or paper in complementary holiday colors. Cut the material into small sections, fold the pieces into repeated accordion or layered shapes, and assemble them into a pinecone-like form using craft glue.
Once the shape is secure, add a small ribbon bow or a loop of twine at the top. Metallic paper, botanical prints, and vintage-inspired patterns each create a different effect.
Because these ornaments are lightweight, they work well on delicate branches. Keep them away from open flames and other sources of heat.
6. Botanical Clear Bauble Ornaments
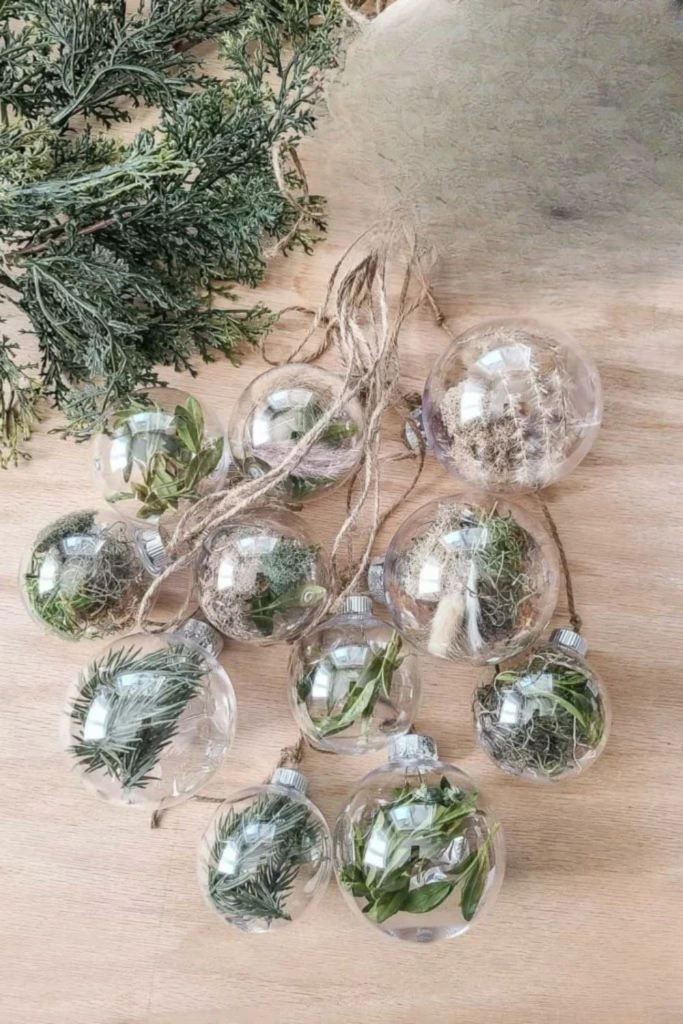
Transparent baubles allow you to showcase tiny natural details without overwhelming your Christmas tree. The result is elegant, understated, and easy to coordinate with neutral or nature-inspired decorations.
Use clear plastic or glass ornaments with removable tops. Insert small artificial pine sprigs, dried moss, rosemary-shaped faux greenery, or other lightweight decorative elements. Arrange the contents carefully with tweezers if the opening is narrow.
Replace the cap securely and add a ribbon or jute hanging loop. For a more layered look, combine greenery with tiny wooden stars or a small amount of decorative white filler.
These ornaments pair beautifully with white lights because the transparent surface allows illumination to pass through. If using fresh botanical materials, make sure they are completely dry before placing them inside to reduce the risk of moisture and mold.
7. Metal Washer Snowflake Ornaments
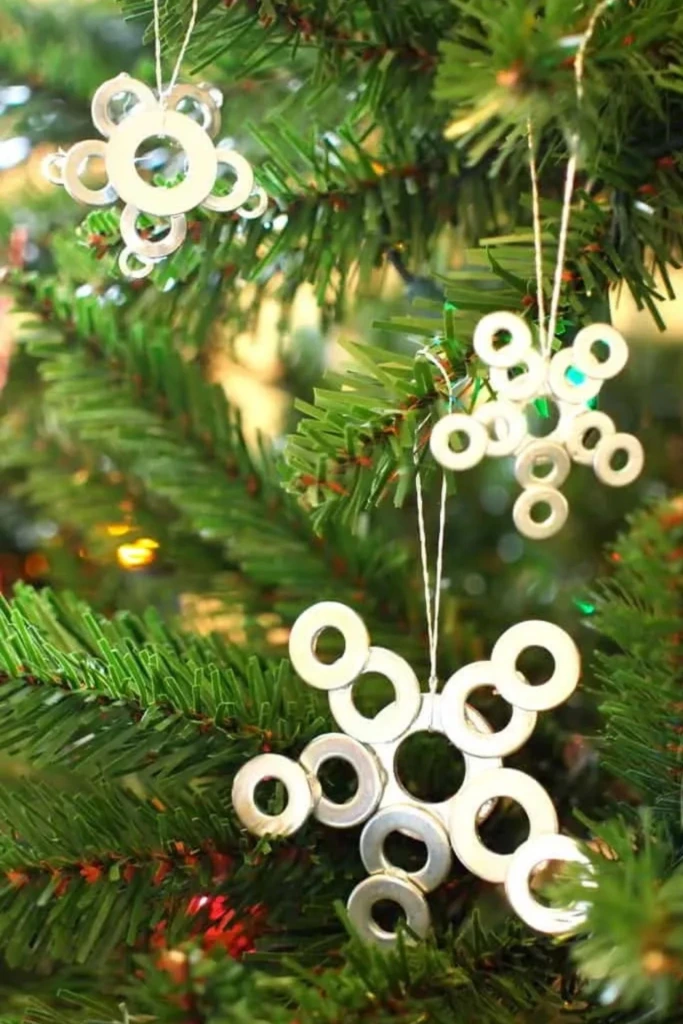
Ordinary metal washers can become attractive geometric snowflakes with a little patience and careful arrangement. This project is particularly useful if you enjoy industrial-style crafts or want to repurpose small hardware pieces.
Lay several clean washers on a flat surface to form a symmetrical snowflake pattern. Join the pieces with a suitable metal adhesive, following the manufacturer's directions, and allow the ornament to cure fully before handling it.
Leave the metal silver for a simple contemporary look, or apply suitable paint to create a gold, white, or icy-blue finish. A small ribbon or sturdy thread provides a way to hang the finished decoration.
Check the edges before decorating your tree, as metal components may have sharp surfaces. Keep these ornaments away from young children and place them on branches strong enough to support their weight.
8. Clay Photo Frame Ornaments
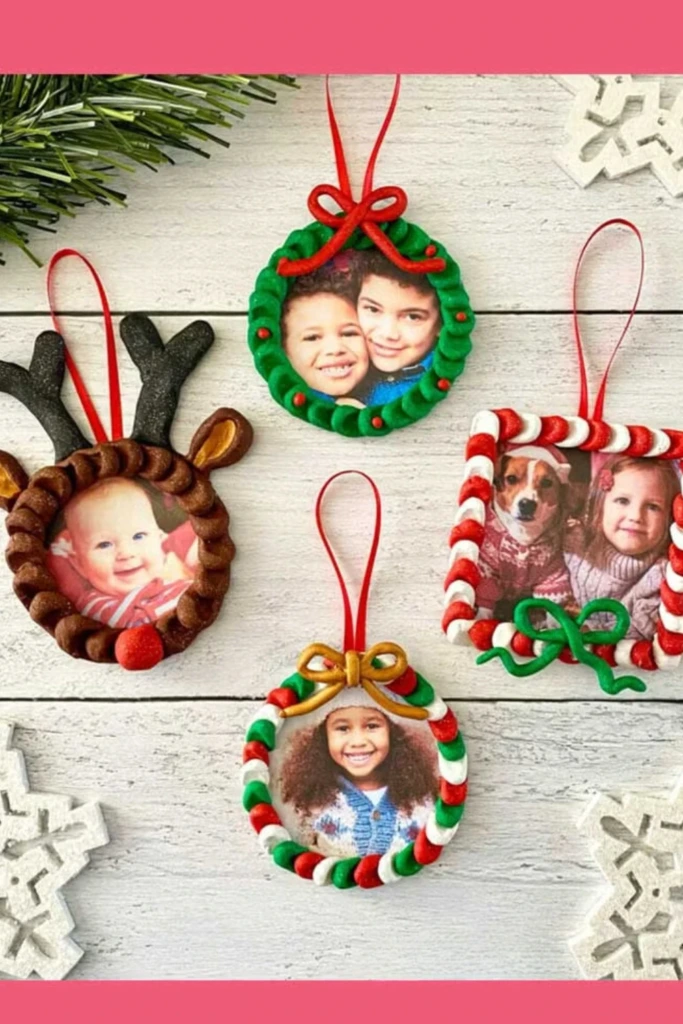
Photo frame ornaments turn favorite family pictures into decorations you can revisit every holiday season. They are also thoughtful gifts for grandparents, relatives, and friends.
Roll out air-dry clay and cut it into small circles, squares, or other shapes. Create an opening in the center for a photograph, then decorate the border with tiny stars, holly leaves, snowflakes, or simple textured patterns.
Before the clay dries completely, make a small hole near the top for hanging. Once it has dried according to the package instructions, paint the frame if desired and apply a suitable protective finish.
Trim a photograph to fit the opening and secure it to the back with an appropriate adhesive. Add a ribbon loop and write the year on the reverse to turn the ornament into a lasting holiday keepsake.
9. Snow Globe Scene Ornament
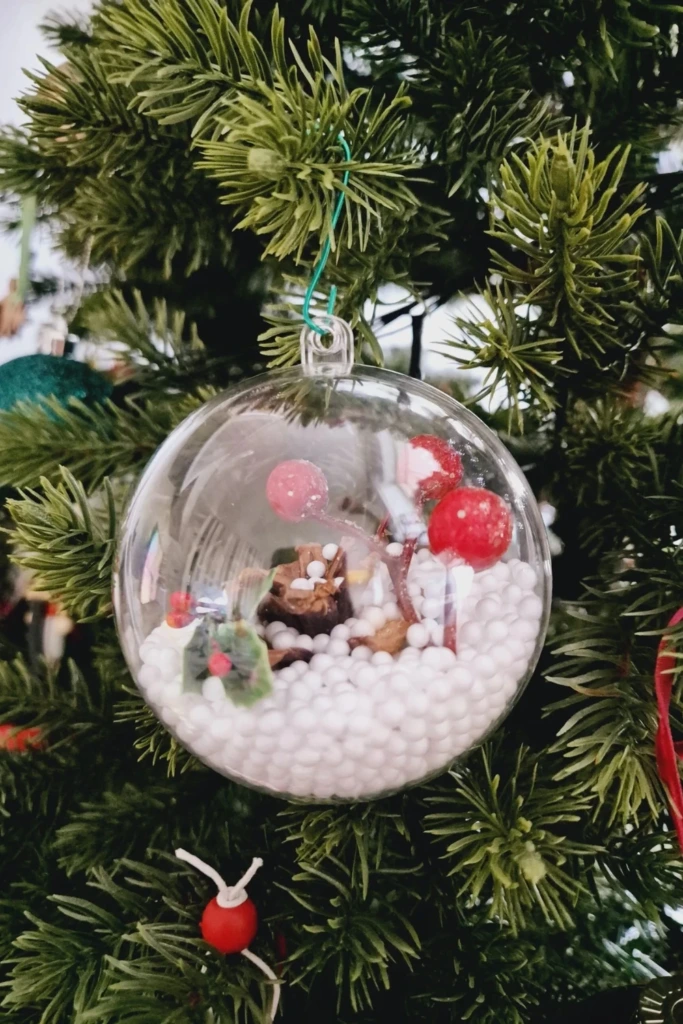
A miniature snow globe ornament creates the feeling of a tiny winter world hanging from your Christmas tree. Inside a transparent bauble, small trees, miniature presents, or festive figurines can form a scene that feels personal and imaginative.
Select a clear ornament with a wide opening. Arrange a small amount of artificial snow or white foam beads inside, then position miniature decorations using long tweezers. If you want a landscape effect, place the largest objects toward the back and smaller details near the front.
Secure any loose decorations with an adhesive compatible with the ornament material. Close the opening firmly and add a ribbon or wire hanger.
Choose a woodland scene, a tiny Christmas village, or a miniature winter celebration. Keep the interior uncluttered so the individual pieces remain visible through the transparent surface.
10. Wood Slice Christmas Tree Ornament
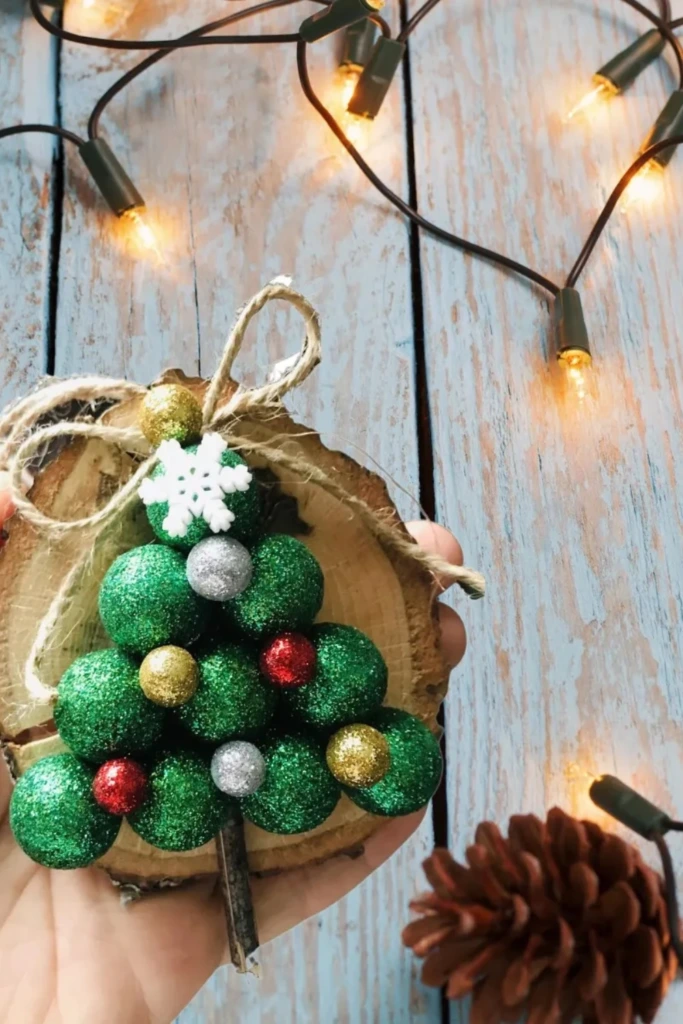
Wood slices provide a natural background for small Christmas tree designs. Their visible grain makes every ornament slightly different, even when you repeat the same pattern.
Start with a clean, dry wood disc. Attach a short twig to represent the trunk, then arrange small green beads, felt circles, or decorative pom-poms above it to form a triangular evergreen shape.
Add a tiny snowflake, a miniature star, or a few dots of glitter for extra detail. You can leave the wood unfinished for a rustic appearance or seal it with a suitable clear coating.
Make a small hanging hole before decorating, or attach a strong loop to the back. These ornaments look especially attractive alongside other natural materials, including pinecones, twine, and burlap ribbon.
11. Lid Cap Diorama Ornaments
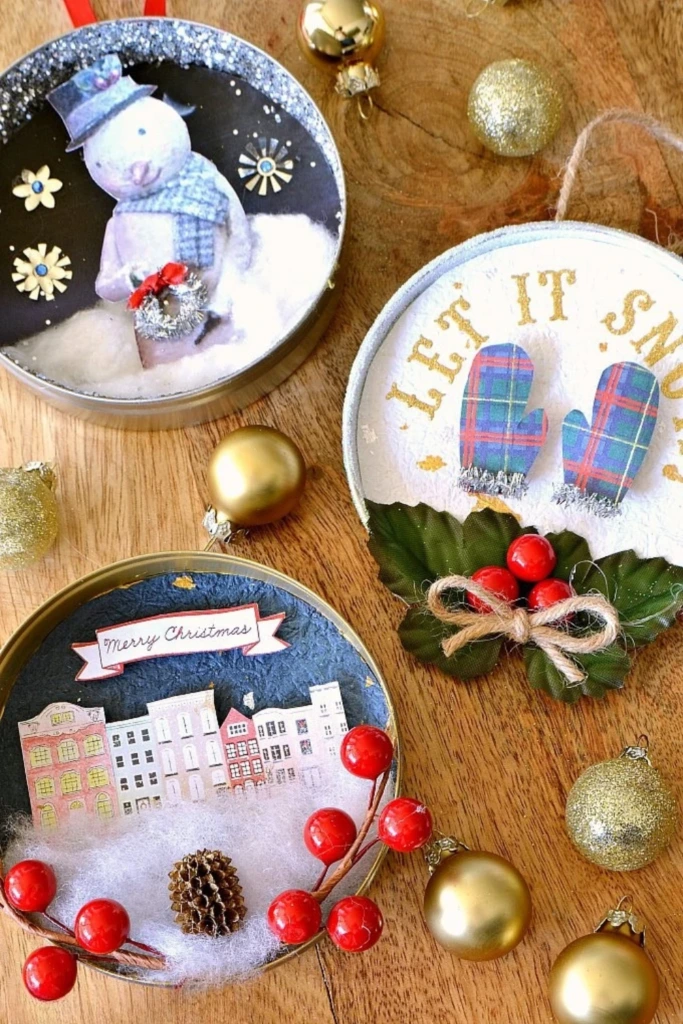
Recycled metal lids can become miniature stages for festive scenes. Their shallow shape makes them useful for displaying tiny objects while keeping the finished ornament compact.
Clean and dry the lid thoroughly before painting the inside with a winter-inspired background. Once the paint is dry, arrange miniature trees, paper houses, tiny figurines, or small cutout shapes inside.
Use a little cotton or artificial snow to create texture, and add faux holly leaves or decorative berries around the rim. A small loop attached securely to the back makes the lid easy to hang.
You can design each scene around a different theme, such as a snowy village, a woodland animal gathering, or a cozy cabin. These ornaments work well on traditional trees and make excellent conversation pieces.
12. Felt Cookie Ornaments
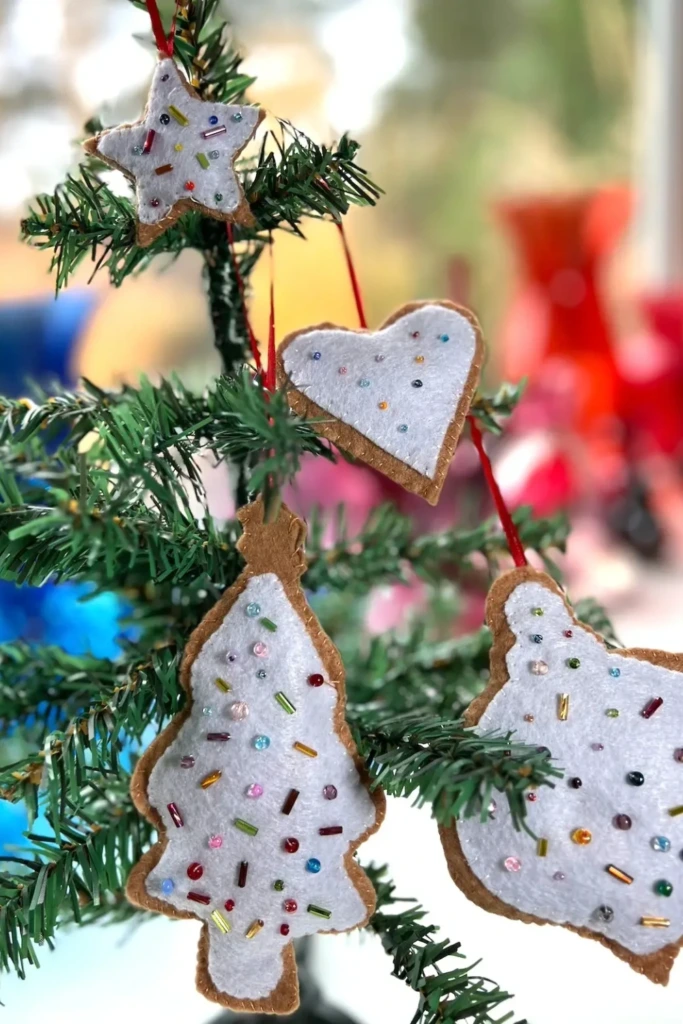
Felt cookies bring a playful bakery theme to Christmas decorating without attracting insects or leaving crumbs behind. Gingerbread people, stars, candy canes, and iced cookies are all easy shapes to recreate.
Cut two matching pieces from brown felt and join them around the edges using thread or fabric glue. If you want a slightly padded appearance, add a small amount of stuffing before closing the shape.
Decorate the front with white felt strips or embroidery to imitate icing. Small colorful beads can resemble sprinkles, while tiny buttons create extra character.
Attach a red ribbon or cotton thread for hanging. For a coordinated collection, use similar colors across several different cookie shapes.
If children are helping, embroidered details or larger fabric decorations are safer choices than tiny beads that could present a choking hazard.
13. Peppermint Candy Stocking Ornament
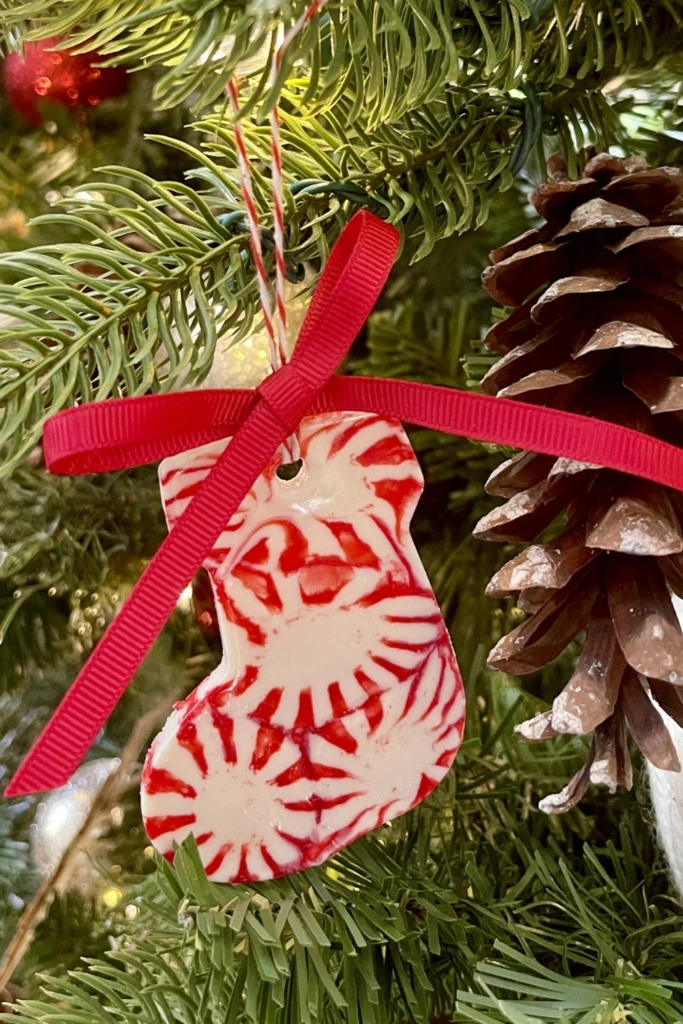
Peppermint-inspired stocking ornaments add bright red-and-white patterns to a festive tree. They are particularly suitable for candy-themed decorating or for anyone who enjoys traditional Christmas colors.
For a decorative version made from real peppermint candies, arrange unwrapped candies inside a stocking-shaped, oven-safe metal cutter placed on a parchment-lined baking tray. Follow a reliable melting method appropriate for the candies and supervise the process carefully, as melted sugar becomes extremely hot.
After the candy has cooled completely, remove it from the cutter and check that the shape is stable. A hanging hole must be planned while the candy is still workable; do not attempt to drill or pierce hardened candy.
For a more durable ornament, create the same stocking shape using white and red felt, polymer clay, or painted cardstock. Add a ribbon loop and decorative stripes to complete the design.
Candy ornaments made with real sweets can soften in warm conditions, so a non-edible version is generally better for decorations you intend to keep for future Christmases.
14. Vintage Card Art Ornament
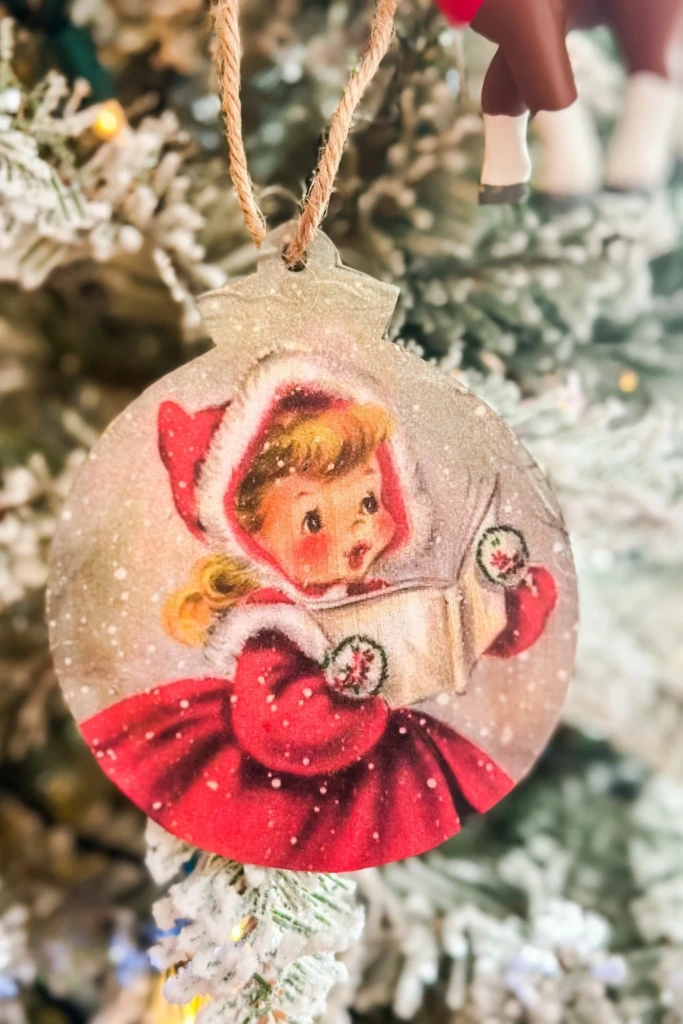
Old Christmas cards often feature illustrations, typography, and color palettes that feel wonderfully nostalgic. Turning these designs into ornaments gives meaningful artwork a new purpose instead of leaving it stored in a box.
Choose a favorite image and cut it into a circle, oval, or decorative shape. Mount it on a small piece of cardboard, thin wood, or another sturdy backing, then smooth the edges.
Apply a suitable decoupage medium to protect the image and attach a few subtle details, such as faux snow, fine glitter, or a narrow border. Allow the finish to dry fully before adding a hanging loop.
You can use greeting cards from previous holidays, vintage-style printed images, or illustrations made by family members. Add the year or a short message on the reverse to make each ornament more personal.
15. Plaid Fabric Scrap Wreath Ornament
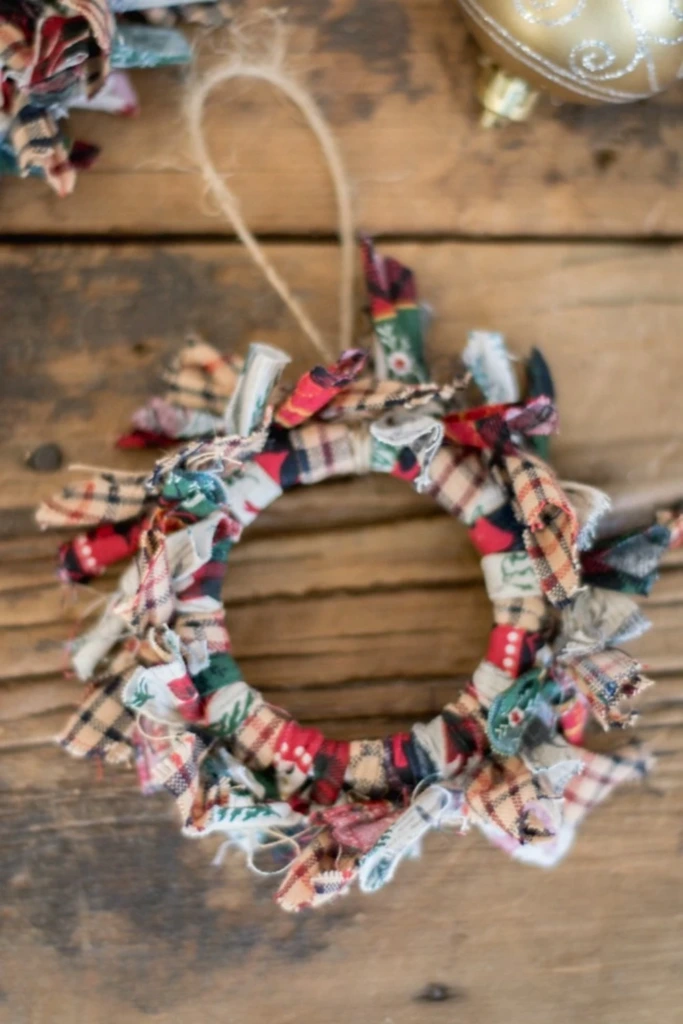
A fabric scrap wreath is an excellent project for using leftover material from sewing, quilting, or other home crafts. Plaid patterns are especially effective because they create a traditional, cozy Christmas look.
Cut your fabric into short, narrow strips. Tie or secure the strips around a small wire ring or embroidery hoop until the base looks full. Alternate different plaid patterns or combine red-and-green fabric with cream and neutral pieces.
Trim uneven ends to create a rounded silhouette, then attach a loop of jute twine. A small ribbon bow or artificial berry cluster can serve as the finishing detail.
This design is easy to customize for farmhouse, country, or vintage-inspired decorating. It also offers a practical way to coordinate ornaments with fabric stockings, tree skirts, or other handmade decorations.
16. Character Glitter Bauble Ornaments
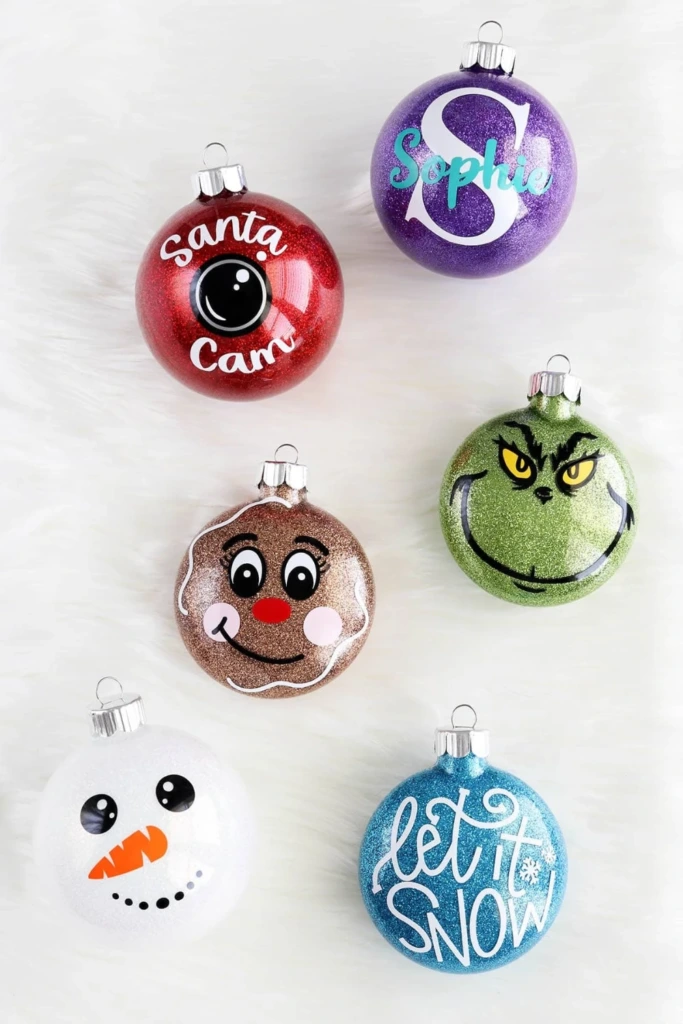
Character baubles add humor and personality to a Christmas tree. You can make recognizable holiday-inspired faces using clear ornaments, paint, decorative vinyl, and glitter.
Choose a character such as a reindeer, a green holiday creature, or a cheerful snowman. Paint the facial details on the outside of the bauble or use suitable adhesive vinyl to create a neat design.
For a glitter-filled effect, use clear ornaments specifically designed for decorative finishes and follow the manufacturer's instructions for any interior coating. Add a small amount of glitter, rotate the ornament to distribute it, and allow the coating to dry before replacing the cap.
Finish with a matching ribbon or a small felt accessory. Group several characters together for a playful section of your tree, or mix them with traditional ornaments to keep the overall display balanced.
17. Textured Earth-Tone Bauble Ornaments
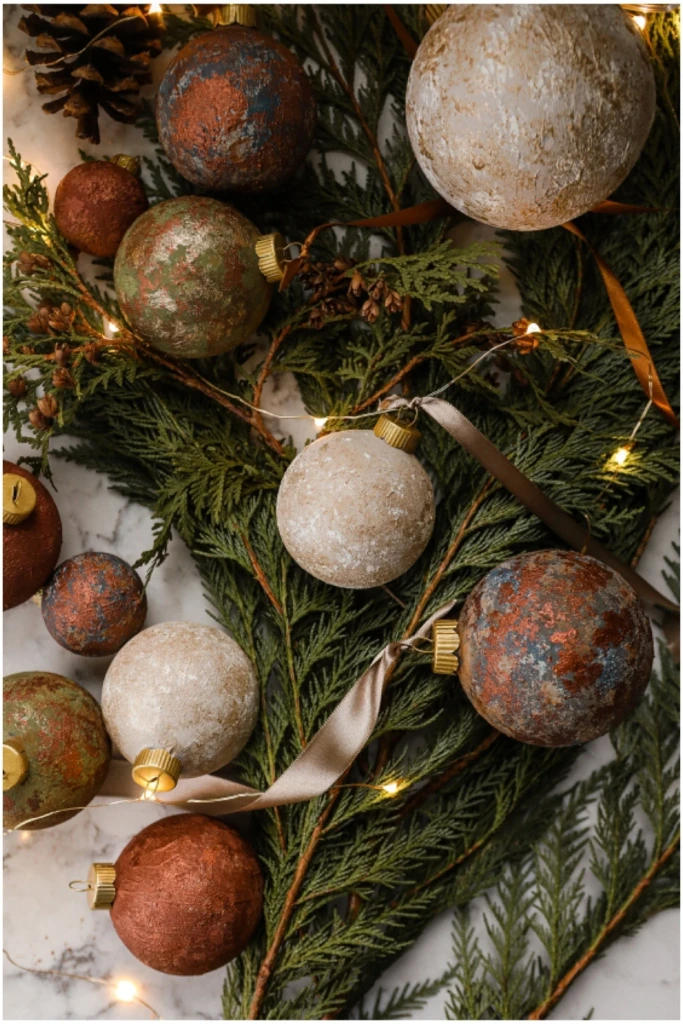
Earth-tone baubles offer an understated alternative to highly reflective Christmas decorations. Shades of sand, clay, taupe, muted brown, and warm cream create a cohesive palette that suits natural and contemporary interiors.
Start with plain ornaments made from a material compatible with your chosen paint. Apply thin layers of neutral acrylic paint, using a sponge or stippling brush to produce a subtle textured effect.
Once the paint has dried, add a compatible matte protective finish if needed. Velvet or satin ribbon can replace traditional metal hooks, making the finished decorations appear more refined.
For visual interest, combine several finishes within the same palette. A mixture of smooth, lightly speckled, and softly textured surfaces creates depth without relying on bright colors or excessive glitter.
18. Fabric Tree Ornaments
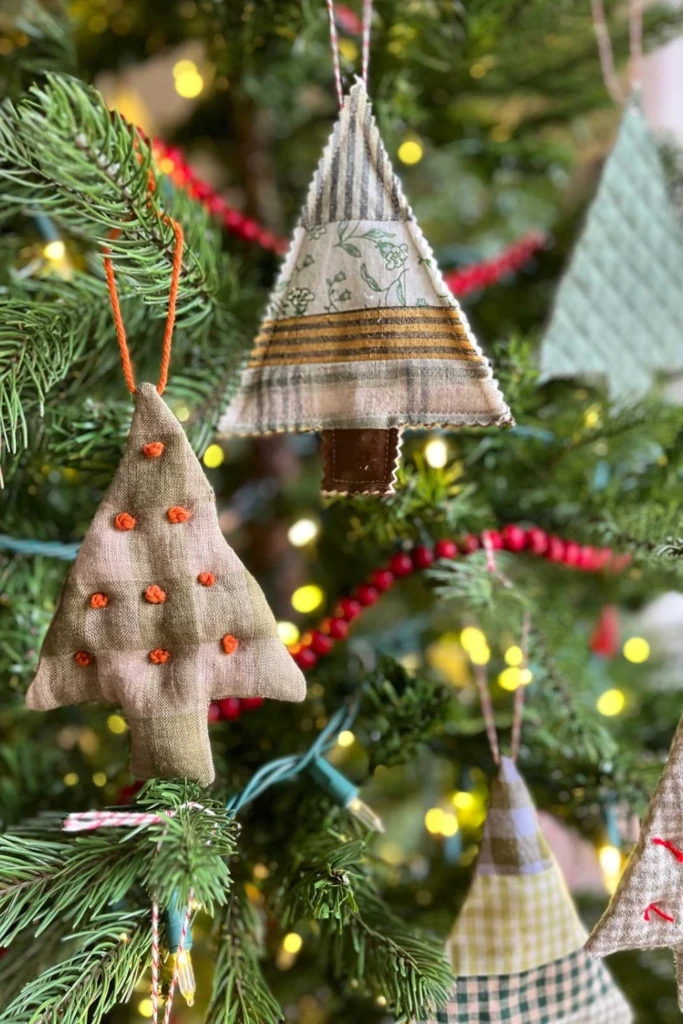
Fabric tree ornaments are ideal for crafters who enjoy sewing and want decorations that can be reused year after year. They are soft, lightweight, and available in countless patterns.
Cut two matching evergreen tree shapes from cotton, linen, felt, or leftover quilting fabric. Place the pieces together and sew around the edges, leaving a small opening. Add a little stuffing, close the opening, and attach a ribbon loop at the top.
Decorate the front with embroidered dots, tiny fabric stars, or securely attached buttons. If you prefer a simpler project, use felt and fabric glue instead of sewing.
Choose coordinated prints for a unified collection, or mix stripes, florals, and traditional holiday patterns for a patchwork effect. Store the ornaments in a dry container after the season to keep the fabric fresh and clean.
19. Swirled Paint Bauble Ornaments
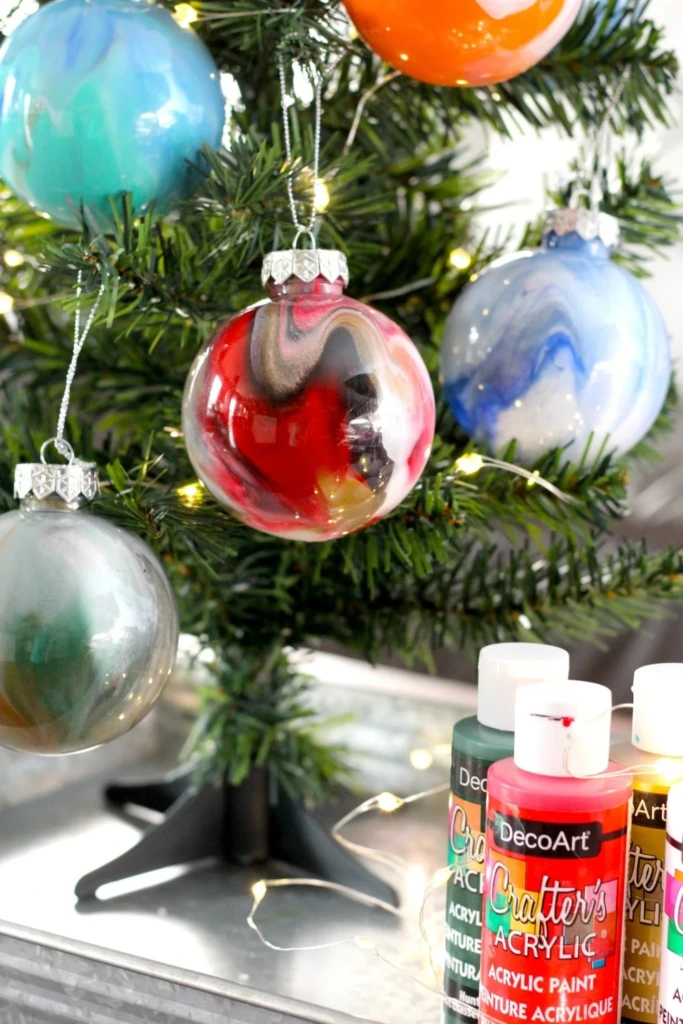
Swirled paint ornaments let you create colorful patterns without needing advanced painting skills. Each bauble develops a different design as the colors move across its surface.
Remove the cap from a clear ornament and add small amounts of compatible acrylic craft paint. Slowly rotate the ornament to encourage the colors to spread and overlap. Pastel shades create a soft, modern appearance, while jewel tones offer a richer holiday palette.
Avoid adding too many colors at once, as they can blend into a muddy finish. Allow excess paint to drain as directed by the paint manufacturer, and leave the ornament in a safe position until the interior is completely dry.
Once finished, replace the cap and add a ribbon. These ornaments work particularly well when displayed in small groups, where their individual patterns can stand out against evergreen branches.
20. Vintage Bulb Pinecone Ornaments
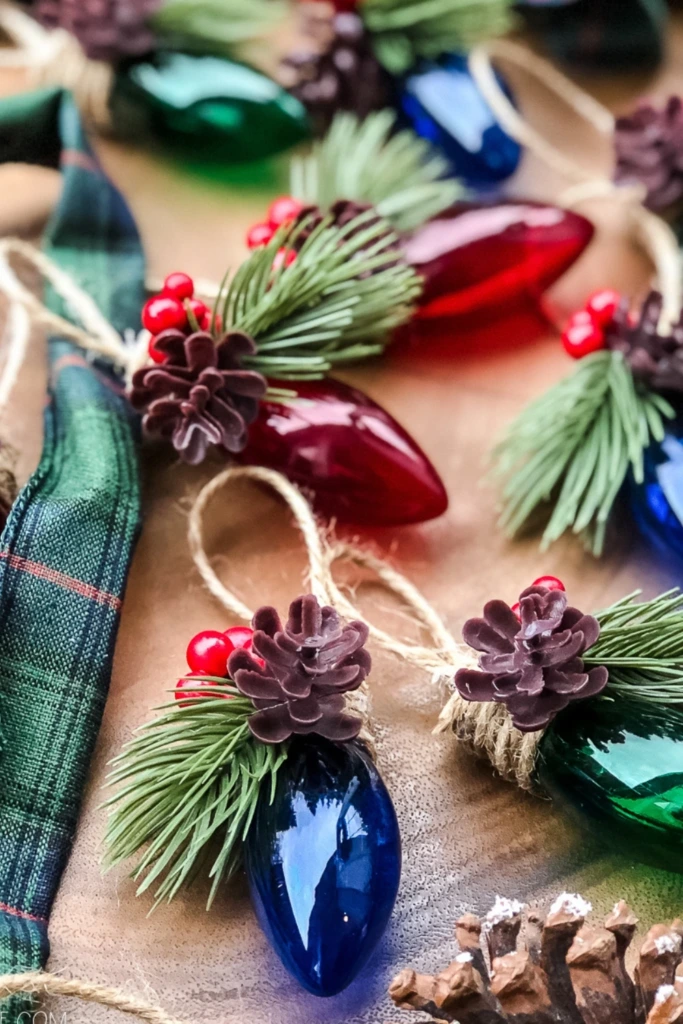
Vintage-inspired bulb ornaments combine the nostalgic shape of old-fashioned Christmas lights with the natural texture of pinecones and greenery.
Use a clean, empty decorative bulb-shaped ornament made from plastic or glass. Wrap its base with jute twine or add a narrow ribbon, then attach tiny artificial pinecones, evergreen sprigs, and red berries near the top.
Arrange the greenery carefully so that the ornament remains balanced and the decorative details do not hide its shape. Secure each piece with an adhesive suitable for the ornament material.
Choose traditional red and green accents for a classic look, or use muted greenery and cream-colored details for a softer woodland theme. Display these ornaments alongside wooden decorations and warm lights for a coordinated vintage-inspired tree.
21. Bottle Brush Forest Ornament
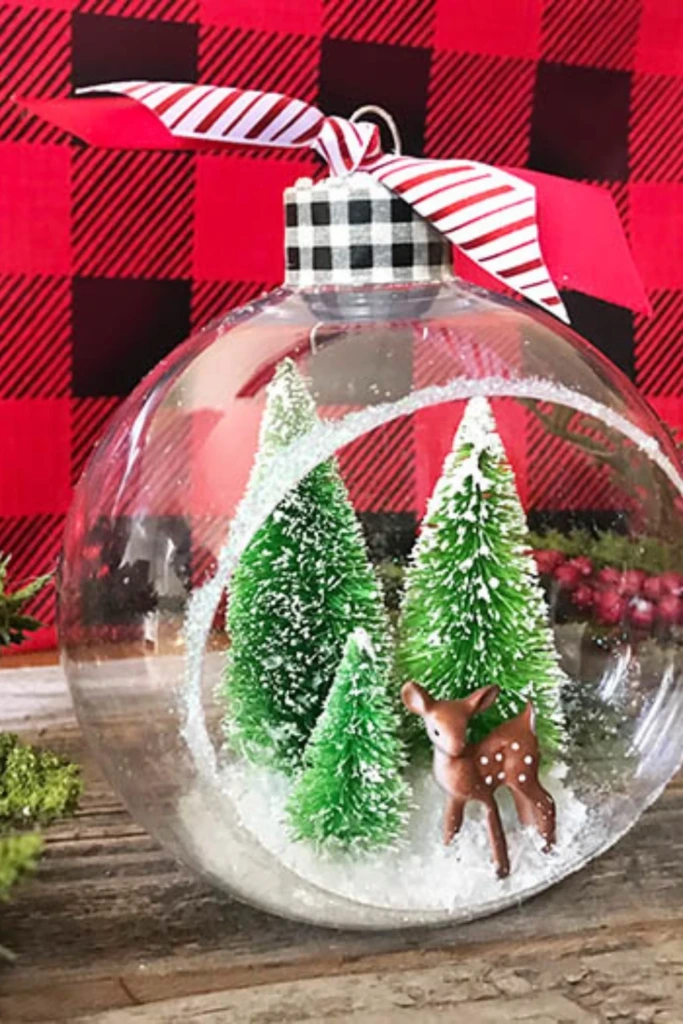
A miniature bottle brush forest creates a tiny snowy landscape inside a transparent ornament. It is a wonderful choice for anyone who loves woodland scenery or miniature holiday villages.
Select a clear bauble with an opening large enough to accommodate small bottle brush trees. Add a little artificial snow to the bottom, then position one or more miniature trees inside.
If space permits, include a tiny deer, a small woodland figure, or a miniature cabin. Arrange the pieces so the scene remains visible from the outside, and secure them if necessary to prevent movement.
Close the ornament carefully and add a decorative ribbon. White, silver, and natural wood accents help emphasize the wintry landscape, while a touch of green gives the scene depth.
These ornaments look especially charming when placed near soft white tree lights, which illuminate the miniature details.
22. Folded Book Page Angel Ornaments
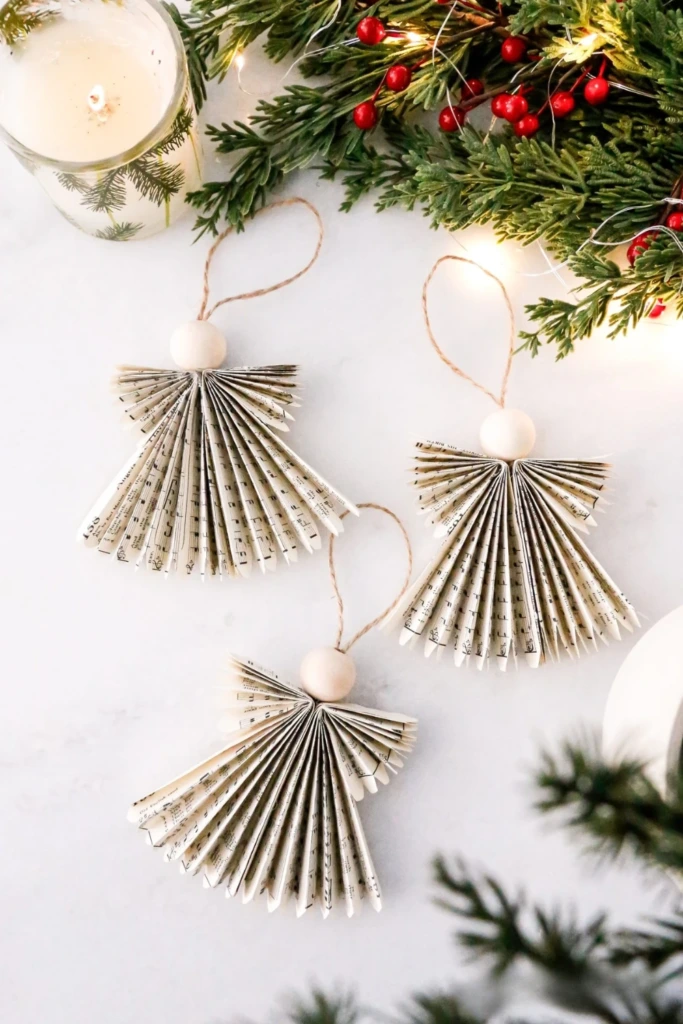
Paper angels made from folded book pages have a delicate appearance and are inexpensive to create. Their neutral colors make them suitable for farmhouse, vintage, and minimalist Christmas themes.
Use pages from a book you no longer need, sheet music, or decorative printed paper. Fold the paper into repeated accordion pleats, then shape the folds to create a flowing gown and outstretched wings.
Attach a wooden bead for the head and use a short length of string or thin wire to secure the center. Spread the folded sections carefully until the angel's shape becomes clear.
Add a small hanging loop and leave the paper unpainted for a natural finish. Alternatively, use metallic paper or a light dusting of glitter for a more decorative effect.
For sentimental value, you could use pages from a book associated with a favorite memory, provided you are comfortable repurposing the material.
23. 3D Paper Ornament Balls
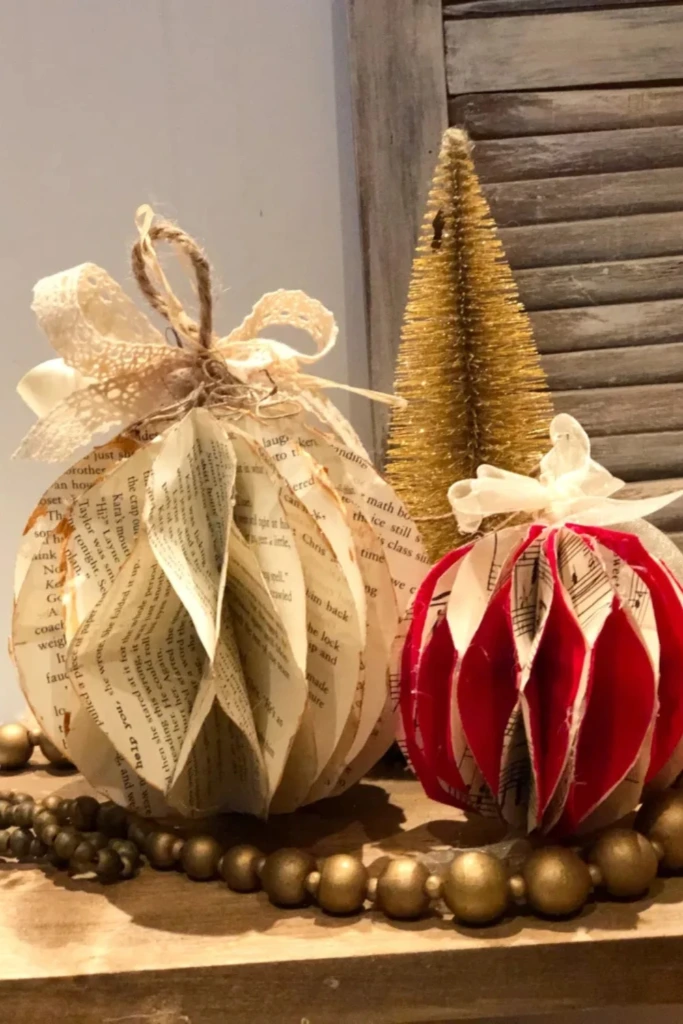
Three-dimensional paper balls offer a lightweight alternative to traditional spherical decorations. They can be made with patterned cardstock, old book pages, wrapping paper, or coordinated scraps from previous craft projects.
Cut several identical circles or other symmetrical shapes from your chosen paper. Fold each shape in half and glue the corresponding halves together, repeating the process until the pieces form a rounded, layered structure.
Attach a ribbon loop or twine hanger before the final sections are completely closed. Allow the glue to dry, then gently fan out the layers to create a balanced spherical shape.
Use metallic paper for a festive finish, botanical prints for a natural look, or contrasting patterns for a more playful design. These ornaments are particularly useful for filling gaps in the tree without adding much weight.
24. Tin Lid Snow Scene Ornament
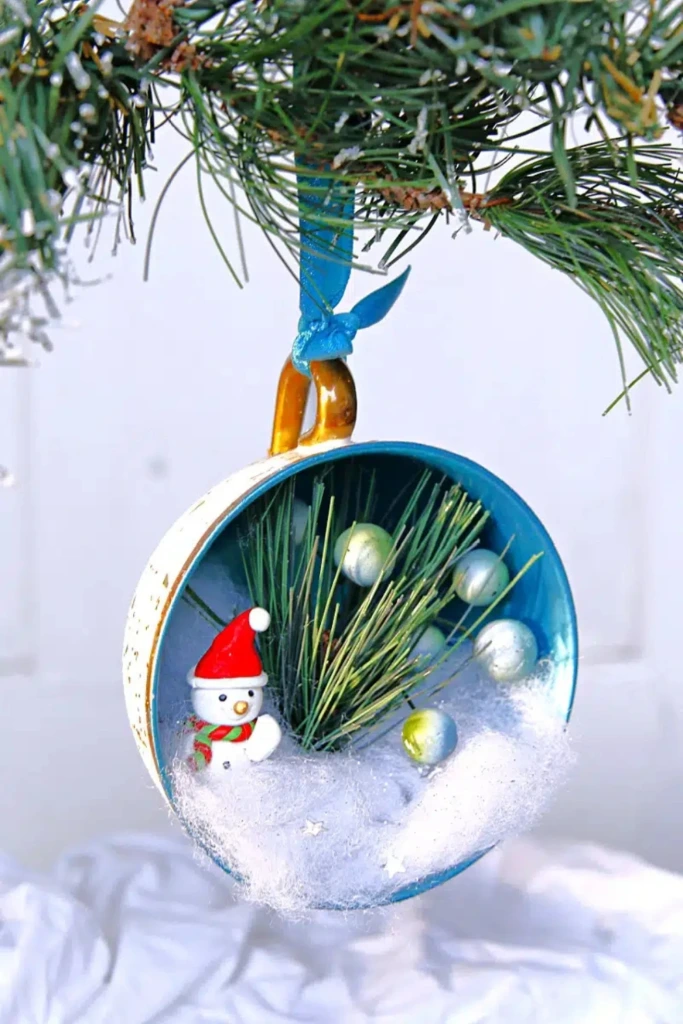
A small tin lid can serve as the frame for a miniature winter scene. The metal edge gives the decoration structure, while the shallow interior provides enough space for a few carefully arranged details.
Clean and dry the lid, then paint the inside in a winter color such as pale blue, navy, or soft gray. After the paint dries, attach a tiny snowman, miniature trees, artificial greenery, and a small amount of decorative snow.
Arrange the pieces at different heights to give the scene depth. A bright ribbon attached securely to the back makes the ornament easy to hang.
For a more personalized design, add a small paper house, a starry night background, or a miniature woodland animal. The reflective metal rim contrasts nicely with the painted scene and helps the ornament stand out on the tree.
Check the edges for sharpness before handling, and cover or smooth any exposed areas that could cause injury.
25. Felt Holly Berry Ornament
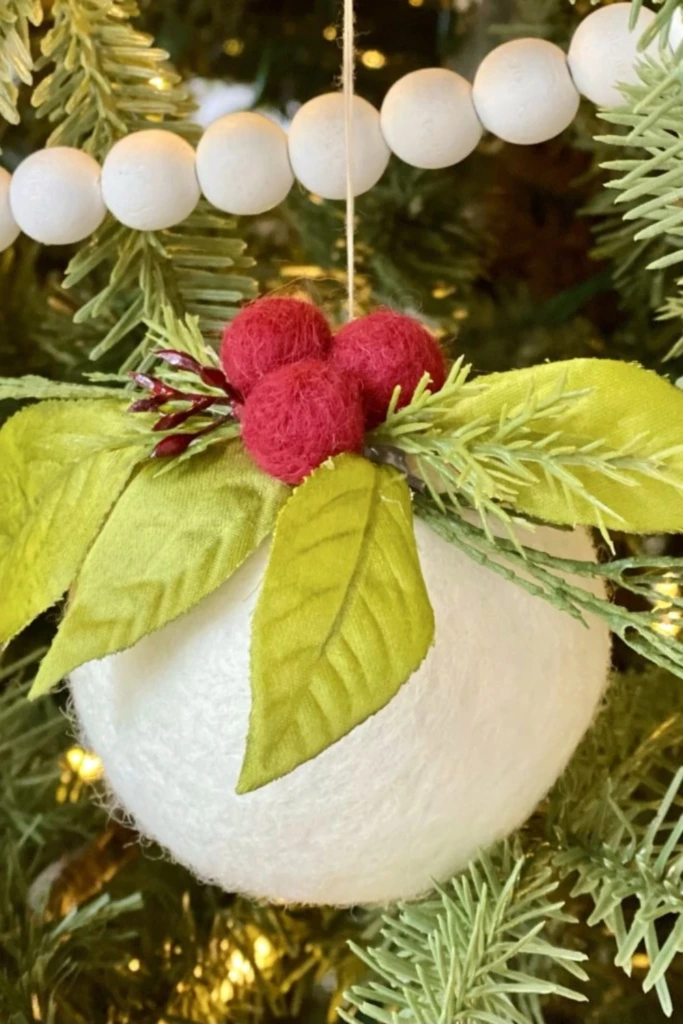
Holly berry ornaments combine a familiar Christmas motif with the softness of felt. Their simple shapes work well with country-style, Scandinavian, and traditional holiday decorations.
Cut several pointed holly leaves from green felt. Arrange the leaves in a small cluster and attach them to a white felt ball, foam sphere, or lightweight ornament base using suitable craft glue.
Add red pom-poms to represent berries, varying their sizes slightly to create a fuller appearance. You can also embroider a few leaf veins or add a small ribbon bow.
Attach a loop of thread or twine to hang the finished decoration. For a coordinated collection, repeat the same design on white, cream, or pale green bases.
Because the materials are soft and lightweight, these ornaments are especially suitable for filling spaces between larger baubles.
26. Epsom Salt Frosted Ornament
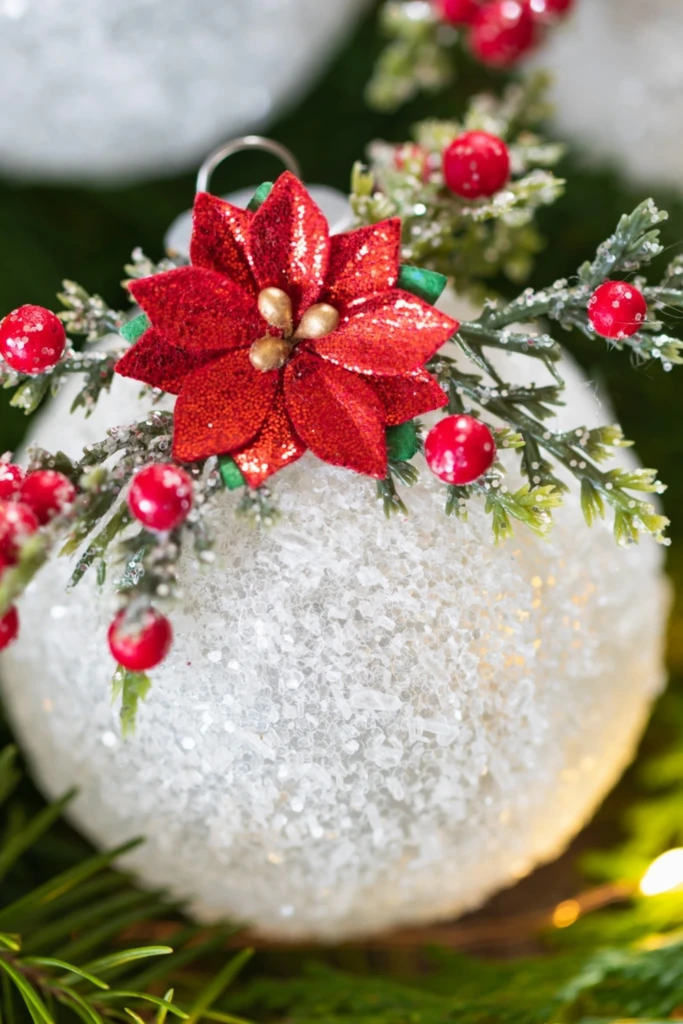
Frosted ornaments imitate the crystalline appearance of winter ice and freshly fallen snow. Epsom salt can provide a textured decorative coating when combined with an appropriate adhesive and a suitable ornament base.
Begin with a clean ornament and apply a thin, even layer of clear craft glue to the exterior. Sprinkle Epsom salt over the coated surface, gently pressing it into place where appropriate. Allow the ornament to dry completely before adding any embellishments.
Finish the top with artificial foliage, a small poinsettia, or red decorative berries. A narrow ribbon completes the design and provides a convenient way to hang it.
For a more controlled frosted appearance, cover only part of the ornament rather than its entire surface. The contrast between the clear material and the textured white areas can create a delicate winter effect.
Keep salt-coated ornaments away from moisture, as the finish may deteriorate in damp conditions. A compatible protective coating can help preserve the decoration if the product instructions permit it.
What Is the Most Common Ornament?
The spherical Christmas bauble is one of the most recognizable and widely used tree decorations. Its simple shape makes it easy to manufacture, decorate, and combine with other ornaments.
Baubles are available in glass, plastic, wood, and other materials, with finishes ranging from glossy and metallic to matte and textured. Popular colors include red, gold, silver, white, and green, although modern decorating schemes often feature pastels and neutral shades.
Their versatility also makes them ideal for DIY projects. You can paint plain baubles, add glitter, create marbled patterns, fill transparent versions with miniature decorations, or personalize them with names and dates.
When choosing ornaments for your tree, consider their weight, durability, and placement. Lightweight plastic baubles are often practical for households with young children or pets, while delicate glass ornaments are better placed on secure branches away from busy areas.
What Is Used to Make Ornaments?
Christmas ornaments can be created from a wide range of materials, depending on the design and the finish you want to achieve.
Common choices include:
Paper and cardstock: Ideal for folded angels, dimensional balls, decorative stars, and recycled-card ornaments.
Felt and fabric: Useful for soft wreaths, stuffed trees, cookies, and colorful character decorations.
Wood and bark: Great for rustic ornaments, miniature tree designs, and natural woodland themes.
Clay: Suitable for photo frames, personalized keepsakes, and sculpted holiday shapes.
Glass and plastic: Popular for transparent baubles, painted ornaments, and miniature scene displays.
Metal: Useful for geometric designs, tin-lid dioramas, and ornaments made from repurposed hardware.
Natural materials: Pinecones, dried foliage, twigs, and other suitable materials can add an organic touch.
Most projects require only a few basic tools, such as scissors, paintbrushes, ribbon, glue, and string. Select materials that work well together, allow adhesives and finishes to dry fully, and make sure every ornament has a secure hanging attachment.
The best DIY Christmas ornaments are those that suit your decorating style, fit your crafting abilities, and bring something personal to your holiday celebrations.