22 DIY Headboard Ideas You Can Do in 2026
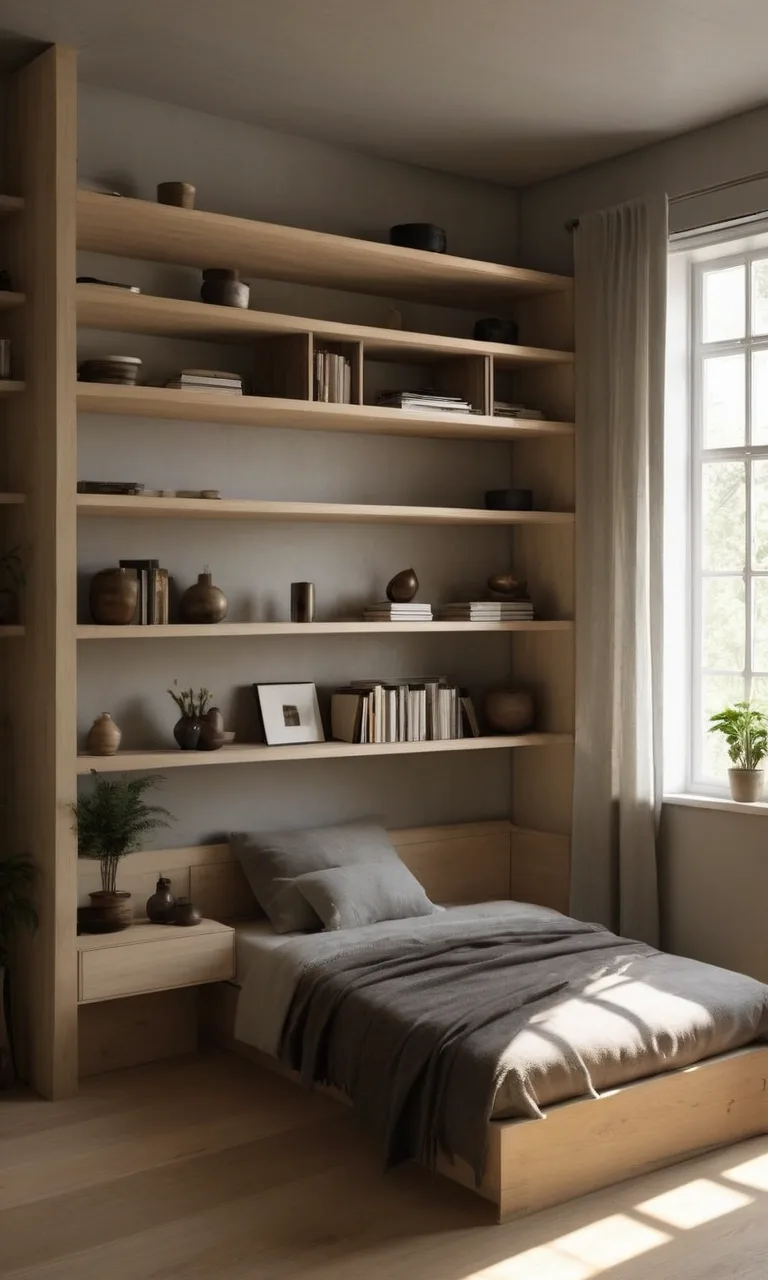
A bedroom can look beautifully furnished and still feel unfinished when the wall behind the bed is bare. A thoughtfully designed headboard helps bring the entire space together, adding texture, color, and a comfortable backdrop without requiring a complete bedroom makeover.
Store-bought headboards can be expensive, but creating your own gives you more control over the materials, dimensions, and overall appearance. You can transform inexpensive lumber, leftover fabric, reclaimed furniture, or even a little paint into something that reflects your personal style.
Whether you prefer contemporary furniture, rustic woodwork, soft upholstery, or colorful statement pieces, these 21 DIY headboard ideas offer inspiration for different budgets, skill levels, and bedroom sizes.
What is A Floating Headboard?
A floating headboard is a wall-mounted feature positioned behind the bed rather than fixed directly to the bed frame. Because its weight is supported by the wall, the design can appear to hover above the floor, creating a streamlined and uncluttered effect.
One advantage of this arrangement is flexibility. You can choose a height that suits your mattress and pillows, extend the headboard beyond the width of the bed, or incorporate decorative lighting without changing the bed frame itself.
Materials can range from stained timber and painted plywood to upholstered panels and padded cushions. The best option depends on the atmosphere you want to create and how much construction you are comfortable doing.
Before installation, locate the wall studs or use suitable anchors rated for the finished headboard's weight. A securely mounted headboard is particularly important if you plan to add shelves, lighting, or other accessories.
1. Unique Headboard Ideas You Can Try

Your headboard can do much more than provide a surface to lean against. It can introduce a new texture, add useful storage, establish a color scheme, or become the main decorative feature of your bedroom.
Consider repurposing architectural pieces for a vintage look, arranging timber boards into an attractive pattern, or using upholstery to create a softer setting. If you enjoy natural materials, cane and rattan offer warmth without making the room feel visually heavy.
You can also explore painted shapes, decorative molding, and fabric-covered designs when you want a distinctive result without investing in expensive furniture. The following ideas cover a variety of styles, from understated designs to bold, artistic creations.
2. Use Vertical Panels for Height
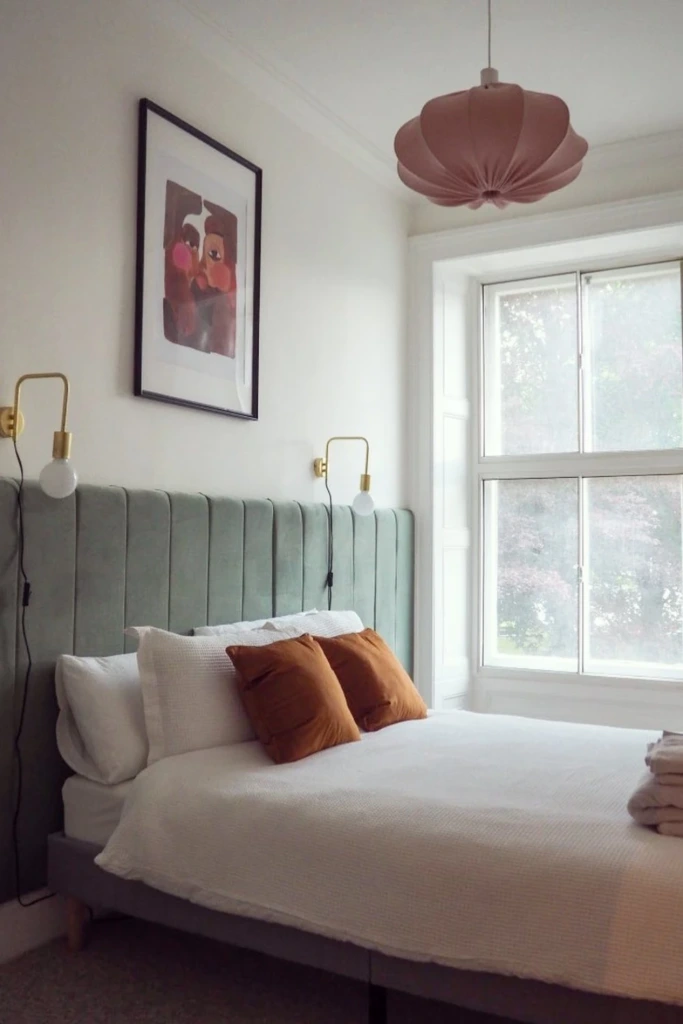
Vertical panels create a sense of upward movement, making them especially useful in bedrooms with low ceilings or limited wall space. Their long, narrow proportions draw attention toward the ceiling while giving the bed a more structured appearance.
To create this look, install upholstered panels in a row across the wall behind the mattress. Choose a consistent fabric for a calm, coordinated finish, or introduce subtle variations in texture for additional depth.
Neutral shades work well in minimalist interiors, while deep green, charcoal, or muted blue can make the headboard more prominent. Wall-mounted reading lights are a practical finishing touch because they keep bedside tables free for books, glasses, and other essentials.
3. Frame It for Luxury
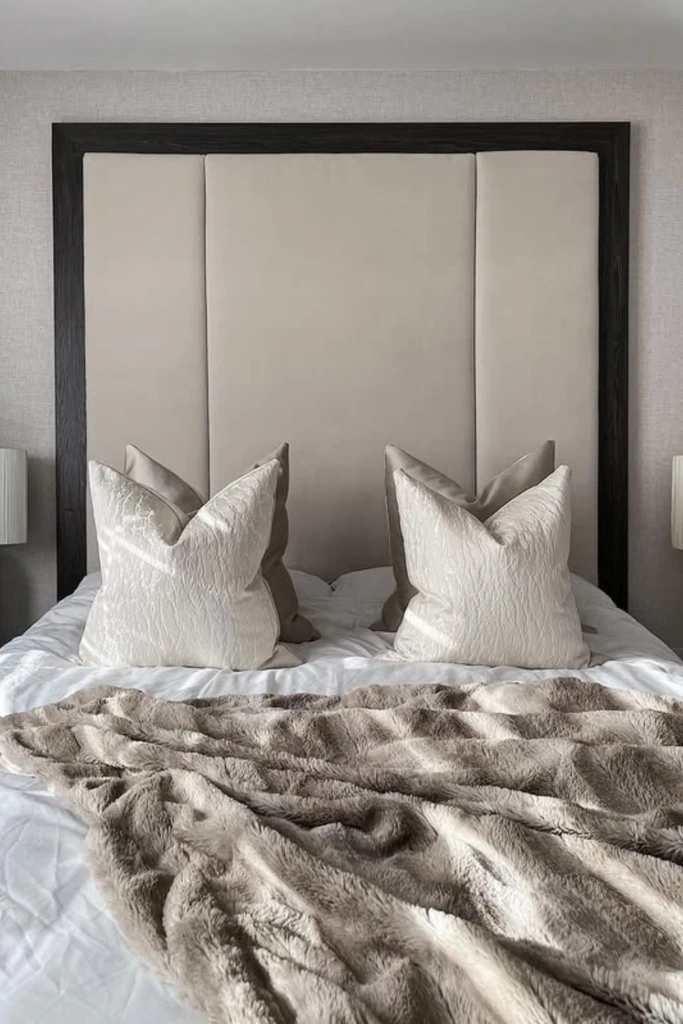
A wooden border can make a simple upholstered headboard look more refined. The contrast between the hard edges of the frame and the softness of the padded center gives the design a tailored appearance reminiscent of upscale hotel furniture.
Begin with a sturdy plywood backing and attach foam padding covered in your chosen upholstery fabric. Build a surrounding frame from smooth timber, then stain or paint it to complement the rest of the bedroom furniture.
Warm walnut tones look particularly appealing alongside cream, beige, and taupe fabrics. For a more contemporary finish, consider a dark frame with pale upholstery and neatly arranged pillows.
Pay attention to the proportions of the border. A frame that is too thick can overwhelm a small bedroom, whereas a slimmer outline keeps the overall design elegant.
4. Add Bold Stripes for Playfulness
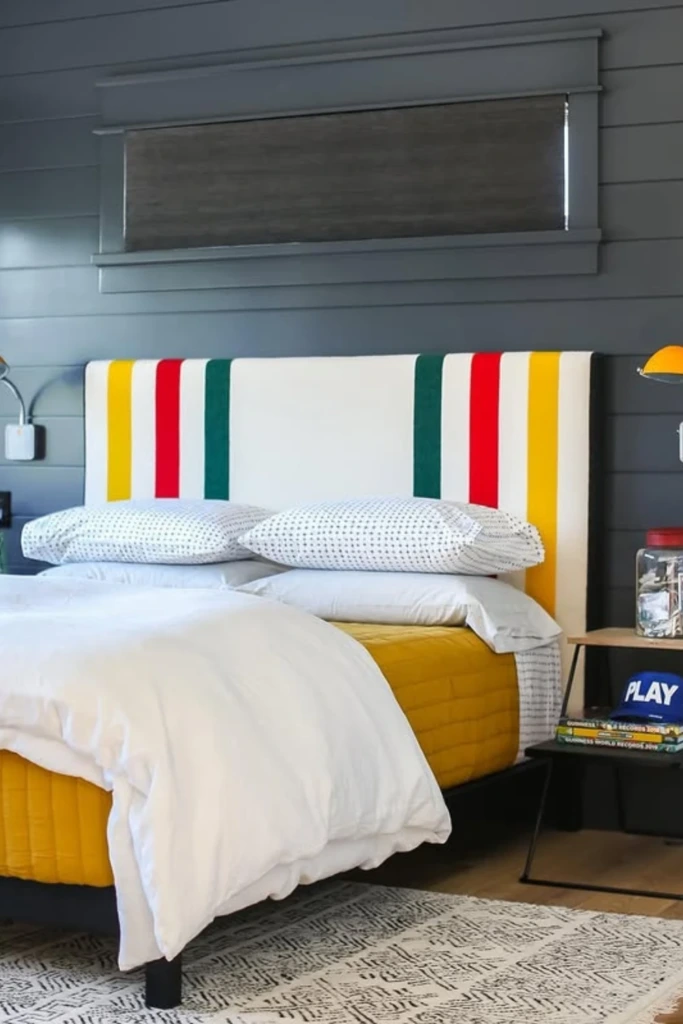
Striped headboards are an easy way to bring color and personality into a child's bedroom, teenager's room, or creative guest space. The pattern can be energetic without requiring a complicated shape or expensive materials.
Create the effect with alternating strips of felt, velvet, or other suitable decorative fabric attached to a flat backing. You can also paint stripes directly onto a prepared wooden panel if you prefer a smooth, non-upholstered surface.
Choose two complementary colors for a coordinated appearance or mix several shades for a more expressive design. Matching one or two colors with the bedding helps the finished headboard feel intentional rather than disconnected from the rest of the room.
For a softer result, use muted pastels. Brighter combinations are ideal when the bedroom needs a cheerful focal point.
5. Use Wood Slats for Texture
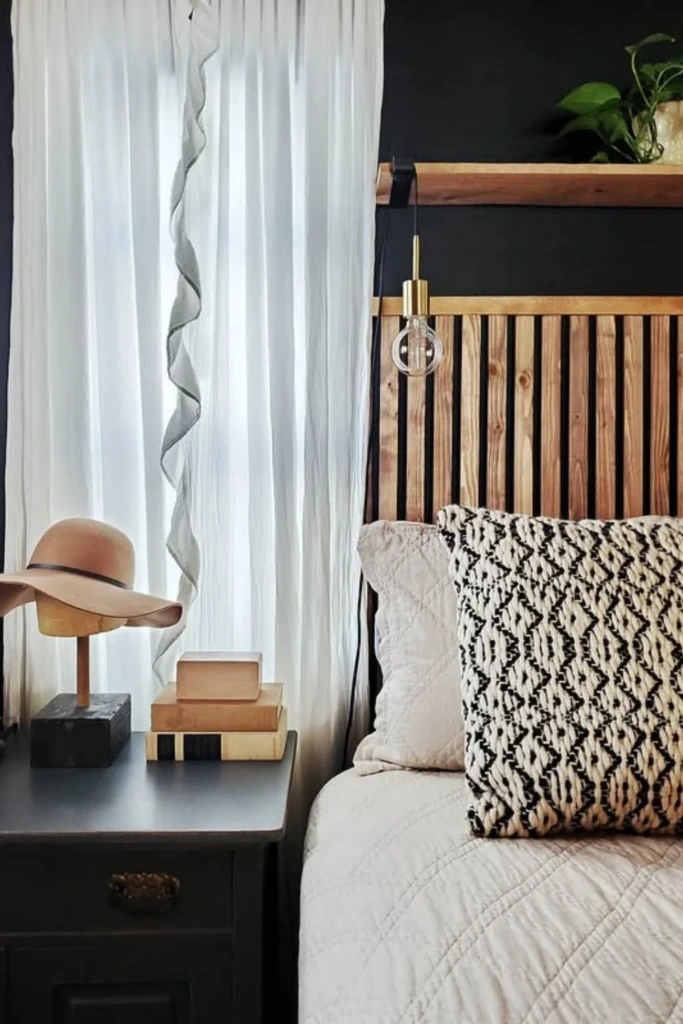
A slatted wooden headboard introduces natural grain and repeating lines, making it suitable for modern rustic, Scandinavian, and bohemian interiors. The gaps between the boards create visual depth while allowing the wood itself to remain the main attraction.
To build one, attach evenly spaced narrow timber boards to a plywood backing or a properly supported frame. Sand the edges to remove splinters, then apply a stain, clear finish, or paint that suits your decor.
Pine is a common choice for budget-friendly projects, while other timber species offer different grain patterns and colors. You can leave small, consistent gaps between the slats for a lighter appearance or arrange the boards more closely for a solid visual effect.
Measure carefully before installation so the spacing remains uniform across the entire width. Secure the finished structure properly, especially if it is tall or heavy.
6. Go Horizontal for a Breezy Look
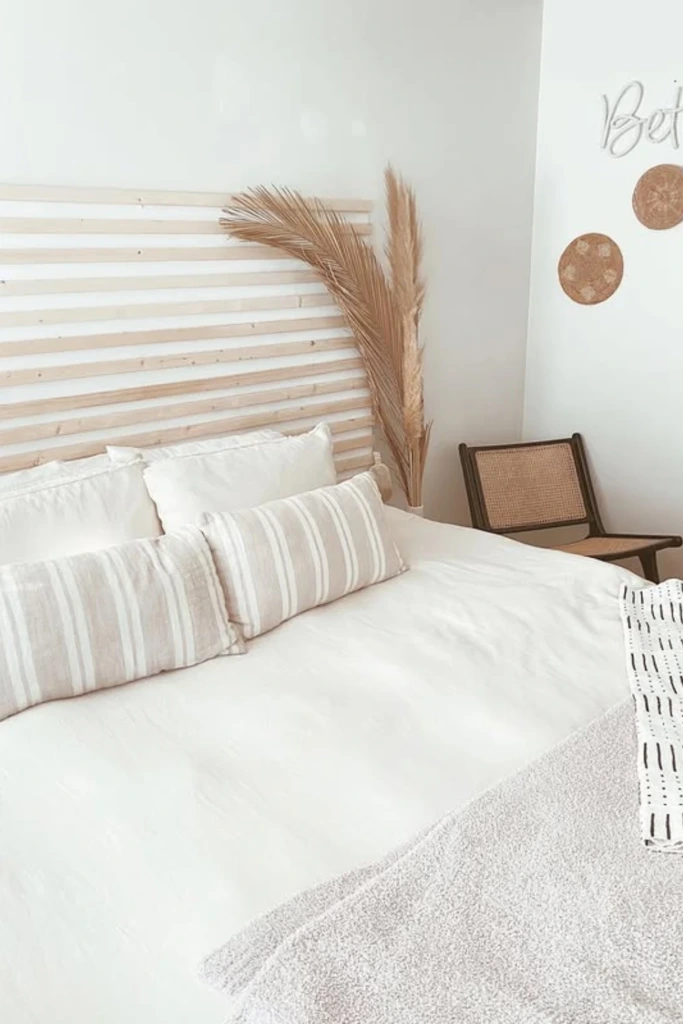
Horizontal wooden boards make a headboard feel wider and more relaxed. This layout is particularly useful when you want to emphasize the width of a bed or create a laid-back farmhouse atmosphere.
Use narrow planks attached across a backing board, leaving equal spaces between each piece if you prefer a more open design. A painted base behind the timber can provide contrast and make the individual boards stand out.
White, pale gray, and warm natural wood work well together in bright bedrooms. For a slightly more dramatic appearance, combine medium-toned timber with crisp white bedding and textured cushions.
This project is also relatively easy to customize. Adjust the board width, spacing, and finish to suit the size of your bed and the amount of wall space available.
7. Use Trim Panels for Bold Impact
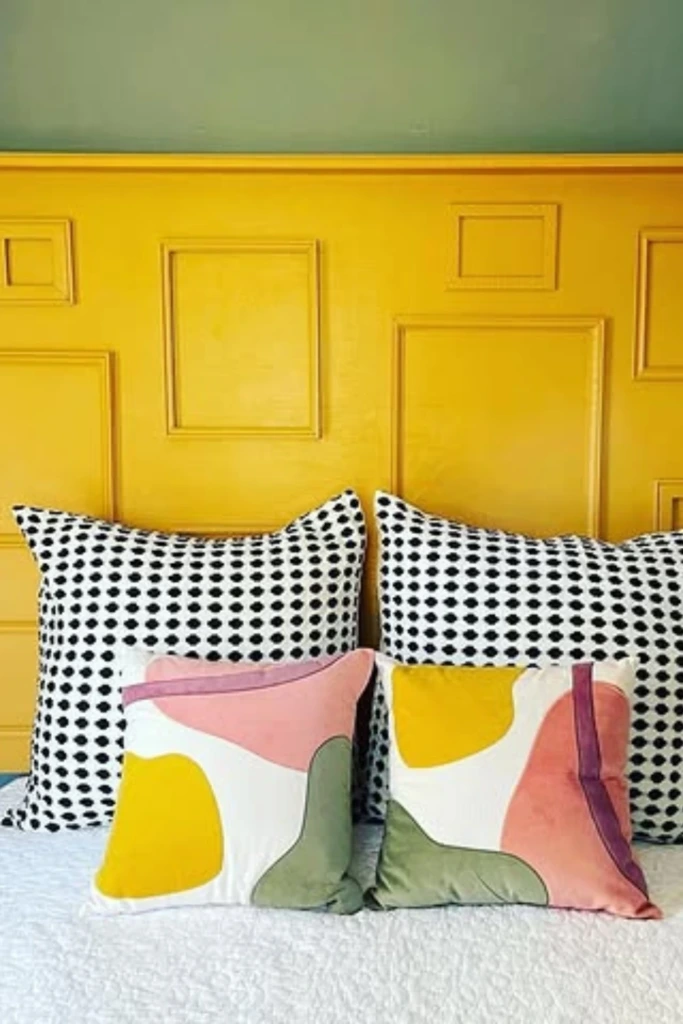
Decorative molding can turn an ordinary wooden panel into a headboard with architectural character. Instead of relying on expensive carved furniture, you can create a geometric design using simple trim pieces arranged into squares, rectangles, or other repeated shapes.
Start with a smooth plywood backing and plan the pattern before attaching the molding. Mark the layout with a measuring tape and pencil, then cut the trim to size and secure it with an appropriate adhesive or fasteners.
Once the adhesive has cured, fill any visible gaps, sand where necessary, and paint the entire headboard in a consistent color. A vibrant shade can make the pattern stand out, while cream, sage, or navy creates a more restrained effect.
Keep the surrounding bedding relatively simple if you want the decorative geometry to remain the focal point.
8. Hang a Cushion for Soft Support
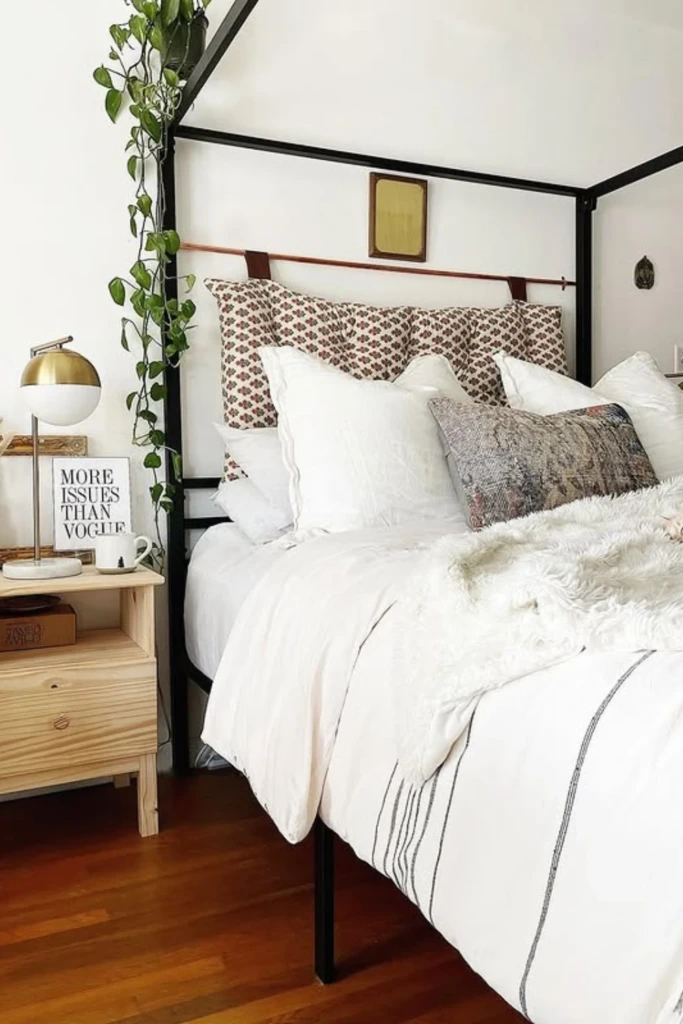
A suspended cushion is an appealing alternative to a permanently installed headboard. It adds softness behind the pillows while allowing you to change the look more easily when your bedroom decor evolves.
Choose a long upholstered cushion or create one using durable fabric, foam, and a sewn or removable cover. Attach it using strong fabric loops, leather straps, or another suitable hanging system designed to support its weight.
This approach can work particularly well with canopy beds, rented homes, and interiors where a conventional wooden headboard would look too bulky. It also offers an opportunity to introduce a contrasting fabric or a different texture.
Check that the hanging points are secure and that the cushion cannot slip or fall during normal use. If you cannot drill into the wall, consider a freestanding support or a bed-frame attachment rather than relying on an unsuitable adhesive.
9. Use Cane Webbing for an Earthy Touch
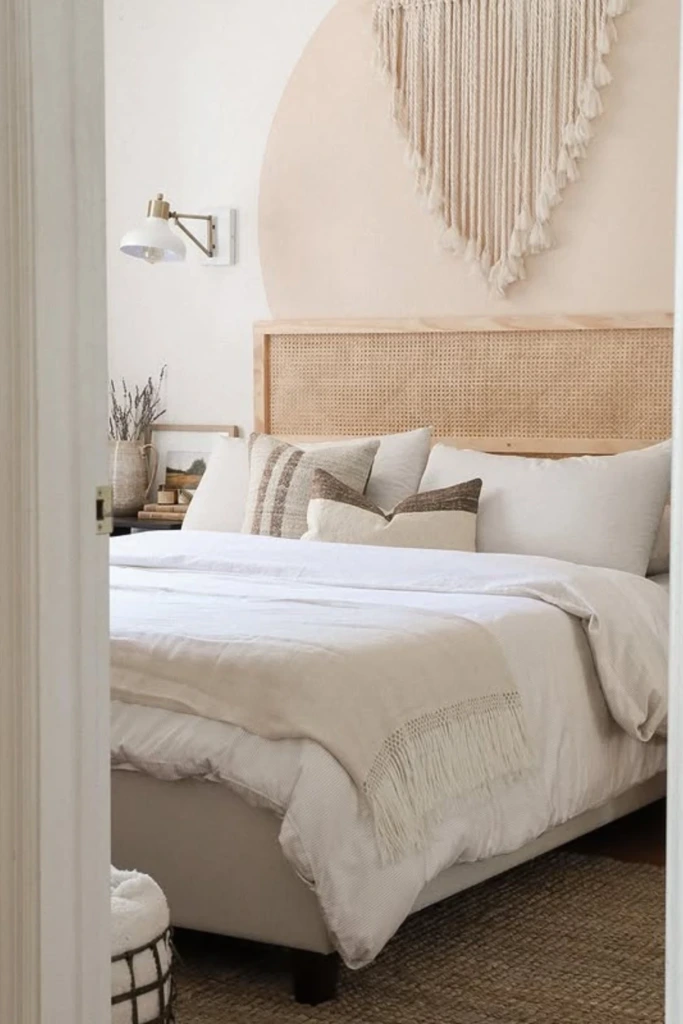
Cane webbing brings an airy, natural texture to a bedroom. Its woven pattern adds interest without the visual heaviness of a solid wooden panel, making it a good choice for neutral, bohemian, and Japandi-inspired spaces.
For a straightforward DIY project, construct a rectangular timber frame and attach cane webbing across the back. The frame provides structure, while the woven material becomes the central decorative feature.
Cane can be left in its natural honey color or paired with a painted frame for contrast. Light oak, off-white, and muted green are especially versatile combinations.
Before attaching the webbing, check the manufacturer's preparation instructions. Some cane materials need conditioning or moisture treatment to become easier to work with. Allow the material to dry and settle before final assembly to help prevent unwanted distortion.
10. Repurpose Old Windows for Charm
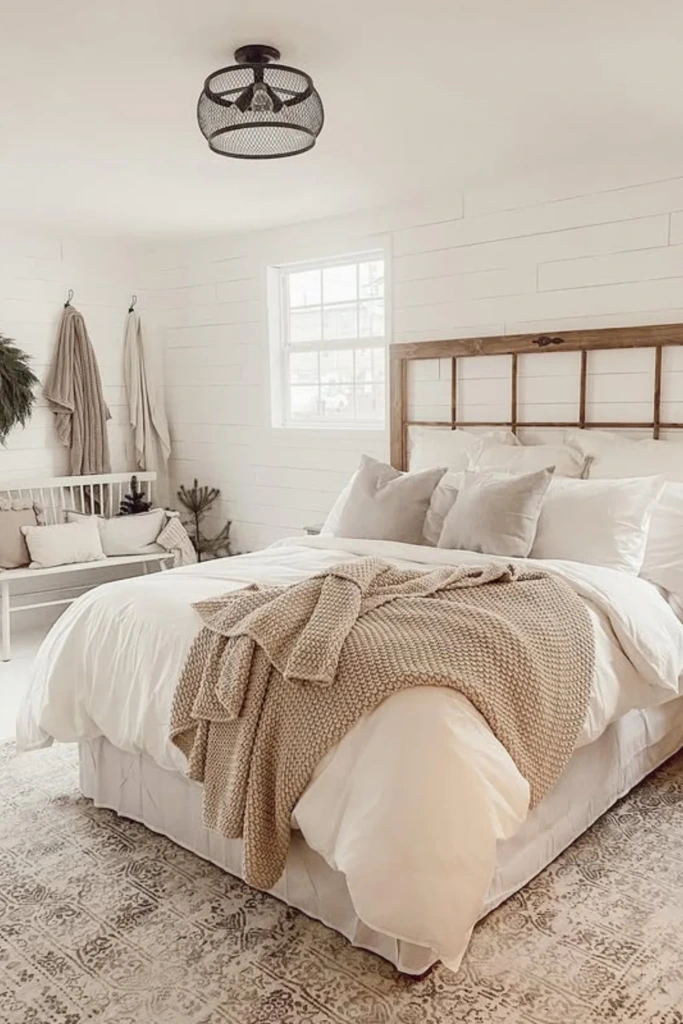
An old window frame can become a distinctive headboard with the character of a farmhouse or cottage bedroom. Its original divisions and aged finish provide decorative detail that would otherwise require additional woodworking.
Look for a frame with attractive proportions and enough width to suit your bed. Remove loose hardware, clean the surface, and repair damaged sections before deciding whether to preserve the existing finish or repaint it.
A solid frame can be secured to a suitable wooden backing or mounted to the wall using hardware appropriate for its weight. If the frame contains glass, inspect every section carefully and avoid using damaged or unstable panes above the bed.
You can also replace the glass with painted inserts, fabric, or lightweight decorative panels for a different appearance. Pair the finished headboard with linen bedding and warm lighting to reinforce its vintage appeal.
11. Try Tufted Velvet for a Retro Vibe
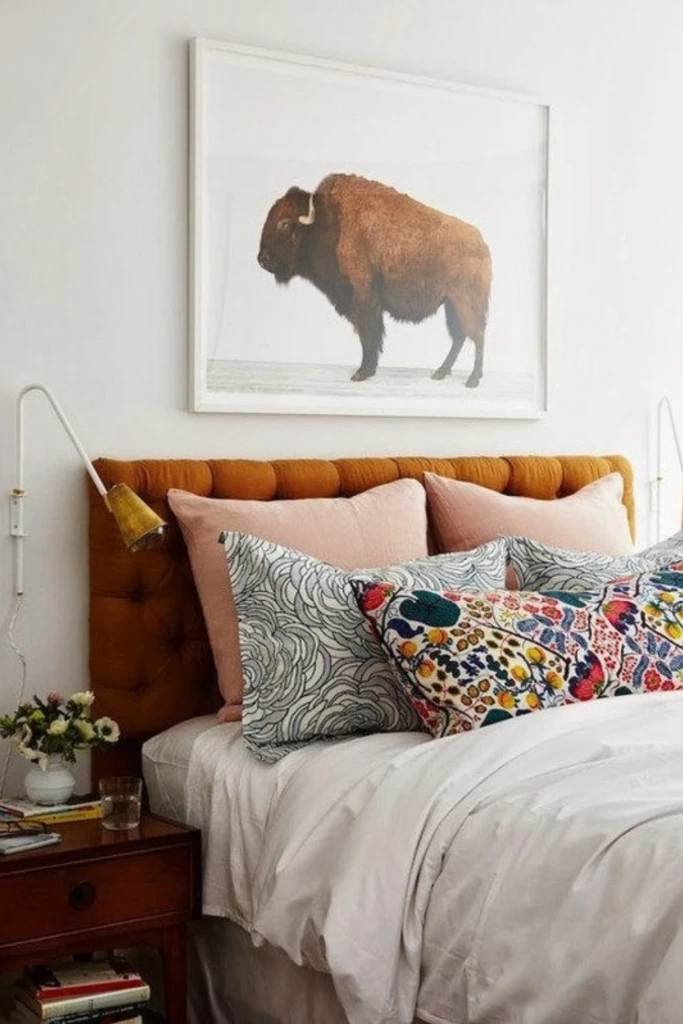
Velvet upholstery and button tufting give a headboard a plush appearance that suits retro, eclectic, and mid-century-inspired bedrooms. The fabric catches light differently across its surface, creating subtle changes in color and making the piece feel richer.
Build the basic shape from sturdy plywood and add upholstery foam before covering it with velvet. If you want a tufted finish, plan the button positions in advance and use an appropriate upholstery method to create consistent indentations.
Rust, emerald, mustard, and deep blue are attractive options when you want a statement piece. Softer colors work well if you prefer a calmer bedroom with vintage details.
This project requires more precision than a flat upholstered panel, particularly when arranging the tufting. Beginners may find it easier to start with a simple rectangular design before attempting curves or elaborate button patterns.
12. Use Thin Slats for a Clean Boho Look
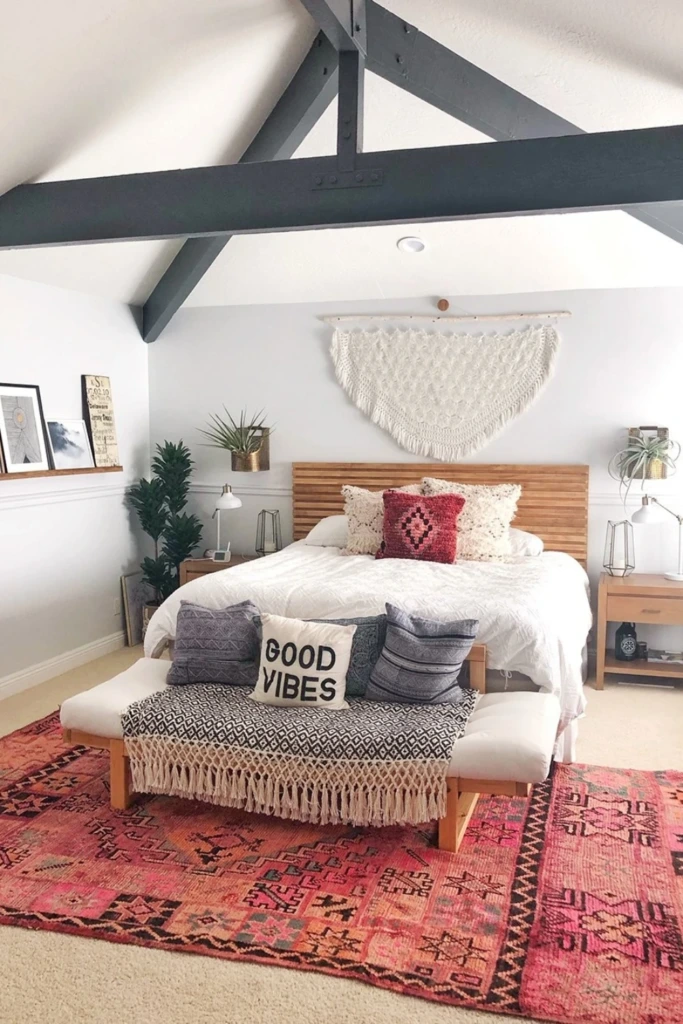
Narrow timber slats offer a lighter alternative to thick, chunky wood panels. Their simple geometry works beautifully with natural fabrics, woven accessories, and relaxed bohemian decor.
Attach slim wooden strips to a stable backing, keeping the spacing consistent from top to bottom. Sand each strip before assembly so the finished surface feels smooth and the wood grain remains attractive.
A warm stain brings out the natural character of the timber, while a clear protective coating helps maintain the finish. You can leave the wood pale for a Scandinavian appearance or choose a deeper tone for more contrast.
Complete the arrangement with textured bedding, a woven wall hanging, or a few carefully chosen decorative pillows. Avoid overcrowding the area, since the open lines of the headboard are part of its appeal.
13. Paint It On for a No-Build Option
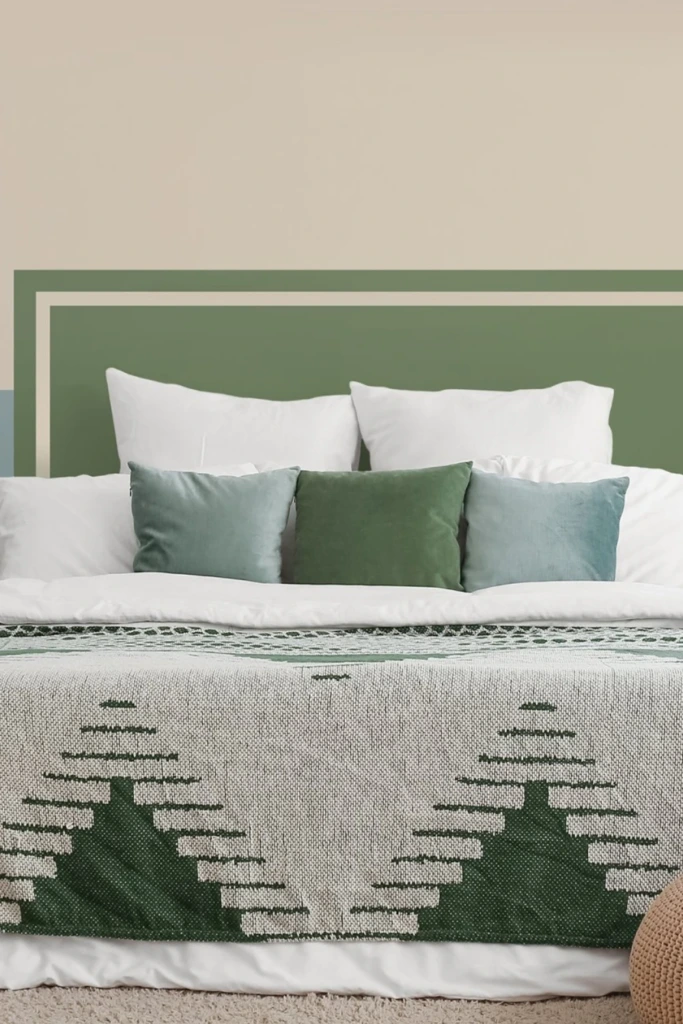
A painted headboard is one of the simplest ways to give a bedroom a finished appearance without constructing furniture. It is especially useful in small rooms, rental properties where painting is permitted, or spaces where floor area is limited.
First, decide on a shape that complements the bed. A wide rectangle creates a structured look, while a rounded arch or scalloped outline introduces a softer decorative element.
Use painter's tape, a pencil, and a level to mark the design before applying paint suitable for the wall surface. Prepare the area according to the paint manufacturer's instructions and apply the color in even coats.
Choose a shade that contrasts gently with the wall or coordinates with your bedding. If you want a subtle effect, use a color only slightly darker than the existing wall; for a stronger focal point, choose a more saturated tone.
Because the design sits directly on the wall, it provides no cushioning or physical support. However, you can pair it with removable cushions if you want somewhere comfortable to lean while reading.
14. Go Maximal with a Statement Shape
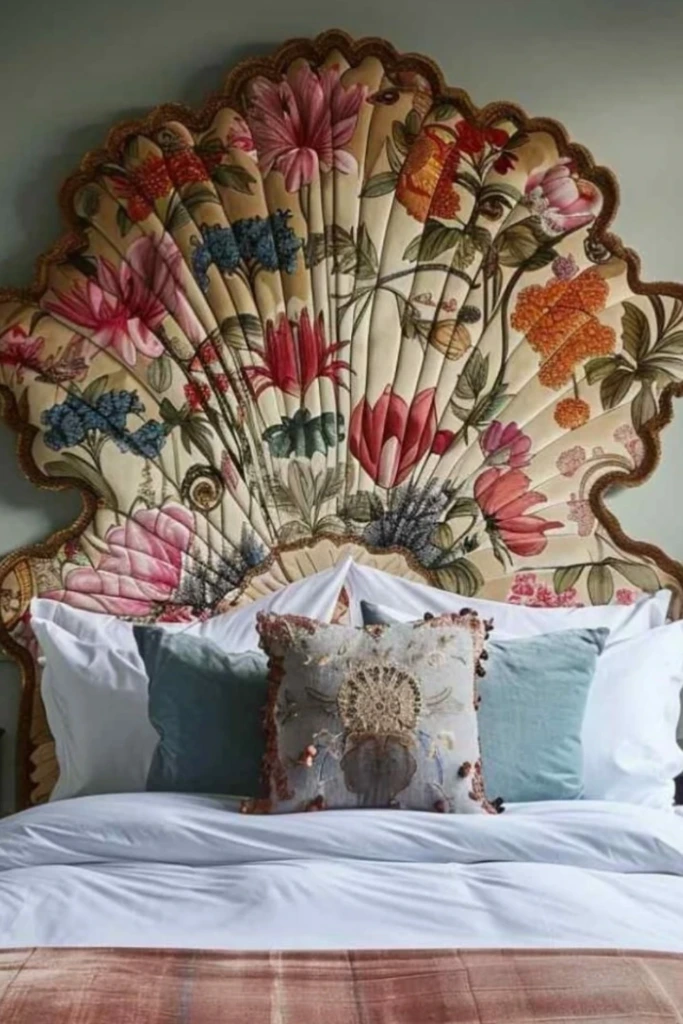
A large, decorative headboard can become the centerpiece of a bedroom, particularly when the rest of the decor is relatively simple. Scalloped edges, fan-like outlines, oversized curves, and bold floral upholstery all help create a distinctive look.
To make an upholstered statement piece, draw the desired outline onto plywood and cut it using suitable woodworking tools. Sand the edges carefully before adding foam and covering the surface with your chosen fabric.
Printed florals, oversized botanical patterns, and contrasting colors are useful for vintage-inspired or maximalist interiors. If the fabric already features a busy pattern, keep nearby accessories restrained enough to let the headboard stand out.
Curved cuts require careful planning, and the finished shape should be checked for rough edges before upholstery. If you are new to woodworking, consider having the plywood cut professionally and focus on the padding, fabric, and finishing details.
15. Keep It Minimal with Winged Panels

A winged headboard extends slightly around the sides of the bed, creating a defined sleeping area without requiring a bulky frame. Combined with slim vertical panels, this design looks crisp and architectural.
Build the central panel and side sections from a suitable backing material, then cover them with upholstery if you want a soft finish. The wings can be angled or gently curved, depending on the style you prefer.
Neutral upholstery, clean seams, and limited decoration help maintain a modern or Scandinavian appearance. You can introduce warmth through wooden bedside tables, natural textiles, or soft ambient lighting.
Measure the available space carefully before building the side wings. They should frame the bed comfortably without obstructing walkways, bedside drawers, or doors.
16. Build a Ledge Headboard for Display
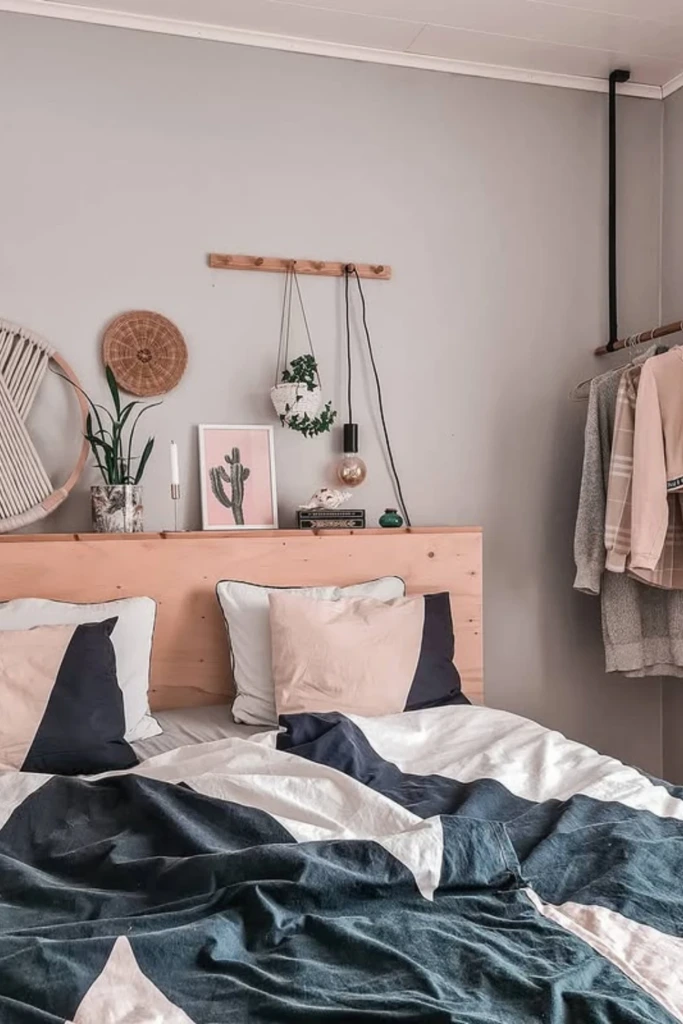
A ledge-style headboard combines a decorative backdrop with a narrow surface for displaying selected items. It can be especially helpful in compact bedrooms where conventional bedside tables are difficult to accommodate.
Choose a wide timber board with enough depth for the objects you intend to display. Sand the edges, apply your preferred finish, and mount the board securely using suitable brackets or another properly rated support system.
The ledge can hold lightweight artwork, a small decorative object, or a few books. If you want to use it for plants, choose stable containers and protect the wood from moisture.
Avoid placing heavy objects above the pillows or using an unsecured ledge as a substitute for a properly supported shelf. For renters, a freestanding unit or a headboard attached to the bed frame may be a better solution than permanent wall mounting.
17. Layer Arches for a Retro Statement
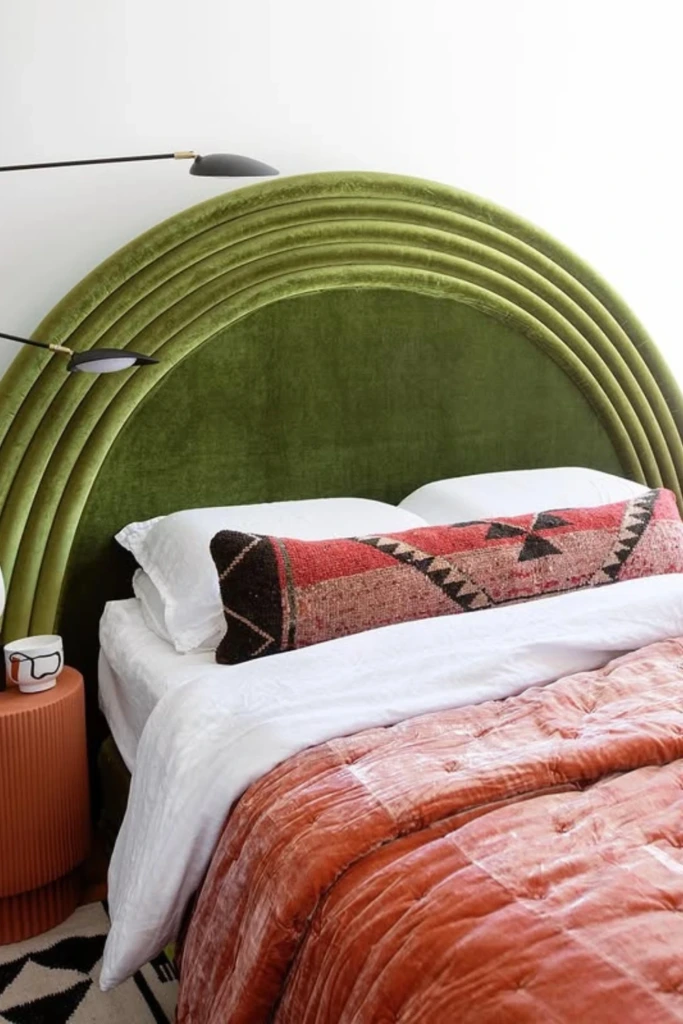
Layered arches create a sculptural headboard with soft curves and a strong visual presence. The repeated rounded shapes add depth and give the bed a distinctive outline without needing elaborate carvings or additional wall art.
You can create the effect using several shaped plywood sections, each slightly smaller or positioned differently from the one behind it. Cover the sections with upholstery if you want a plush appearance, or paint them in complementary shades for a cleaner finish.
Deep green, terracotta, rust, and dusty pink are attractive choices for a retro-inspired bedroom. Using the same color across several layers produces a cohesive design, while contrasting shades make the individual arches more noticeable.
Plan the dimensions on paper before cutting the panels. Consistent curves and carefully aligned layers will help the finished headboard look intentional rather than uneven.
18. Go Bold with Printed Fabric
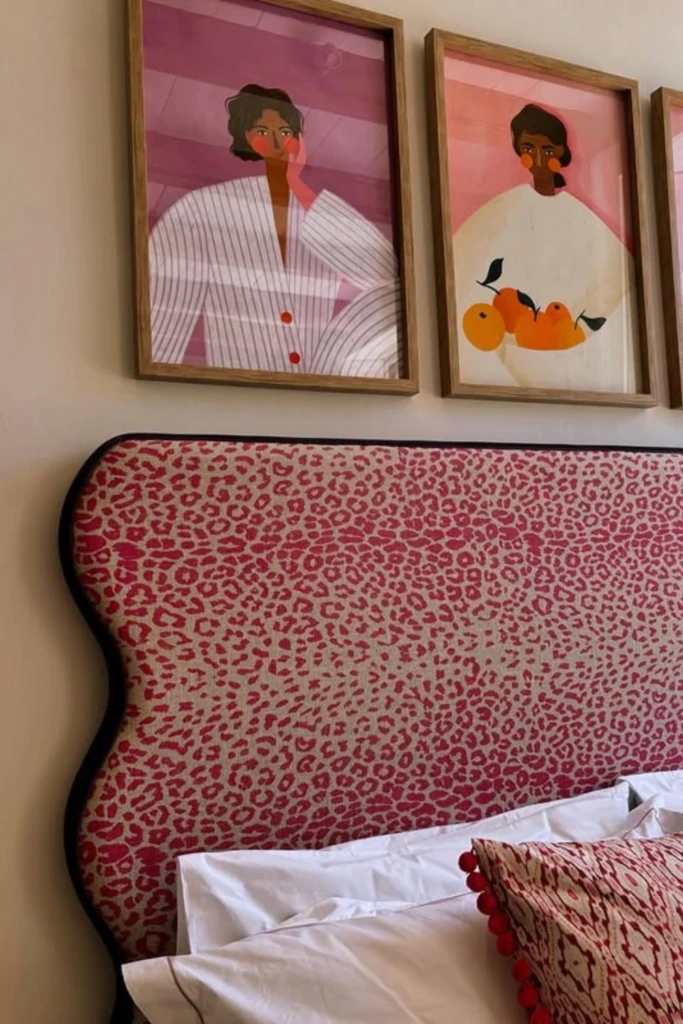
A headboard covered in striking fabric can transform a plain bedroom into a more expressive space. Animal prints, oversized florals, abstract motifs, and colorful geometric patterns each offer a different way to introduce personality.
Begin with a plywood backing and choose a silhouette that suits the print. A curved or scalloped outline can complement flowing patterns, while a rectangular panel works well with geometric designs.
Add upholstery foam if you want a padded surface, then stretch the fabric evenly over the backing and secure it on the reverse side. Pull the material firmly enough to remove wrinkles without distorting the pattern.
Bright pink, vivid blue, or multicolored prints work best when the rest of the bedroom provides some visual balance. Repeating one or two colors in cushions or artwork can tie the arrangement together without making the entire room feel overly busy.
19. Create a Chevron Pattern with Wood Planks
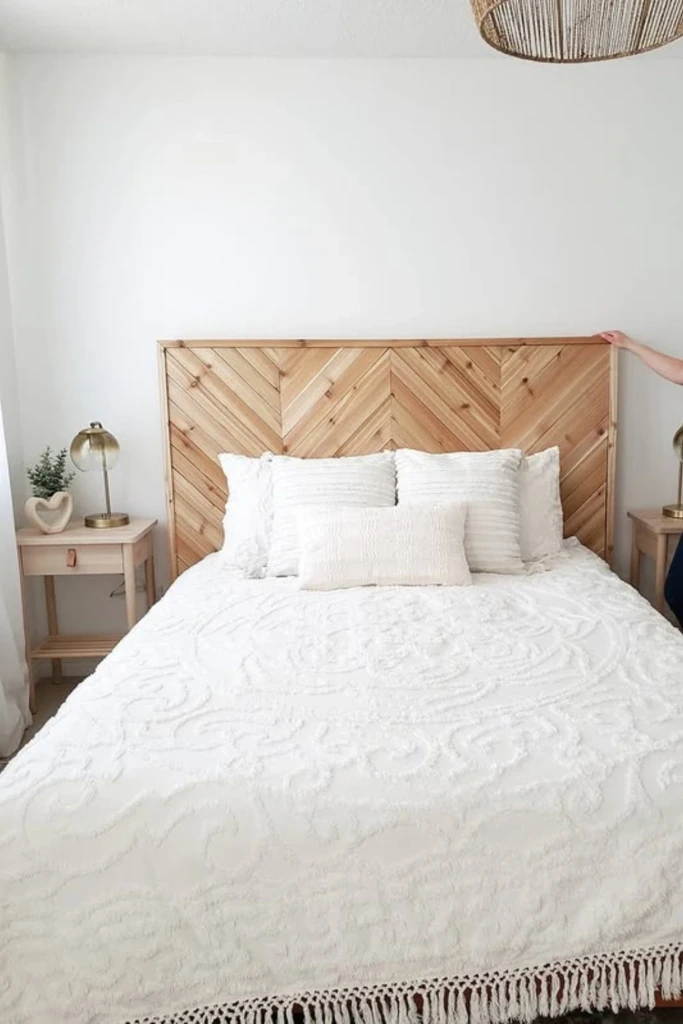
A chevron headboard uses angled wooden boards to form a repeating V-shaped pattern. The directional lines make a simple timber surface more dynamic, creating a decorative feature without relying on paint or upholstery.
Start with a plywood backing and establish a centerline so the pattern remains symmetrical. Cut the planks at matching angles, then arrange them in alternating directions to form the chevrons before attaching them permanently.
Measure each piece carefully, since small cutting errors become more noticeable when the boards meet at repeated angles. Sand the surface and finish the wood with a stain or clear protective coating to emphasize the grain.
Natural timber pairs well with neutral bedding, black metal accents, and warm bedside lighting. If you prefer a contemporary appearance, consider a pale finish and a relatively narrow chevron pattern.
20. Paint Abstract Lines on a Padded Arch
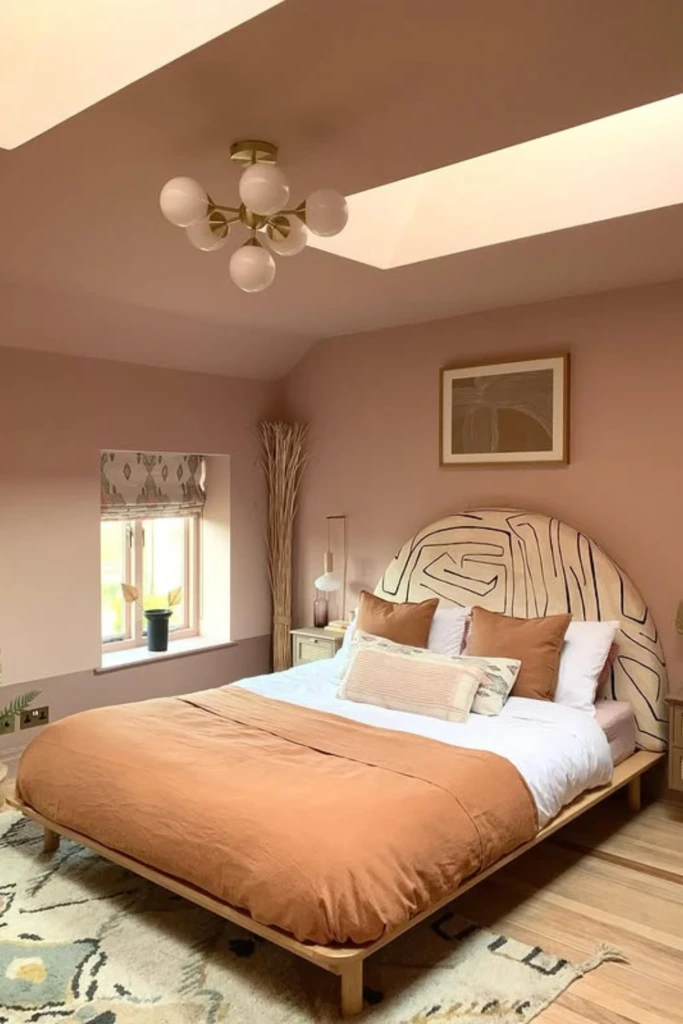
An arched upholstered headboard with painted details combines the comfort of fabric with the individuality of hand-drawn artwork. It is a good choice if you want something creative without using a complicated decorative shape.
Cut a suitable backing into an arch, or have the piece shaped professionally if you lack the necessary tools. Attach foam and upholstery fabric, ensuring the material is smooth and securely fastened.
Once the upholstered surface is ready, add abstract lines, simple curves, or organic shapes using paint formulated for the chosen fabric. Test the paint on a spare piece of material first to check the color and texture.
Keep the artwork relatively simple so the arch remains visually clear. Contrasting lines can create a modern effect, while softer shades and irregular shapes suit relaxed, artistic bedrooms.
Because fabric paints differ in flexibility and durability, follow the product instructions and allow the design to dry fully before using the headboard.
21. Use Fluted Wood Panels for Subtle Texture
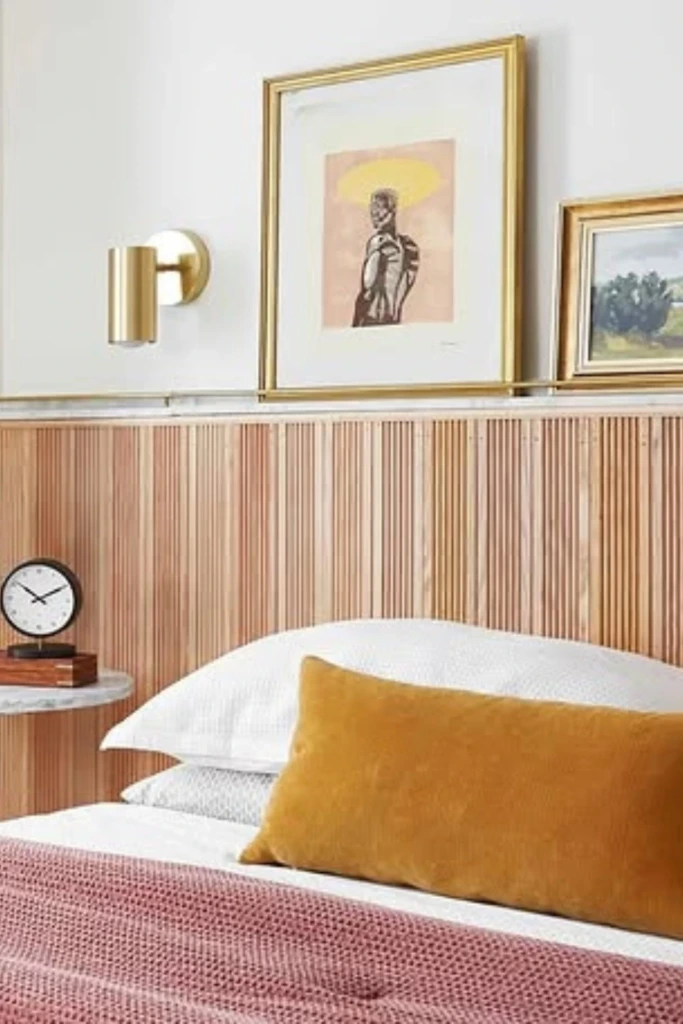
Fluted wood creates a series of narrow vertical grooves that add dimension without introducing a complicated pattern. This understated detail is ideal for contemporary, minimalist, and mid-century-inspired bedrooms.
The effect can be achieved with ready-made fluted panels or by attaching evenly spaced half-round wooden dowels to a flat backing. Once the structure is complete, sand the surface where needed and apply paint or a suitable wood finish.
Natural oak tones create warmth, while a painted surface offers a more uniform appearance. The narrow grooves catch light and shadow throughout the day, giving the headboard depth even when its color remains neutral.
For a polished result, keep the edges neatly finished and align the fluting consistently across the panel. Pair it with simple bedding and unobtrusive bedside accessories to preserve the clean aesthetic.
22. Blend Cane with Clean Frames
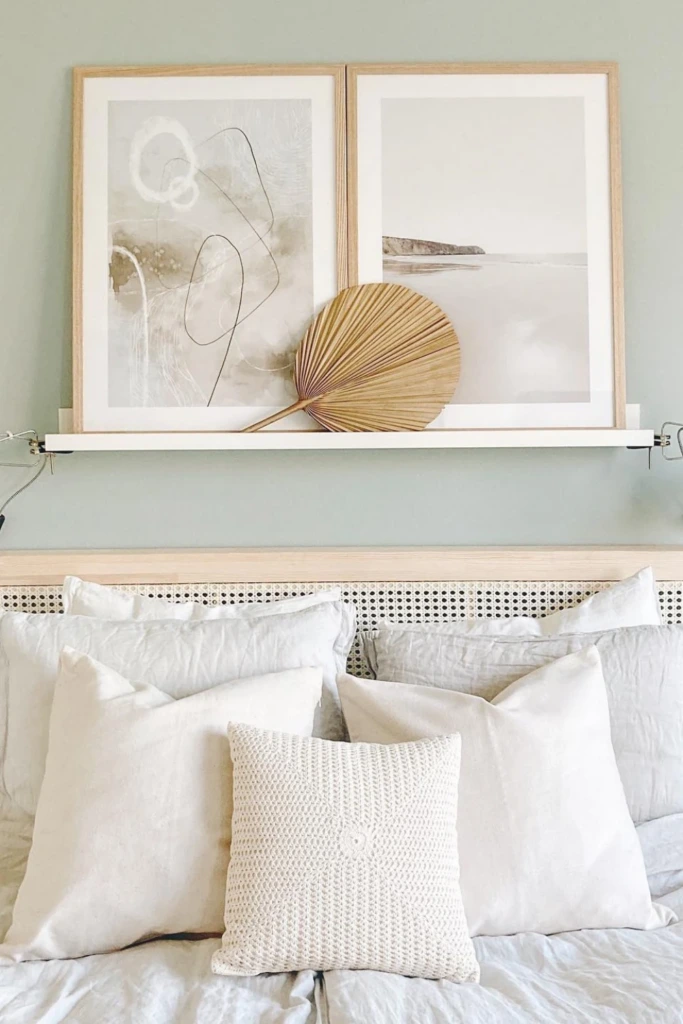
Combining woven cane with a straightforward timber frame creates a headboard that feels both natural and contemporary. The solid border gives the piece a defined shape, while the open weave prevents it from appearing too heavy.
Build a rectangular frame from straight, sanded timber and secure suitable cane webbing across the central opening. Alternatively, attach the material to a prepared backing if that construction method better suits your design.
Use a natural or lightly stained frame for a warm, organic look. A darker border provides contrast and can make the woven texture more prominent.
To finish the bedroom, consider wall-mounted swing-arm reading lights and a narrow shelf placed at an appropriate height. These additions provide useful lighting and display space without requiring bulky bedside furniture.
Make sure any lights are installed according to their mounting and electrical requirements, and keep shelves and accessories securely supported.
What can I use instead of a traditional headboard?
There are plenty of alternatives if you would rather avoid a conventional furniture piece. A large tapestry, a curtain hung behind the bed, or a framed artwork can establish a clear focal point without requiring extensive construction.
Other options include a painted wall design, a decorative timber panel, a woven screen, or a row of upholstered cushions. These solutions let you choose the amount of texture and physical support you need.
For a rental bedroom, removable wall decor, lightweight panels, and fabric accessories may be more convenient than permanently installed furniture. Always check your rental agreement and the condition of the wall before applying adhesives or paint.
If comfort is a priority, choose a padded alternative rather than a purely decorative surface. If you mainly want to improve the appearance of the room, artwork or a painted shape may be all you need.
How do I attach a DIY headboard without drilling into the wall?
You can install a headboard without making holes in the wall by choosing a design that attaches to the bed frame or stands independently. Frame-mounted brackets are a practical option when the bed structure can support the additional weight.
A freestanding headboard can sit between the bed and the wall, provided it has a stable base and cannot easily tip over. Lightweight decorative panels may also be secured using a suitable removable mounting system, but the manufacturer's weight limits and surface requirements must be followed.
For fabric cushions, consider a secure attachment to the bed frame or a purpose-built hanging support rather than relying on weak adhesive strips.
The safest method depends on the headboard's size, construction, and weight. Heavy timber, glass, or upholstered panels should not be held in place by an improvised attachment that has not been rated for the load. When in doubt, choose a supported freestanding design or hardware specifically designed for the intended installation.