23 Canned Food Storage Ideas for 2026
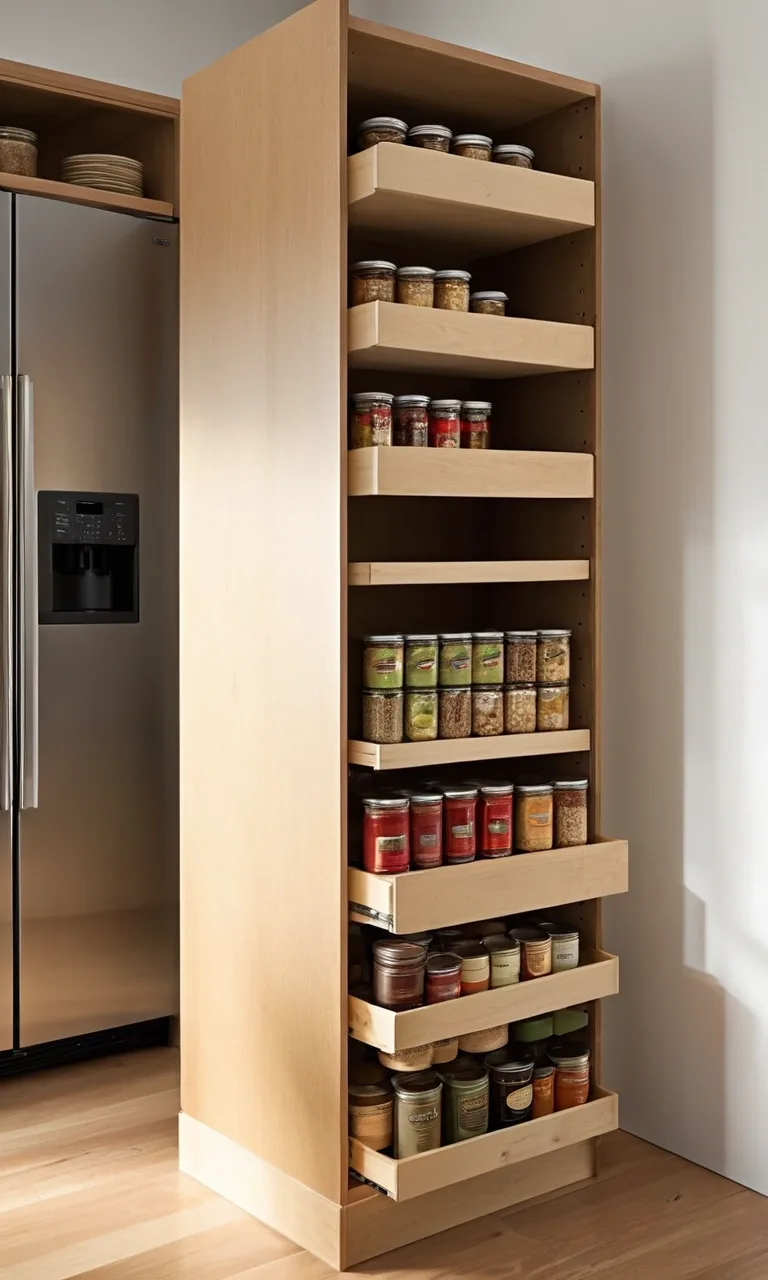
Keeping canned food organized can be surprisingly difficult, especially when your pantry shelves are packed with vegetables, soups, beans, sauces, and other staples. Without a clear system, cans get pushed to the back, labels become difficult to read, and you may accidentally buy items you already have.
The good news is that you can create an organized canned food storage system without remodeling your kitchen or spending a fortune on accessories. A few well-chosen organizers, smarter shelf arrangements, and consistent habits can make a noticeable difference.
These 23 canned food storage ideas offer practical ways to maximize available space, improve visibility, and keep your everyday ingredients within easy reach.
How Can You Build a Simple Canned Food Storage System at Home?
Start by choosing one main location for your canned goods. Depending on your kitchen, this might be a pantry shelf, a kitchen cabinet, a utility cupboard, or a dedicated storage rack.
Next, sort your cans into categories. Keep vegetables together, group soups separately, and create individual sections for beans, fruits, sauces, and other frequently used products. This makes it easier to locate ingredients and check your inventory before shopping.
Make the most of your available space by organizing vertically whenever possible. Shelf risers, stackable organizers, and tiered racks can create additional storage levels without requiring more cabinets.
Finally, follow a first-in, first-out routine. Place newly purchased cans behind older ones so that products with earlier expiration dates are used first. Check labels periodically and discard any cans that are leaking, bulging, badly dented, or otherwise damaged.
1. Gravity Feed
<bold>Best for: Frequently used canned goods and compact pantries.</bold>
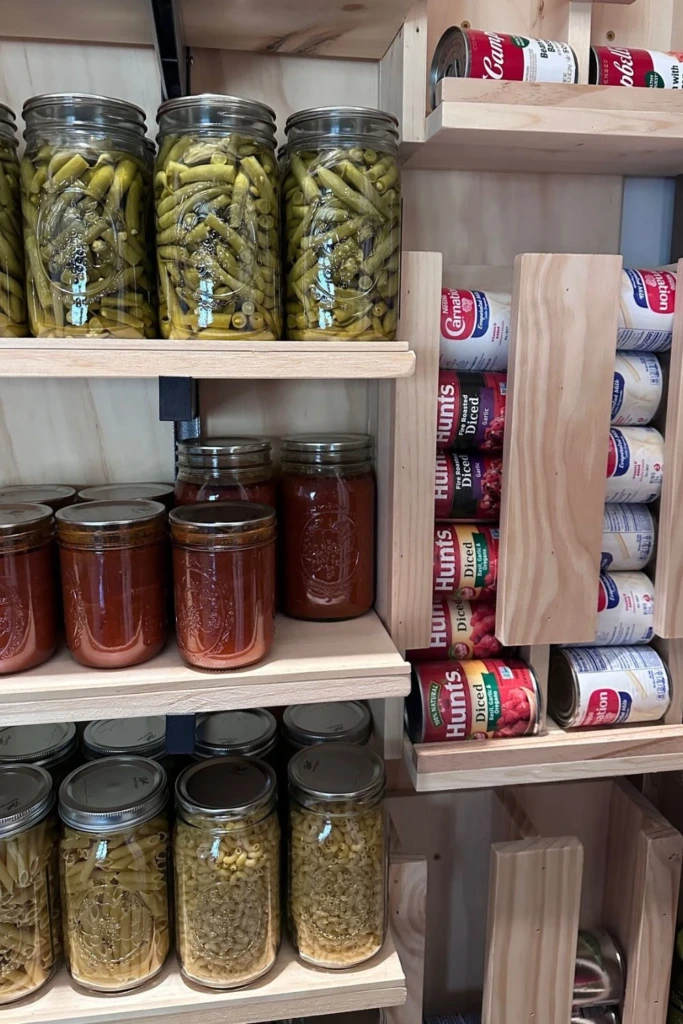
A gravity-feed can dispenser automatically moves the next can toward the front as you remove one. This design keeps your supply organized while making everyday ingredients easier to access.
You can purchase a ready-made dispenser or build a simple version using a sturdy frame and angled rails designed to accommodate your can sizes. The important thing is to ensure that the rails are smooth, secure, and properly fitted.
Install the dispenser on a pantry shelf or inside a suitable cabinet. Load cans from the back or top according to the organizer's design, allowing older stock to move forward first.
This arrangement works particularly well for households that regularly use canned tomatoes, beans, soup, or vegetables. Just make sure the dispenser fits the cans you buy most often and is easy to refill.
2. Tiered Racks
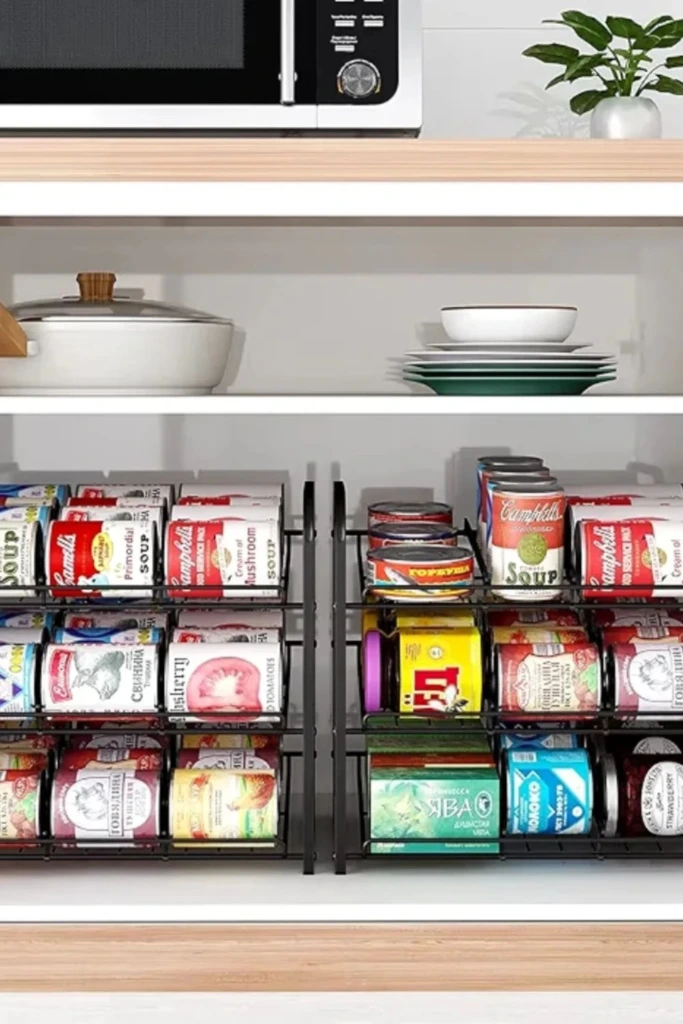
<bold>Best for: Deep shelves and cabinets where labels are difficult to see.</bold>
Tiered racks elevate the back row of cans above the front row, creating a stepped display. Instead of hiding behind one another, products remain visible enough for you to identify them quickly.
Place different categories on separate sections of the rack, such as soups on one side and vegetables on the other. Choose a rack with sufficient depth and weight capacity for your collection.
Metal, bamboo, and sturdy plastic models can all work well, depending on your kitchen's style and storage needs. Keep heavier cans on lower levels whenever the design allows, and avoid overloading narrow shelves.
Tiered organizers are particularly useful when you have plenty of cabinet depth but limited shelf height. They also help reduce the temptation to stack cans in unstable piles.
3. Floor Racks
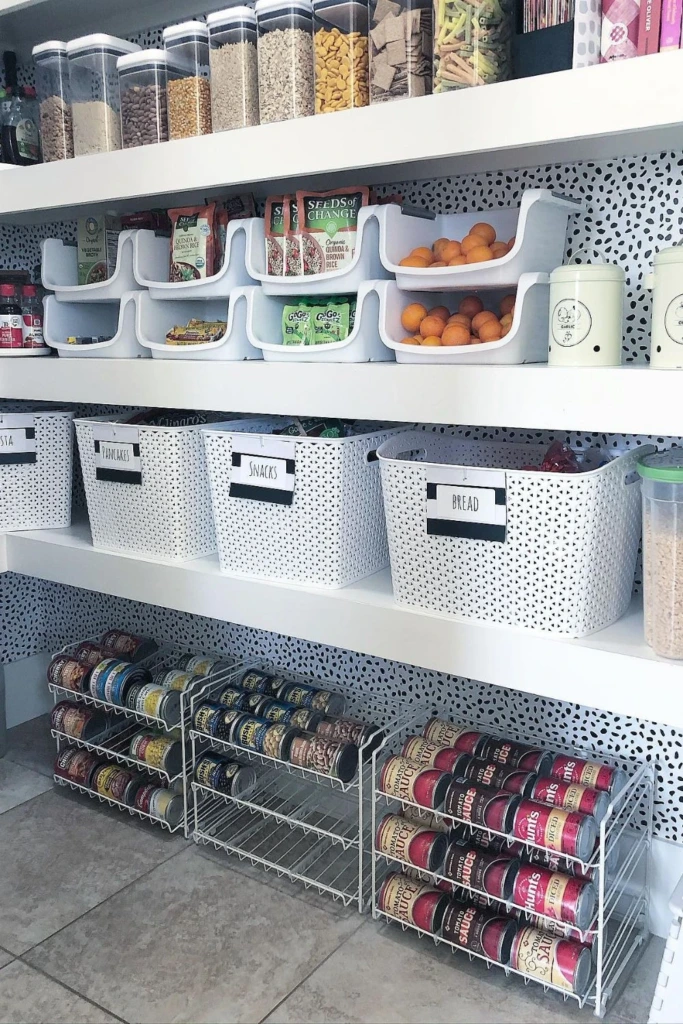
<bold>Best for: Large pantries, utility rooms, and bulk food storage.</bold>
If your pantry has unused floor space, a low storage rack can provide room for additional cans without crowding your existing shelves.
Wire shelving is a practical option because it allows you to see products from different angles. Choose a rack with a sturdy frame, stable feet, and shelves rated for the combined weight of your canned goods.
Arrange heavier products, such as large vegetable cans and tomato tins, on the bottom shelf. Reserve upper levels for lighter items that are easy to reach.
For a more efficient setup, group similar products together and leave enough room to remove individual cans without disturbing neighboring rows.
If you use multiple racks, position them where doors can open fully and walkways remain clear. This solution is especially useful for households that purchase groceries in bulk or maintain a larger pantry inventory.
4. Corner Pantry
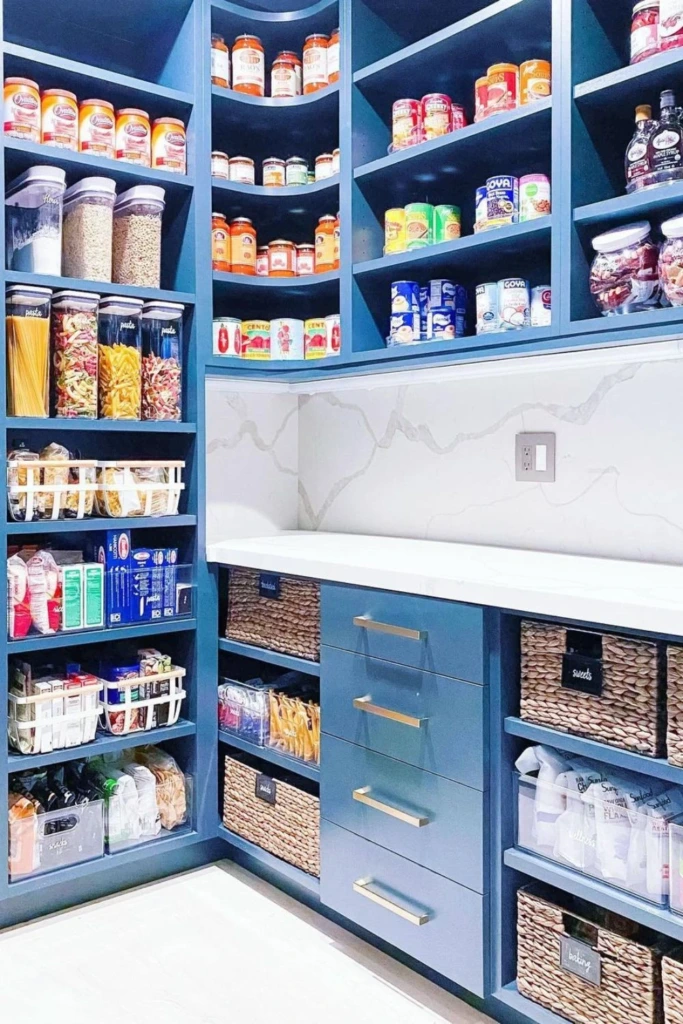
<bold>Best for: Making awkward corner spaces more useful.</bold>
Kitchen corners can be difficult to organize because items placed at the back are easily forgotten. Curved shelves, corner inserts, and appropriately sized rotating organizers help turn these overlooked areas into functional storage.
Use the shelves to arrange cans in short rows, grouping products by type. Rounded shelves can accommodate small collections of soup, beans, sauces, and vegetables while keeping everything relatively accessible.
For existing cabinets, measure the available width, depth, and clearance before purchasing an insert. Custom corner shelving can be worthwhile if you have a larger pantry and want a permanent solution.
Keep the most frequently used cans near the front of each shelf. Store backup supplies farther back, provided their labels and expiration dates remain easy to check.
A well-planned corner pantry can increase usable storage without taking up additional floor space.
5. Can Zones
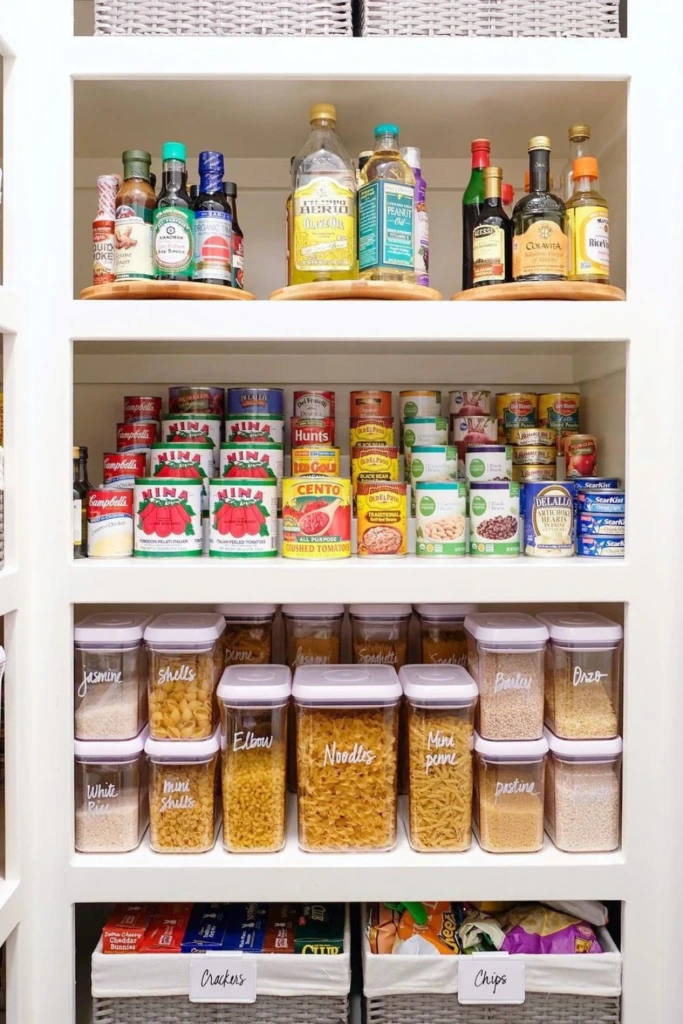
<bold>Best for: Anyone who wants a simple, low-cost organizing method.</bold>
Creating dedicated can zones is one of the easiest ways to organize canned food without purchasing special equipment.
Choose a shelf or section of your pantry exclusively for cans, then divide it into categories. One area might hold beans, another canned vegetables, and another soups or fruit.
You can create these boundaries with small bins, removable dividers, shelf labels, or simply by leaving consistent spaces between groups.
Arrange products so their names and expiration dates are easy to inspect. Keep frequently used ingredients within comfortable reach and reserve less accessible areas for occasional purchases.
This system also makes grocery planning easier. When all your tomato cans are together, for example, you can quickly see whether you need another one or already have enough.
6. Drawer Dividers
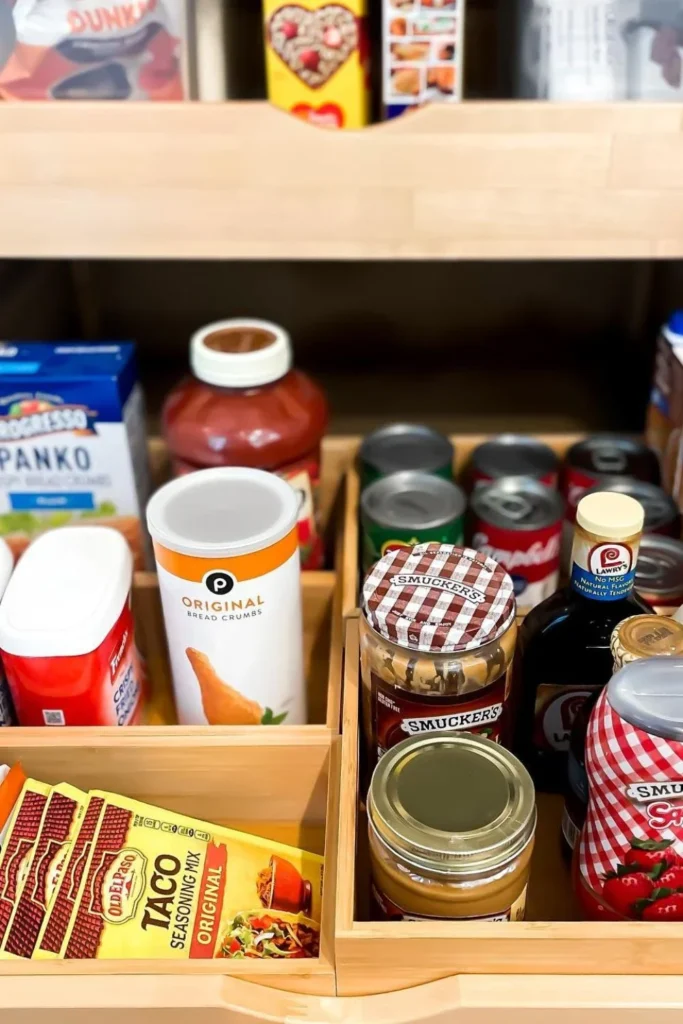
<bold>Best for: Wide drawers and lower kitchen cabinets.</bold>
Deep drawers can become useful canned food storage areas when you add dividers to prevent products from rolling or mixing together.
Adjustable wooden or plastic partitions allow you to create separate compartments for soup, vegetables, beans, fruit, and smaller tins. Arrange the cans in stable rows, ensuring the drawer closes without catching on the products.
One advantage of drawer storage is visibility. Pulling the drawer open reveals its contents more clearly than reaching into a deep cabinet and moving cans around.
Before setting up the drawer, confirm that its base can support the combined weight of the cans. Heavy-duty drawer slides are particularly important when storing a substantial collection.
This method works best when the drawer is deep enough to hold your chosen cans securely but not so deep that products disappear beneath other items.
7. Clear Bins
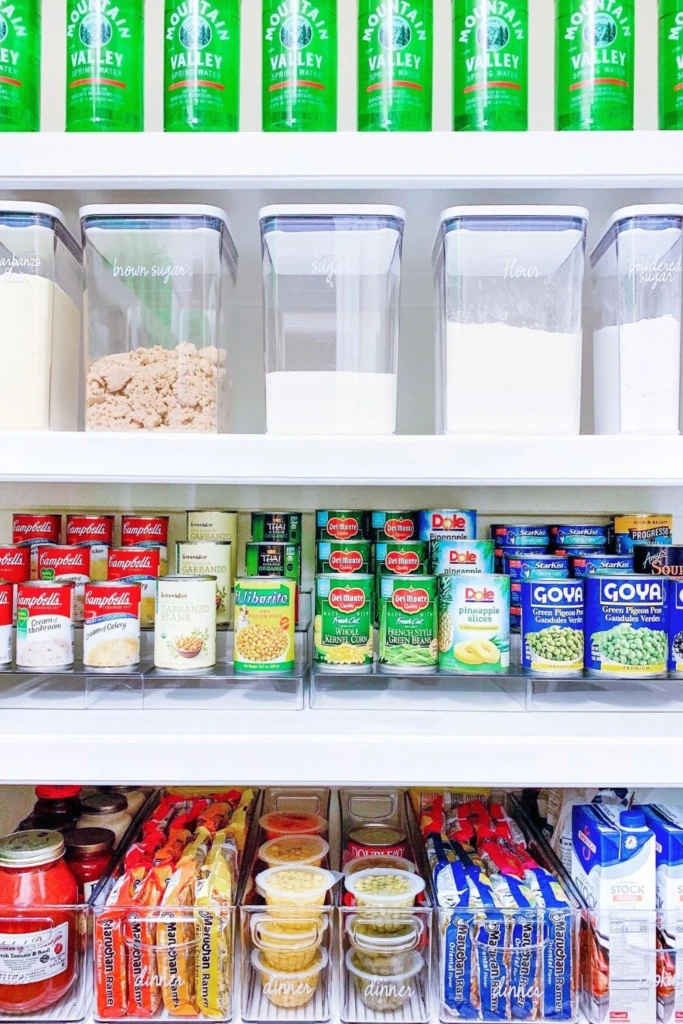
<bold>Best for: Deep pantry shelves and neatly grouped supplies.</bold>
Transparent storage bins make it easier to keep canned goods together while preventing individual cans from spreading across the shelf.
Use separate containers for different categories, such as vegetables, soups, fruit, and beans. Clear sides let you check the contents without removing every can or opening several boxes.
Choose bins with sturdy bases and enough width to accommodate your preferred can sizes. Handles can be helpful when you need to pull a container toward you, particularly on deep shelves.
For efficient stock rotation, position older cans at the front and newer purchases behind them. If the bin is too deep to maintain this arrangement, choose a shallower container or divide the collection into smaller groups.
Avoid filling bins so heavily that they become difficult to lift. Keeping containers manageable makes restocking and cleaning much easier.
8. Shelf Glides
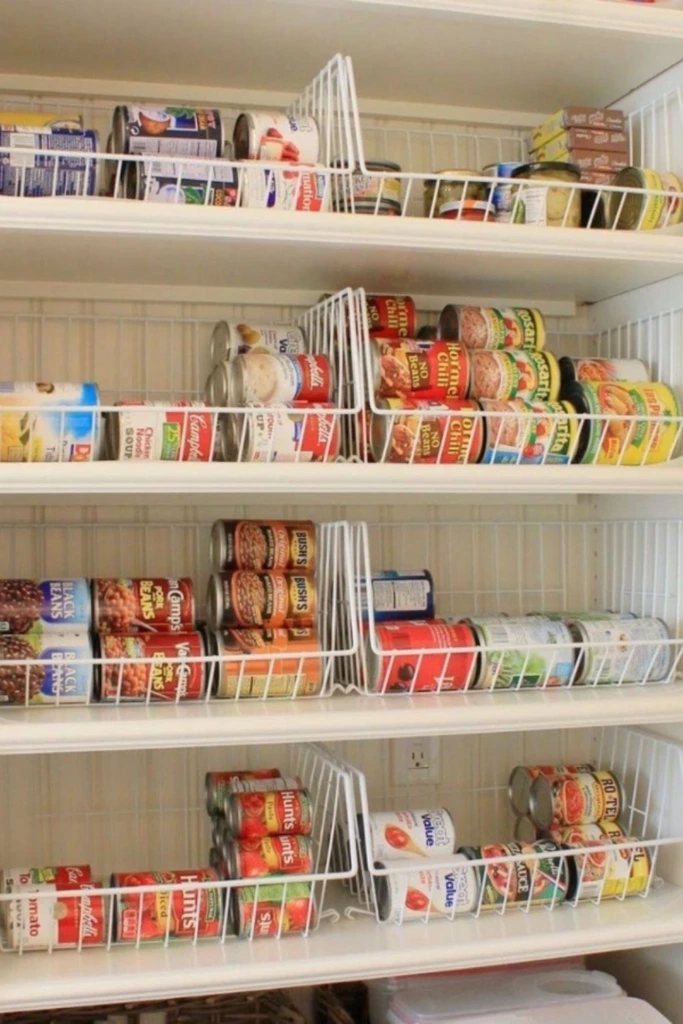
<bold>Best for: Keeping rows of cans orderly on long shelves.</bold>
Shelf glides and can organizers create dedicated lanes that prevent canned goods from drifting into mixed piles. Depending on the design, these organizers may include wire rails, adjustable dividers, or sloped tracks.
Assign each lane to a specific product category. For example, one row can hold canned beans, while another accommodates soup or vegetables.
The rails help maintain straight rows and make it easier to see how many cans remain. Some designs also allow cans to roll toward the front as products are removed.
Measure the shelf carefully before buying an organizer, paying attention to its width, depth, and height. Check that the system is suitable for the weight and dimensions of your cans.
A well-fitted glide system can make a long pantry shelf considerably easier to manage, particularly if you regularly replenish the same staples.
9. Pantry Wall
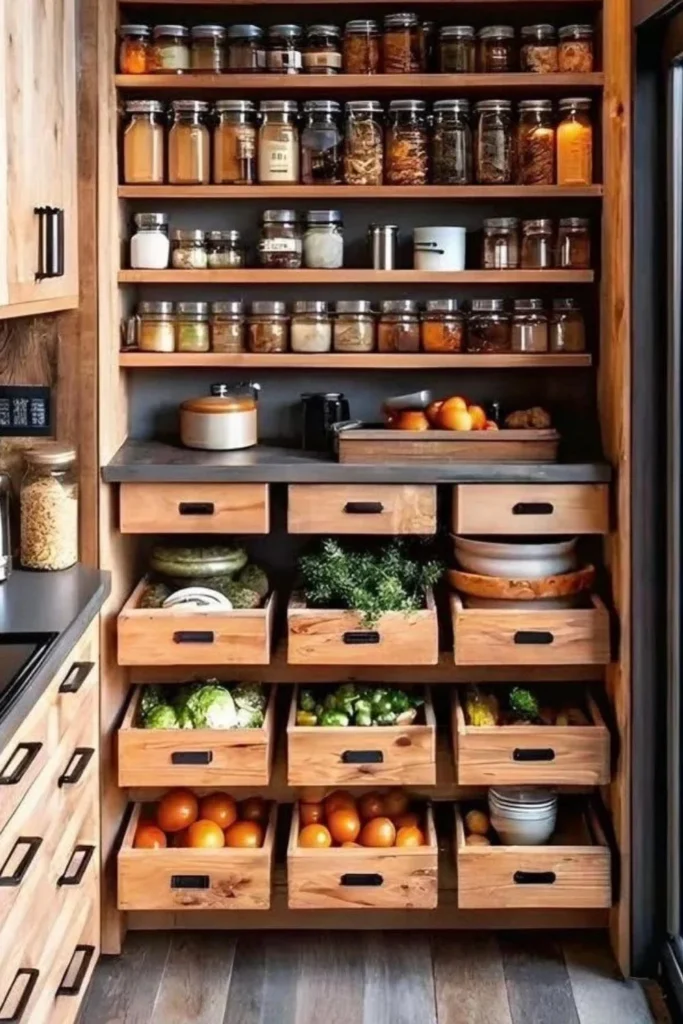
<bold>Best for: Kitchens that need more vertical storage.</bold>
An unused kitchen wall can become a practical pantry station with a combination of sturdy shelves, small storage baskets, and lower cabinets.
Install shelving at convenient heights and reserve accessible levels for everyday canned goods. Lower cabinets or drawers can accommodate heavier supplies, while upper shelves may hold jars, dry ingredients, and less frequently used items.
Wooden shelves offer a warm, traditional appearance, while metal shelving suits a more utilitarian kitchen. Whatever material you choose, make sure the brackets and wall anchors are appropriate for the expected load.
Keep canned goods away from direct sunlight, cooking heat, and damp areas. If the wall is close to a stove or dishwasher, choose a different location when possible.
This arrangement is particularly effective in small kitchens where adding another freestanding cabinet would make the room feel crowded.
10. U-Pantry
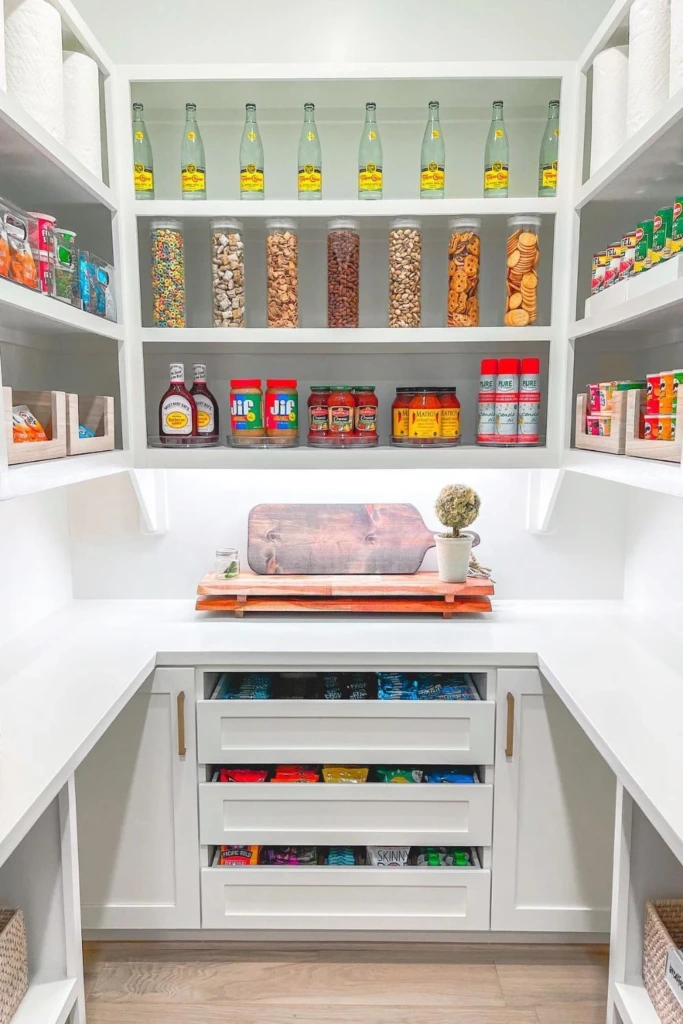
<bold>Best for: Walk-in pantries and rooms with shelving on several walls.</bold>
A U-shaped pantry uses three sides of a room or alcove for storage. This layout can accommodate a larger collection of canned goods while keeping the main walking area open.
Dedicate each wall to a different category. One side might contain vegetables and fruit, another soups and beans, and the third sauces, baking supplies, and other pantry staples.
Continuous shelving makes it easier to create consistent rows, while drawers and baskets can hold smaller items that might otherwise get lost.
Pay attention to shelf depth. Very deep shelves can hide products behind the front row, so shallower shelves or tiered organizers may be more effective for cans.
Keep the most frequently used items at waist or eye level and place heavier backup supplies lower down. A thoughtful U-shaped arrangement provides substantial storage while making it easier to monitor your inventory.
11. Door Shelves
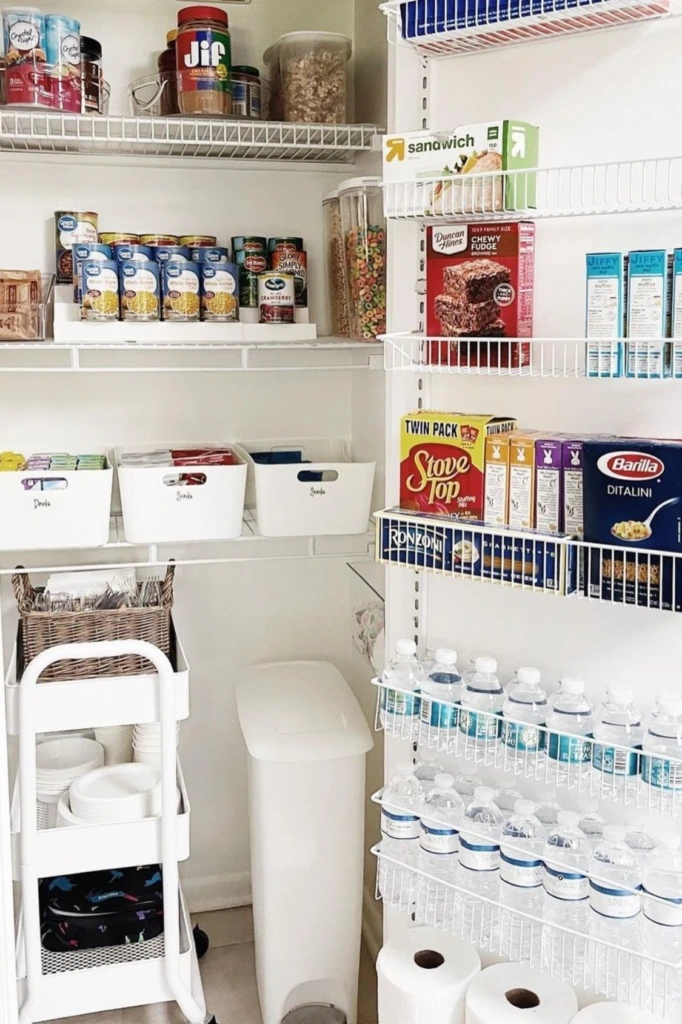
<bold>Best for: Small pantries with limited cabinet space.</bold>
The inside of a pantry door can provide extra storage when fitted with a suitable over-the-door organizer or securely mounted shelving system.
Narrow baskets work well for lightweight pantry products, small jars, seasoning packets, and appropriately sized cans. Avoid placing heavy products on a door rack unless the manufacturer specifically rates it for that load.
Before installing anything, check the door's thickness, available clearance, hinge capacity, and whether the shelves will interfere with nearby cabinets.
Use the upper baskets for lighter items and keep products you reach for often at a comfortable height. Labeling the baskets can make the arrangement even more practical.
Door-mounted storage is especially useful in compact kitchens, where even a small increase in accessible storage can make a difference. However, the system should remain secure when the door opens and closes.
12. Lazy Turntable
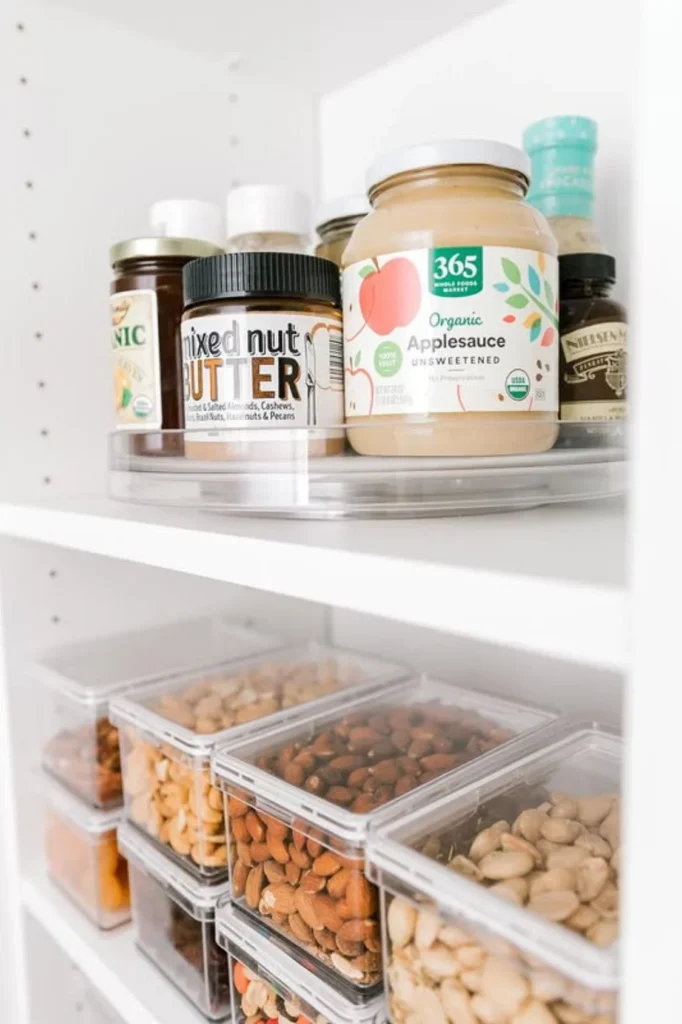
<bold>Best for: Small cans, jars, sauces, and awkward cabinet corners.</bold>
A lazy Susan is a rotating tray that brings stored items toward you with a simple turn. It is particularly useful in cupboards where products tend to disappear behind one another.
Place smaller cans, condiments, jars, and spreads on the tray, arranging them in a single stable layer. Keep similar products together so you can identify them quickly as the organizer rotates.
Measure the shelf before purchasing a turntable, allowing enough clearance for it to spin freely. A raised edge helps prevent items from slipping off during use.
Plastic and acrylic models are lightweight and easy to clean, while sturdier options may be better suited to heavier containers.
Although a turntable cannot replace a full pantry system, it can make a crowded shelf much more functional. For larger cans, verify the tray's weight capacity and diameter before loading it.
13. Jar Wall
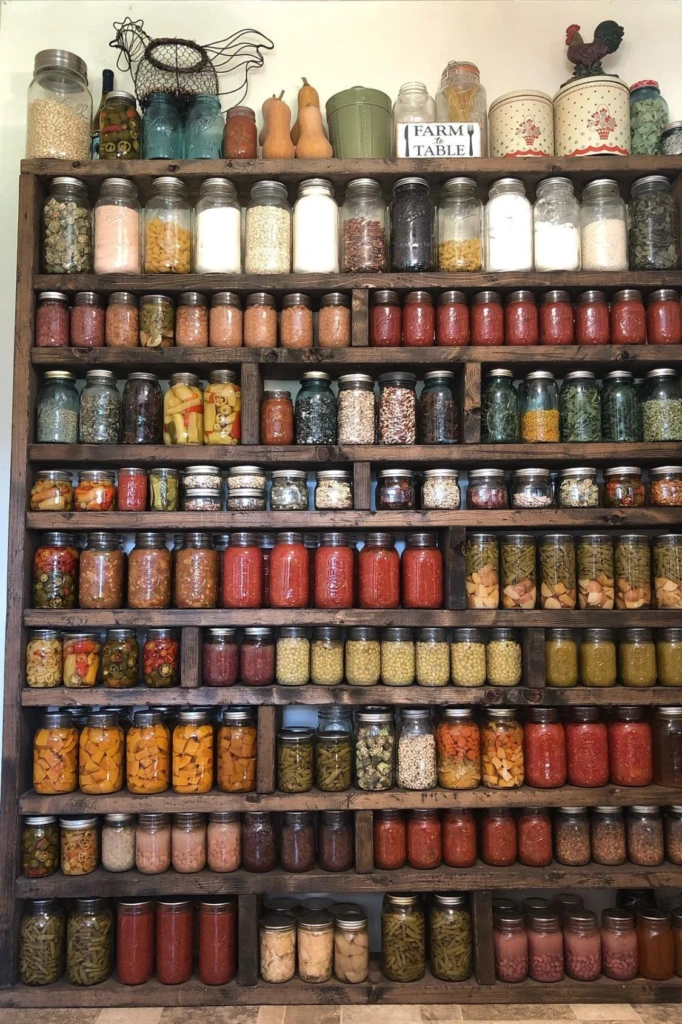
<bold>Best for: Home canners and kitchens with substantial wall space.</bold>
A dedicated jar wall can provide attractive, practical storage for homemade preserves and other shelf-stable foods.
Install strong shelves with enough depth to support your jars securely. Keep jars in organized rows, grouping fruit preserves, sauces, vegetables, and other foods by type.
Because filled glass jars can be heavy, use suitable wall anchors and brackets, and confirm that the shelves can support the total load. Avoid placing heavy jars above frequently occupied work areas.
Label each jar with its contents and preparation or packing date where applicable. For home-canned foods, follow tested preservation guidance and recommended storage practices rather than relying on appearance alone.
Rotate supplies so older jars are considered first, and inspect containers before use. Discard jars with signs of spoilage, damaged seals, leaking contents, or other warning signs.
A jar wall works especially well in a dedicated pantry or home-preserving area where shelves can be installed safely.
14. Pull Cabinets
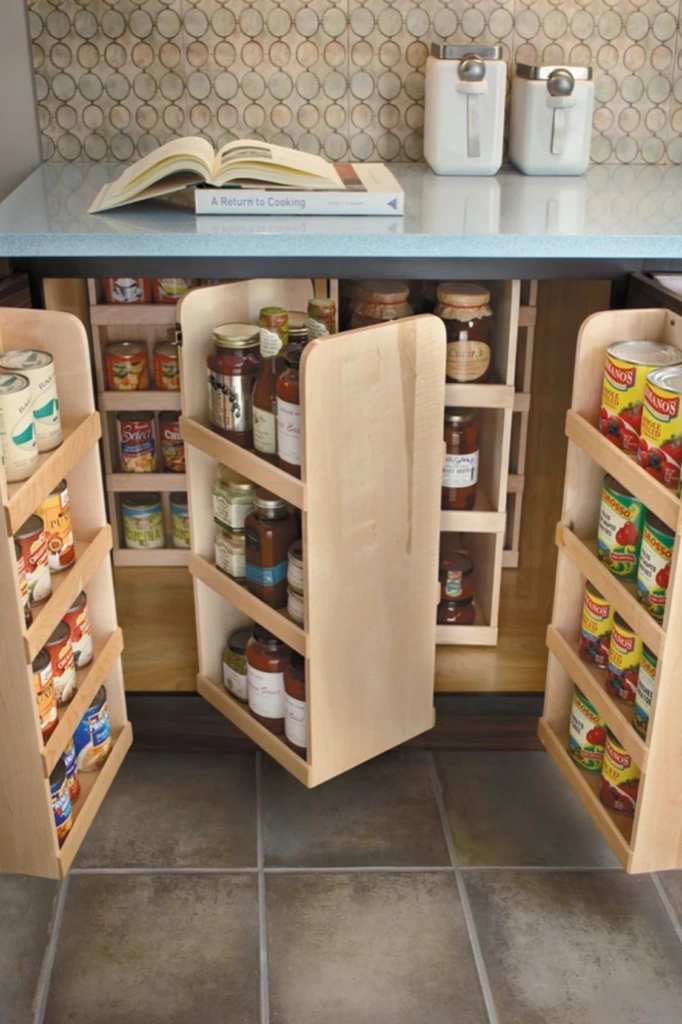
<bold>Best for: Deep base cabinets and narrow spaces beside appliances.</bold>
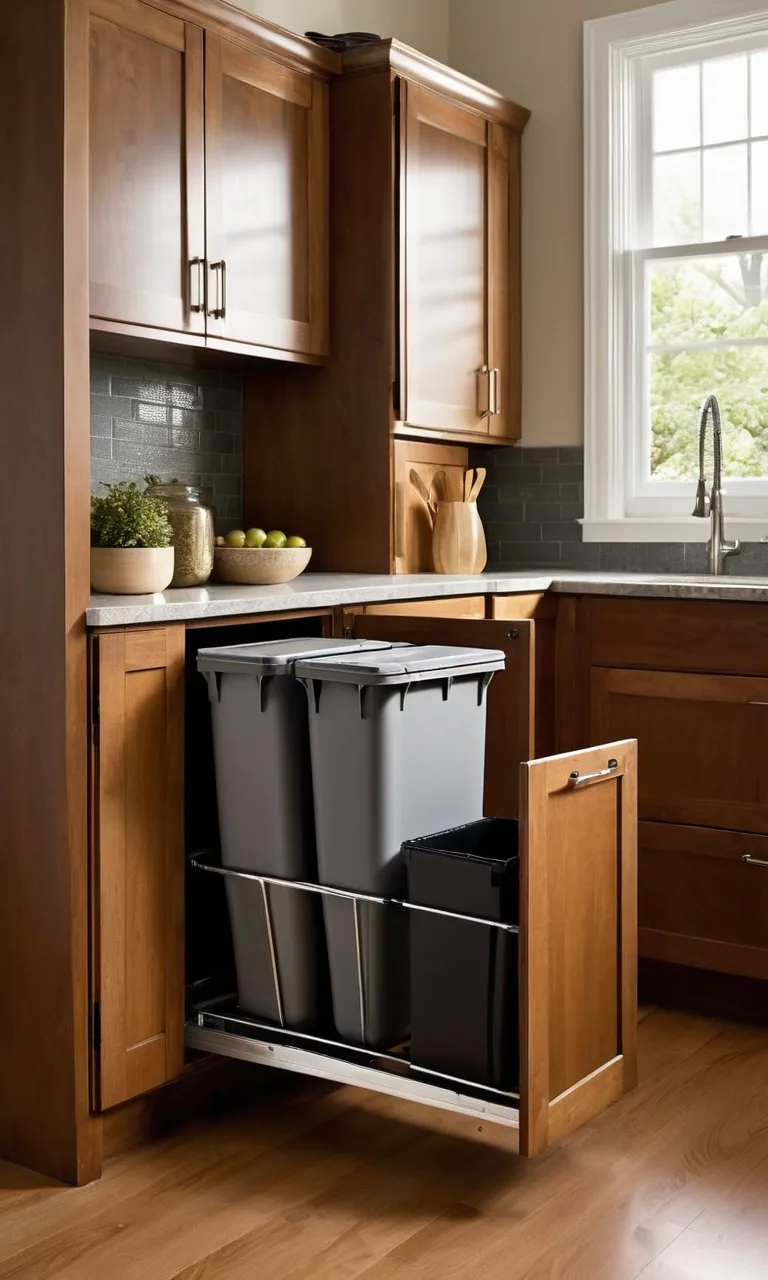
Pull-out pantry cabinets make use of storage space that would otherwise be difficult to reach. Their sliding shelves bring products forward instead of requiring you to reach into a deep cabinet.
Depending on the cabinet design, you can arrange canned goods along the sides and use other compartments for jars, condiments, or packaged ingredients.
Measure the opening and interior dimensions before purchasing a pull-out unit. Check the slide mechanism's weight rating and make sure plumbing, hinges, or nearby appliances will not obstruct movement.
Group similar cans on each shelf and position heavier products on lower levels whenever possible. This improves accessibility and helps keep the cabinet balanced.
For an existing kitchen, a retrofit pull-out organizer may provide many of the benefits without requiring an entirely new cabinet. It is a particularly practical option for narrow spaces where conventional shelving wastes room.
15. Pantry Lighting
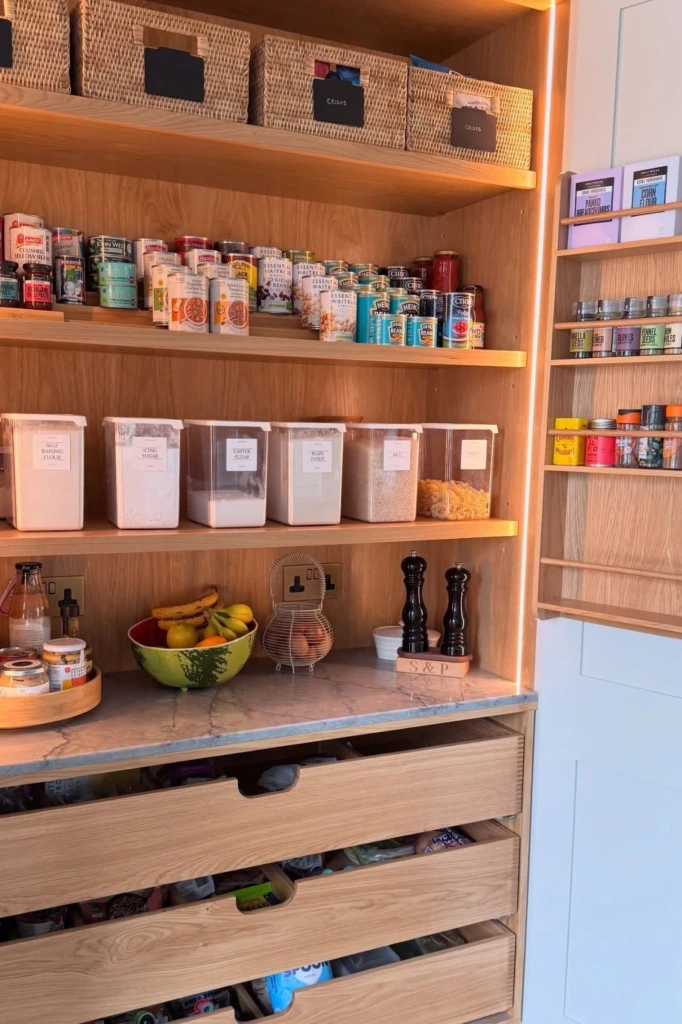
<bold>Best for: Dark cabinets and deep pantry shelves.</bold>
Even a well-organized pantry becomes difficult to use when labels are hidden in shadow. Better lighting makes it easier to identify products, check expiration dates, and notice supplies running low.
LED strip lights can be installed beneath shelves or along suitable cabinet interiors. Battery-operated motion-sensor lights are another option when electrical wiring is inconvenient.
Choose lighting designed for the intended location, and follow the manufacturer's installation and safety instructions. Keep electrical components away from moisture and areas exposed to heat.
Lighting works best alongside a clear storage arrangement. Keep cans in orderly rows, avoid excessive stacking, and leave enough space to read the labels.
This improvement is especially useful in tall pantry cabinets, basement storage rooms, and cupboards with deep shelves. A small lighting upgrade can make everyday food preparation faster and more comfortable.
16. Can Drawer
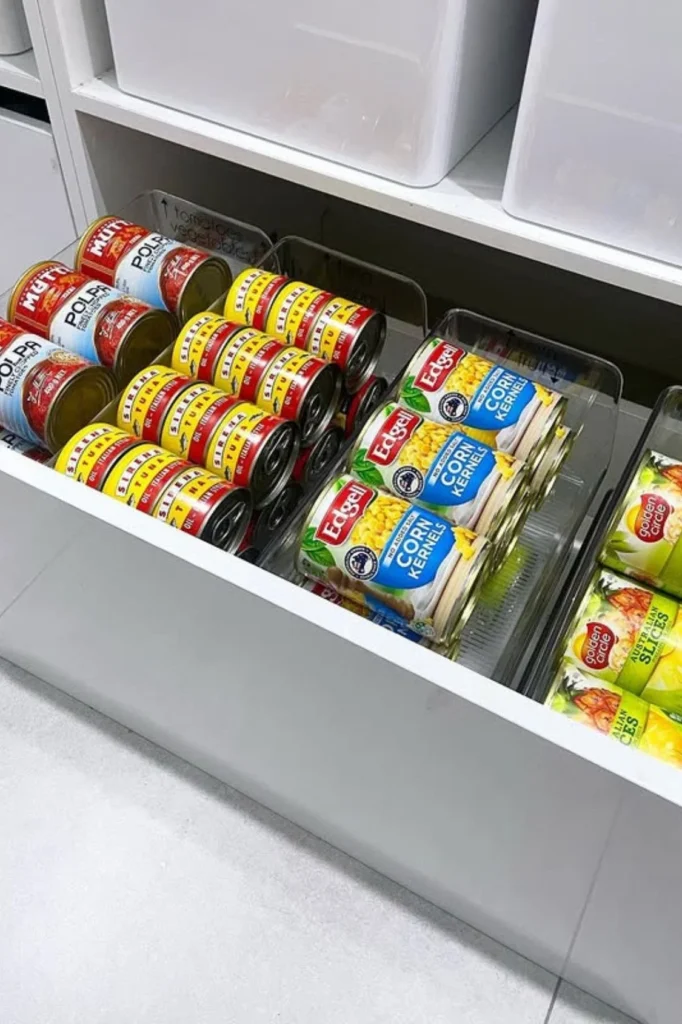
<bold>Best for: Lower cabinets with deep, accessible drawers.</bold>
A dedicated can drawer allows you to arrange canned goods in horizontal rows instead of stacking them where they become difficult to see.
Use adjustable dividers or sturdy trays to create sections for tomatoes, beans, vegetables, soups, and other staples. Arrange products so their labels remain visible when you open the drawer.
Before using a drawer for heavy cans, check the load rating of its base and runners. A fully extended drawer can place considerable stress on its hardware, particularly when packed with metal cans or glass containers.
Keep the drawer organized by returning products to their designated sections after shopping or cooking. Put older cans near the front and newer ones behind them.
If your cabinets do not have built-in dividers, removable acrylic trays or simple partitions can create a similar setup without permanent modifications.
17. Sliding Baskets
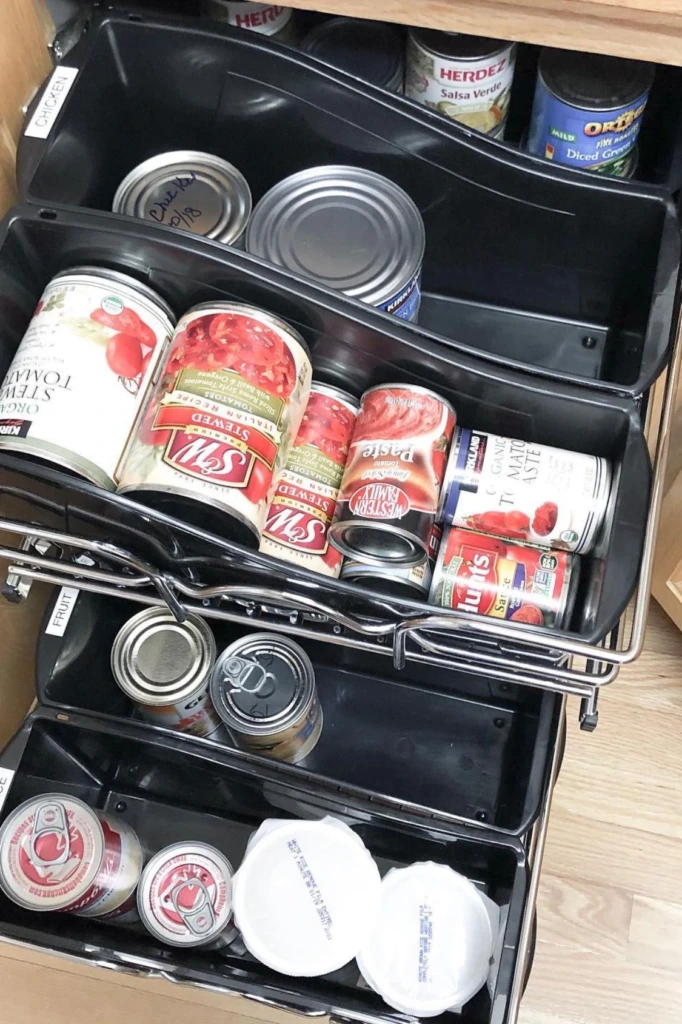
<bold>Best for: Cabinets where items frequently get lost at the back.</bold>
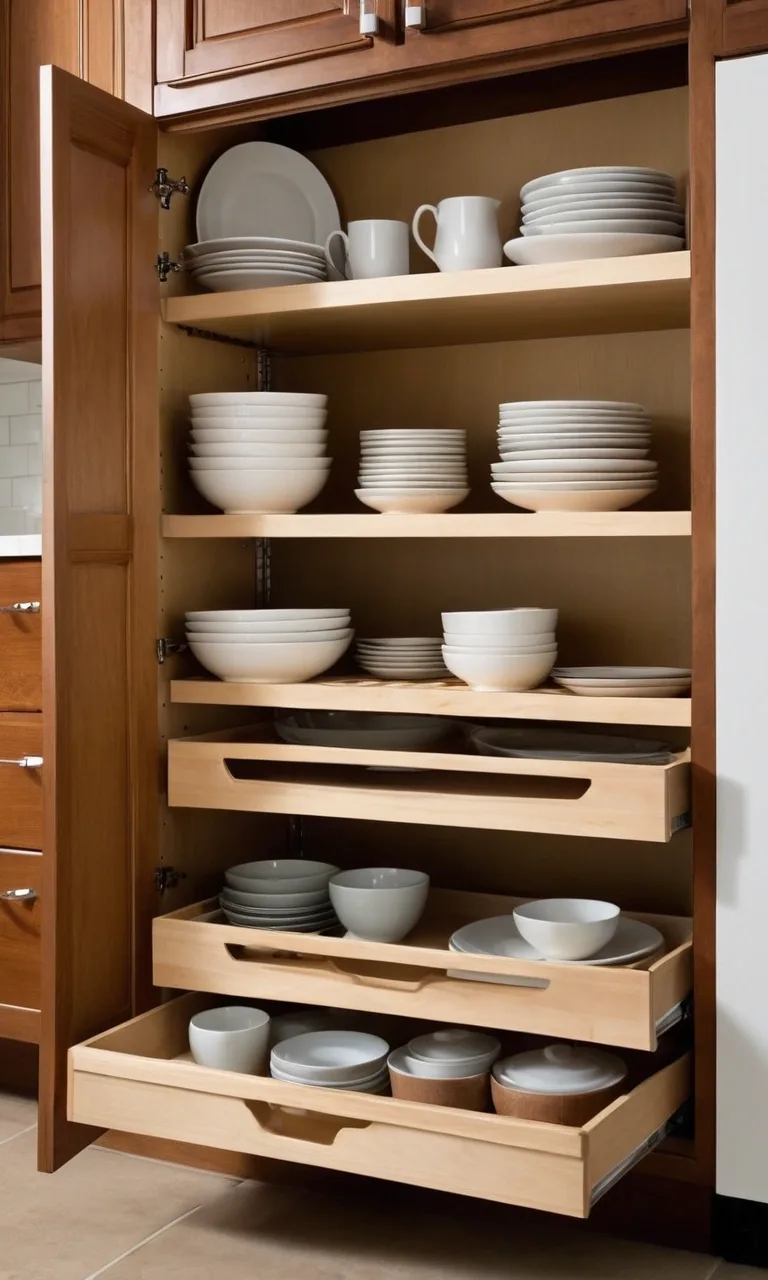
Sliding baskets turn the interior of a deep cabinet into a series of accessible storage compartments. Each basket pulls forward independently, allowing you to reach products without unloading the entire shelf.
Assign different baskets to soups, vegetables, beans, fruit, or other canned foods. Labels on the basket fronts can make the system even easier to maintain.
Wire baskets provide visibility and ventilation, while solid-sided containers may be preferable for small products that could slip through openings.
Measure the cabinet carefully and choose a sliding system with a suitable weight capacity. Securely installed rails are essential when storing heavy cans.
This method is especially useful in lower cabinets where reaching the back can be uncomfortable. Once everything has a designated basket, restocking becomes simpler and you can quickly see which categories need replenishing.
18. Slat Shelves
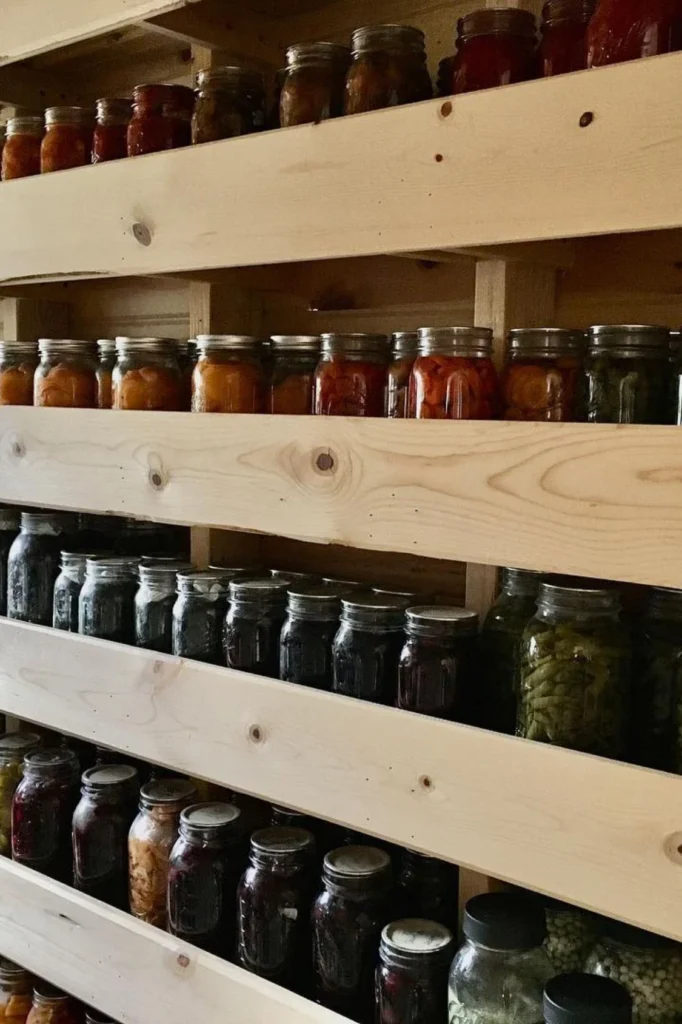
<bold>Best for: Large pantries, garages, and home-canning storage areas.</bold>
Slat shelving can provide an efficient way to store a substantial collection of home-canned jars. Wooden boards or purpose-built shelf sections create individual rows while helping keep containers aligned.
Choose sturdy materials and shelving supports designed for the combined weight of the jars. Filled glass containers are much heavier than they appear, so the structure must be properly secured.
Arrange jars by food type and preparation date, leaving enough space to remove each container without knocking others over. Labels should face outward so you can check the contents easily.
This system can work well in a dedicated pantry, basement storage room, or suitable garage area. However, avoid locations that experience extreme temperature changes, dampness, or freezing conditions.
For the best results, combine strong shelving with regular inspections and a consistent rotation routine. A properly planned storage wall can hold a considerable supply without creating a jumble of jars.
19. Pantry Display
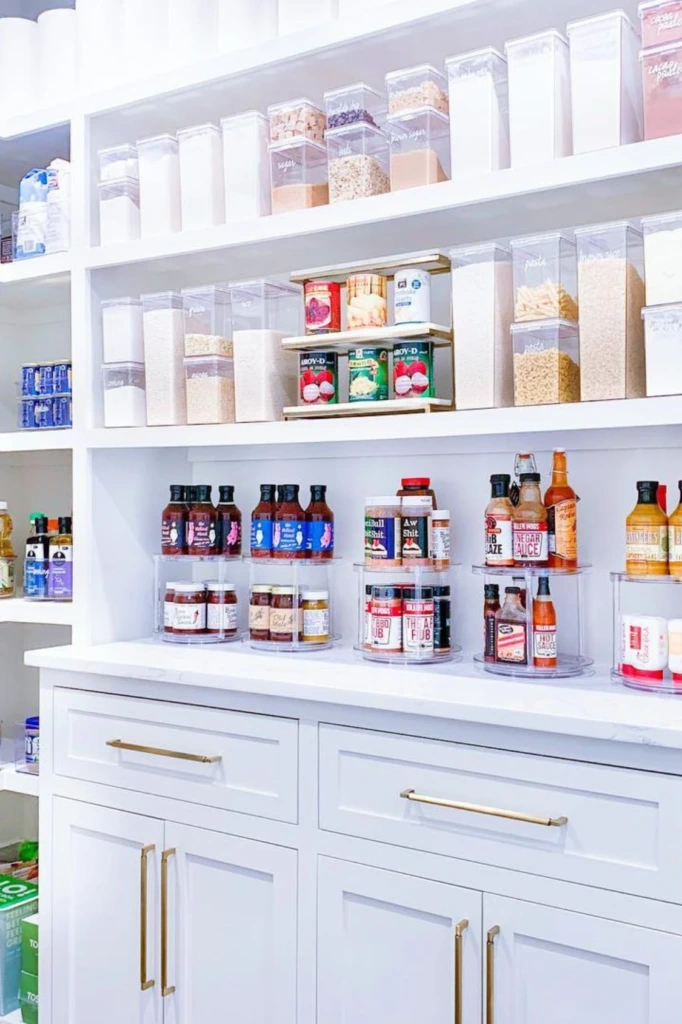
<bold>Best for: Open pantries where visibility and appearance matter.</bold>
Open shelving turns canned food storage into a visible part of your pantry design. When products are arranged in neat rows, you can quickly scan the shelves and identify what you need.
Group similar items together and position labels toward the front. Use baskets or small containers for products that do not sit neatly on the shelves.
Reserve the easiest-to-reach levels for frequently used cans and place heavier supplies on lower shelves. Keep enough space between rows to remove products comfortably without disturbing neighboring items.
Open storage also makes it easier to spot duplicates and check your inventory before shopping. The main drawback is that products remain exposed to dust and light, so the pantry should be kept clean and away from direct sunlight.
This arrangement works especially well in walk-in pantries, where wider shelves allow you to spread out your supplies without excessive stacking.
20. Shelf Risers
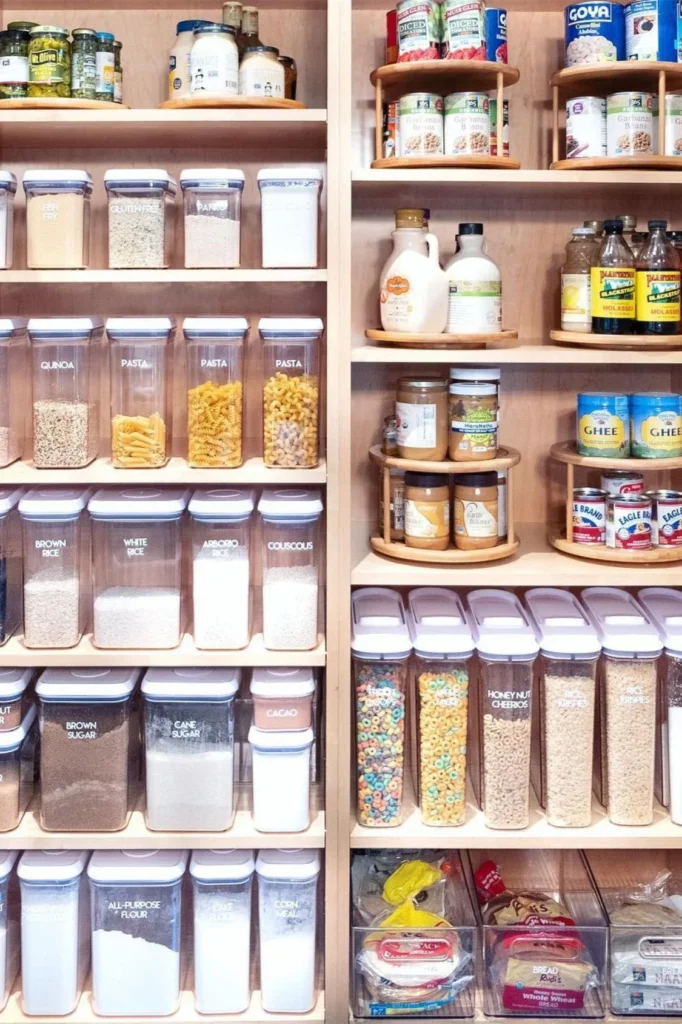
<bold>Best for: Small cabinets that need more usable shelf space.</bold>
Shelf risers create a second level within an existing cabinet, allowing you to store cans at different heights instead of placing everything in one row.
The raised rear platform helps keep labels visible and makes better use of vertical clearance. Depending on the riser's size, you can place smaller cans on top and larger containers underneath.
Choose a riser with a stable base and a weight rating appropriate for canned food. Measure the cabinet's height and depth first to ensure the additional level will not prevent the door from closing.
Wooden, metal, and acrylic versions are available, so you can select one that suits your kitchen and cleaning preferences.
Shelf risers are particularly helpful in narrow cupboards where there is enough height for another level but insufficient room to spread cans across a wider area. They provide a straightforward way to improve visibility without renovating your cabinets.
21. Category Shelves
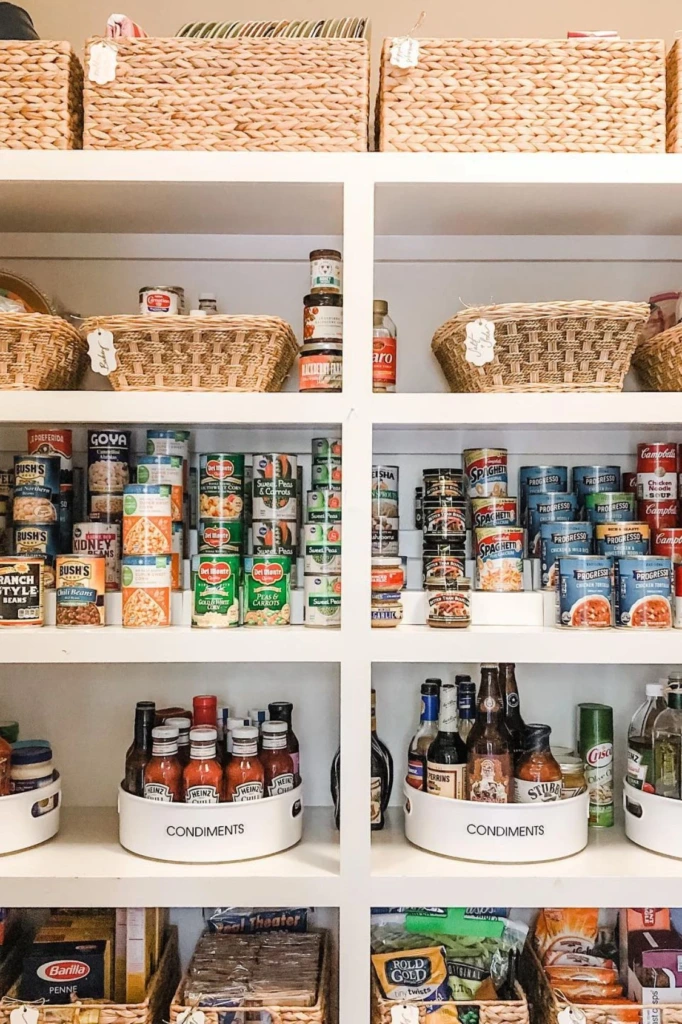
<bold>Best for: Families with varied pantry staples and frequent grocery trips.</bold>
Category shelving gives each type of canned food a clearly defined location. Rather than mixing everything together, create separate sections for beans, soups, vegetables, fruit, tomatoes, and sauces.
You can organize these sections on a single long shelf or distribute them across several shelves according to the size of your collection.
Use small labels to identify each category, especially when multiple family members put groceries away. This makes the system easier to maintain over time.
Arrange products by expiration date within each category, keeping older items toward the front. When new cans arrive, move the existing stock forward before adding the new purchases at the back.
This approach improves visibility and reduces unnecessary purchases because you can see your available supplies at a glance. It is inexpensive to implement and works with almost any pantry layout.
22. Stack Towers
<bold>Best for: Strong shelves with limited width and sufficient vertical clearance.</bold>
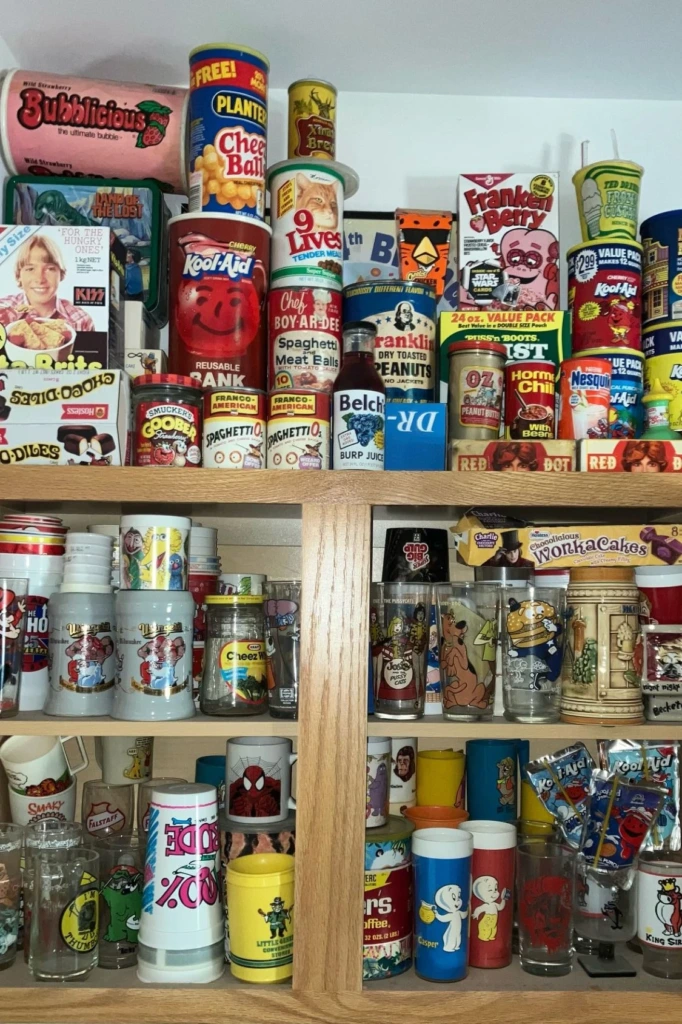
Stacking cans vertically can conserve shelf space when your pantry is narrow. A can tower groups several containers into a compact footprint, leaving additional room for other products.
However, stability matters more than maximizing height. Follow the manufacturer's stacking guidance, use organizers designed for your can sizes, and avoid building tall, unsecured piles that could fall when you remove a can.
Keep heavier containers lower and lighter ones above them. Do not exceed the shelf's weight limit or stack products so high that retrieving them becomes uncomfortable.
If you frequently use the same canned foods, a purpose-built stacking rack may be more practical than placing cans directly on top of one another.
This approach works best in cabinets with adequate headroom and sturdy shelves. For households with children or in areas prone to movement, low, secure arrangements are generally safer than tall towers.
23. Cubby Storage
<bold>Best for: Tall pantry cabinets and large collections of canned goods.</bold>
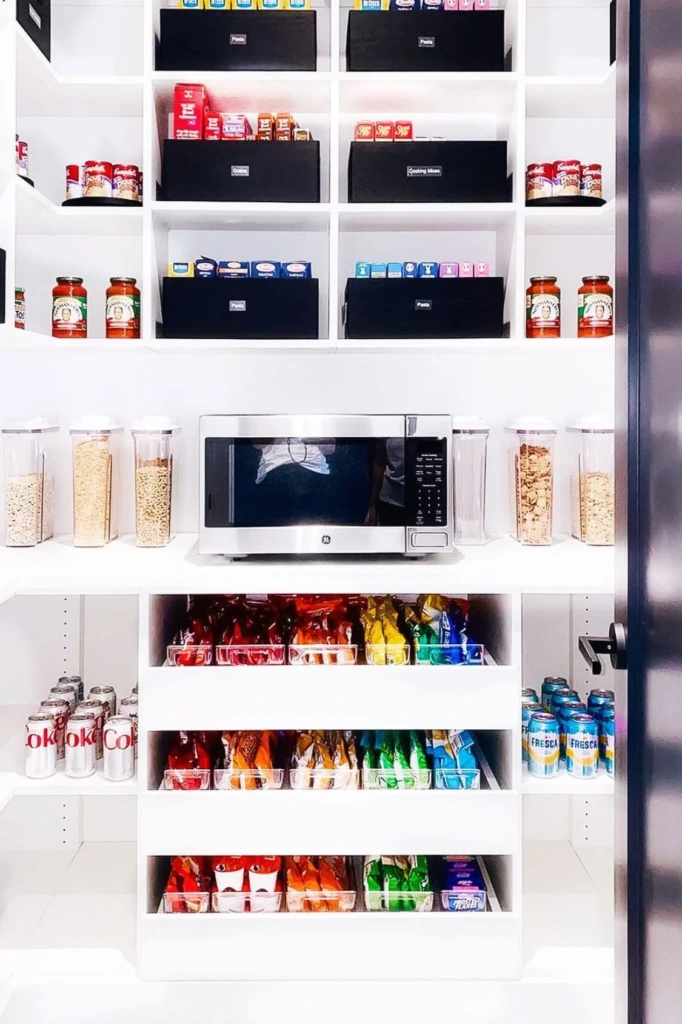
Cubby storage divides a larger shelving unit into individual compartments. Each opening becomes a designated home for a specific category of food, reducing the tendency for cans to spread across the pantry.
You might assign one cubby to beans, another to soups, and another to canned vegetables or fruit. Smaller containers within a compartment can provide additional separation if necessary.
Choose cubbies deep enough to accommodate your cans without leaving excessive unused space behind them. Shallower compartments often improve visibility and make it easier to reach individual products.
Ensure the shelving unit is sturdy and properly secured, especially when several compartments will hold heavy canned goods.
To keep the system organized, arrange cans by category and place newly purchased items behind older stock. This makes it easier to review supplies, plan meals, and maintain a consistent rotation routine.
Cubby storage is particularly useful when you want a structured pantry that can accommodate different types of canned food without mixing everything together.
How do you organize canned food so nothing expires in the back?
Use a first-in, first-out system. When you purchase new canned goods, move the older products toward the front and place the new ones behind them. This encourages you to use earlier stock before opening newer cans.
Check expiration and best-before dates regularly, and arrange products so labels remain visible. Tiered racks, pull-out drawers, and dedicated can dispensers can make this process easier.
Group similar foods together so you can see how much of each item you have. A simple inventory list can also help you avoid buying duplicates.
Remember that storage conditions matter, too. Keep cans in a cool, dry location away from direct sunlight and heat sources. Inspect containers before use and discard cans that are leaking, bulging, or severely damaged.
What is the best place to store canned food in a kitchen?
The best location is a cool, dry, clean cupboard or pantry away from direct sunlight, ovens, dishwashers, and other heat sources. A stable storage environment helps preserve product quality and reduces unnecessary temperature exposure.
A commonly recommended storage range for unopened commercially canned foods is approximately 50°F to 70°F (10°C to 21°C), although product guidance and local conditions can vary. Avoid damp locations and areas that may freeze.
Choose shelves or drawers that can support the weight of your cans and allow you to see labels easily. Use racks, bins, or dividers if they improve access without overcrowding the space.
Keep canned goods away from household chemicals and other contaminants. With suitable storage conditions and regular stock rotation, your pantry can remain organized while helping you make the most of the food you purchase.