21 Art Supply Organization Ideas for 2026
A creative workspace should make it easy to start a project, not leave you searching through piles of paints, brushes, and scattered materials. When every supply has a designated place, you can spend less time cleaning and more time making art.
Whether you have a dedicated studio, a small crafting desk, or a shared family art corner, thoughtful storage can make a noticeable difference. The right organization system also helps protect delicate materials, reduce waste, and keep your favorite tools ready whenever inspiration strikes.
These 20 art supply organization ideas offer practical ways to arrange everything from colorful markers to painting essentials without sacrificing valuable workspace.
1. Wall-Mounted Pegboards
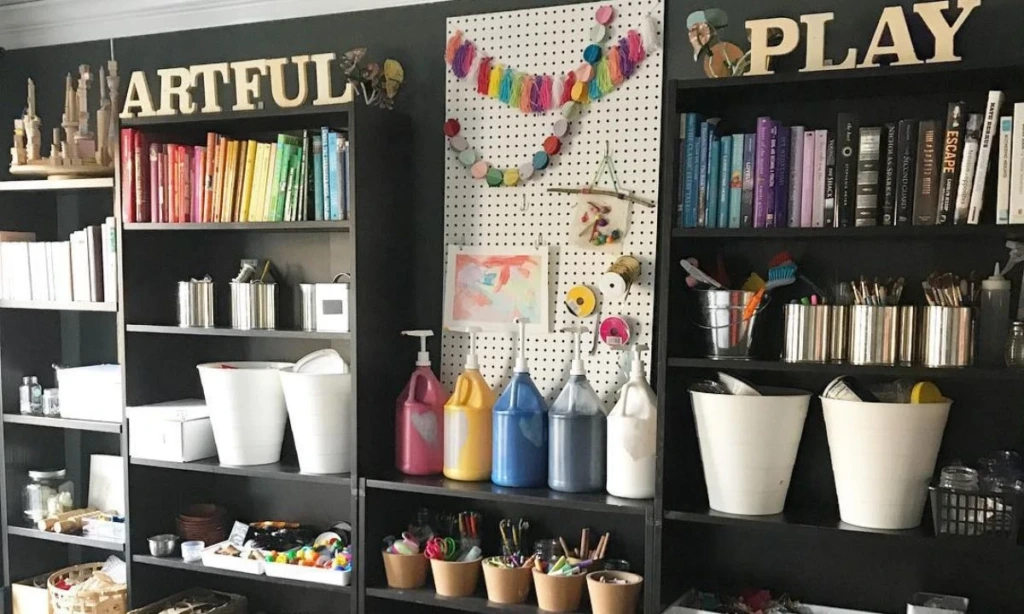
A wall-mounted pegboard turns unused vertical space into a customizable storage area. Instead of filling your desk with containers, you can arrange frequently used tools on the wall directly above your workstation.
Combine hooks, small baskets, and narrow shelves to accommodate different supplies. Keep scissors and rulers on hooks, place drawing materials in hanging cups, and reserve shelves for lightweight containers.
One major advantage is flexibility. As your collection grows, you can rearrange the accessories without replacing the entire storage system. Install the board securely and keep heavier items on properly supported shelves.
2. Clear Bin System
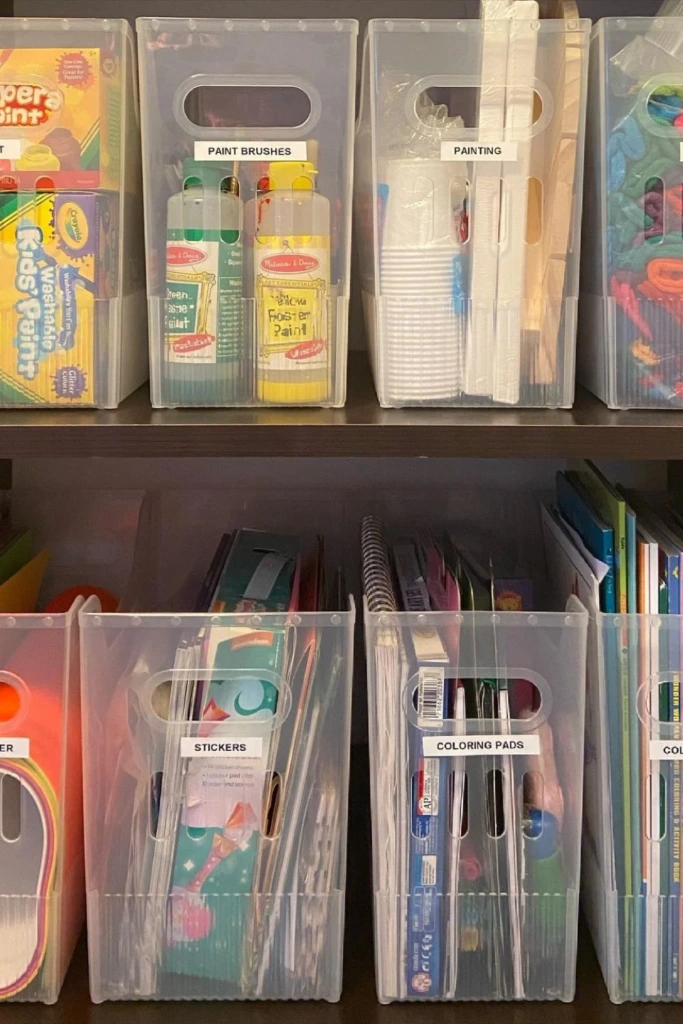
Transparent storage bins make it easier to identify supplies without opening several containers. They're particularly useful for collections containing different materials that need to stay separated.
Choose bins that fit your shelves and assign each one a purpose, such as watercolor supplies, sketching tools, or unfinished projects. Add simple labels to help everyone return materials to the correct location.
For smaller items, use shallow containers rather than deep boxes where supplies can disappear beneath one another. Keep frequently used materials at eye level and store occasional-use items higher up.
3. Sectioned Basket Organizer
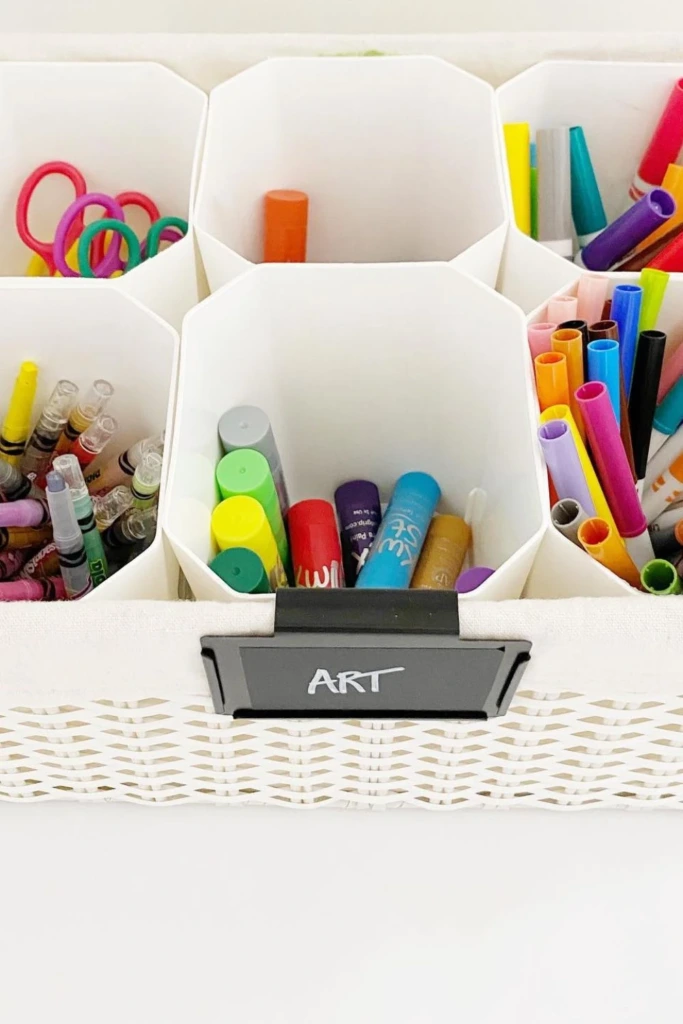
A basket with interior compartments provides a convenient home for everyday crafting essentials. It works especially well when you prefer keeping your most-used supplies together rather than distributing them across several drawers.
Arrange pencils, markers, adhesives, and cutting tools in separate sections. Removable dividers are helpful because they let you change the layout for different projects.
Choose a basket with a sturdy handle if you regularly move between workspaces. For family crafting areas, consider keeping sharp tools in a separate, supervised storage location.
4. Hanging Pocket Organizer
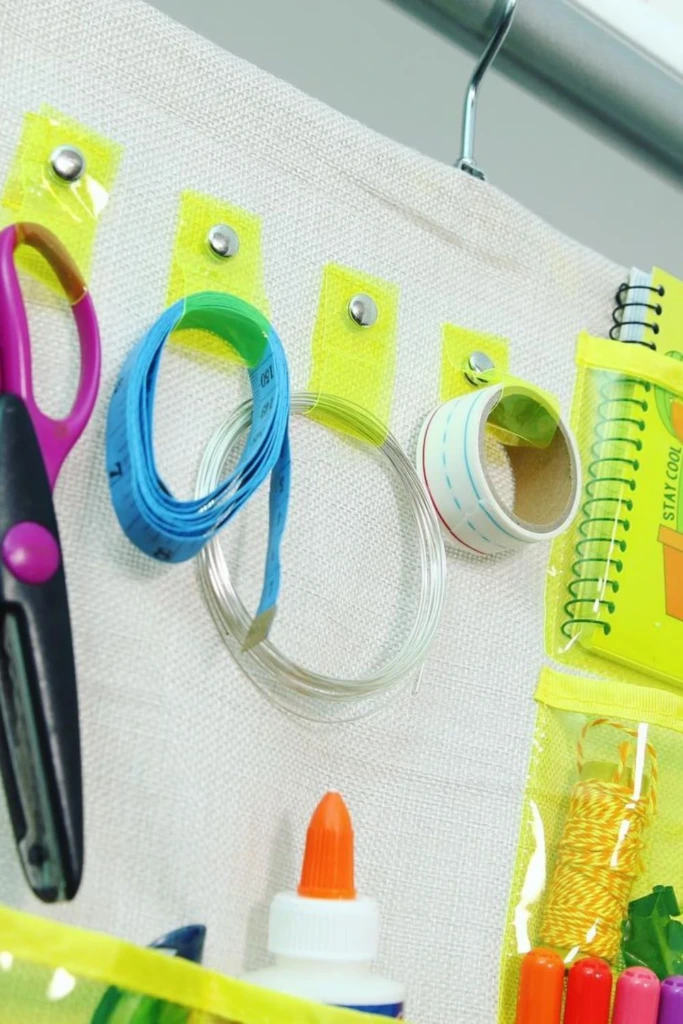
A hanging pocket organizer is a practical solution when your desk and shelves are already full. It makes use of doors or walls while keeping smaller supplies individually separated.
Fill the pockets with lightweight materials such as stickers, colored pencils, stencils, and adhesive tape. Transparent pockets help you spot what you need immediately, while fabric pockets can be labeled for easier identification.
Hang the organizer at a comfortable height and avoid overloading individual sections. This setup is particularly useful in bedrooms, classrooms, and compact craft spaces.
5. Wall Paint Display
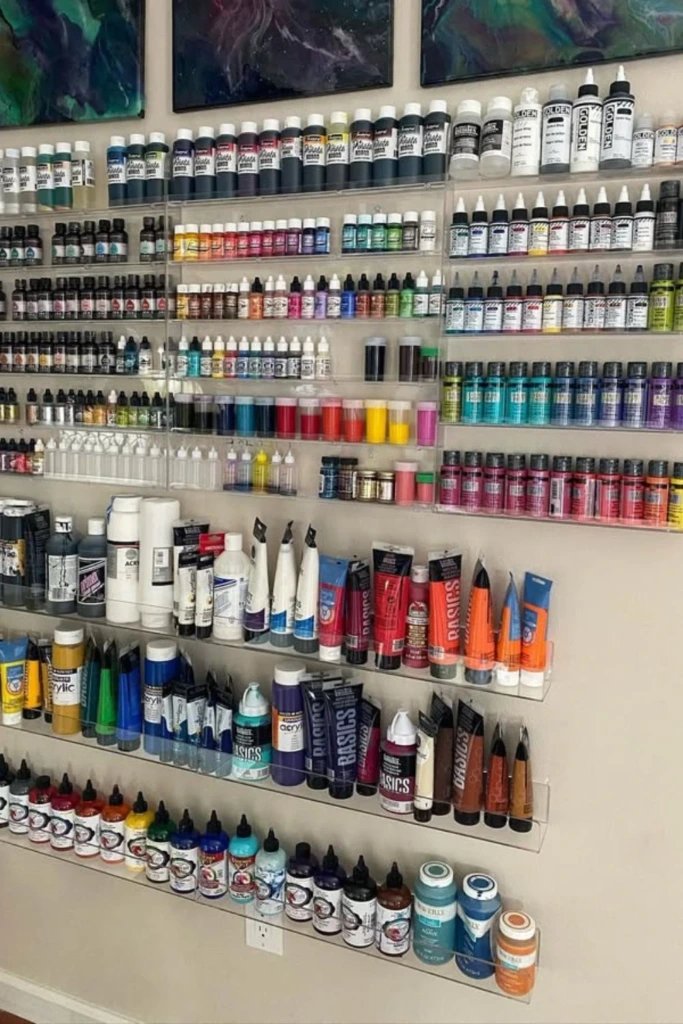
A dedicated wall display can turn your paint collection into an attractive feature of your art room while improving accessibility.
Install shallow shelves or suitable racks that accommodate the sizes of your paint bottles. Arrange them by medium, then by color, so acrylics, watercolors, and other paints remain easy to distinguish.
Make sure bottles are stable and protected from direct sunlight and excessive heat. Keeping paints in appropriate storage conditions helps maintain their usability while creating a visually organized studio.
6. Rolling Cart Station
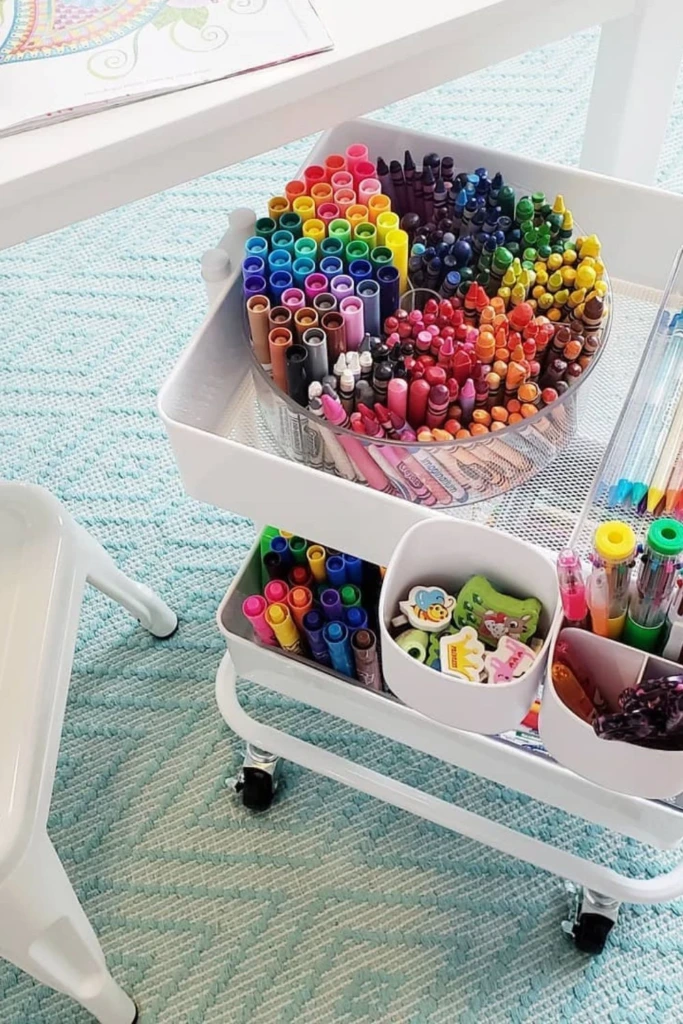
A multi-tier rolling cart allows you to create a flexible art station that moves wherever you're working. It's particularly useful when your dining table, desk, or kitchen counter doubles as a crafting surface.
Reserve the upper tier for frequently used supplies, such as pencils and brushes. Use the middle level for paints and adhesives, while the bottom shelf can accommodate sketchbooks, paper pads, or heavier containers.
Small cups and removable trays prevent materials from shifting around. A cart with locking wheels offers additional stability while you're working.
7. Color-Sorted Paper
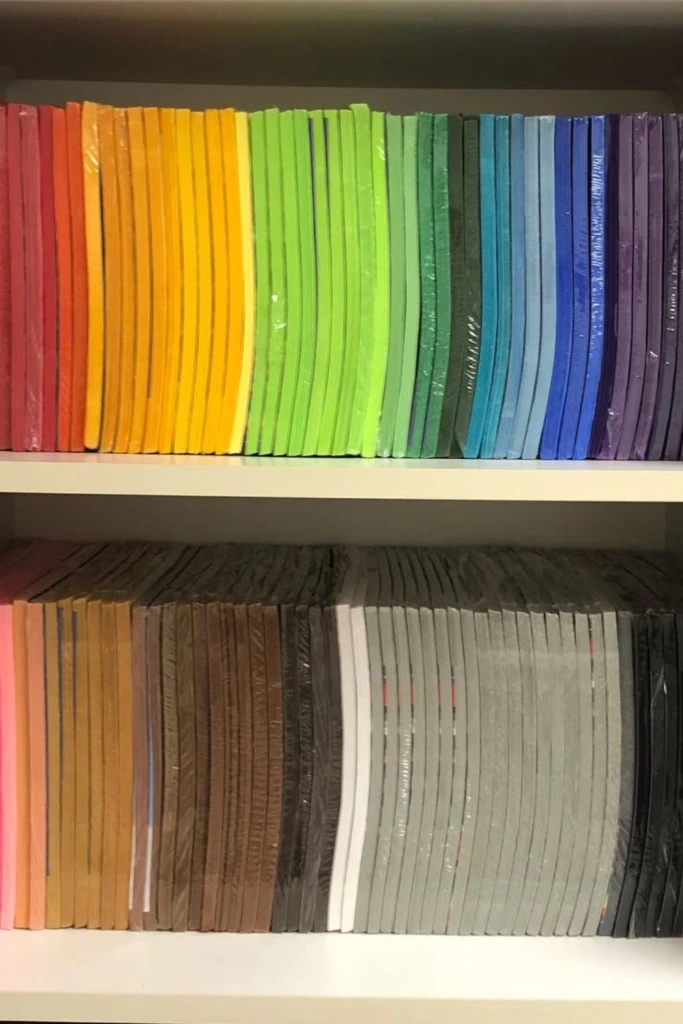
Organizing paper by color makes selecting materials faster and creates an appealing display of your collection.
Separate cardstock, construction paper, and specialty sheets before arranging each category into color families. Flat shelves or horizontal paper trays help prevent bending and curled corners.
Keep larger sheets supported across their full width, and protect delicate or archival papers from moisture and strong light. For leftover scraps, designate a separate folder or container so reusable pieces don't become mixed with full sheets.
8. Jars & Buckets
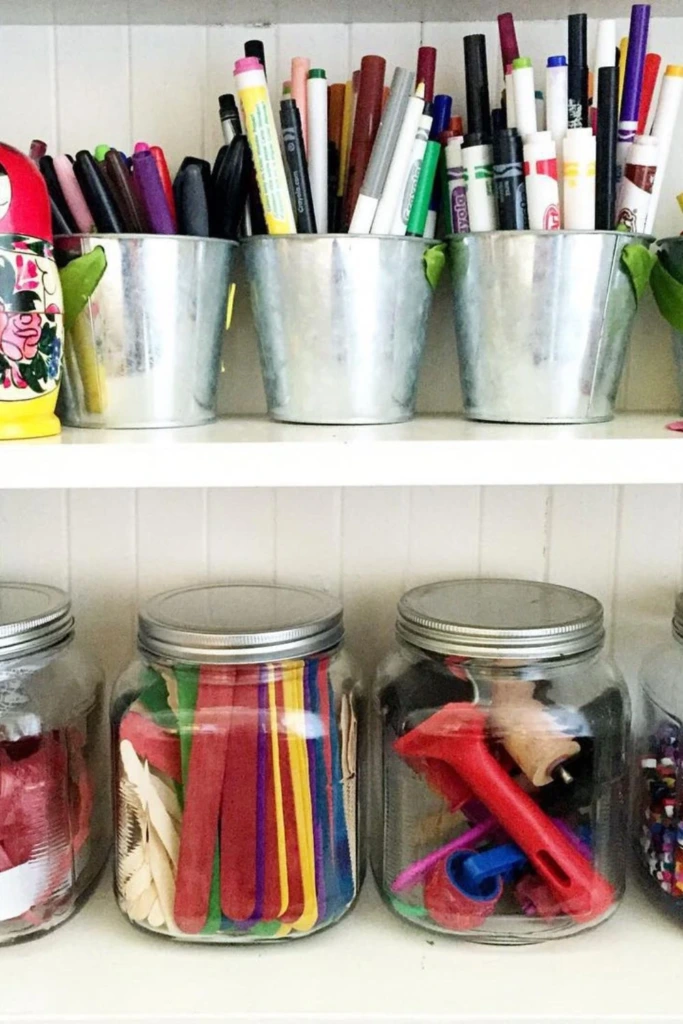
Repurposed jars and small buckets offer an affordable way to organize tools without purchasing an elaborate storage system.
Use wide containers for paintbrushes, pencils, and other long supplies. Smaller containers can hold erasers, clips, and decorative materials that tend to scatter across work surfaces.
Select containers with smooth edges and stable bases. Plastic or metal options are often safer than glass in children's art areas. Matching containers can create a cohesive look, but functionality should guide your choices.
9. Stacked Drawer Boxes
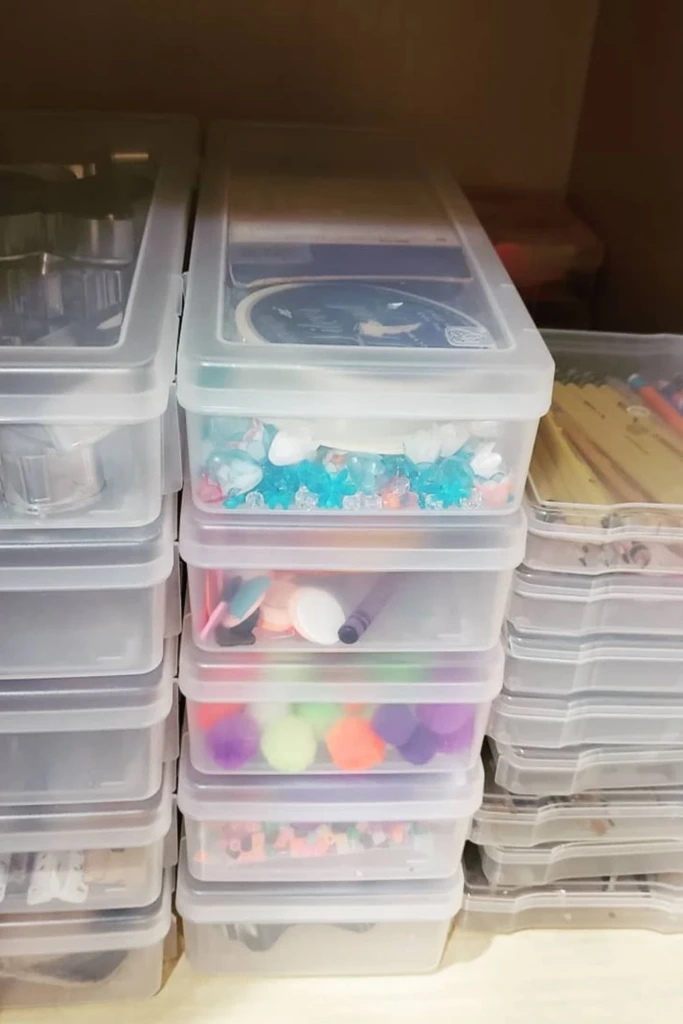
Stackable drawer boxes help manage small art supplies that are difficult to keep organized in open containers.
Assign drawers to categories such as beads, sequins, stamps, and miniature crafting accessories. Shallow drawers are particularly helpful because they prevent items from collecting in deep, hard-to-reach piles.
Label the front of each drawer and avoid filling it beyond capacity. Place heavier units at the bottom and secure tall stacks to prevent tipping.
10. Acrylic Dividers
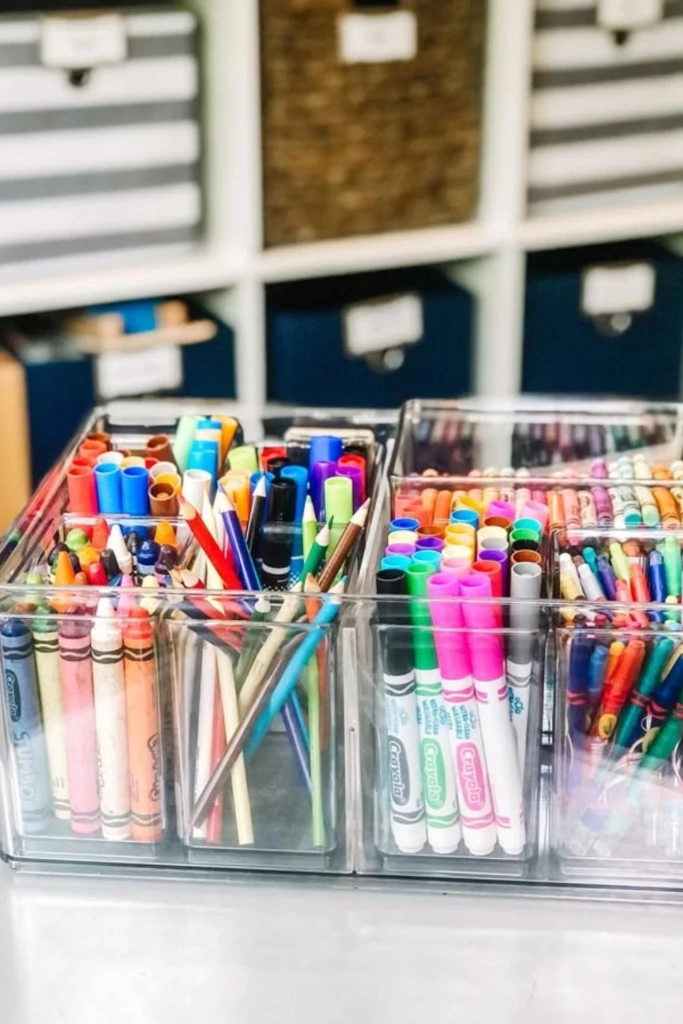
Clear acrylic dividers provide defined storage sections without visually crowding your workspace. They're especially effective for organizing stationery and drawing materials.
Place dividers inside drawers or on shelves to separate pens, colored pencils, markers, and other essentials. Adjustable designs allow you to customize compartment sizes according to your collection.
Before buying, measure the storage area and consider the length of your supplies. Keeping each category in its own section makes cleanup easier and helps prevent delicate tools from getting damaged.
11. Labeled Pails
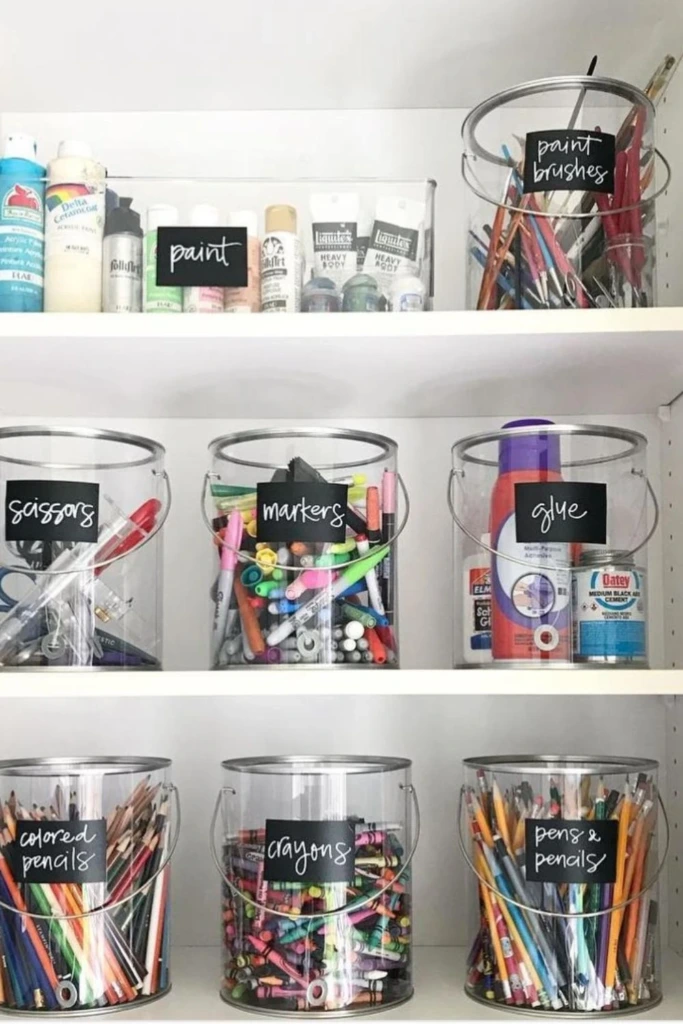
Individual labeled pails make sorting and returning supplies straightforward, particularly in shared creative spaces.
Create separate containers for crayons, brushes, markers, and other frequently used tools. Labels with both words and pictures can help younger children identify where everything belongs.
Arrange the pails on a low shelf or inside a cabinet, leaving enough room to remove each one comfortably. Washable containers are a sensible choice for supplies that may leave paint or glue residue.
12. Rolling Drawer Cart
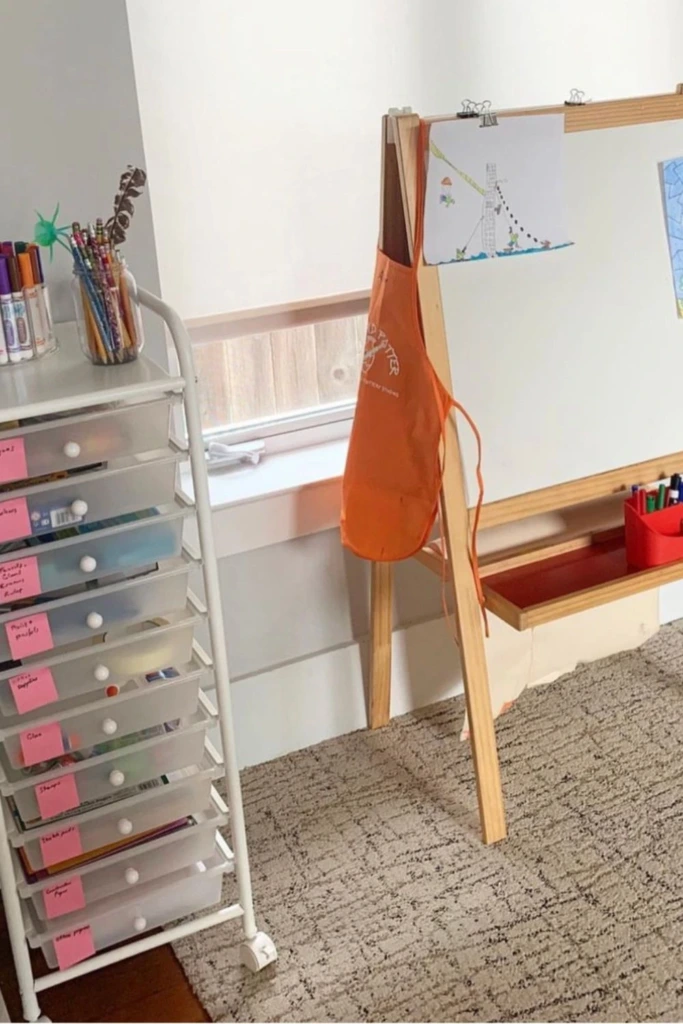
A rolling drawer cart combines concealed storage with the convenience of a mobile workstation. Unlike an open cart, its drawers keep loose materials contained and reduce visual clutter.
Organize the drawers according to your workflow. Keep sketching supplies near the top, painting accessories in the middle, and less frequently used materials below.
Drawer organizers can prevent small items from shifting when the cart moves. Labeling each compartment also helps maintain the system, especially when several people share the same supplies.
13. Canvas Wall Organizer
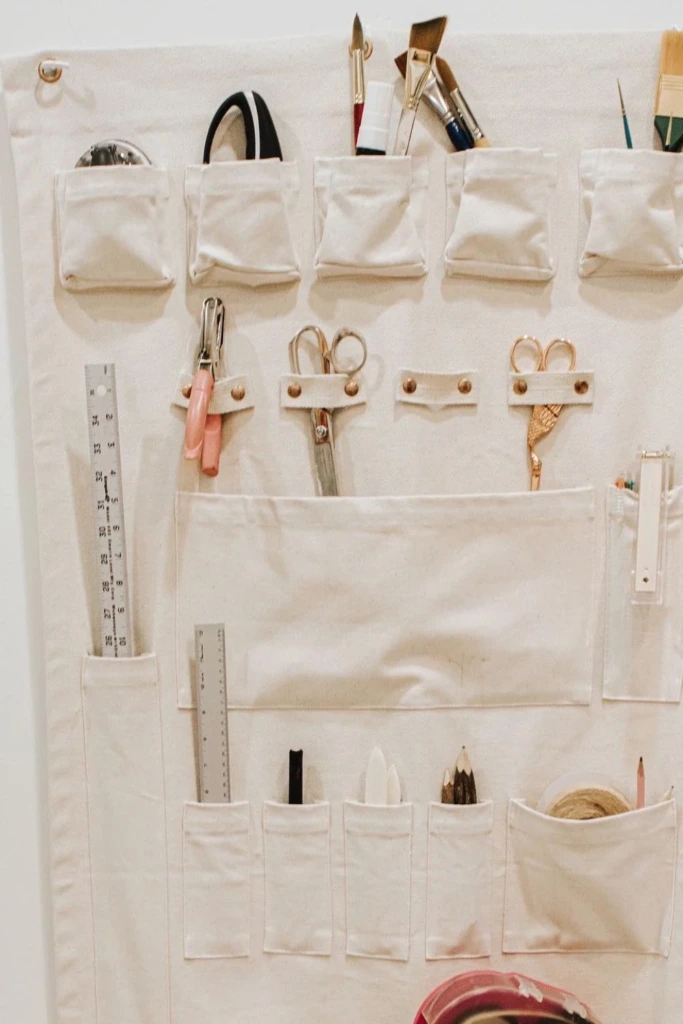
A canvas wall organizer offers a softer, lightweight alternative to rigid shelving. Its stitched pockets and loops are useful for storing tools that need to remain accessible.
Arrange pencils, rulers, brushes, and small notebooks according to how often you use them. Taller pockets can accommodate longer items, while smaller sections are suitable for compact accessories.
Choose durable fabric with reinforced stitching, particularly if you plan to use it daily. Hang it away from wet painting areas to reduce the risk of staining and moisture buildup.
14. Themed Holder
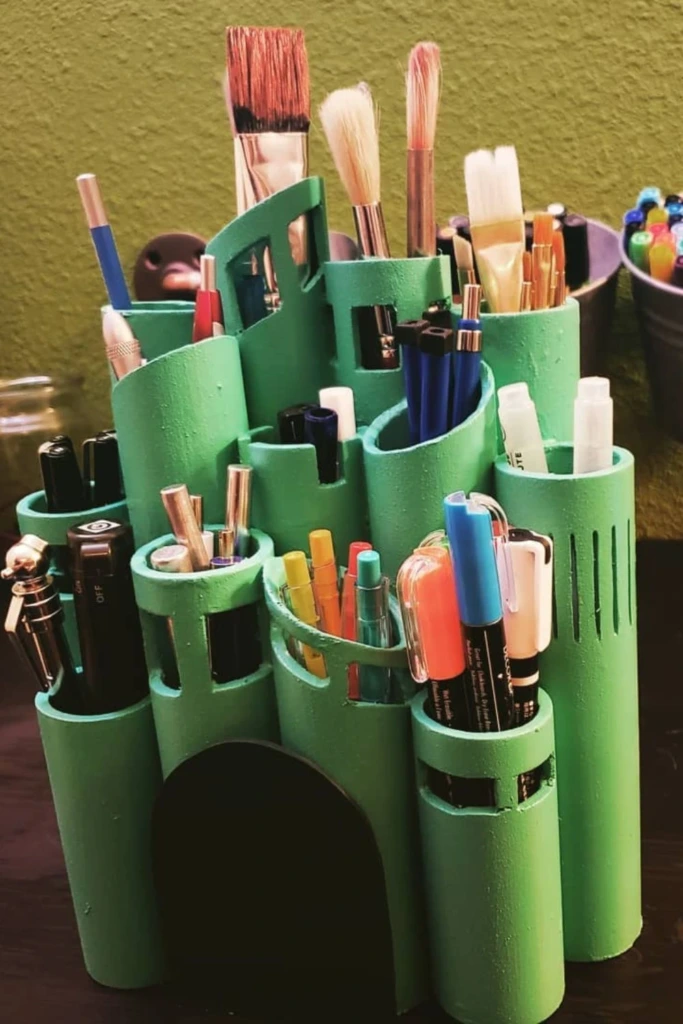
A themed supply holder can bring personality to an art desk while keeping everyday tools in order.
Consider designs inspired by castles, animals, flowers, or geometric shapes. Look for multiple compartments so you can separate drawing tools by type rather than placing everything in one large opening.
For a DIY version, decorate a sturdy wooden organizer or assemble lightweight containers into a playful arrangement. Keep the base broad enough to remain stable when filled with taller brushes and markers.
15. Silicone Mold Storage
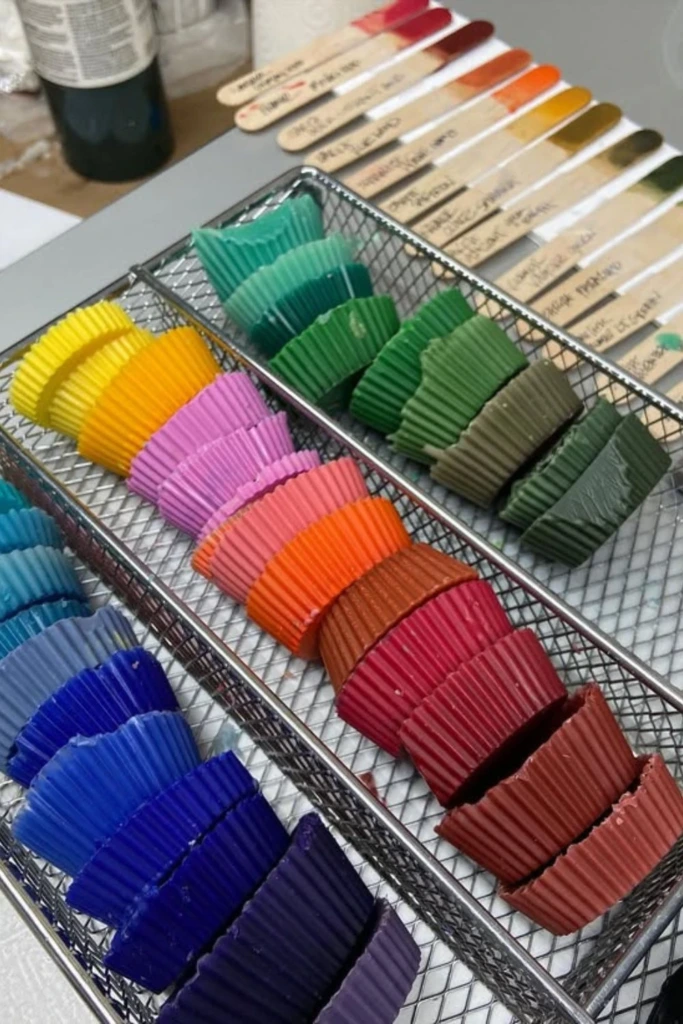
Silicone molds used for clay, resin, wax, or other creative projects benefit from storage that protects their shapes and surfaces.
Group molds by size, purpose, or design, then arrange them in shallow baskets or trays. Keeping them flat helps prevent unnecessary bending, especially for larger or more detailed molds.
Make sure molds are clean and completely dry before putting them away. Avoid stacking heavy objects on top of delicate designs, and keep molds used for non-food crafting materials separate from food preparation equipment.
16. Hanging Pail Bar
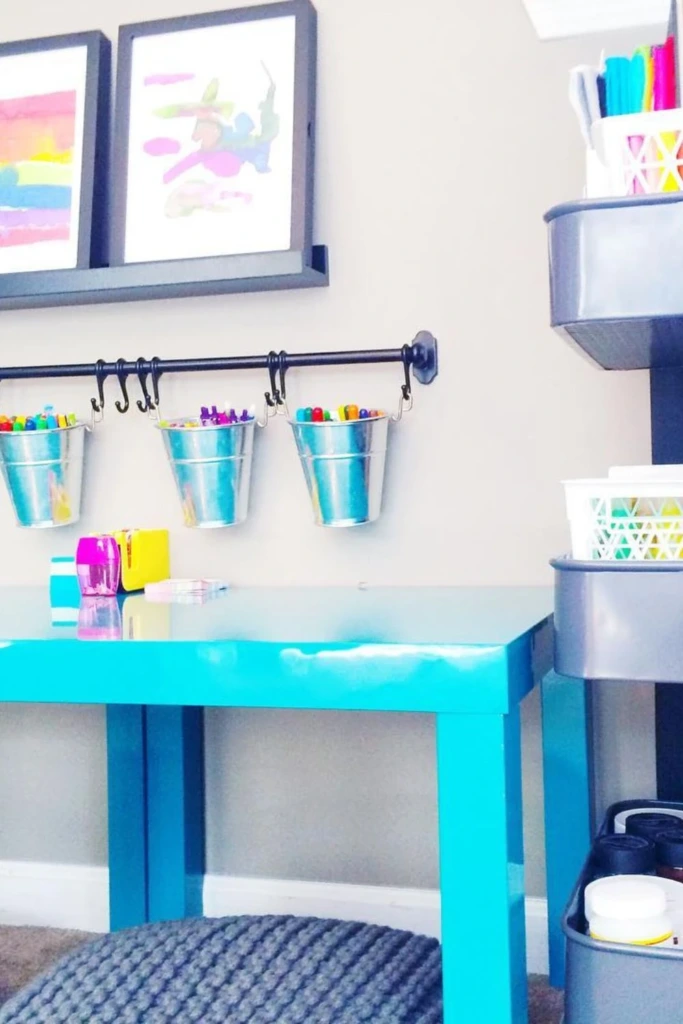
A wall-mounted rail with hanging pails provides convenient access to art supplies while leaving the worktable clear.
Attach compatible hooks and containers to a securely installed rail. Assign each pail a specific category, such as colored pencils, brushes, or markers.
Position the rail where the containers can be reached comfortably without interfering with your work. For children's craft stations, install it at an appropriate height and ensure the containers cannot easily be pulled loose.
17. Marker Tube Racks
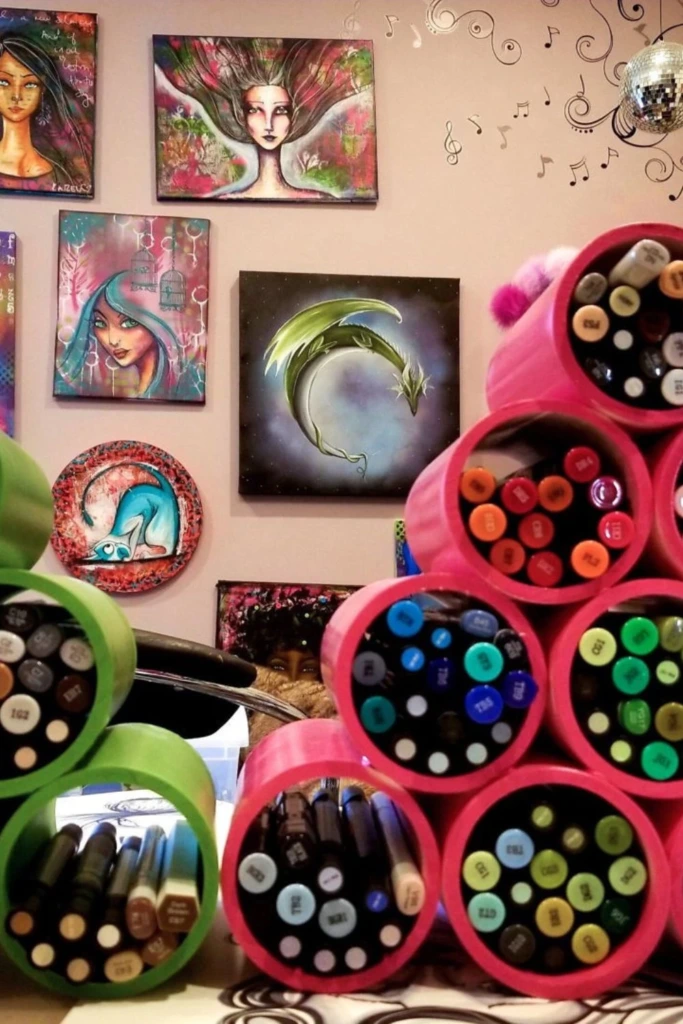
A marker tube rack is an efficient solution for artists who own numerous pens or markers in different shades.
Individual tubes or divided compartments allow you to group colors into recognizable families. You can organize the collection by color number, hue, or marker type, depending on your preferred drawing process.
Check the manufacturer's storage recommendations before choosing a horizontal or vertical arrangement, since marker designs differ. Make sure the compartments are wide enough to remove markers without damaging their caps.
18. Washi Tape Rods
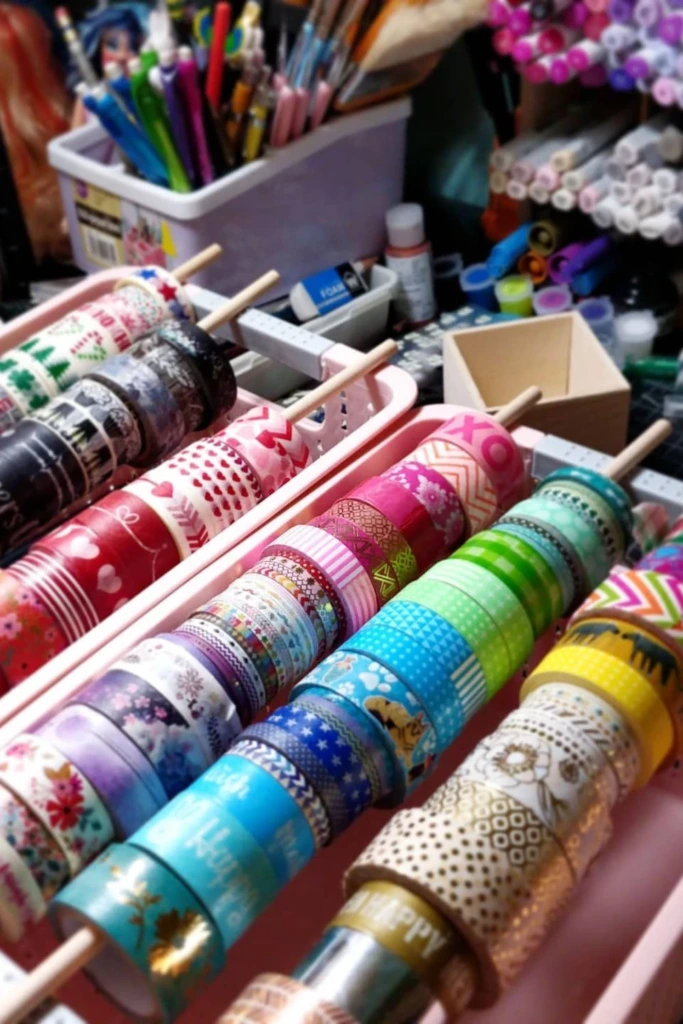
Washi tape collections can become difficult to manage when individual rolls are scattered through drawers. A simple rod system keeps them together and makes patterns easy to compare.
Slide the rolls onto wooden dowels supported by brackets or a suitable frame. Arrange tapes by color, pattern, or width to make selecting the right design easier.
Use removable rods so you can add or replace rolls without dismantling the organizer. Keep the display away from prolonged heat and direct sunlight, which may affect decorative tapes over time.
19. Thread Clip Board
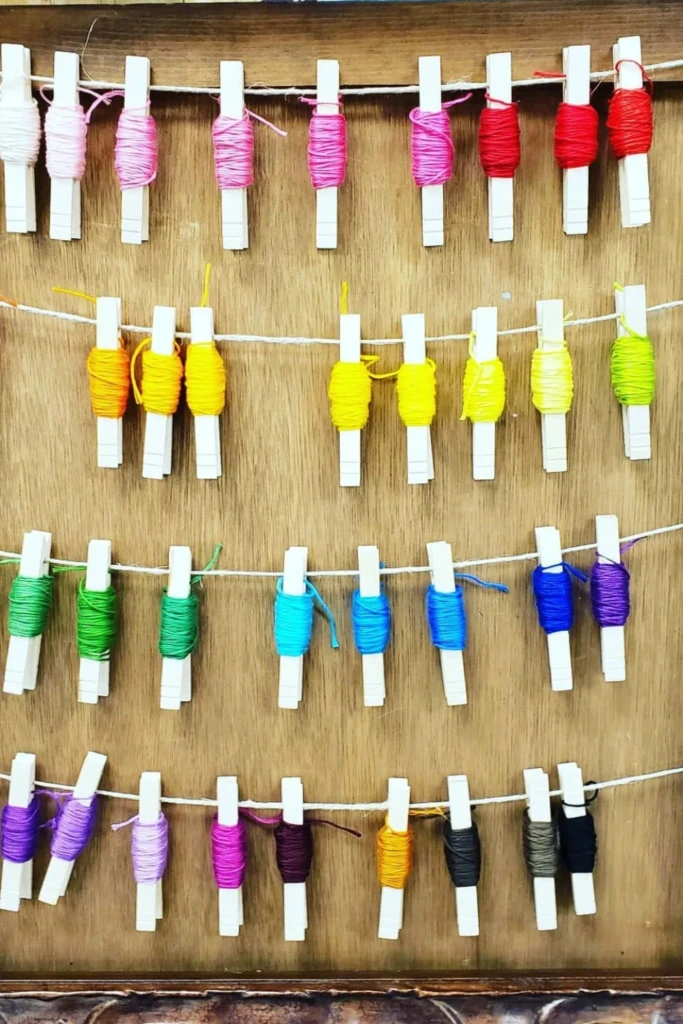
A thread display board is useful for keeping embroidery floss and other crafting threads separated and visible.
Attach small clips to a framed board or stretch sturdy cords across a backing surface. Hang thread bundles individually and arrange them by color family or project.
Secure loose ends before hanging the threads to reduce tangling. For larger collections, label each bundle with its color code so you can easily identify shades when following embroidery patterns.
This method also turns colorful threads into a decorative element without requiring additional drawer space.
20. Portable Art Bag
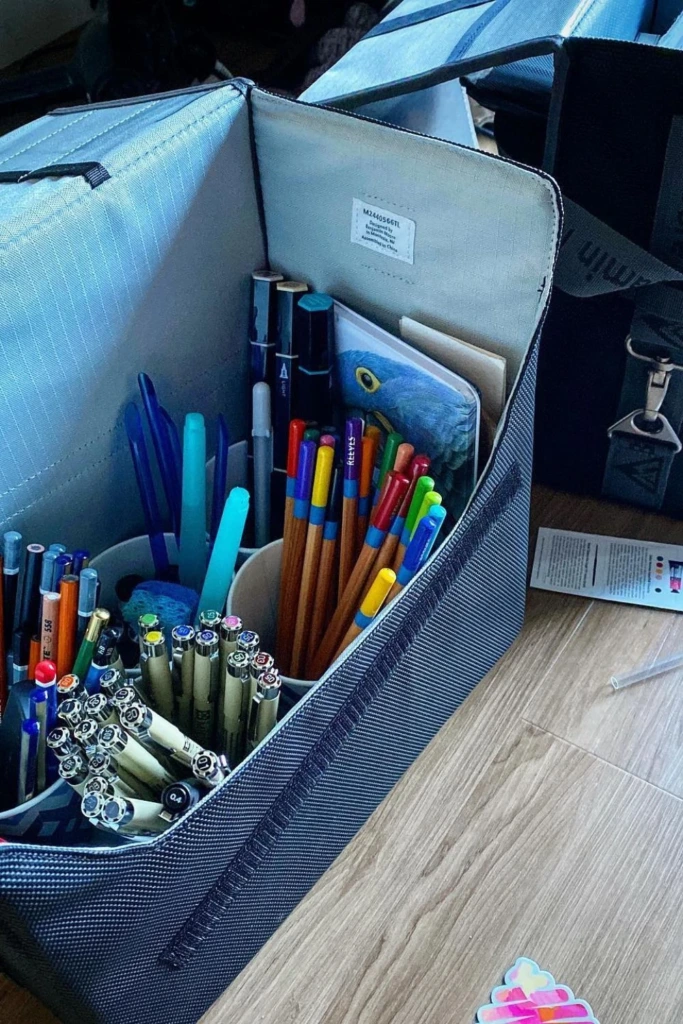
A portable art bag keeps essential materials together when you attend classes, travel, or enjoy sketching outdoors.
Choose a bag with padded sections, secure closures, and compartments suited to your preferred medium. Pencil loops, brush sleeves, and zippered pockets can help prevent supplies from rubbing against one another.
Pack only what you're likely to use rather than carrying your entire collection. Protect sharp tools and store paints in leak-resistant containers when appropriate.
After each outing, check the bag for damp brushes, loose caps, or spilled materials before putting it away.
21. Paint Tube Box
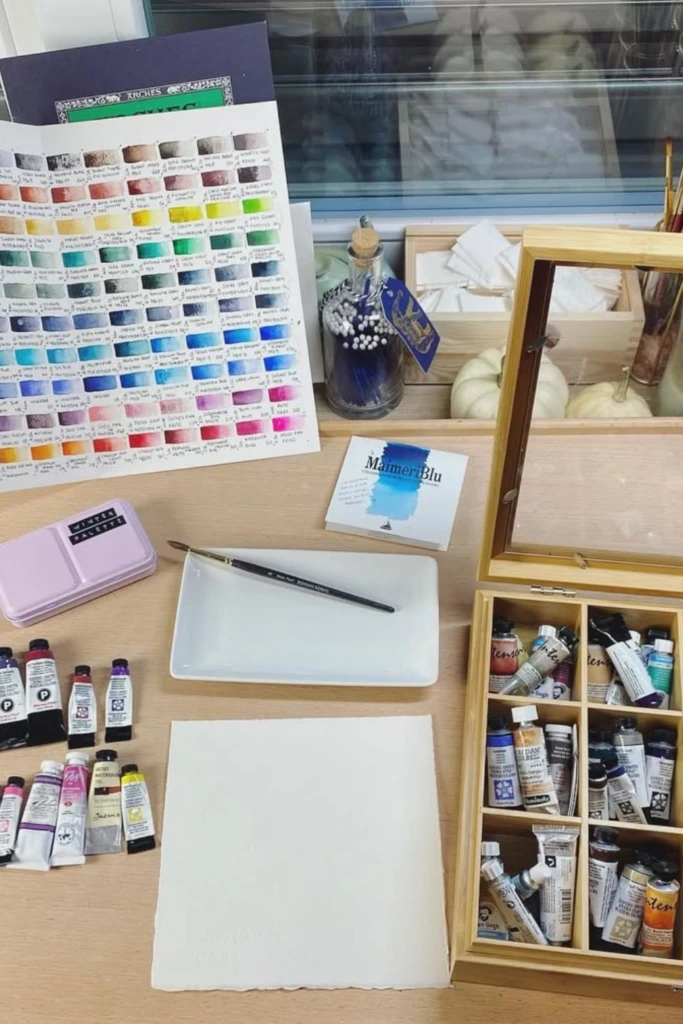
A compartmentalized paint tube box makes it easier to manage a collection of watercolor, gouache, or acrylic paints.
Arrange tubes by color family or pigment name and use dividers to prevent them from becoming mixed together. A shallow box allows you to see labels more easily than a deep container.
Keep caps tightly closed and follow each paint manufacturer's storage guidance. A small color swatch chart stored with the box can help you identify paints quickly, particularly when packaging colors don't accurately represent the dried result.
With a consistent arrangement, you'll be able to locate the right shade, monitor your supplies, and spend more time painting instead of searching.
Organizing art supplies doesn't require a large studio or expensive furniture. A few well-chosen storage solutions can make even a small creative corner easier to use and maintain.
Start with the materials you reach for most often, give each category a practical home, and adjust your system as your projects change. The most effective setup is one that supports your creative habits and remains simple enough to maintain every day.