14 DIY String Bracelet Ideas to Make at Home
Making your own string bracelets is an enjoyable way to explore creativity, experiment with colors, and create accessories that reflect your personality. With a few basic supplies, you can craft everything from simple everyday bands to decorative bracelets featuring beads, charms, and intricate knots.
Handmade bracelets also make thoughtful gifts for friends, family members, and loved ones. Whether you are a beginner learning your first knot or an experienced crafter looking for fresh inspiration, these DIY string bracelet ideas offer plenty of ways to create something unique.
What String Should You Use?
Choosing the right cord makes a noticeable difference in how your bracelet looks, feels, and holds together. Consider the thickness, flexibility, and durability of the material before starting your project.
Embroidery floss is an excellent option for friendship bracelets. It comes in a wide range of colors and works well for braiding, weaving, and creating colorful patterns.
Hemp cord suits rustic and bohemian designs. Its natural texture pairs beautifully with wooden beads, shells, and earthy colors.
Waxed polyester cord is useful for bracelets with beads and adjustable knots because it resists fraying and holds its shape well. Nylon cord is another option for lightweight designs featuring charms or small decorative beads.
For delicate bracelets with tiny seed beads, choose fine beading thread or suitable jewelry wire. Always check that the cord fits through the bead holes before beginning.
1. Mix Bold Beads with Simple String
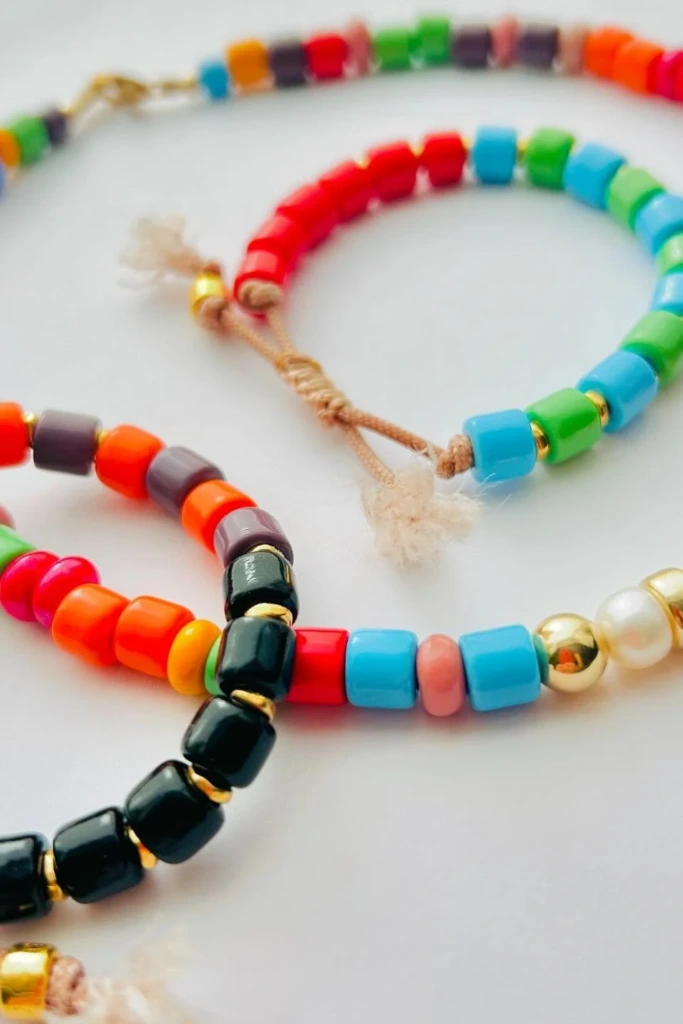
Combine colorful beads with a plain cord to create a bracelet that feels playful without looking overly complicated. Bright acrylic beads work well for casual accessories, while a few pearl-style or metallic accents can give the design a more refined appearance.
Choose two or three complementary colors and arrange the beads in a repeating pattern. You can place larger beads in the center and smaller ones toward the ends to create visual balance.
Finish the bracelet with an adjustable sliding knot so it can fit different wrist sizes. This design is beginner-friendly and easy to customize with your favorite colors.
2. Keep It Minimal with a Single Accent Bead
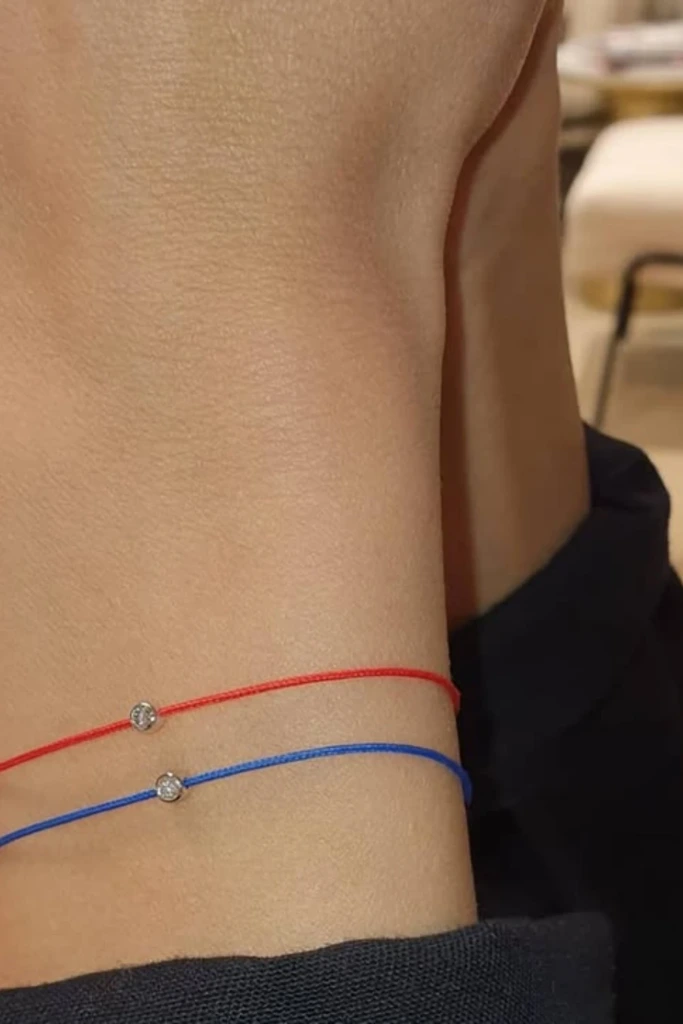
A simple bracelet can look elegant when one distinctive bead becomes the main feature. Choose a wooden bead, polished stone, colored glass bead, or small metallic sphere to create a subtle focal point.
Start with a thin cord in a neutral shade such as black, beige, cream, or brown. Thread the accent bead onto the cord and secure it in the middle, leaving the surrounding space uncluttered.
A sliding closure makes the bracelet easy to wear, while a small knot on either side of the bead helps keep it centered. This understated design works well on its own or alongside other bracelets.
3. Twist Colors for a Bold Everyday Look
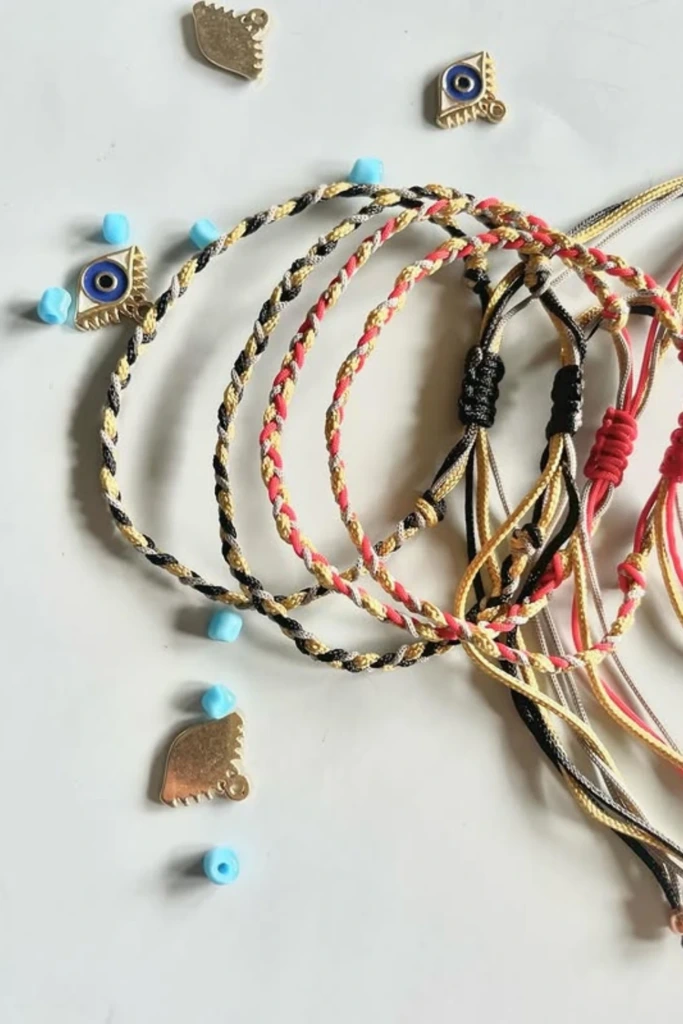
Twisted string bracelets are a simple way to add color and texture without using additional decorations. Select two or three strands in contrasting shades, such as navy and white, red and black, or purple and pink.
Align the strands, secure one end, and twist them together until they form a consistent pattern. Tie the ends securely, checking that the strands remain evenly tensioned throughout the bracelet.
For a more personalized finish, attach a small charm or use a sliding closure. You can also experiment with alternating color combinations to make matching bracelets for friends.
4. Add a Charm for a Personal Touch
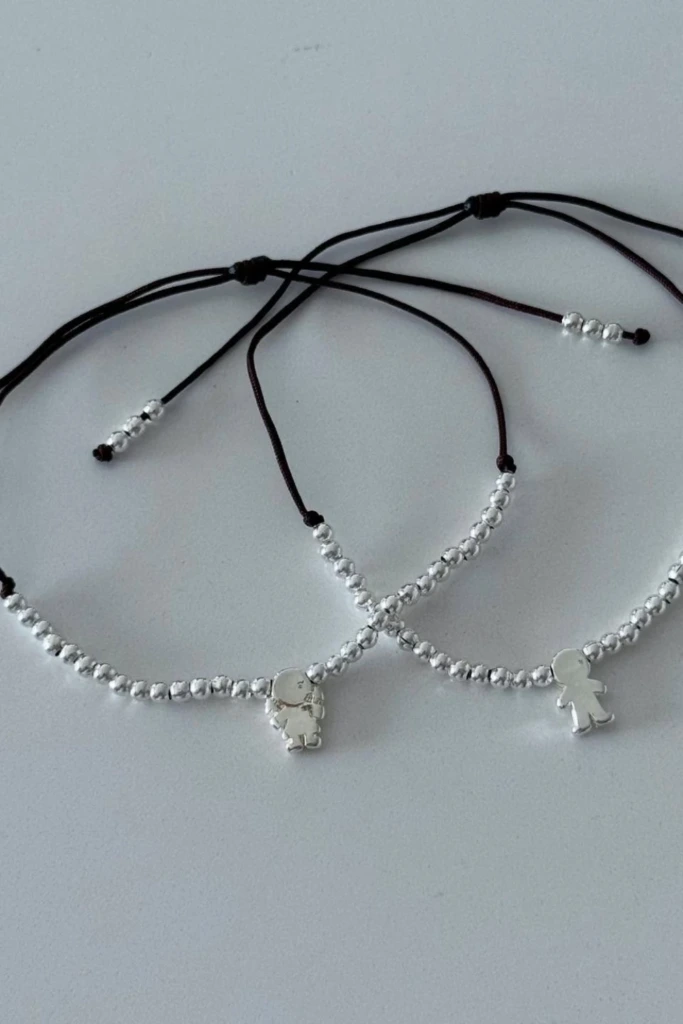
Charms allow you to turn an ordinary string bracelet into a meaningful accessory. Choose a tiny heart, star, initial, animal, or other symbol that represents a favorite memory or personal interest.
Use a strong, lightweight cord that complements the charm rather than competing with it. Thread a few small beads onto the bracelet if you want additional detail, keeping the central charm as the main attraction.
Position the charm in the middle and secure it with suitable knots or a connecting ring. Make sure the attachment is firm enough to prevent the charm from slipping off during everyday wear.
5. Use Metallic Beads for a Luxe Finish
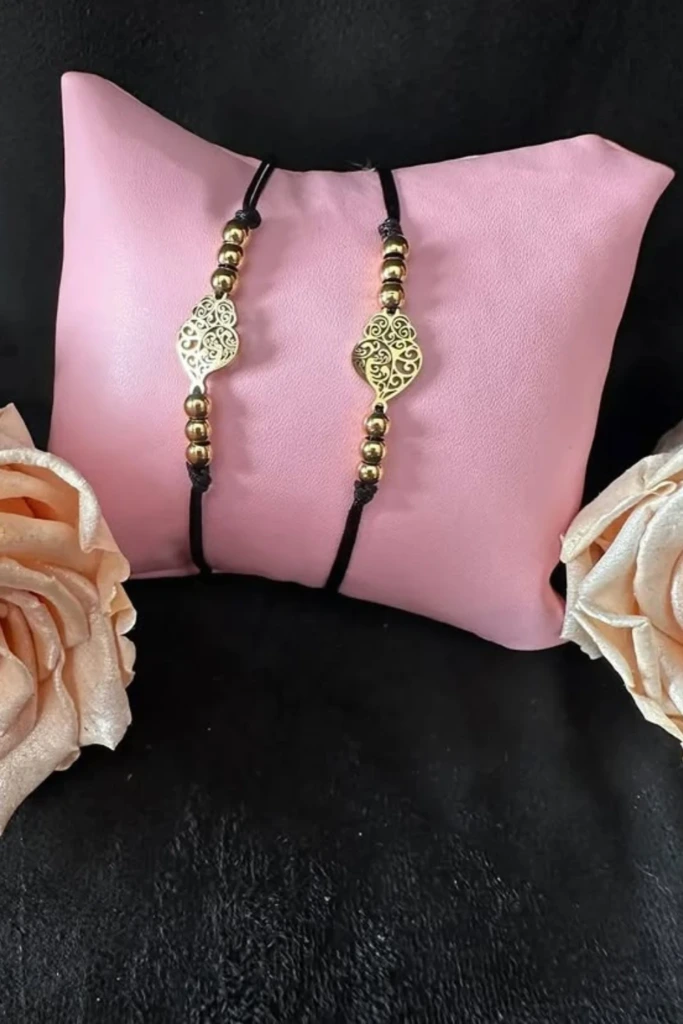
Metallic beads can make an inexpensive handmade bracelet look polished and sophisticated. Gold-tone, silver-tone, and bronze-colored accents each create a different effect, depending on the cord and charm you choose.
For a balanced design, place several small metallic beads on either side of a central decorative element. A black cord creates a striking contrast, while cream or brown cord produces a softer appearance.
Use beads with smooth holes to protect the string from abrasion. Finish the bracelet with secure knots or an adjustable closure, and avoid overcrowding the design so the metallic details remain noticeable.
6. Add Seashells for a Boho Vibe
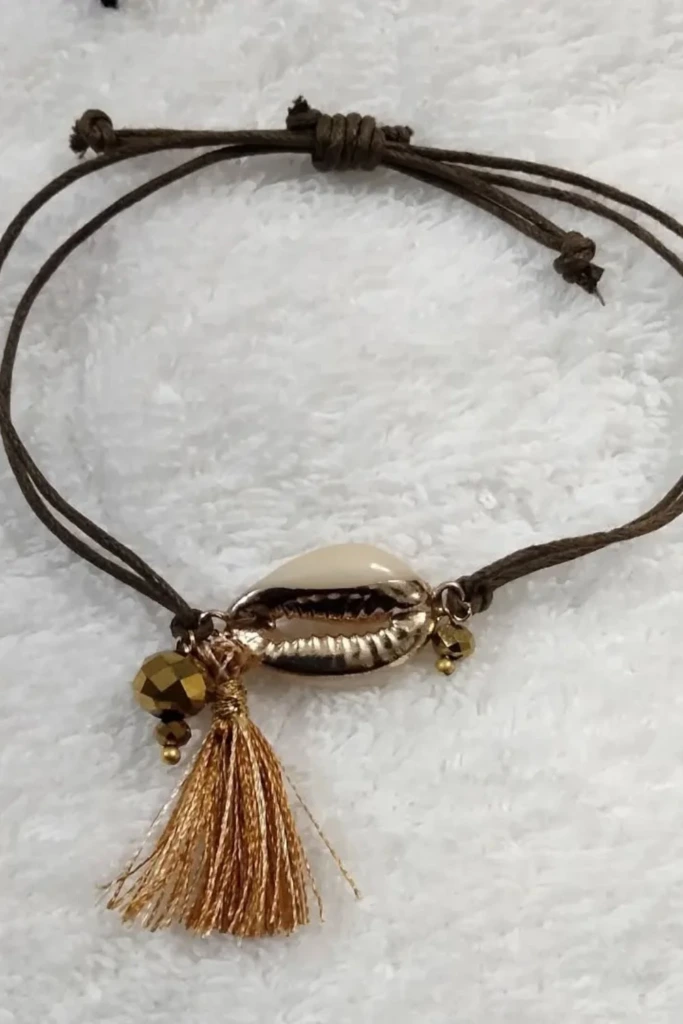
Shell bracelets are ideal for summer accessories, beach-inspired outfits, and relaxed bohemian styles. Cowrie shells, small shell-shaped beads, and natural wooden accents all work well with earthy-colored cord.
Choose tan, cream, rust, or brown string to complement the natural materials. Arrange a shell in the center and add a few small beads or a tassel for extra texture.
If the shell has a suitable opening, thread the cord through it. Otherwise, use a jewelry connector designed for shell pendants. Secure the shell carefully so it stays in place without damaging the material.
7. Go Bold with Rainbow Patterns
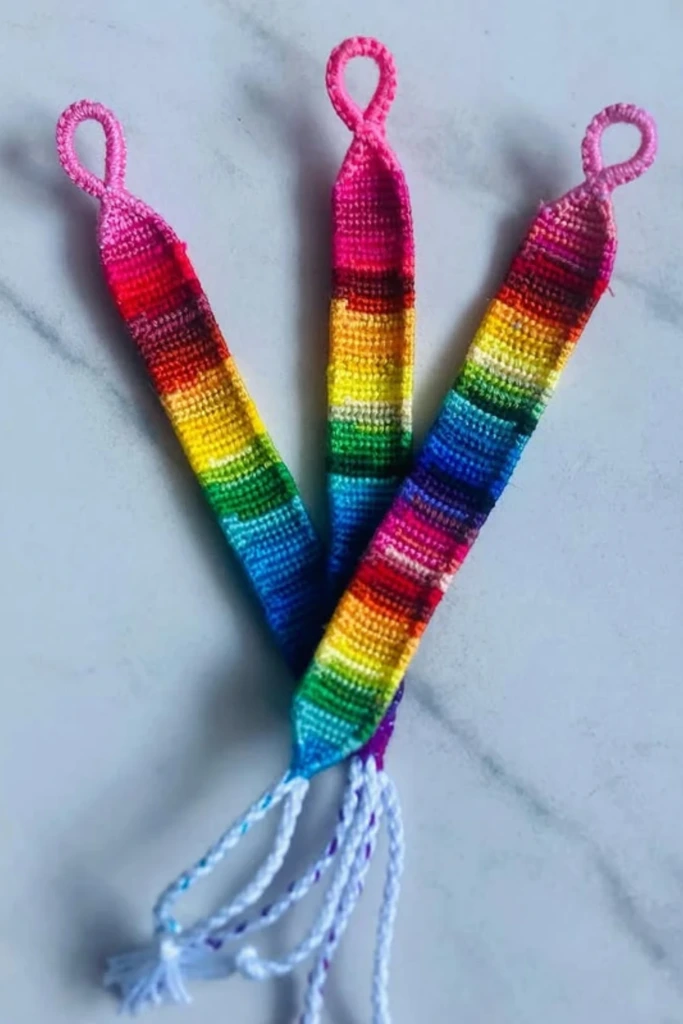
Rainbow bracelets are a cheerful choice for friendship gifts, festivals, and colorful everyday outfits. Embroidery floss is particularly useful because it offers plenty of shades and works well for traditional friendship-bracelet knots.
Choose a full spectrum of colors or create a softer gradient by arranging similar shades next to one another. Secure the strands to a stable surface and work through the pattern with consistent knots to keep the bracelet even.
A wider band allows more colors and intricate patterns, while a narrow version offers a subtle accent. Take your time maintaining even tension, especially around the edges, to prevent the bracelet from curling.
8. Keep It Classic with Gold Beads
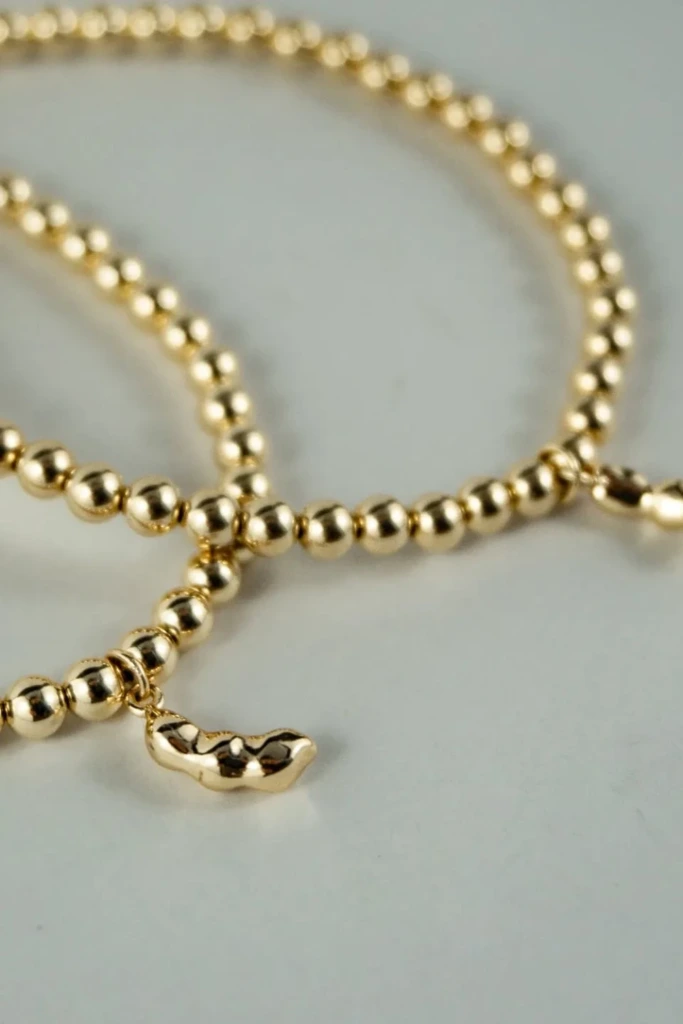
Small gold-tone beads create a timeless bracelet that can be worn alone or layered with other jewelry. For a clean appearance, choose beads of similar size and distribute them evenly along the cord.
You can use a continuous row of beads for a simple design or place a single decorative bead at the center. A fine black, white, or neutral cord helps the metallic finish stand out.
Before tying the bracelet, check the spacing and confirm that the beads sit comfortably against your wrist. A sliding knot offers adjustability, making this style a practical handmade gift.
9. Create a Delicate Look with Seed Beads
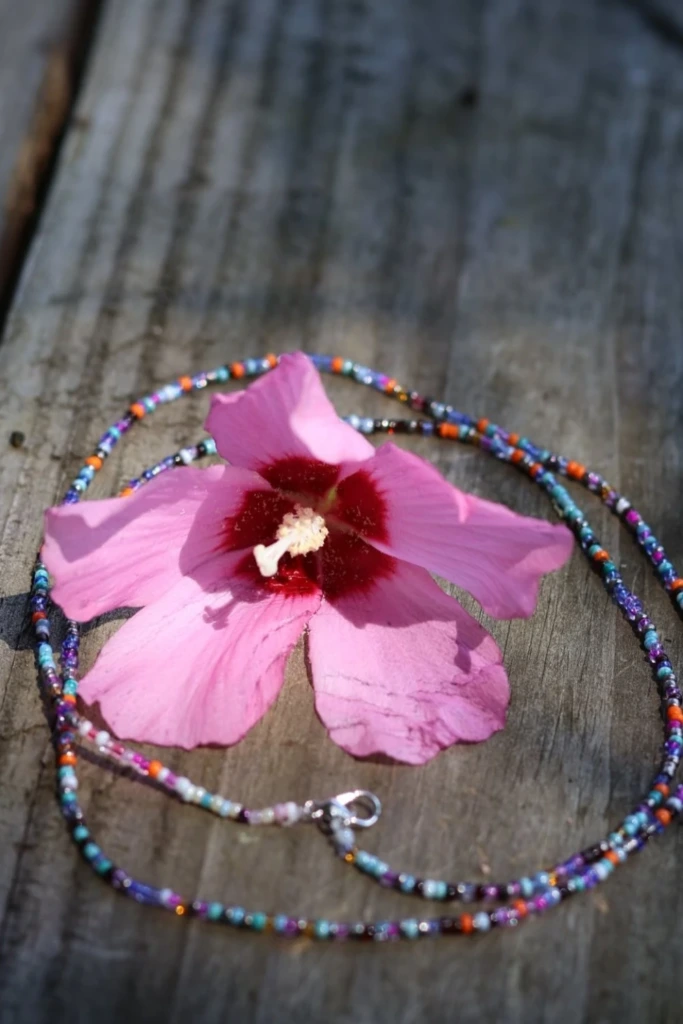
Seed beads are tiny decorative beads that make it possible to create intricate patterns without adding much weight. They are available in many colors, finishes, and sizes, so you can make everything from subtle single-color bracelets to detailed multicolored designs.
Use beading thread, fine cord, or jewelry wire that fits through the bead openings. Arrange the beads in a planned sequence before threading them to reduce mistakes and maintain a consistent pattern.
For a professional finish, attach a suitable jewelry clasp and secure the ends with the appropriate findings. A delicate seed-bead bracelet looks beautiful on its own and can also complement chunkier handmade accessories.
10. Highlight the Centerpiece with Contrast String
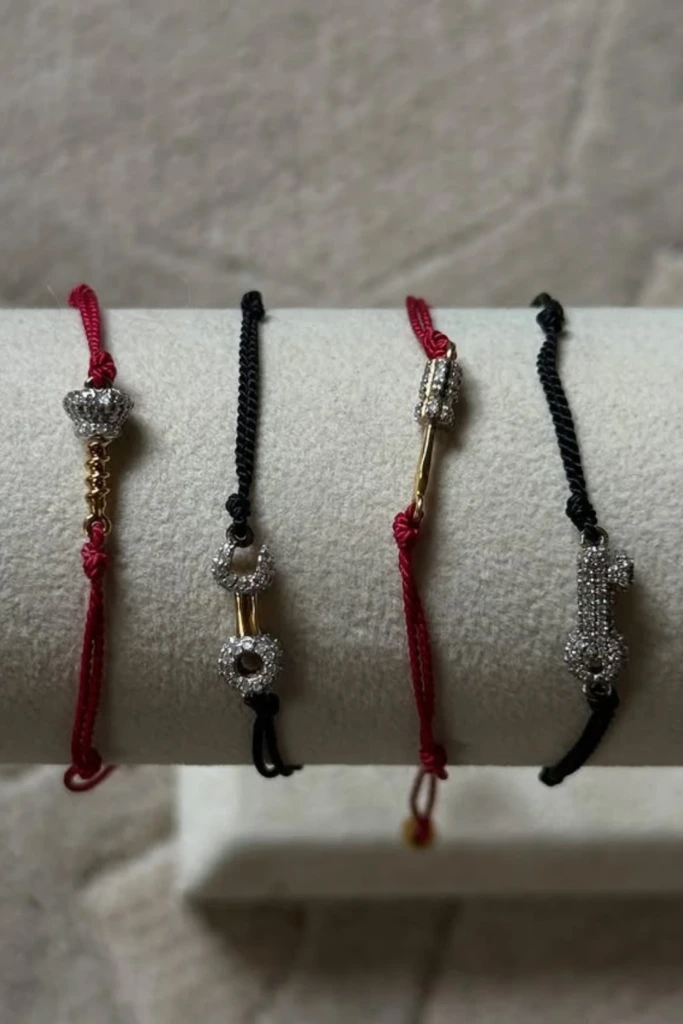
A decorative centerpiece becomes more noticeable when it contrasts with the surrounding cord. For example, a bright crystal charm can stand out against dark string, while a colorful pendant looks striking against a neutral background.
Choose a charm with attachment points that suit your bracelet-making technique. You can incorporate it into a macramé design, connect it using a jewelry ring, or position it between decorative knots.
Keep the remaining details relatively simple so the centerpiece remains the focus. Check that the charm is securely attached and that the finished bracelet bends comfortably around your wrist.
11. Keep It Chic with Simple Symbols
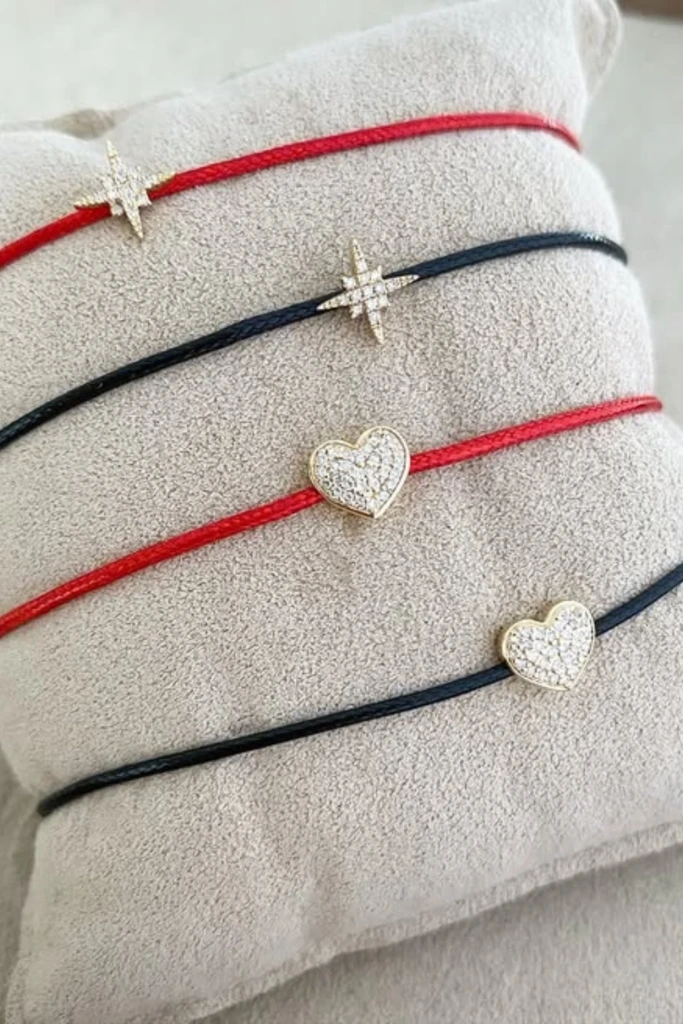
A bracelet featuring a small symbol is an easy way to create personalized jewelry without complicated techniques. Hearts, stars, moons, initials, and geometric shapes are popular choices for everyday accessories.
Select a charm that suits the intended wearer and pair it with a cord in a complementary color. Red, black, navy, and cream are versatile options, although brighter shades can create a more playful result.
Use one main charm rather than several competing decorations. These bracelets are also suitable for friendship sets: make each bracelet in a different color while keeping the symbol consistent.
12. Try Macramé Knots with Cute Charms
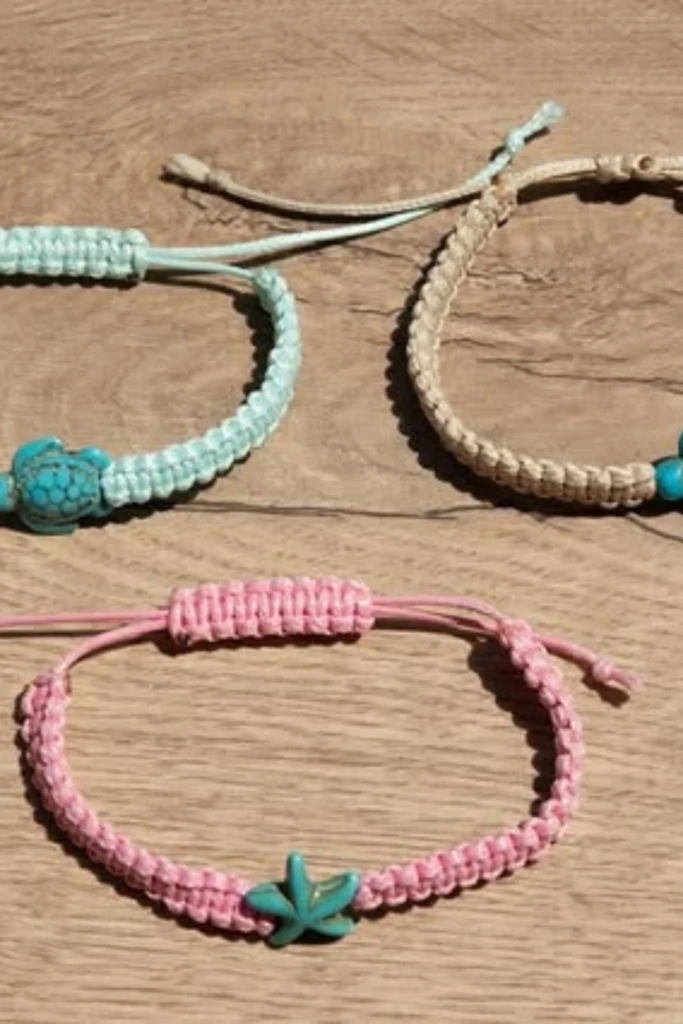
Macramé bracelets use repeated knots to form textured bands, making them an excellent choice for crafters who enjoy learning simple patterns. Square knots are particularly useful for creating a neat, woven appearance.
Cut two base cords and position them parallel to one another. Use a separate working cord to tie alternating square knots around the base strands, maintaining even tension as the band grows.
Add a starfish, turtle, flower, or other charm at the center if you want a decorative focal point. Continue knotting until the bracelet reaches the desired length, then finish the ends securely.
Practice the knot pattern with inexpensive cord before starting a detailed project. Consistent spacing will help the finished band look tidy and feel comfortable.
13. Add a Floral Charm for Playful Style
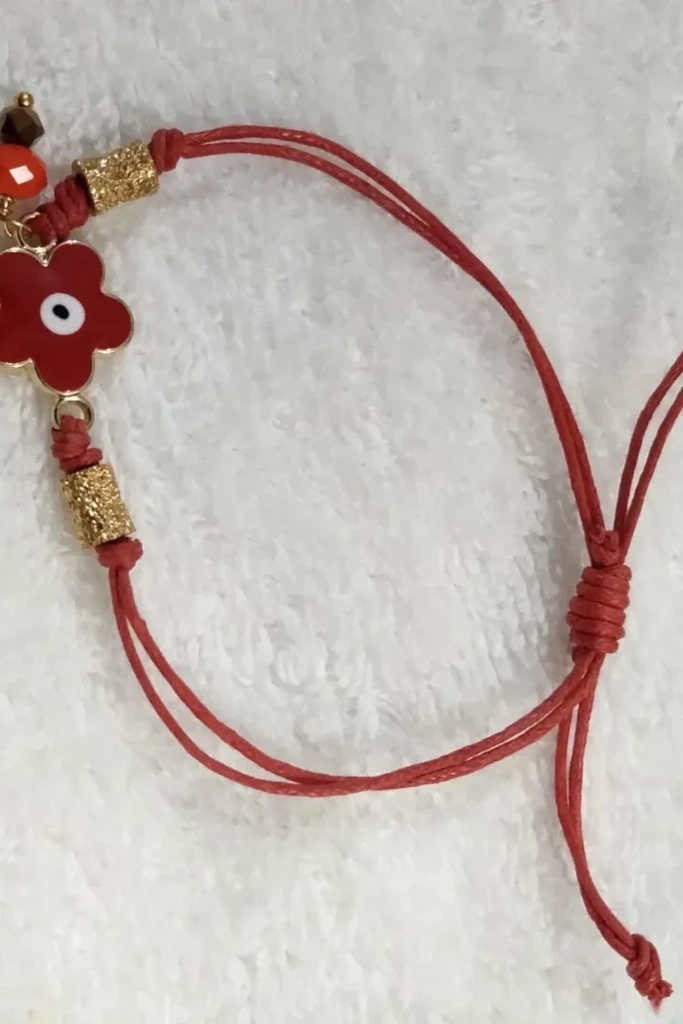
Flower charms bring a cheerful touch to handmade bracelets and work especially well with bright or pastel-colored string. Choose a small floral pendant, a flower-shaped bead, or a decorative centerpiece with contrasting colors.
Thread the charm onto the cord and position it in the middle. Add a few small spacer beads on either side to create symmetry without making the bracelet too bulky.
A red cord paired with a gold-tone flower creates a vivid look, while pink or lavender string produces a softer style. Complete the bracelet with adjustable knots and check that the charm does not twist excessively when worn.
14. Play with Color Blocking and Charms
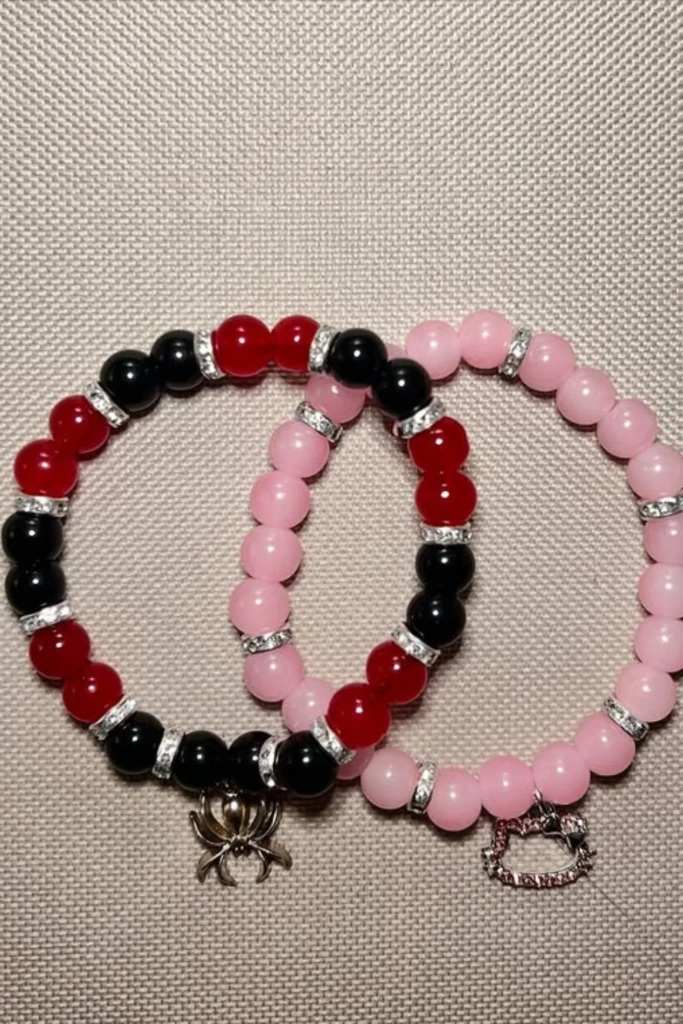
Color blocking uses distinct sections of contrasting colors to create a bold, organized design. Instead of blending every shade together, group beads into repeated sections such as red, black, and pink.
Start by deciding the order and approximate length of each color block. Thread the beads onto suitable stretch cord or jewelry cord, adding small spacer beads between sections if you want a touch of shine.
Include a charm that matches the bracelet's theme, but keep the bead arrangement balanced so the decoration does not overwhelm the pattern. If using elastic cord, tie a secure knot appropriate for the material and conceal it inside a bead when possible.
Stretch the bracelet gently before wearing it to check the strength of the closure. Avoid excessive tension when threading beads, as sharp-edged holes can weaken elastic over time.
How do I stop my string bracelet from fraying?
Fraying can occur when cord ends rub against rough surfaces, become untwisted, or are repeatedly pulled through knots. Choosing a cord suited to your design is the first step toward preventing this problem.
Try these practical techniques:
Secure the knots: Tighten each knot carefully and leave enough material at the ends to prevent slipping.
Use fabric glue: Apply a small amount of suitable fabric adhesive to knots made with embroidery floss, following the product's instructions.
Finish synthetic cord correctly: Some nylon and polyester cords can be sealed with heat, but only when the material is designed for that method. Use an appropriate tool and follow the manufacturer's safety guidance.
Trim carefully: Use sharp scissors to make clean cuts and avoid damaging nearby knots.
Protect exposed ends: Fold or tuck the ends into a woven section when the bracelet design allows it.
Avoid using an open flame near your hands, loose threads, or flammable materials. If you are unsure whether a cord can be heat-sealed, use a compatible adhesive or another recommended finishing technique instead.
How much string should I cut for a bracelet?
The amount of string depends on the bracelet pattern, wrist size, number of strands, and type of knotting technique. A simple bracelet usually requires less cord than a wide friendship bracelet or an intricate macramé design.
For many basic knotted bracelets, cutting each working strand to approximately 30–40 inches provides a useful starting point. However, some patterns require considerably more material, so follow the pattern's measurements whenever available.
For a more accurate estimate:
Measure the wrist where the bracelet will sit.
Add extra length for comfort and the closure.
Allow additional cord for every knot, braid, or woven section.
Cut a little extra if you are a beginner or working with a complicated pattern.
For simple designs, starting with a length around three times the wrist measurement may be sufficient, but this is only a rough guide. Wide patterns and tightly knotted styles can consume much more string.
It is generally easier to trim excess cord at the end than to discover that your strands are too short halfway through the project.