25 Painted Rocks DIY Ideas for 2026
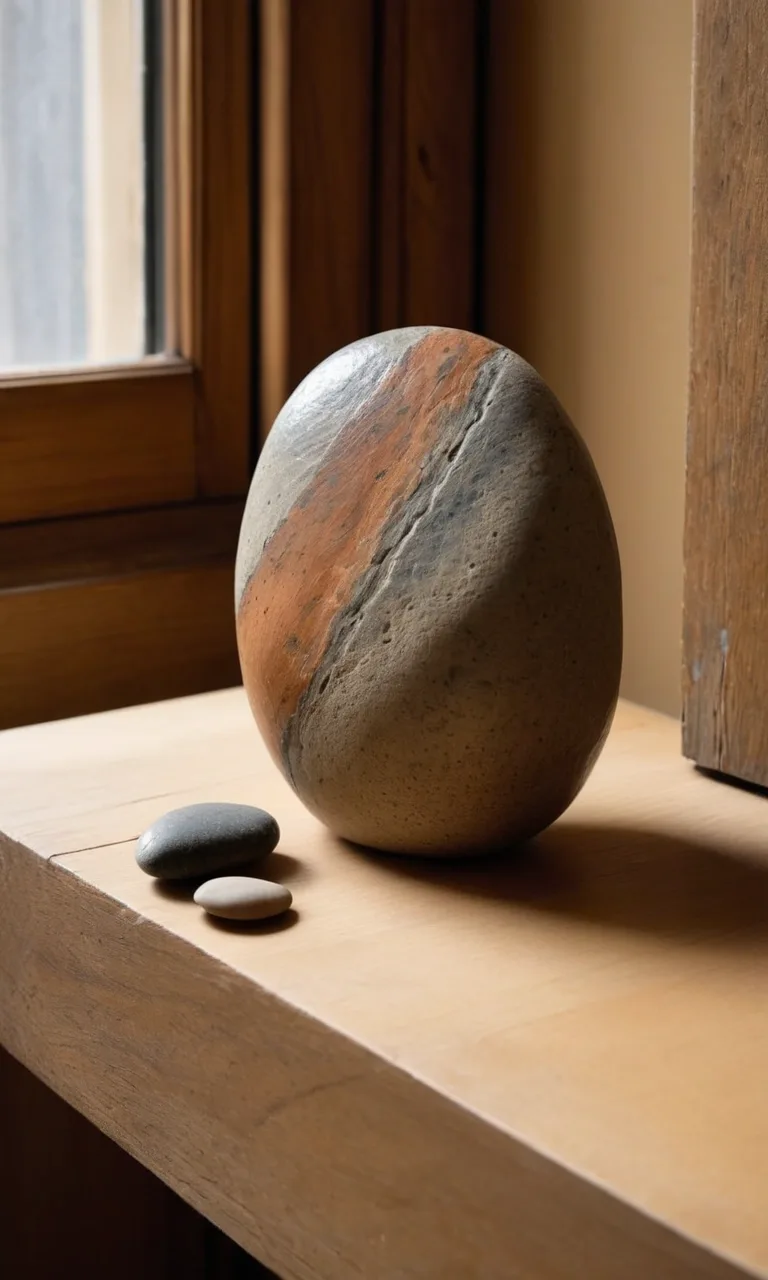
Painted rocks are a simple way to turn ordinary stones into colorful pieces of handmade art. With a few acrylic paints, suitable brushes, and a little imagination, you can create decorations for your garden, personalized gifts, or charming accents for your home.
This craft works well for beginners and experienced artists alike. You can choose easy patterns, playful characters, nature-inspired illustrations, or detailed miniature landscapes. Each stone offers a different shape and surface, making every finished piece unique.
Explore these 24 painted rock DIY ideas to find inspiration for your next creative project, whether you want a relaxing afternoon activity or a collection of decorations that reflect your personal style.
1. Final Tips & Sealing the Art
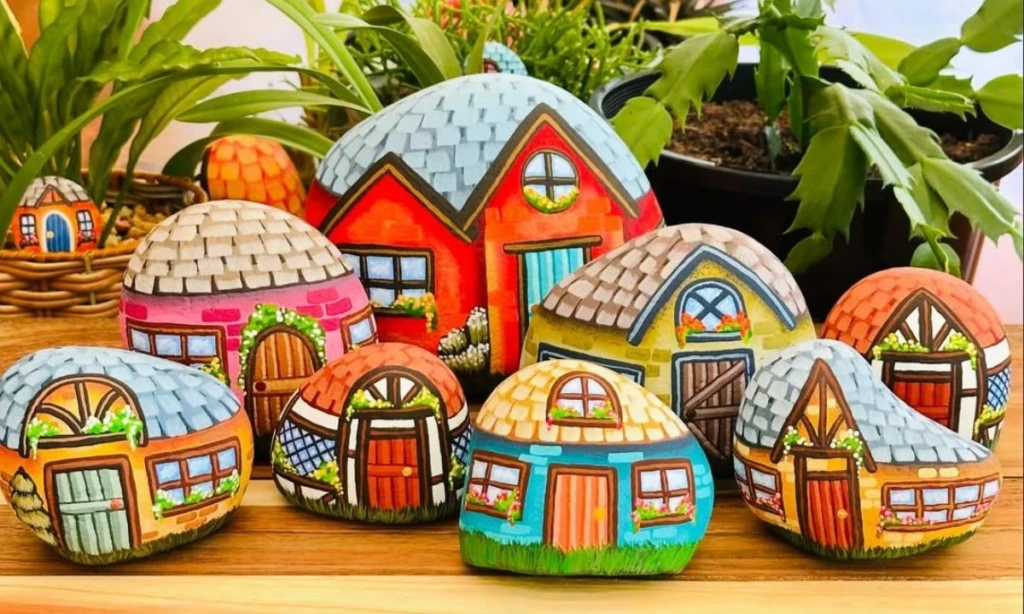
A successful painted rock project starts with the right materials and a little preparation. Choose stones with relatively smooth surfaces if you want to create detailed pictures, lettering, or clean geometric patterns. Wash away dirt and debris, then let each stone dry completely before applying paint.
Acrylic paints are a versatile option because they offer bright colors and work on many stone surfaces. Small brushes help with fine details, while paint markers can make lettering and outlines easier. If drawing directly onto a rock feels difficult, lightly sketch your design with a pencil first.
Allow each layer of paint to dry before adding another color. Once the artwork has dried thoroughly, apply a clear protective sealer suitable for painted stone. For decorations displayed outdoors, select a product specifically designed for exterior use and follow its application instructions. Keep in mind that prolonged sunlight, moisture, and temperature changes can still affect the finish over time.
Most importantly, enjoy experimenting. Your designs do not need to look professionally painted to be meaningful. A simple flower, a funny face, or a short encouraging message can turn an ordinary stone into something memorable.
2. Snowman Rocks
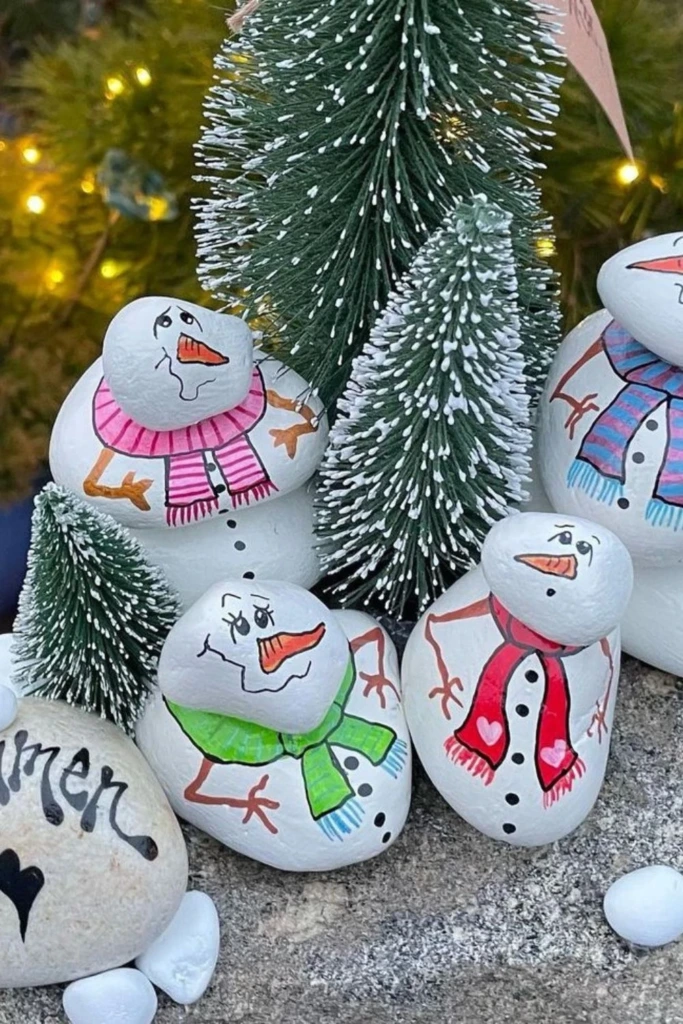
Create a miniature winter display with stones painted to resemble cheerful snowmen. Choose rounded white stones or paint darker stones with white acrylic paint to establish the snowy base.
Add small black dots for eyes and buttons, an orange triangle for the nose, and colorful scarves or hats for personality. You can paint tiny branches for arms or add rosy cheeks to make each character look friendlier.
Arrange the finished snowmen beside miniature trees, pinecones, or other seasonal decorations. They make lovely additions to a holiday centerpiece, windowsill, or winter-themed display.
3. Ladybug Trail
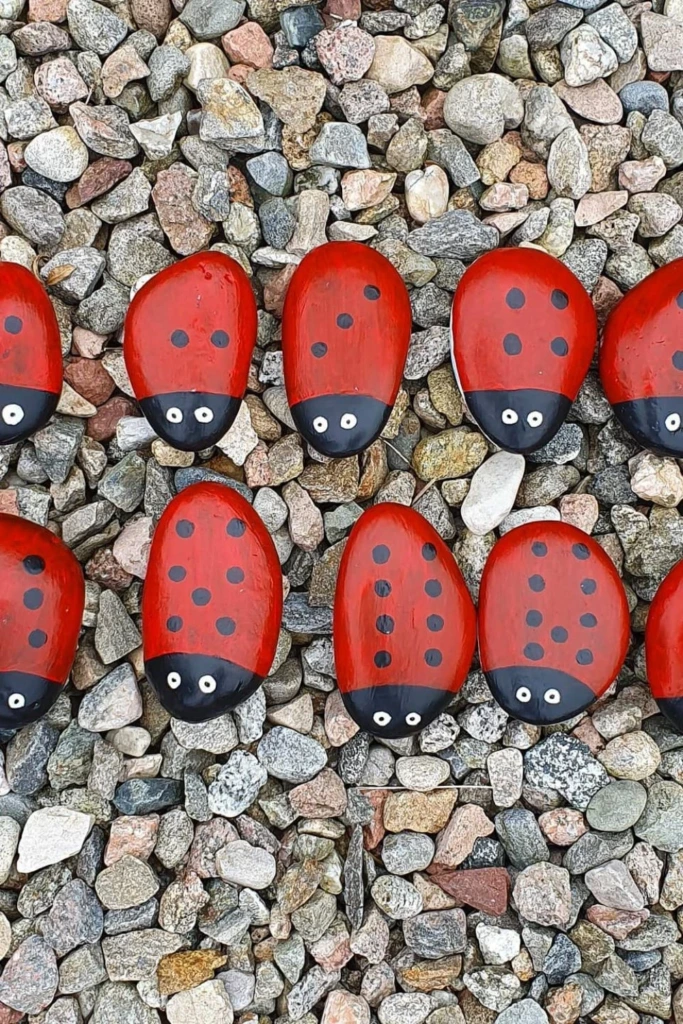
Bring a little garden charm to your outdoor space with painted ladybugs. Flat, oval-shaped stones work particularly well because their natural outlines resemble the insect's body.
Coat each stone in red paint, let it dry, and add a black head, a dividing line, and several round spots. Finish with small white-and-black eyes or use a fine brush to create a more detailed face.
Place the ladybugs among flowerpots, beside garden paths, or around the edges of a flowerbed. You can also make several in different sizes for a playful collection. If displaying them outside, protect the paint with a suitable outdoor sealant.
4. Word Rocks
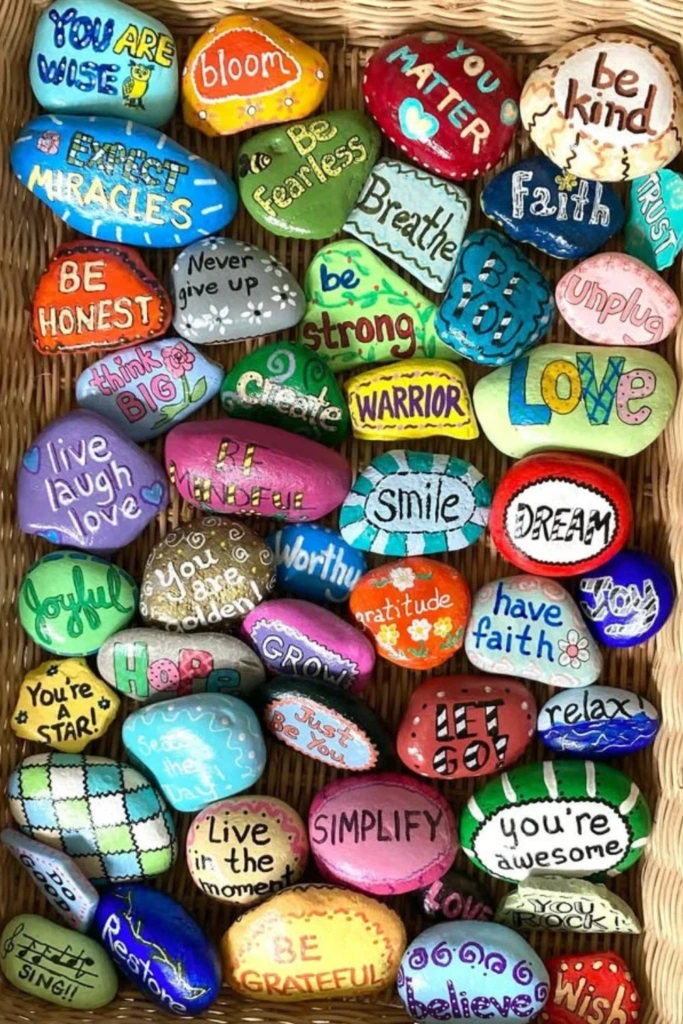
Turn simple stones into small reminders of encouragement by decorating them with meaningful words. Choose smooth surfaces and paint them in colors that complement your room, garden, or workspace.
Use paint pens to write words such as Hope, Create, Breathe, or Shine. For a more decorative finish, surround the lettering with tiny stars, leaves, dots, or hand-drawn borders.
These stones can brighten a desk, decorate a bookshelf, or serve as thoughtful handmade gifts. You could also create a set of words for a classroom, family activity, or personal inspiration corner.
5. Ocean Friends
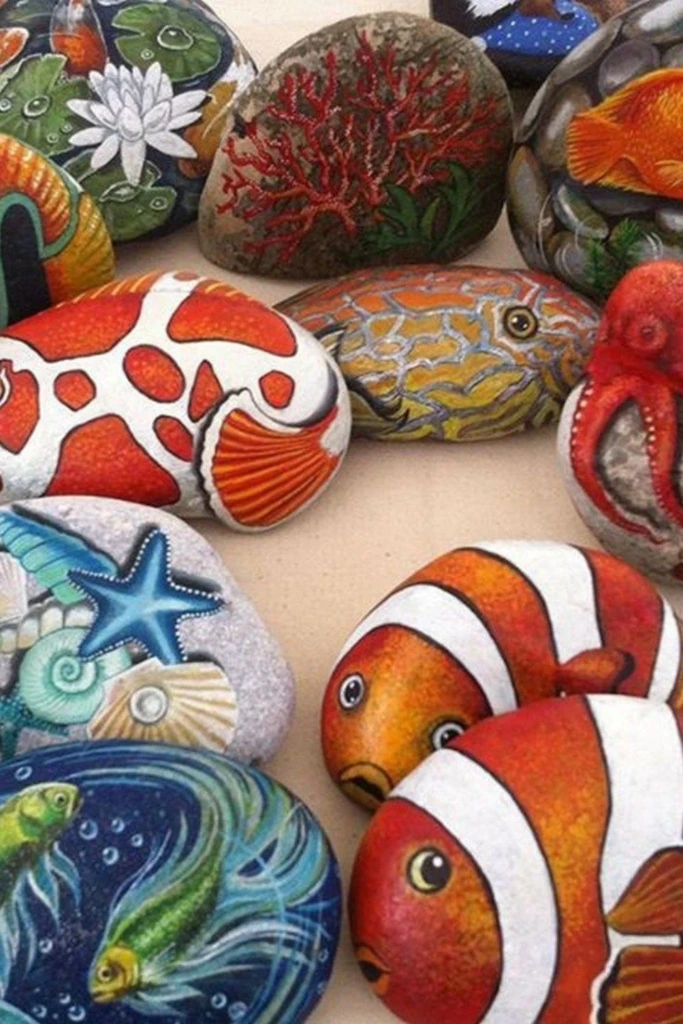
Bring an underwater theme to your rock collection by painting colorful sea creatures. Flat stones provide a useful canvas for fish, while rounder shapes can become turtles, crabs, or starfish.
Begin with a base color, then add fins, scales, shells, and facial features using contrasting shades. Blue and turquoise backgrounds can suggest ocean water, while small white dots and curved lines create bubbles and movement.
For a more detailed design, layer lighter and darker colors to give the creatures dimension. Display the finished stones in a bathroom, on a coastal-themed shelf, or as part of a summer craft arrangement.
6. Garden Blooms
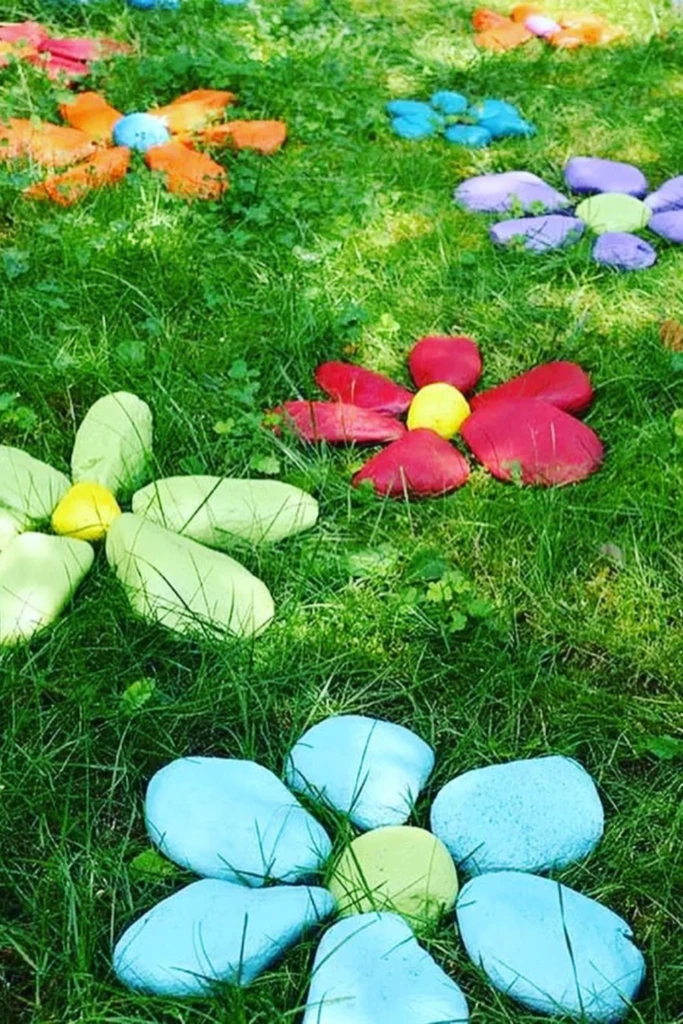
Make flowers that never wilt by transforming stones into colorful garden blooms. Collect stones in different sizes so you can create varied petals and flower centers.
Paint each stone with a single color, or decorate the surface with petal shapes, stripes, and tiny dots. Arrange several painted stones in a circular pattern to form daisies or other stylized flowers. A contrasting center helps each design stand out.
Place the finished arrangements beside planters, along a garden border, or in a decorative tray indoors. For a more complete display, combine the painted flowers with natural pebbles and small pots.
7. Realistic Cats
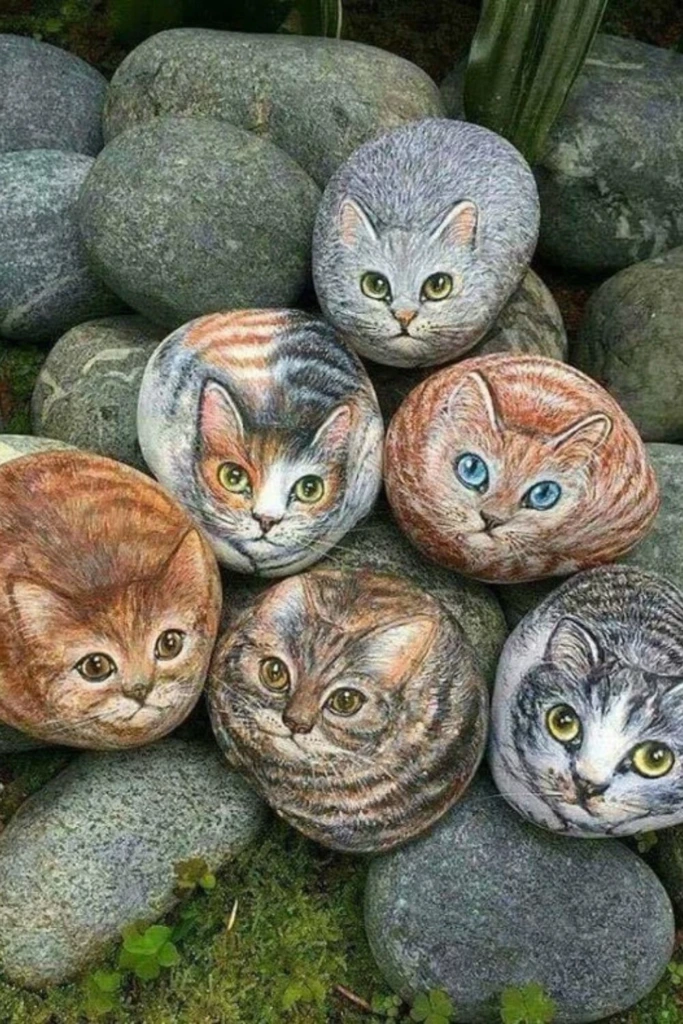
Cat lovers can turn smooth stones into miniature feline portraits. Oval and rounded stones are especially useful because their shapes can suggest a cat's face or curled-up body.
Start with the main fur color, then carefully paint the ears, muzzle, nose, and expressive eyes. Use thin brushstrokes to suggest whiskers and fur, adding lighter and darker shades to create depth. You can paint a tabby, black cat, ginger kitten, or a pet-inspired portrait.
Beginners may prefer a simple cartoon face before attempting realistic details. Finished cat stones look charming on bookshelves, beside indoor plants, or tucked into a decorative garden corner.
8. Breakfast Plate
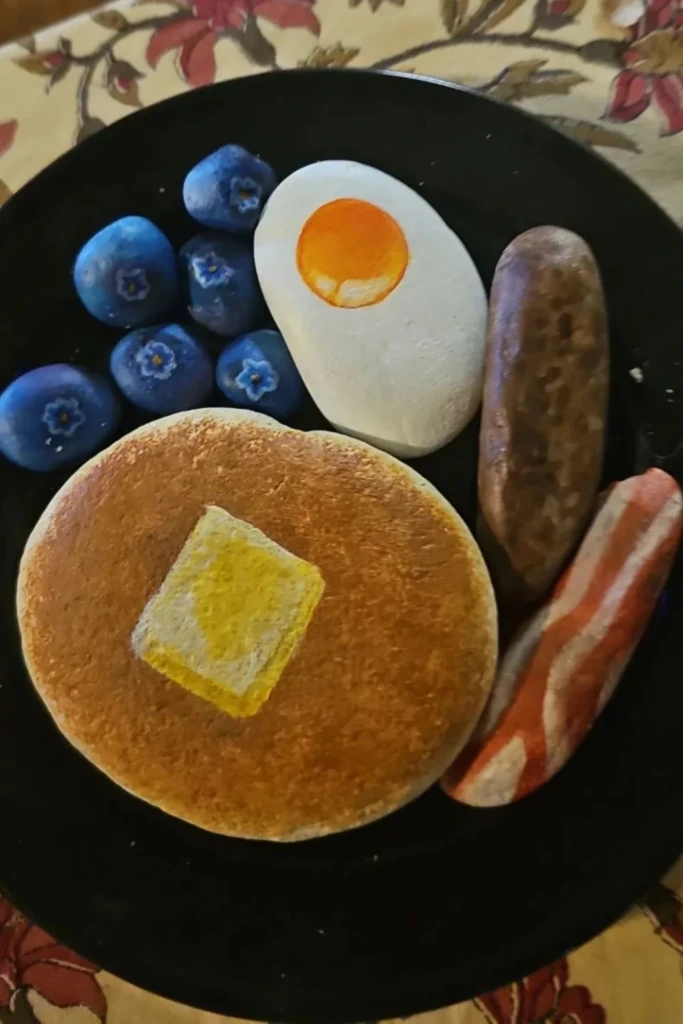
Create a playful pretend breakfast using flat stones painted as familiar foods. A wide, smooth stone can become a pancake, while smaller pieces work well for eggs, bacon, berries, or toast.
Use warm browns and cream shades for pancakes, white and yellow for a fried egg, and pinkish-red tones for bacon. Add subtle shading and small highlights to suggest texture and make the food look more recognizable.
Arrange the finished pieces on a small decorative tray or use them as props for imaginative play. Keep them separate from actual food and avoid presenting painted stones as edible items, especially around young children.
9. Cactus Pot
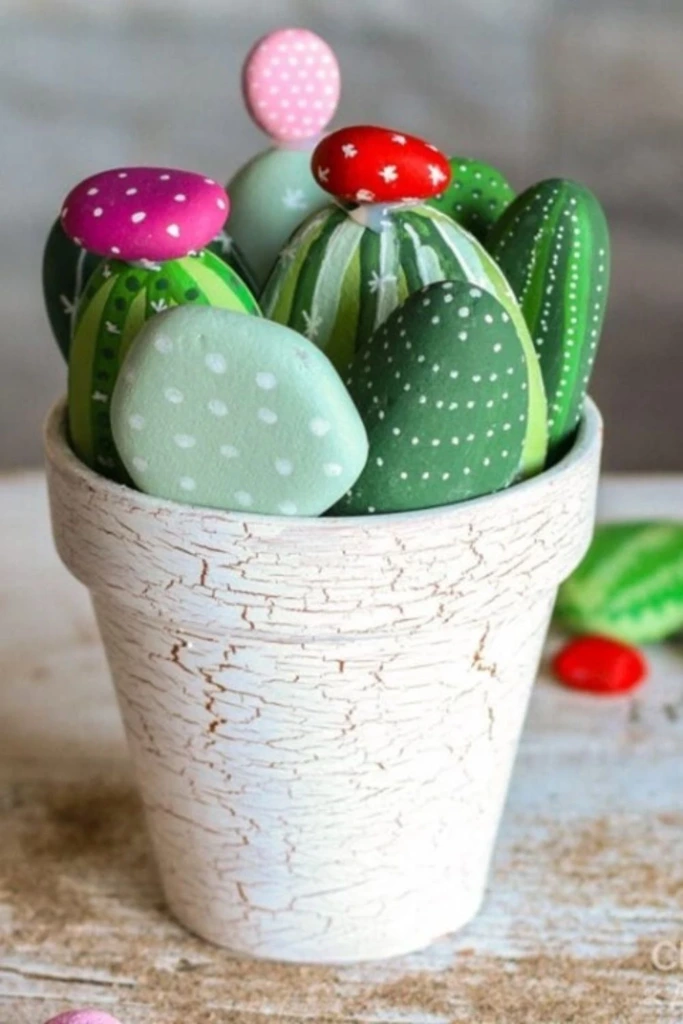
Enjoy the look of a succulent arrangement without worrying about watering by creating a painted stone cactus garden. Choose elongated or rounded stones that resemble different cactus shapes.
Paint the stones in several shades of green, then add tiny white or yellow marks to represent spines. Small pink, orange, or red flowers can provide a cheerful finishing touch.
Fill a small pot with clean gravel or pebbles and position the painted stones upright. You can secure them with additional stones to help them stay in place. This low-maintenance decoration is ideal for desks, shelves, and sunny-looking indoor corners.
10. Owl Stones
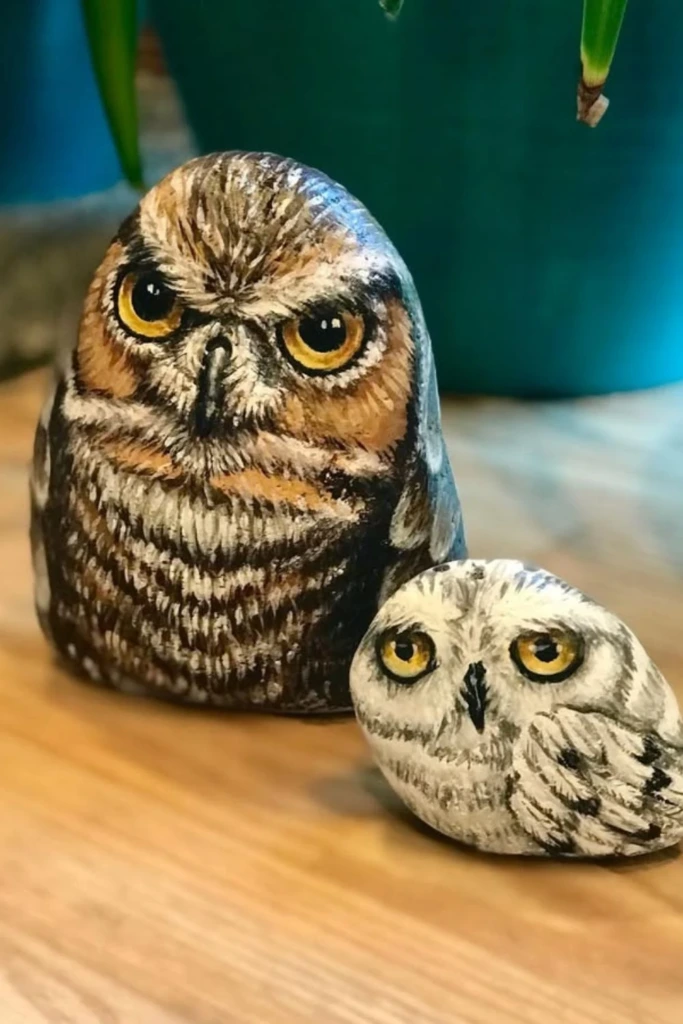
Create woodland-inspired decorations by painting owls on rounded stones. Look for shapes with a broad lower half and a slightly narrower top to help suggest the bird's body and head.
Start with earthy colors such as brown, gray, cream, or rust. Add large circular eyes, a small beak, and layered feather markings. Golden or amber eye details can create a striking contrast against darker paint.
For variety, make a family of owls in different sizes and color combinations. Display them beside books, indoor plants, or other nature-themed decorations for a cozy woodland effect.
11. Whimsical Animals
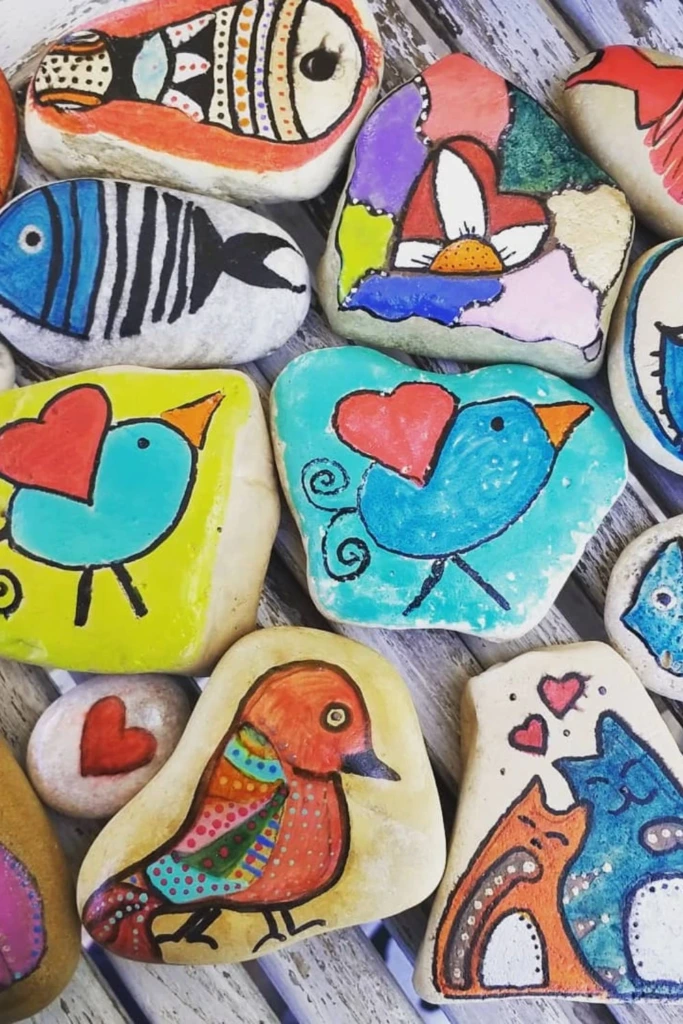
If you prefer imaginative artwork over realistic illustrations, turn stones into bright, cartoon-style animals. Cats, birds, turtles, fish, and imaginary creatures all work well with this approach.
Choose a base color, outline the main features, and add oversized eyes, expressive mouths, and playful patterns. Stripes, spots, hearts, and contrasting borders can make each character distinctive.
You can create a matching collection or give every stone its own personality. These colorful designs are suitable for garden displays, children's craft sessions, and handmade gifts. When making them with children, select age-appropriate paints and supervise the use of small stones.
12. Fitness Avocado
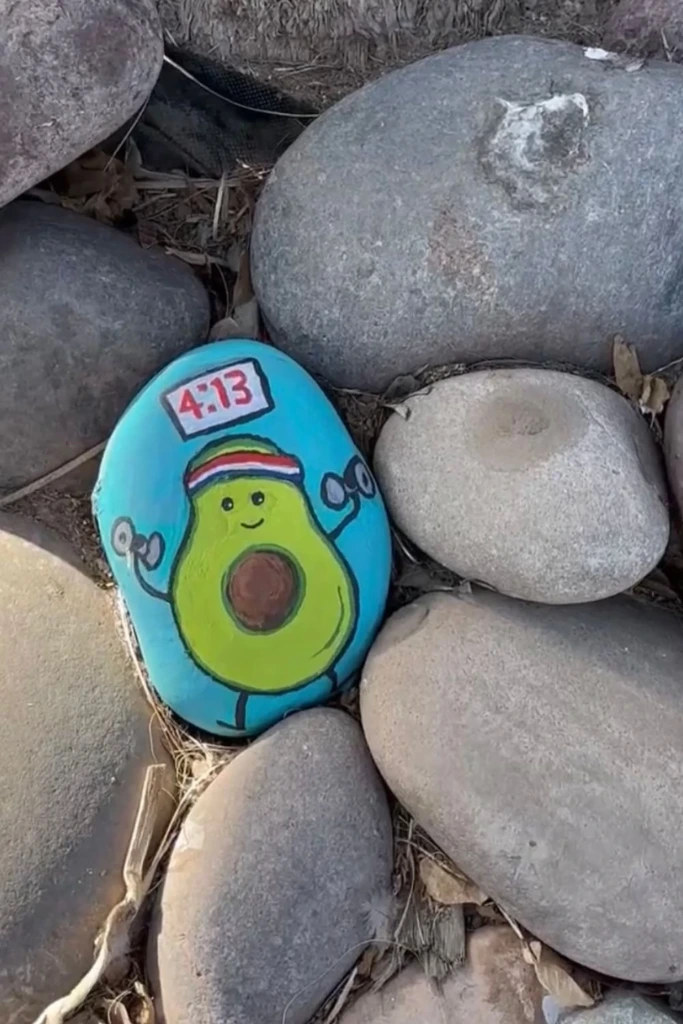
Give your rock art a humorous twist with an avocado character that looks ready for a workout. Start with a rounded stone and paint the familiar green avocado shape, including a darker outline and a lighter center.
Add a friendly face, tiny arms, and miniature dumbbells. A sweatband, raised eyebrows, or exaggerated muscles can make the character even funnier. Use a brown circle for the avocado pit if your design includes one.
This lighthearted decoration is a fun choice for a home gym, fitness-themed gift basket, or office desk. You could also create a series of fruit characters doing different exercises for a coordinated collection.
13. Watermelon Smiles
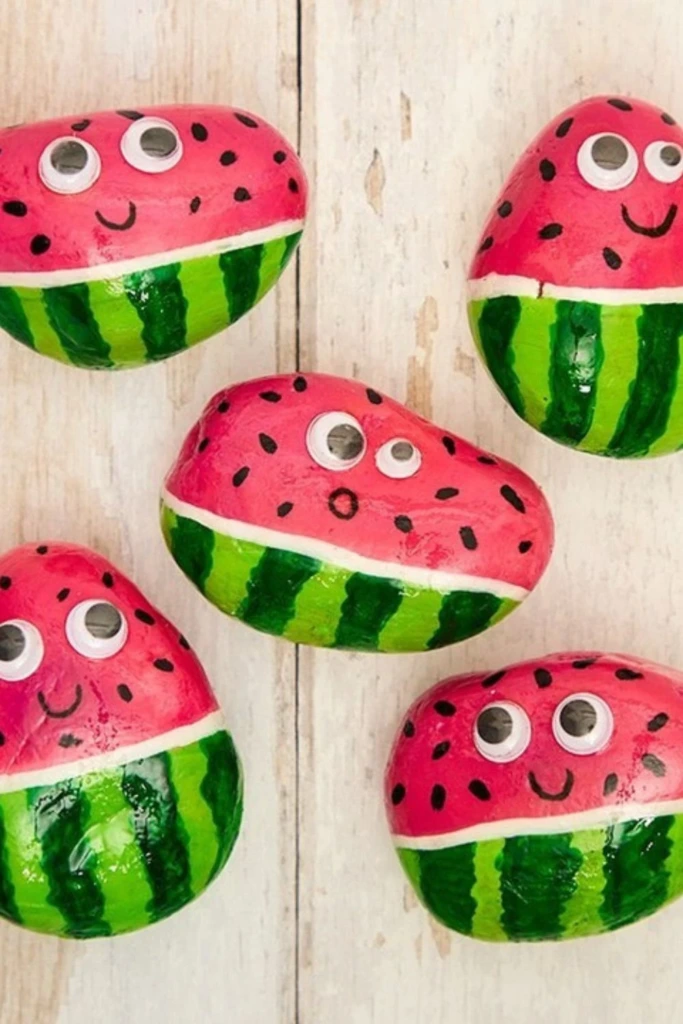
Celebrate summer with painted watermelon stones in bright pink, red, and green. Flat stones are convenient for this design because they provide enough space for the fruit's curved rind and smiling face.
Paint the main surface pink or reddish, then add a curved green border to represent the rind. Small black teardrops can serve as seeds, while googly eyes or hand-painted facial features give the watermelon a playful personality.
Once the colors have dried, apply a compatible clear finish if you want a glossy appearance. Display the stones beside picnic accessories, on a patio table, or among other summer decorations.
14. Cottage Stone
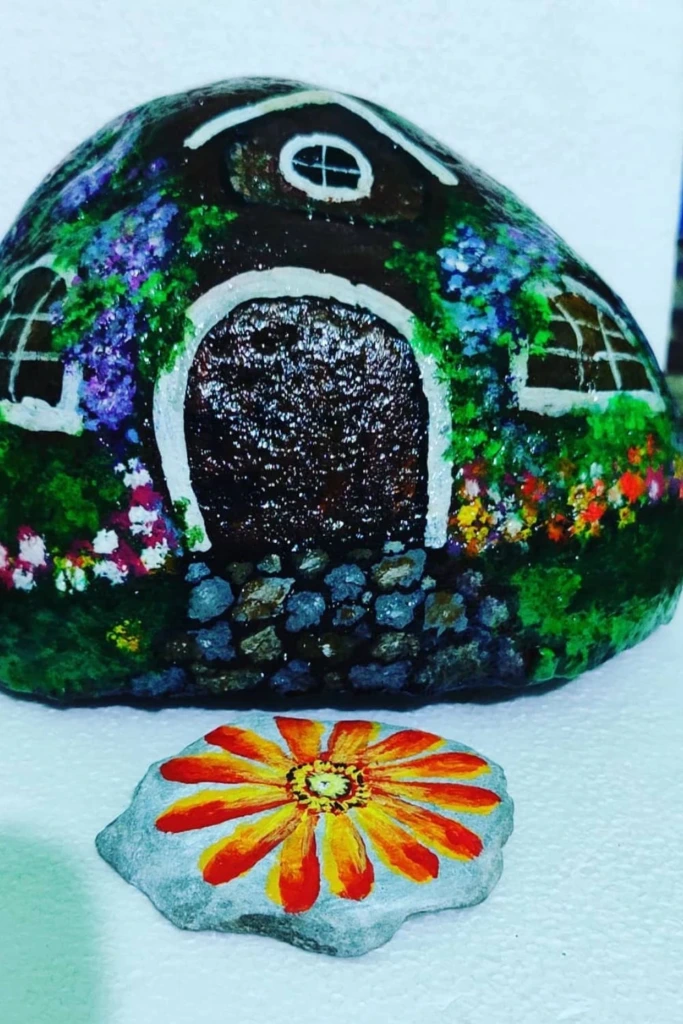
Turn an ordinary rock into a tiny storybook cottage with painted doors, windows, and garden details. Choose a stone with a broad, rounded surface that provides room for the house design.
Begin by painting the cottage walls in a warm neutral shade. Add an arched wooden door, small windows, flower boxes, and a winding pathway. Fine brushstrokes can create roof tiles, stonework, climbing vines, or little mushrooms around the entrance.
For a more magical appearance, use soft pastel colors and surround the cottage with miniature flowers. These stones fit beautifully into fairy gardens, decorative plant pots, or indoor woodland displays.
15. Nautical Scenes
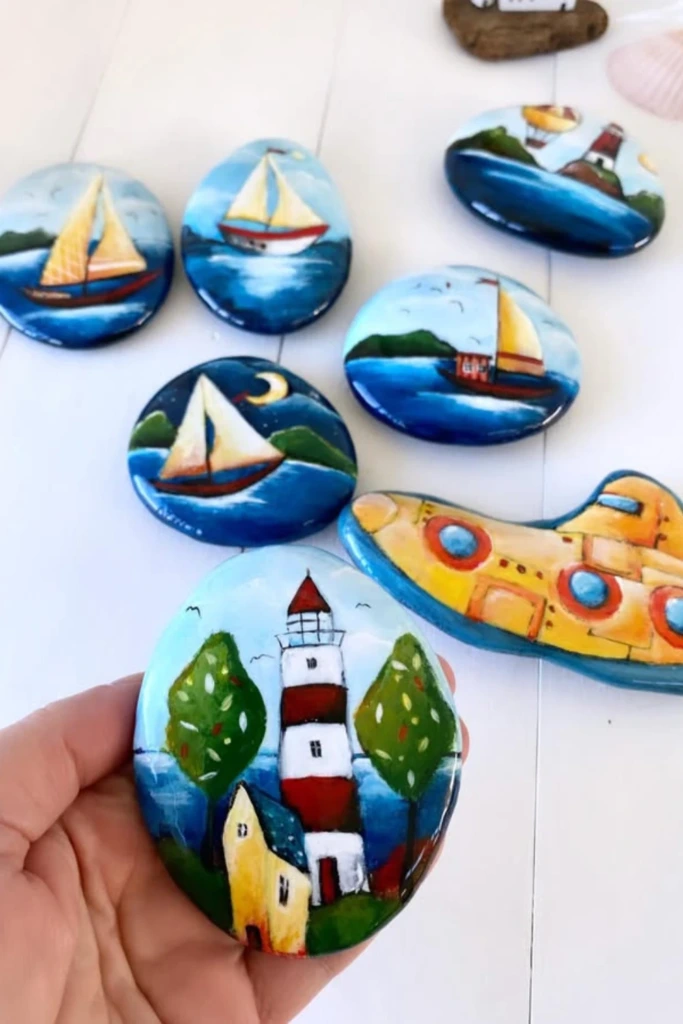
Create seaside-inspired rock art featuring sailboats, lighthouses, ocean waves, or tiny submarines. A flat stone makes a useful canvas for a landscape that combines several maritime details.
Paint the background in shades of blue, blending lighter tones near the horizon and darker ones toward the bottom. Add white wave crests, a small boat, or a lighthouse standing against the sky. Yellow, red, and white accents can help the main subject stand out.
Use a fine brush for narrow outlines and small details. Once complete, display the stone with shells, driftwood, or other coastal decorations to create a relaxed seaside theme.
16. Feel-Good Rocks
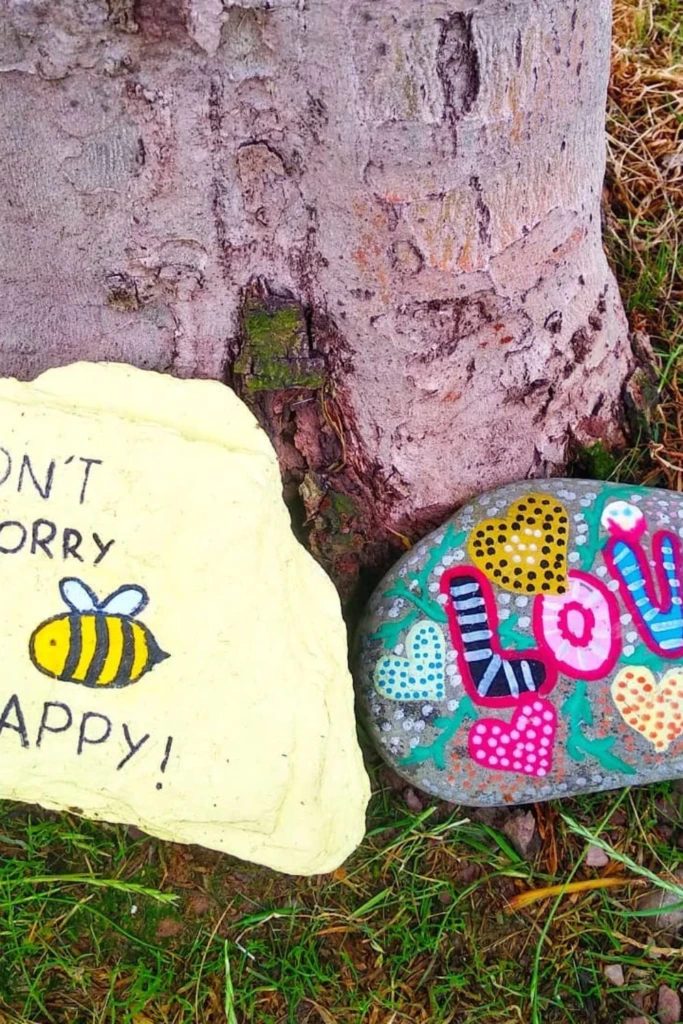
Spread kindness through simple stones decorated with positive messages and cheerful illustrations. Start with a smooth surface and choose a background color that makes your lettering easy to read.
Write a short phrase such as Choose Kindness, You Matter, or Keep Smiling. Add hearts, flowers, smiling suns, or small bees to make the design more inviting. Paint markers are particularly useful for neat lettering and fine outlines.
These rocks can be shared with friends, displayed in a classroom, or included in a community kindness activity. If you plan to leave them in public spaces, check local guidelines and avoid placing them where they could obstruct pathways or harm wildlife.
17. Dot Art Stones
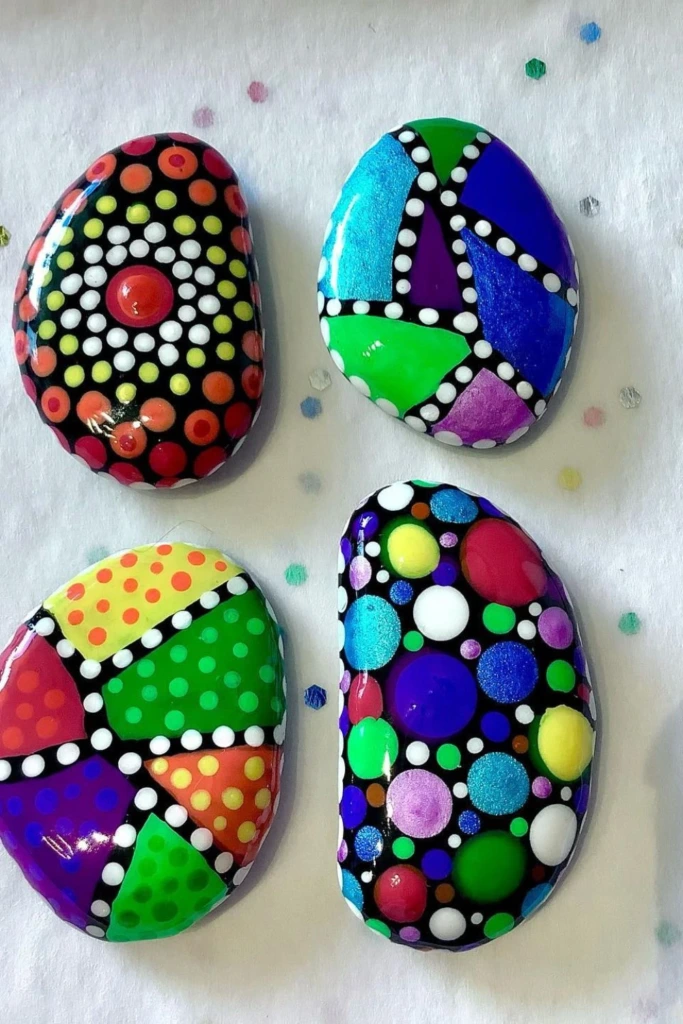
Explore detailed patterns with a dot-art design inspired by mandalas and geometric motifs. This technique uses repeated dots of different sizes to form circles, petals, and symmetrical arrangements.
Paint the stone with a solid base color and let it dry. Then use a dotting tool, the end of a brush, or a suitable stylus to apply dots in contrasting shades. Begin with a central point and build outward using repeated shapes and balanced spacing.
Bright colors can create a lively appearance, while muted tones produce a calmer, more understated result. After the artwork has dried completely, seal it with a compatible clear coating if desired. These patterned stones make attractive paperweights and decorative accents.
18. Orca Rock
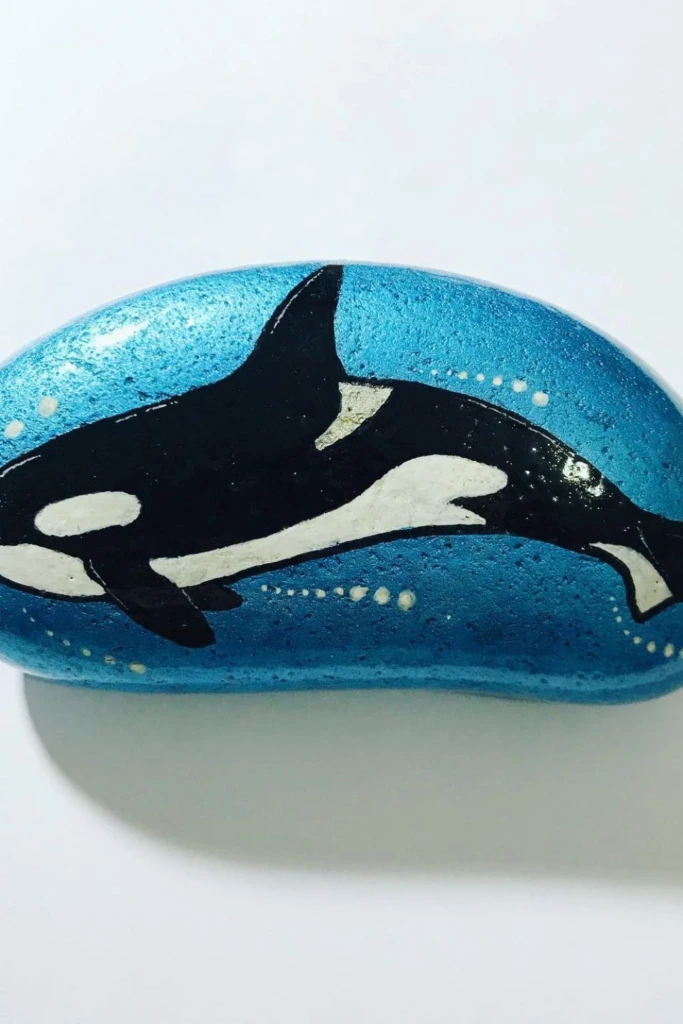
Celebrate marine wildlife with a painted orca, also known as a killer whale. Choose a curved or elongated stone that can represent the animal's streamlined body.
Paint the stone black, leaving space for the characteristic white patches near the eyes and underside. Add a dorsal fin, flippers, and a small eye using a fine brush. A blue background or painted ocean details can suggest the whale swimming through the sea.
For extra movement, add a few bubbles or small waves around the figure. This design suits ocean-themed rooms, nature-inspired displays, and handmade gifts for anyone fascinated by marine animals.
19. Beach Vibes
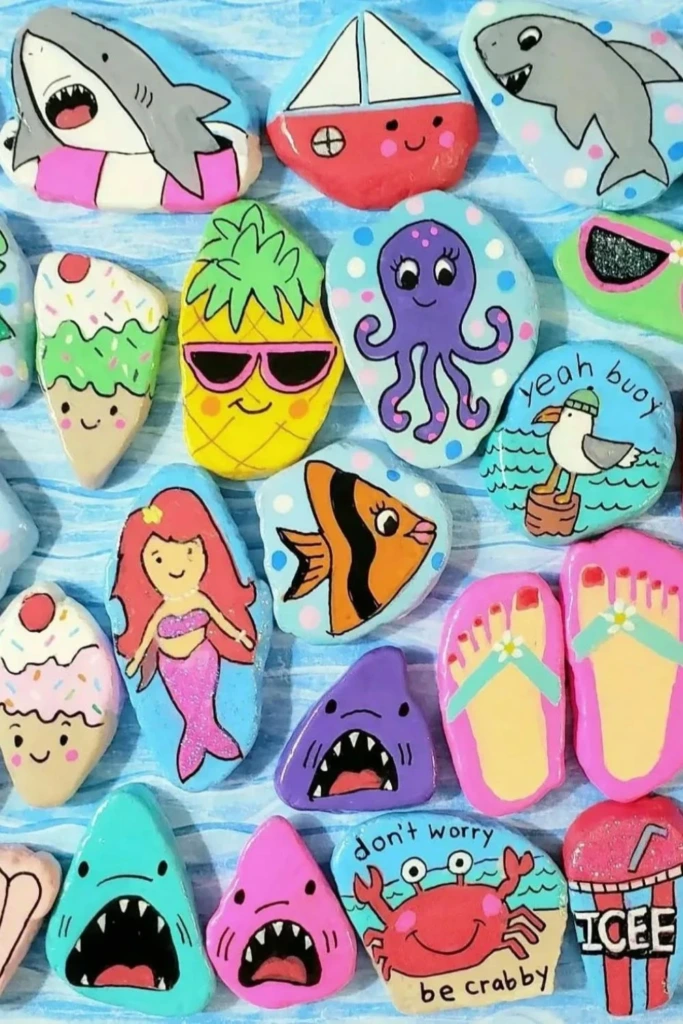
Bring the feeling of a sunny holiday to your craft table with stones decorated in beach-inspired designs. Choose familiar summer subjects such as flip-flops, ice cream cones, seashells, tropical fruit, and mermaids.
Use bright colors and simple outlines to keep each illustration recognizable. For example, paint a pair of tiny sandals in contrasting shades, or create a colorful ice cream cone with several scoops and decorative sprinkles.
You can also paint individual sea creatures or miniature beach scenes. Arrange the finished stones near planters, on a summer-themed shelf, or in a decorative bowl for a cheerful seasonal display.
20. Sunset Silhouettes
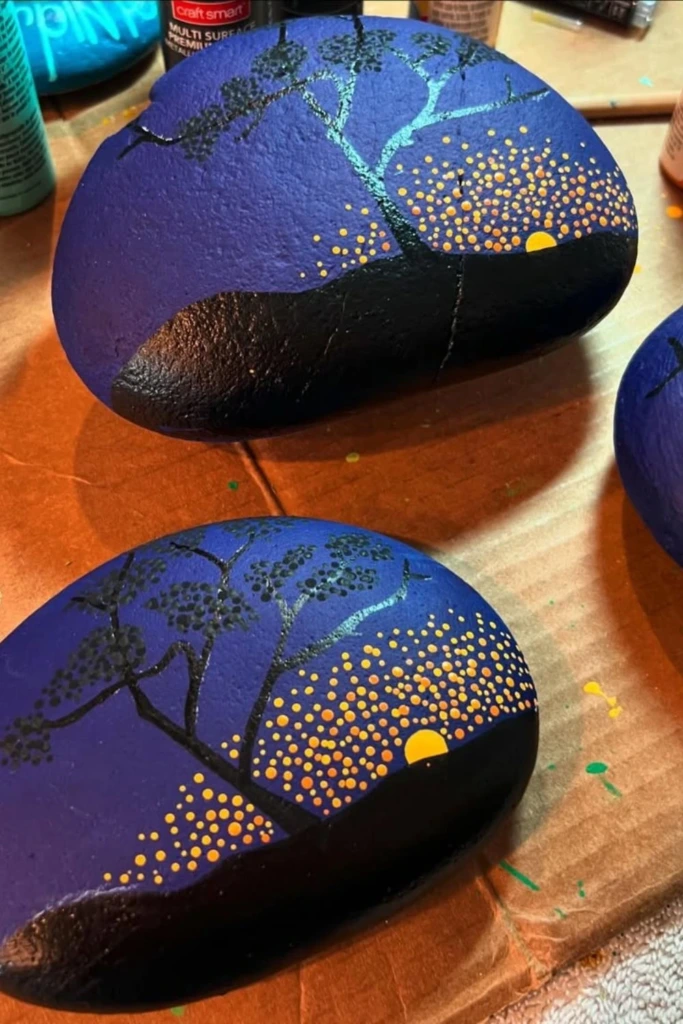
Capture the beauty of an evening sky with a miniature sunset painted on a flat stone. This project is especially appealing if you enjoy landscape art and blending colors.
Apply bands of yellow, peach, orange, pink, and purple across the stone, gradually transitioning into deeper blue tones. Blend the colors while the paint is still workable, following the instructions for your chosen paint. Allow the background to dry before adding dark silhouettes.
Paint distant hills, trees, grass, or a solitary palm against the colorful sky. Simple black shapes create strong contrast without requiring highly detailed drawing. These sunset stones work well as shelf decorations, desk accents, or part of a nature-inspired art collection.
21. Tribal Patterns
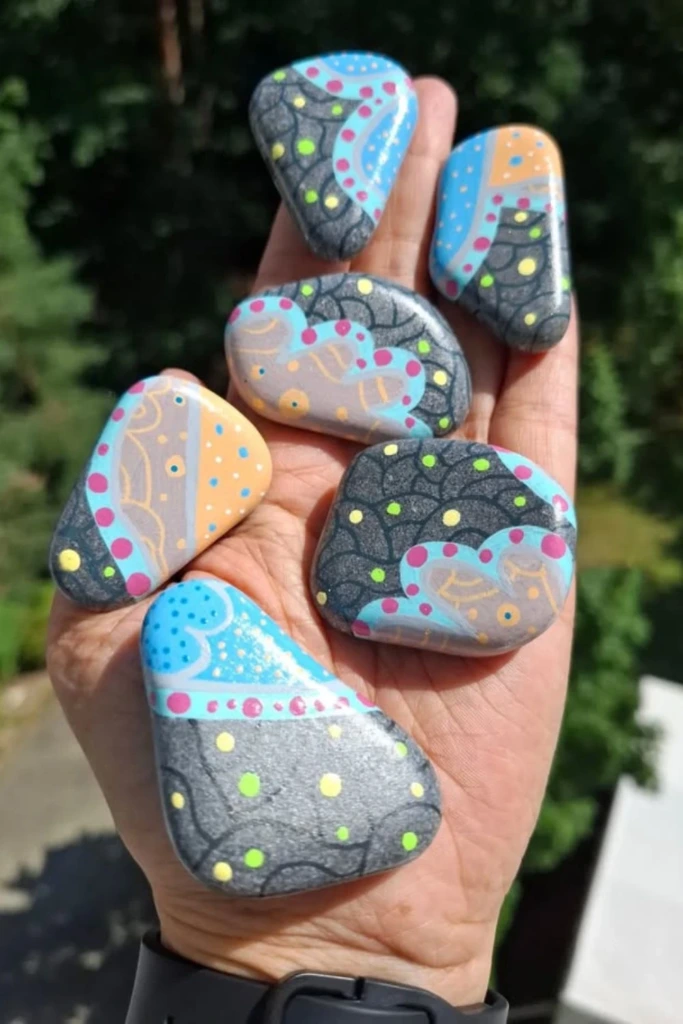
Create bold geometric rock art with repeating lines, dots, triangles, and abstract shapes. Smooth stones in cream, gray, brown, or charcoal provide a neutral foundation for more colorful details.
Begin with a simple arrangement of shapes, then build a pattern using repeated marks and contrasting colors. White lines against a dark background create a clean look, while brighter accents can make the design more energetic.
For a balanced result, repeat a few shapes instead of filling every available space with different details. The finished stones can complement modern interiors, bohemian-inspired displays, or collections of handmade decorative objects.
22. Holiday Corks
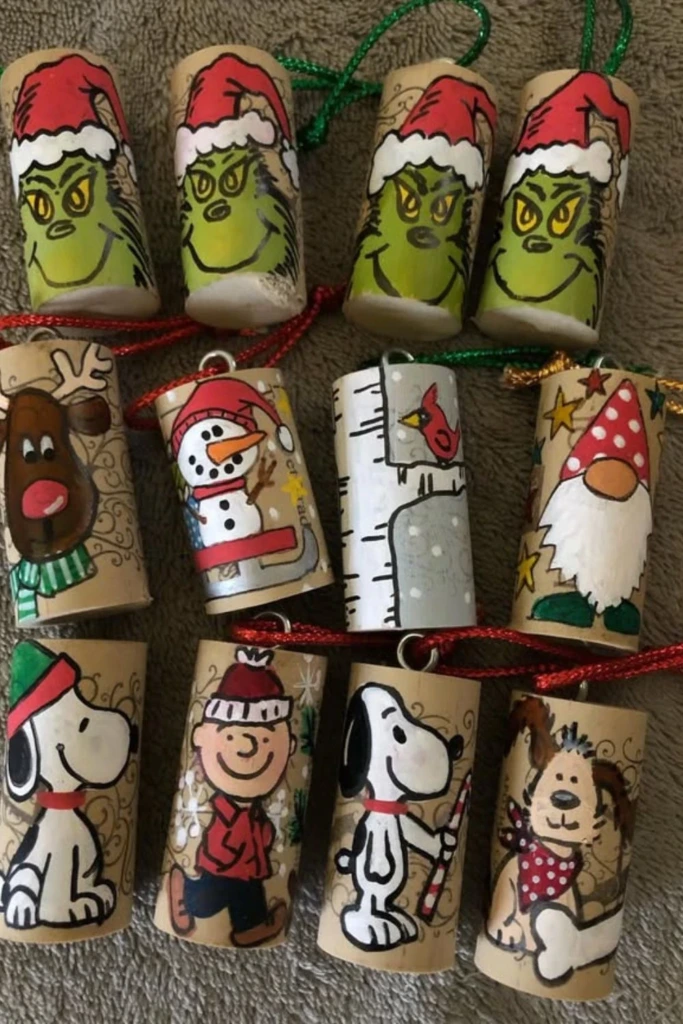
For a festive alternative to painted stones, transform leftover corks into miniature holiday characters. This project uses a different material but follows the same basic idea of turning everyday objects into decorative artwork.
Paint the corks as snowmen, cheerful seasonal characters, or other holiday figures. Add faces, scarves, hats, and colorful details using small brushes. Once the paint has dried, attach a ribbon loop securely if you want to hang the decorations.
Arrange them on a holiday shelf, use them as part of a festive centerpiece, or give them as handmade seasonal gifts. Choose corks that are clean and intact, and make sure any hanging attachment is firmly secured before displaying them.
23. Mini Cactus Pots
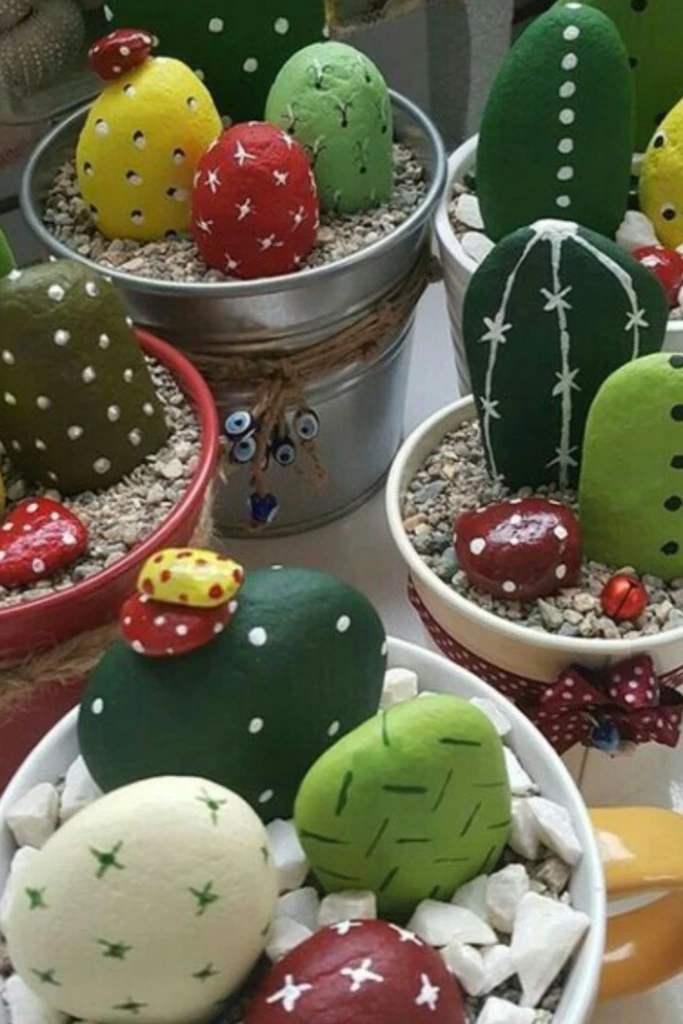
Make a collection of tiny potted cacti using painted stones and small containers. This project is a good choice for anyone who enjoys plant-inspired crafts but prefers decorations that need no watering.
Select stones with varied shapes and sizes, then paint each one in a shade of green. Add rows of white dots, short lines, or small dashes to imitate cactus spines. Tiny flowers in pink, yellow, or red provide an attractive finishing detail.
Fill miniature pots with gravel and arrange the painted stones so they resemble a collection of real plants. Use several pots in matching colors or mix different containers for a more playful look.
These little arrangements are ideal for desks, windowsills, shelves, and handmade gifts for plant enthusiasts.
24. Desert Blooms
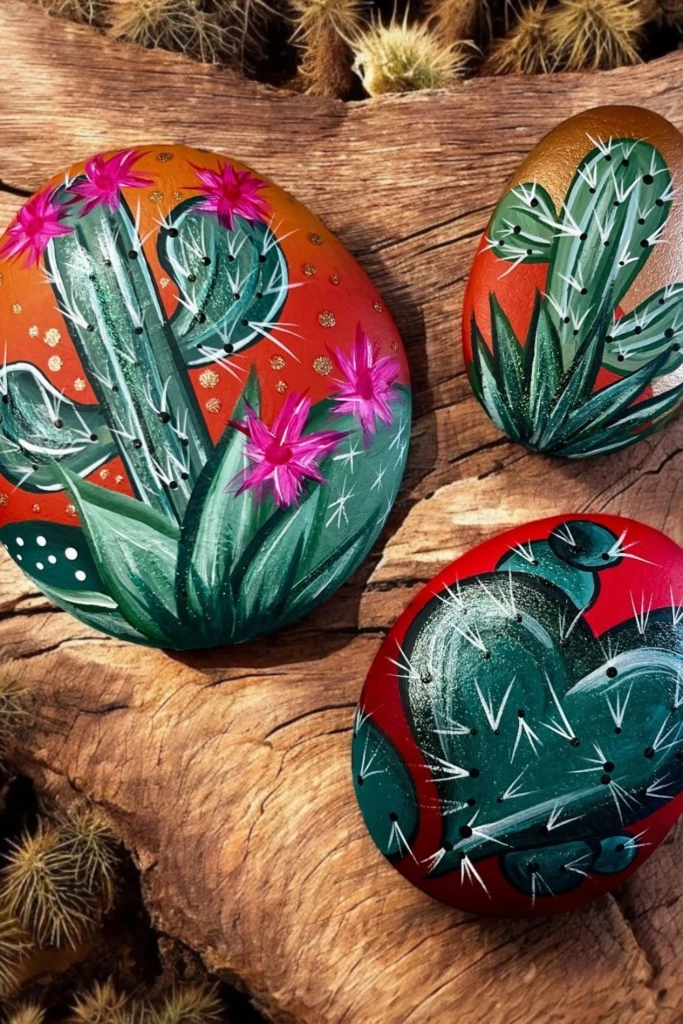
Bring warm desert colors to your rock collection with painted cacti, flowers, and sunset scenery. Smooth stones provide a compact canvas for a miniature landscape inspired by arid regions.
Paint the background in terracotta, burnt orange, dusty pink, or golden yellow. Add green cacti in the foreground and surround them with small pink or purple flowers. Fine brushstrokes can suggest cactus ridges, spines, distant hills, and desert plants.
For a more dramatic result, blend warm sunset shades behind dark silhouettes. Alternatively, create a simple cactus illustration on a solid background for a design that is easier for beginners.
Display the finished stones with clay pots, natural wood, or other earthy decorations to complement a southwestern-inspired interior.
25. Garden Veggies
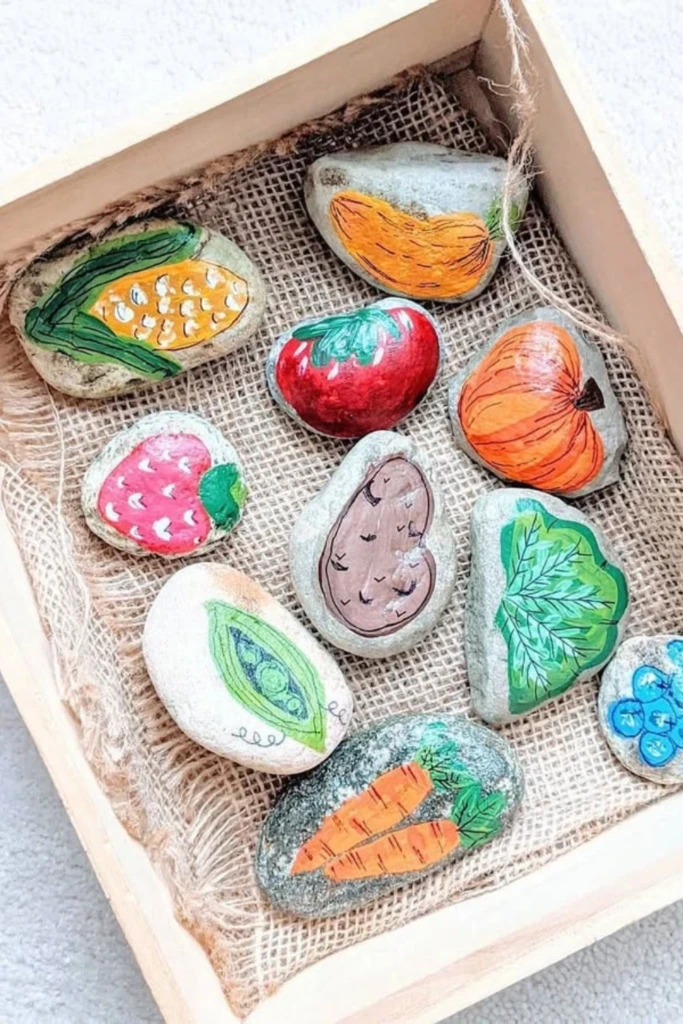
Turn ordinary stones into a colorful collection of miniature fruits and vegetables. This project combines painting with imaginative play and can also help children recognize different foods.
Choose stones that resemble the produce you want to create. A narrow stone can become a carrot, a round one can represent a pumpkin, and a small red stone can become a strawberry. Paint each piece in a suitable base color before adding leaves, stems, seeds, or outlines.
You can also make potatoes, peas, tomatoes, or other vegetables to build a complete pretend harvest. Arrange the painted pieces in a small basket or wooden tray for a miniature market display.
These creations are useful as garden-themed decorations, props for supervised pretend play, or visual aids for simple learning activities. If using them as garden markers, add the vegetable names to make each stone easy to identify.