DIY Patchwork Hoodie You Can Actually Make at Home

I’ll structure the article around the DIY patchwork hoodie topic, with practical materials, clear construction steps, and useful customization advice. I’ll keep the writing original rather than reproducing the competitor’s prose.
A patchwork hoodie is a creative way to turn leftover fabric, worn-out sweatshirts, and secondhand clothing into something you can wear every day. By combining different colors, prints, and textures, you can make a one-of-a-kind piece that reflects your personal style without spending much on new materials.
The best part is that you can choose how ambitious you want your project to be. Beginners can decorate an existing hoodie with fabric patches, while experienced sewists can build an entirely new garment from salvaged sweatshirt material.
The secret to a successful result is choosing compatible fabrics, planning the design before cutting, and taking time to finish each seam properly. With a little patience and a suitable sewing machine, you can create a comfortable hoodie that looks intentional rather than pieced together at random.
What Materials Do You Need to Start?
Before starting your patchwork hoodie, collect your supplies and decide whether you will modify an existing garment or sew one from scratch.
Here is what you will need:
Old sweatshirts or hoodies: These provide useful fabric, ribbed cuffs, waistbands, and reusable pockets.
Fabric scraps: Choose coordinating colors, contrasting prints, or a combination of both.
A hoodie sewing pattern: Alternatively, use a well-fitting hoodie as a reference for tracing the main pieces.
Fabric scissors or a rotary cutter: Sharp cutting tools help produce accurate shapes and clean edges.
Pins or sewing clips: These keep fabric layers aligned while you work.
Sewing machine: A machine with a stretch stitch or narrow zigzag stitch is ideal for sweatshirt material.
Polyester thread: It provides useful strength for seams that experience regular movement.
Measuring tape and ruler: Use these to check dimensions and maintain consistent patch sizes.
Knit stay tape or clear elastic: These optional supplies help stabilize areas that might stretch out of shape.
Ribbed knit fabric: Save this for the cuffs and bottom band if you are not reusing existing pieces.
Iron and ironing board: Pressing your seams as you sew helps the finished garment look smooth and professional.
Wash and dry your reclaimed fabrics before cutting them, following their care instructions. This helps reduce unexpected shrinkage after the hoodie is finished. Remove damaged sections, inspect the fabric for weak spots, and separate materials according to their weight and stretch.
Take the “before” and choose your fabrics
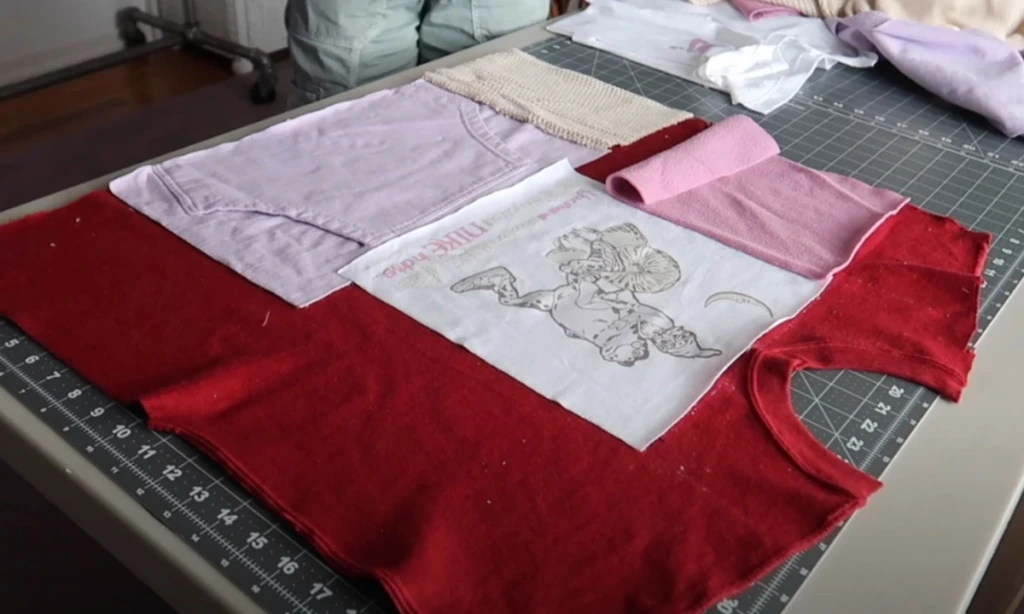
Start by photographing your materials and deciding what you want the finished hoodie to look like. A quick reference photo can help you compare your original supplies with the completed project.
Look through old sweatshirts, cotton T-shirts, fleece garments, and other suitable clothing you no longer wear. You do not need perfectly matching fabrics. A mix of solid colors, small patterns, and graphic sections can create an interesting design.
Try selecting a small color palette before you begin. For example, navy, cream, and faded denim can create a coordinated casual look, while red, orange, and pink offer a brighter, more playful effect.
Check every fabric for holes, thinning areas, and stretched seams. Save attractive graphics or embroidered details for places where they will be visible. Avoid using damaged sections in areas that need to withstand frequent movement, such as the underarms and elbows.
Make or trace your pattern
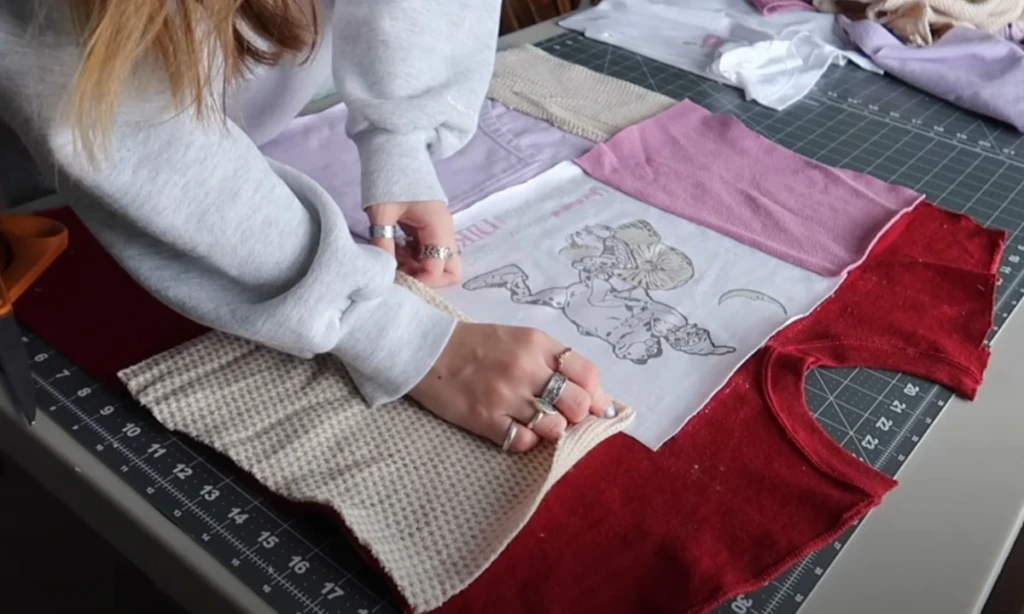
A reliable pattern helps ensure that the finished hoodie fits properly. If you already own a sweatshirt with a comfortable fit, use it as a reference for the front, back, sleeves, and hood.
Lay the garment flat without stretching it. Trace each section onto pattern paper, adding the appropriate seam allowance before cutting your fabric. Mark the center front, center back, sleeve direction, and any notches that will help you align the pieces later.
You can also use a commercial hoodie pattern, which is especially helpful if you want a specific fit or are creating the garment from separate panels.
Keep existing ribbed cuffs, waistbands, and hoods intact whenever possible if you plan to reuse them. Removing these components unnecessarily can create extra work and make it harder to preserve their original shape.
Remember that the patchwork panels must be large enough to accommodate the entire pattern piece. Arrange your fabric scraps into larger sections first, then cut the final garment shapes from those completed panels.
Deconstruct and sort materials
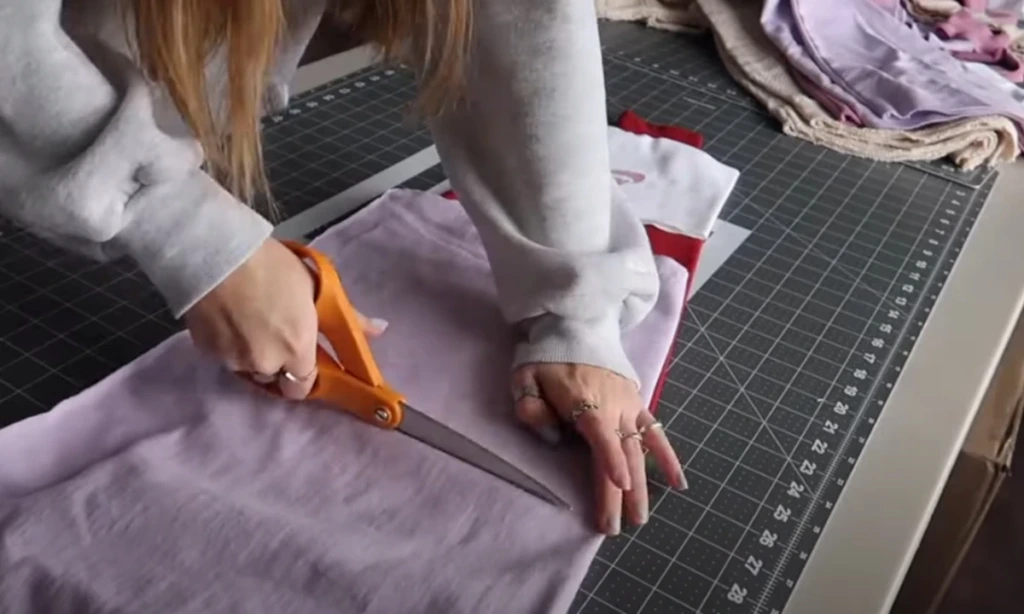
If you are recycling old clothing, carefully take apart the garments before beginning construction. Use fabric scissors or a seam ripper to open the seams and separate the usable sections.
Organize the recovered pieces into groups such as:
Large front and back panels
Sleeve fabric
Hood material
Ribbed cuffs and bottom bands
Pockets and zippers
Printed graphics, embroidery, or decorative sections
Sorting everything makes it easier to estimate how much usable fabric you have and prevents you from cutting an important piece by accident.
Pay particular attention to existing pockets and hoods. A kangaroo pocket in good condition can be reused with relatively little alteration, while a hood from another sweatshirt may work if its dimensions are compatible with your pattern.
Remove loose threads and trim away worn edges. If a fabric piece has a small hole, decide whether it can be avoided during cutting or incorporated into the design intentionally.
Keep stretchy fabrics separate from rigid woven materials. Sweatshirt fleece and jersey are generally easier to combine with fabrics that have similar stretch and thickness.
Plan your design layout
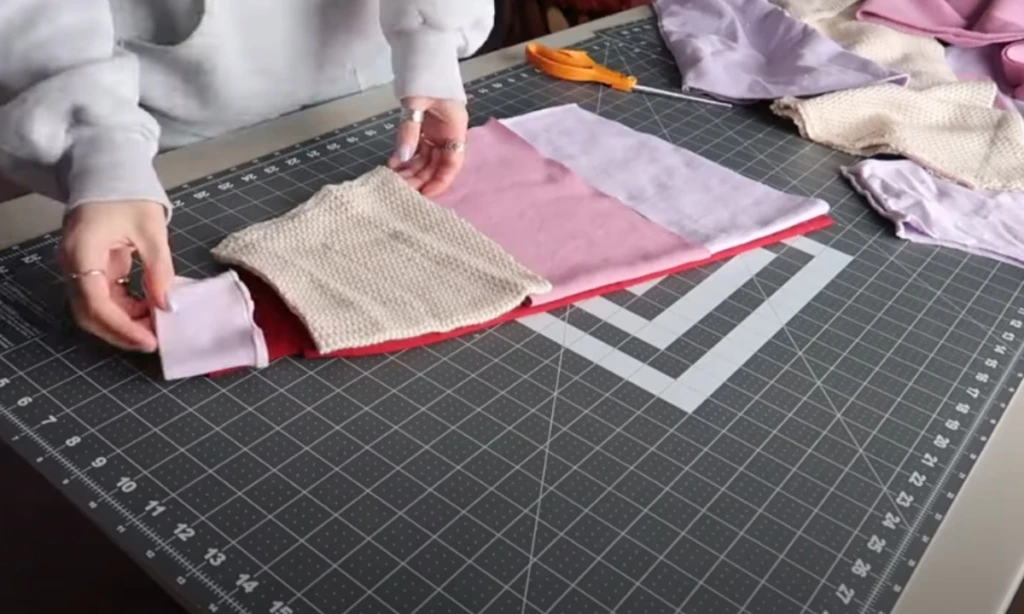
Lay your fabric pieces on a large, flat surface before sewing anything together. This gives you an opportunity to experiment with different arrangements without wasting material.
Start with the front panel because it often serves as the visual centerpiece of the hoodie. Decide whether you want a balanced arrangement, an irregular patchwork pattern, or a design built around a large graphic.
Spread the colors across the garment rather than concentrating all the darker or brighter pieces in one area. Alternating similar shades with contrasting colors can help individual patches stand out.
Think about the size of each section, too. Medium and large patches are often easier for beginners to sew neatly. Very small pieces require more seams, which can make the garment stiff and bulky.
Leave enough extra fabric around every patch for seam allowances. If you intend to reuse a pocket, check that the finished panel will accommodate its size and placement.
Once you are happy with the arrangement, take a photograph and label the pieces if necessary. This simple reference will make it easier to preserve your chosen layout as you sew.
Create patchwork panels
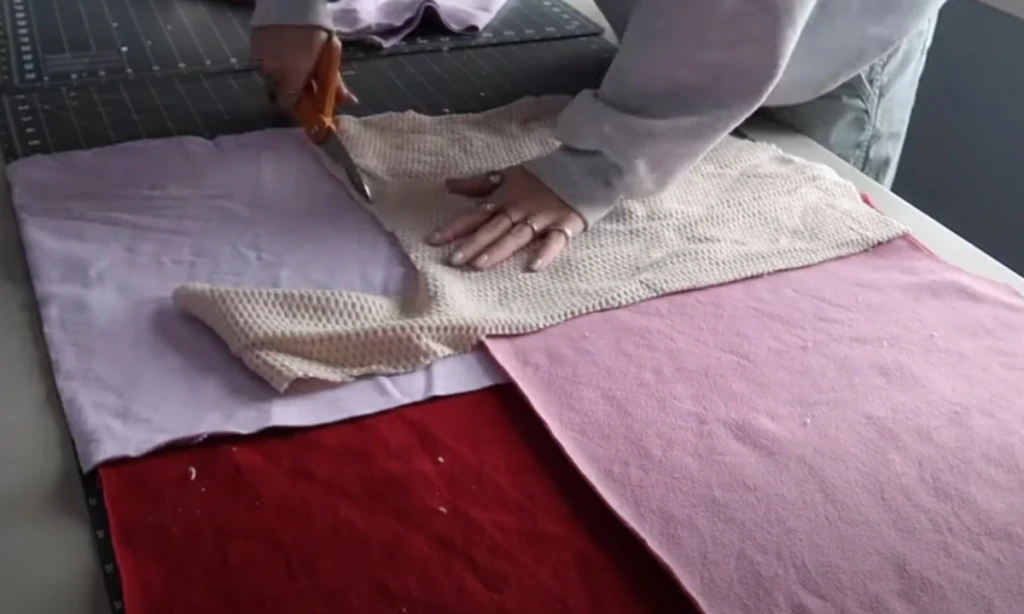
Now join your fabric scraps into larger sections that will become the front, back, and sleeves.
Begin with two pieces at a time. Place them with their right sides facing each other, align the edges, and stitch them together using a suitable stretch stitch. Press the seam carefully before attaching the next patch.
Continue adding pieces until you have panels large enough for your pattern. Check the dimensions frequently so you do not run short of fabric when it is time to cut the hoodie shapes.
For a cleaner finish, try to keep seam allowances consistent. Trim excess fabric where appropriate, but avoid cutting away material that is needed to support the seam.
Thin fabrics may benefit from a lightweight knit lining or backing, particularly if they will be joined to thicker sweatshirt material. Test the combination first to ensure that the finished section remains flexible and comfortable.
After completing each panel, lay it flat and check for puckering, gaps, or uneven edges. Correcting these problems now is much easier than trying to fix them after the garment has been assembled.
Sew the hoodie body together
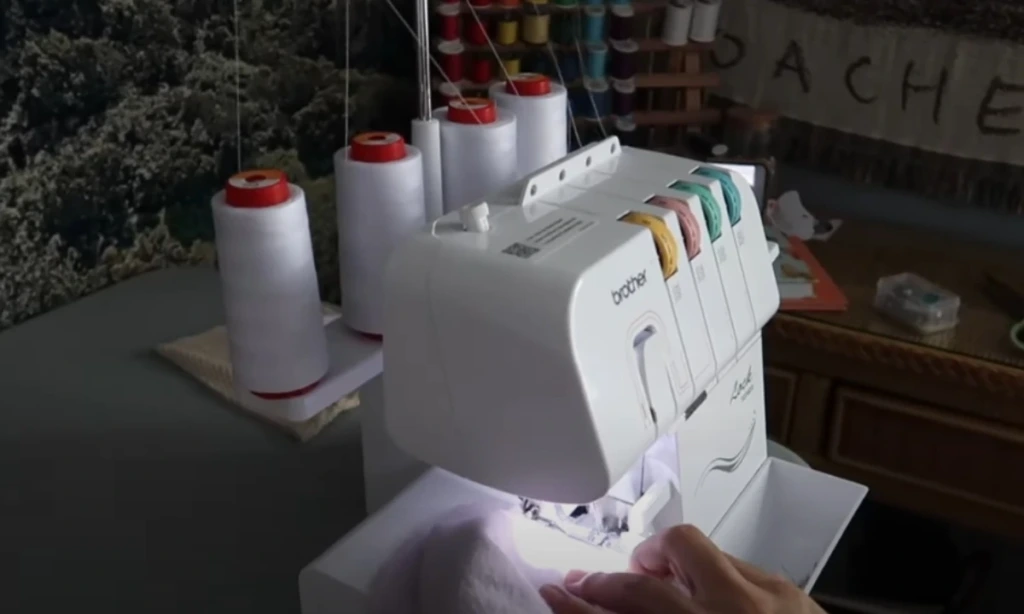
Once the patchwork panels are complete, place your pattern pieces over them and cut out the front, back, and sleeves. Follow the grain or stretch direction of the original fabric whenever possible.
With the main pieces prepared, begin assembling the hoodie.
First, join the shoulder seams of the front and back panels. Next, attach the sleeves according to your pattern, carefully matching any notches or reference points. Finish by sewing the side seams and the undersides of the sleeves.
Use clips or pins to prevent the layers from shifting as you work. Stretch fabrics can move under the presser foot, so sew slowly and avoid pulling the material through the machine.
A serger can provide neat, durable seam finishes, but it is not essential. A regular sewing machine with a narrow zigzag or another suitable stretch stitch can also produce flexible seams.
Try the partially assembled hoodie on, if practical, before attaching the finishing pieces. Check the body width, sleeve length, and overall fit. Making small adjustments at this stage can save time later.
Attach the hood and waistband
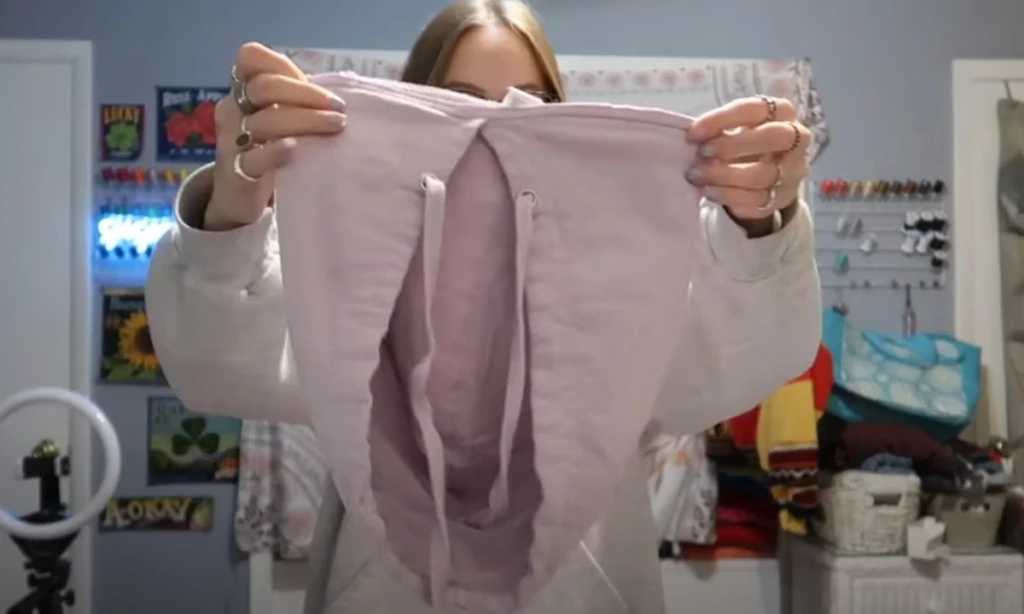
With the body assembled, you can add the hood, bottom band, cuffs, and pocket.
If you are making a new hood, join its sections according to the pattern and finish any exposed edges as directed. Match the hood's center points with the center back of the neckline, then distribute the remaining fabric evenly around the opening.
Pin or clip the hood in place with the appropriate sides facing each other. Sew around the neckline using a stitch that accommodates the fabric's stretch.
Next, attach the ribbed waistband and sleeve cuffs. Ribbing is often slightly shorter than the opening it fits, so distribute the stretch evenly rather than gathering the fabric into one spot. Follow your pattern's measurements for the correct proportions.
If you are reusing a kangaroo pocket, position it on the front before closing any areas that would make it difficult to reach. Check that both openings are accessible and that the pocket sits level.
Finally, inspect the neckline and hems to make sure everything lies comfortably. Avoid pulling the ribbing too tightly, as this can distort the body or make the hoodie difficult to wear.
Finish seams and reveal the hoodie
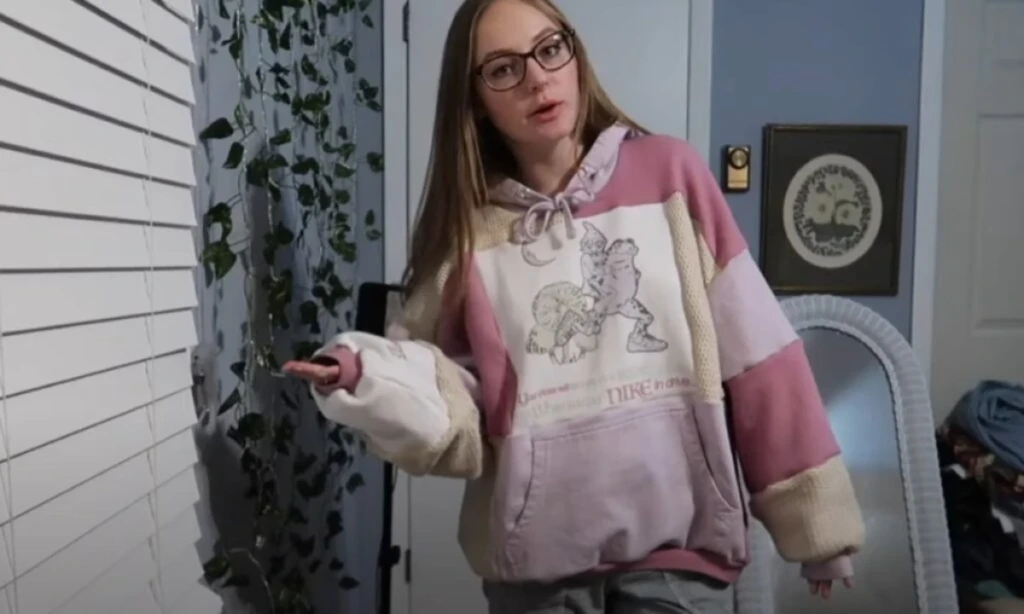
Finishing details can make the difference between a homemade garment that looks rough and one that feels thoughtfully constructed.
Trim loose threads and remove excess seam bulk where it is safe to do so. Secure the ends of your stitches using the method recommended for your machine and stitch type; do not rely on simply cutting the threads short.
Press the completed seams with an appropriate heat setting for the fabric. Use a pressing cloth when necessary, especially around printed graphics or delicate materials. Avoid excessive heat on synthetic fleece, which can become damaged.
Turn the hoodie right side out and examine the front, back, sleeves, hood, and waistband. Check for skipped stitches, uneven hems, open seams, and areas that feel unnecessarily thick.
Try the hoodie on and move your arms to test its comfort. The shoulders should sit properly, the sleeves should allow movement, and the neckline should not feel restrictive.
Once you are satisfied with the fit, take a photo of your finished creation. Every arrangement of reclaimed fabrics will be different, giving your patchwork hoodie its own distinctive character.
What Mistakes Should You Avoid?
A little planning can prevent many common sewing problems, especially when working with reclaimed clothing.
Choosing fabrics that behave differently: Combining very stretchy jersey with stiff woven cotton can lead to uneven seams and uncomfortable sections. For your first project, use fabrics with similar weight and stretch. If you want to include a lighter material, consider stabilizing or lining it appropriately.
Cutting without seam allowances: Fabric pieces that are cut to the exact finished dimensions will usually end up too small once the seams are sewn. Follow your pattern's seam allowance instructions and measure twice before cutting.
Ignoring the color arrangement: A collection of attractive scraps can still look unbalanced when assembled. Spread the colors and patterns across the garment, and check the complete layout before stitching the pieces together.
Using patches that are too small: Tiny pieces create many intersecting seams, which can make a hoodie heavy and stiff. Choose manageable patch sizes, particularly around the shoulders, underarms, and sleeves.
Forgetting fabric direction: Some knits stretch more in one direction than another. Cutting the panels incorrectly can affect the fit and cause the garment to twist. Pay attention to the pattern markings and the fabric's natural stretch.
Skipping seam pressing: Unpressed seams can bunch together and make the finished garment look uneven. Press each seam as you work, using a temperature suitable for the material.
Overlooking fabric thickness: A lightweight T-shirt patch attached to thick fleece may sag or distort unless it is properly supported. Test the combination and use a suitable backing when necessary.
Attaching the hood incorrectly: An uneven neckline can affect both the appearance and comfort of the hoodie. Mark the center points, distribute the fabric carefully, and check the alignment before sewing the entire seam.
Neglecting seam security: Cutting thread ends too short or leaving weak seams can cause problems after repeated wear. Secure stitch ends properly and reinforce areas that experience extra stress.
Rushing the final fitting: Even a well-planned patchwork design can be uncomfortable if the sleeves, body, or neckline are poorly fitted. Check the garment's shape before completing the final hems.
Final Thoughts
Making a DIY patchwork hoodie is an enjoyable way to give old clothing a new purpose while creating something that suits your style. You can experiment with contrasting colors, reuse favorite graphics, and transform fabric scraps into a garment that would be difficult to find in a store.
For the best results, begin with materials that have similar weight and stretch, map out your design before cutting, and assemble the garment one section at a time. Pressing seams as you work and checking the fit before adding the finishing details will also help improve the final result.
Your first attempt does not need to be flawless. Start with a simple color scheme and larger fabric pieces, then experiment with more intricate patterns as your sewing skills improve. With practice, you can develop your own approach to patchwork and make future hoodies with greater confidence.
FAQs
Can I make a patchwork hoodie without a sewing machine?
Yes, you can sew a patchwork hoodie by hand, although the process will generally take longer. Hand stitching can work for decorative patches or smaller projects, but constructing an entire hoodie requires strong, flexible seams that can withstand movement.
If you sew by hand, use a suitable needle and durable thread, keep your stitches consistent, and secure seams carefully. Stretch fabrics need particular attention because rigid hand stitching may break or restrict movement.
A sewing machine with a zigzag or stretch stitch is usually the more practical option for assembling a wearable hoodie. If you are a beginner without a machine, consider adding patches to an existing hoodie instead of building the whole garment from scratch.
Can I mix different fabric types in one hoodie?
Yes, combining different materials can create an interesting patchwork design, but compatibility matters more than appearance alone.
Try to use fabrics with similar thickness, weight, and stretch so the finished garment hangs evenly. Cotton jersey, sweatshirt fleece, and compatible knit fabrics are often easier to combine than a mixture of heavy fleece and thin, rigid woven cloth.
If you want to use a particularly lightweight fabric, stabilize it with a suitable backing or lining. Test a small sample first to see how the fabrics behave when stitched and stretched.
You should also consider how the finished hoodie will be washed. Materials with very different shrinkage rates or care requirements may distort the garment over time. Prewashing compatible fabrics and following appropriate care instructions can help preserve its shape and appearance.