20 Sewing Easy DIY Ideas Anyone Can Do at Home in 2026
Learning to sew opens up countless possibilities for creating useful accessories, personalized gifts, decorative items, and even clothing. You don't need years of experience or an expensive collection of equipment to get started. With a few basic supplies and some patience, you can turn leftover fabric into something beautiful and practical.
The best way to develop sewing skills is to start with manageable projects and gradually experiment with new techniques. Simple fabric pouches, soft toys, tote bags, and decorative ornaments are excellent choices because they let you practice cutting, stitching, shaping, and finishing without feeling overwhelmed.
Whether you have a sewing machine or prefer working by hand, these DIY sewing projects offer plenty of inspiration for your next creative afternoon. Choose a design that matches your current skill level, gather your materials, and enjoy making something entirely your own.
What do you really need to start sewing?
You can begin sewing with a surprisingly small collection of supplies. A basic sewing machine is helpful for larger projects, but hand sewing is perfectly suitable for felt ornaments, small decorations, and simple fabric accessories.
Start with fabric scissors, measuring tape, pins or sewing clips, needles, coordinating thread, and a seam ripper for correcting mistakes. A washable fabric marker or tailor's chalk will help you mark cutting lines accurately. An iron is also useful for flattening seams and giving finished projects a cleaner appearance.
For fabric, woven cotton is an excellent beginner-friendly option because it generally stays in place while you cut and stitch. Felt is another good choice for small crafts since it doesn't fray like ordinary woven material.
Avoid buying every sewing gadget immediately. Learn the basics with the supplies you already have, then invest in additional equipment as your projects become more ambitious.
1. Patchwork Bucket Hat
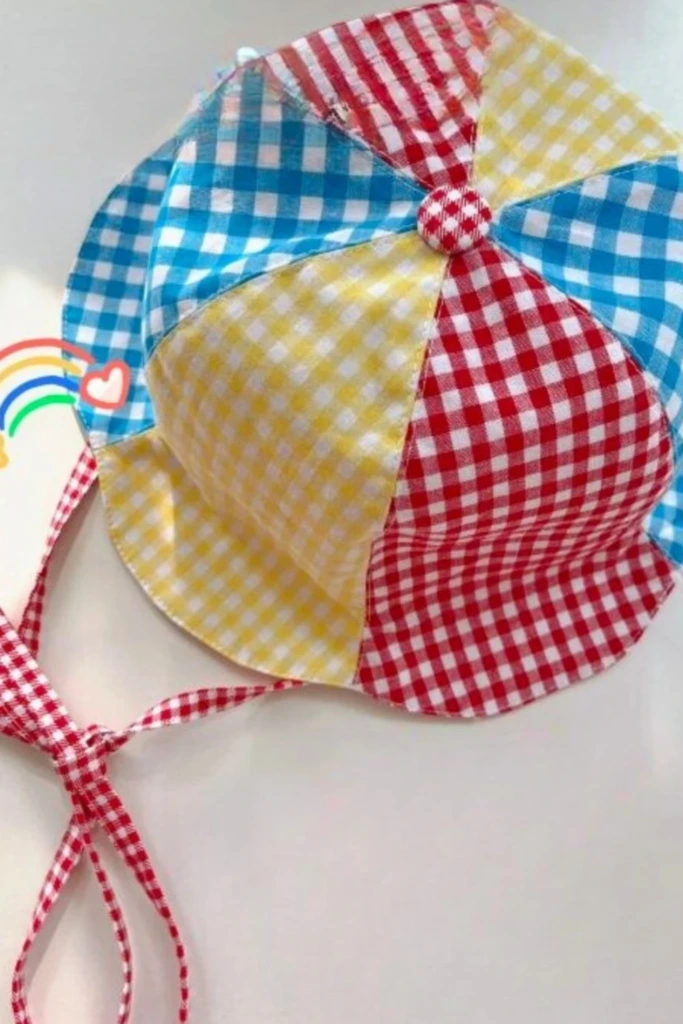
A patchwork bucket hat is a fun way to combine several coordinating fabrics into a wearable accessory. Choose floral prints, checks, stripes, or contrasting solid colors to create a design that reflects your personal style.
Begin by selecting a suitable bucket-hat pattern and cutting the crown panels, brim, and other required pieces. Sew the patchwork sections together before assembling the hat. Lightweight cotton works well, while interfacing can provide additional structure when needed.
For a more comfortable finish, add a lining and carefully press the seams as you work. You can also incorporate matching fabric ties or decorative stitching. Since hats require accurate shaping, this project is best attempted after practicing straight seams and following a simple pattern.
2. Fabric Flower Charm
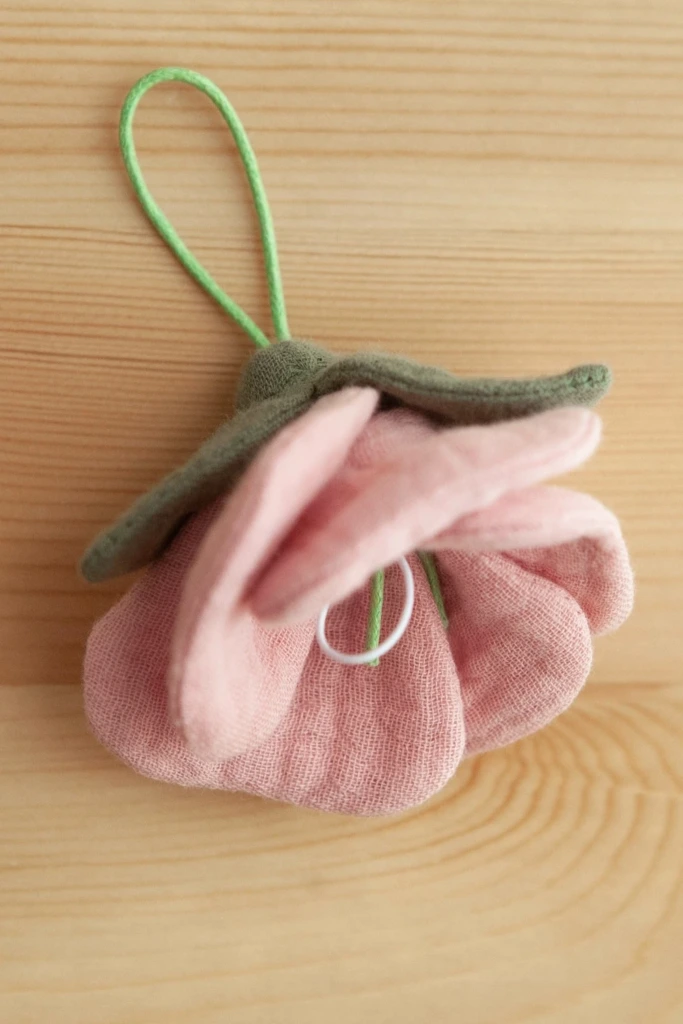
Fabric flower charms are small, customizable accessories that can brighten up handbags, backpacks, keyrings, and gift packages. They are also a useful way to make something attractive from leftover fabric.
Cut several matching or contrasting petal shapes from cotton, linen, or another manageable material. Arrange the petals in overlapping layers and secure them with stitches at the center. Add a small fabric circle, button, or embroidered detail to conceal the stitching.
Finish your flower with felt leaves and a securely attached ribbon loop or keyring. You can make miniature blossoms for accessories or larger flowers for decorative arrangements. Experimenting with different petal shapes will give each creation its own character.
3. Quilted Vest DIY
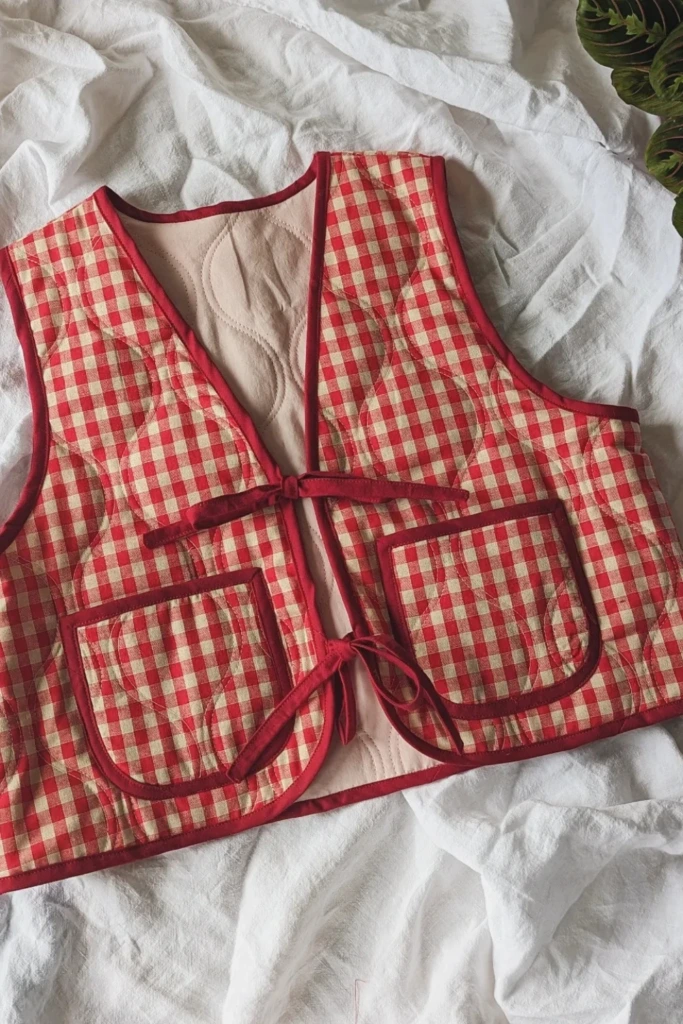
A handmade quilted vest is a rewarding project for anyone ready to move beyond basic sewing accessories. It offers an opportunity to practice layering fabric, controlling seam allowances, and finishing garment edges.
Choose a vest pattern that matches your measurements and select cotton fabric for the outer layer. Add suitable batting between the outer fabric and lining, then quilt the layers according to your chosen design. Once the panels are prepared, assemble the vest and finish the edges with bias binding.
Front ties provide a simple closure that avoids the need to install a zipper. Patch pockets can make the garment more practical, while contrasting thread or patterned fabric adds visual interest.
Because clothing requires a comfortable fit, test the pattern on inexpensive fabric before cutting your final materials. Follow the pattern instructions for lining, seam allowances, and garment construction.
4. Patchwork Butterfly Block
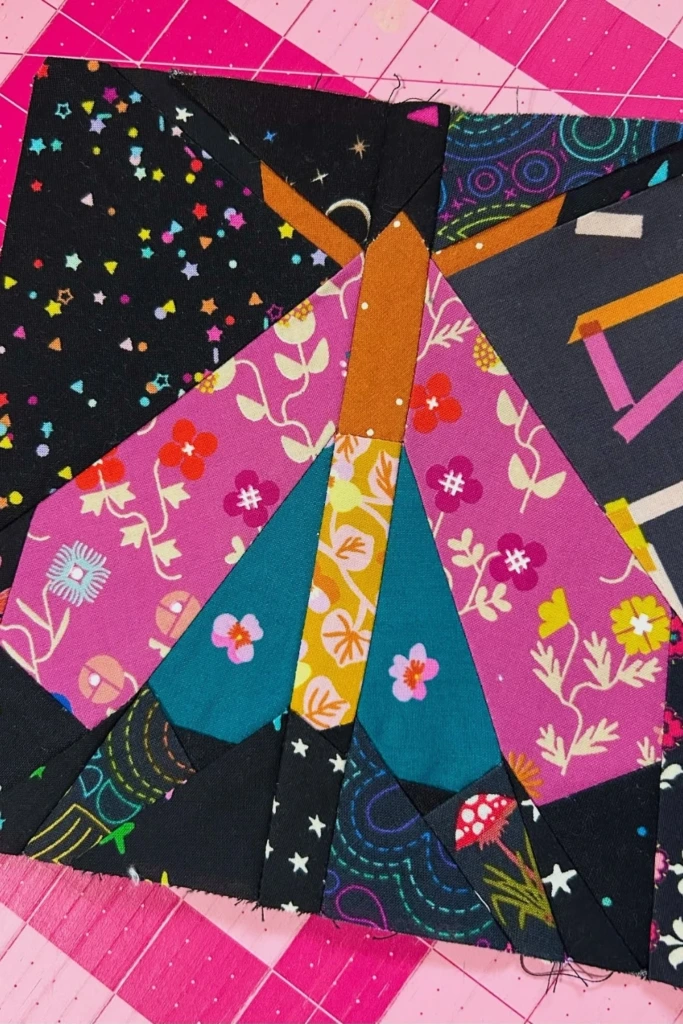
A patchwork butterfly block is a colorful project for quilters and fabric enthusiasts who enjoy geometric designs. Its symmetrical wings make it suitable for quilts, decorative cushions, wall hangings, and personalized bags.
Select several fabrics with contrasting colors or patterns. Cut the pieces according to a butterfly template and arrange them into matching wing sections before stitching everything together. If you want precise angles and smaller shapes, foundation paper piecing can help keep the design organized.
Use a darker background to make bright wings stand out, or choose soft pastels for a gentler appearance. Press each seam carefully and check that the wing sections align before joining the completed block.
You can make a single butterfly as a decorative feature or sew several blocks together to create a larger textile design.
5. Pop Tab Statement Bag
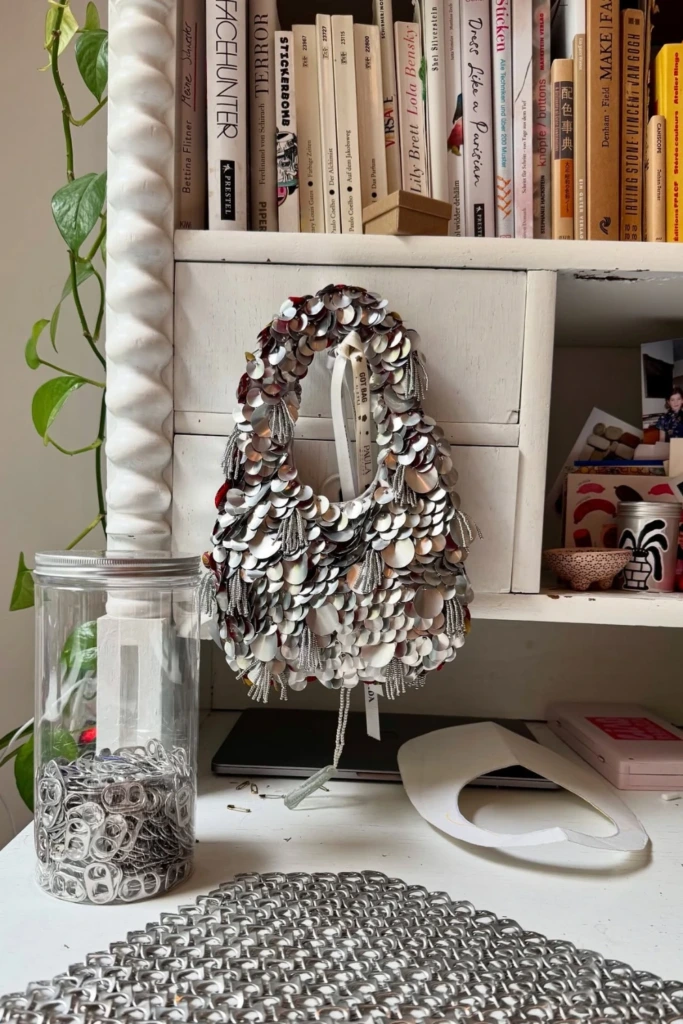
A bag made with recycled beverage-can tabs is an unusual project for crafters who enjoy experimenting with unconventional materials. The metal pieces create a reflective, textured surface that looks different from an ordinary fabric handbag.
Collect clean, undamaged tabs and arrange them into small sections using a suitable connecting technique, such as crochet with strong thread or cord. Join the sections to form the bag's front, back, and side panels, then attach them according to your chosen design.
A fabric lining can help protect the contents and make the bag more comfortable to use. You may also add a fabric handle, closure, or decorative trim.
Inspect every tab carefully before working with it. Avoid pieces with sharp edges, and make sure the finished construction is secure enough for its intended use. This project involves more preparation than basic fabric sewing, so it is best for crafters who enjoy detailed, time-consuming work.
6. Embroidered Butterfly Pillow Toy
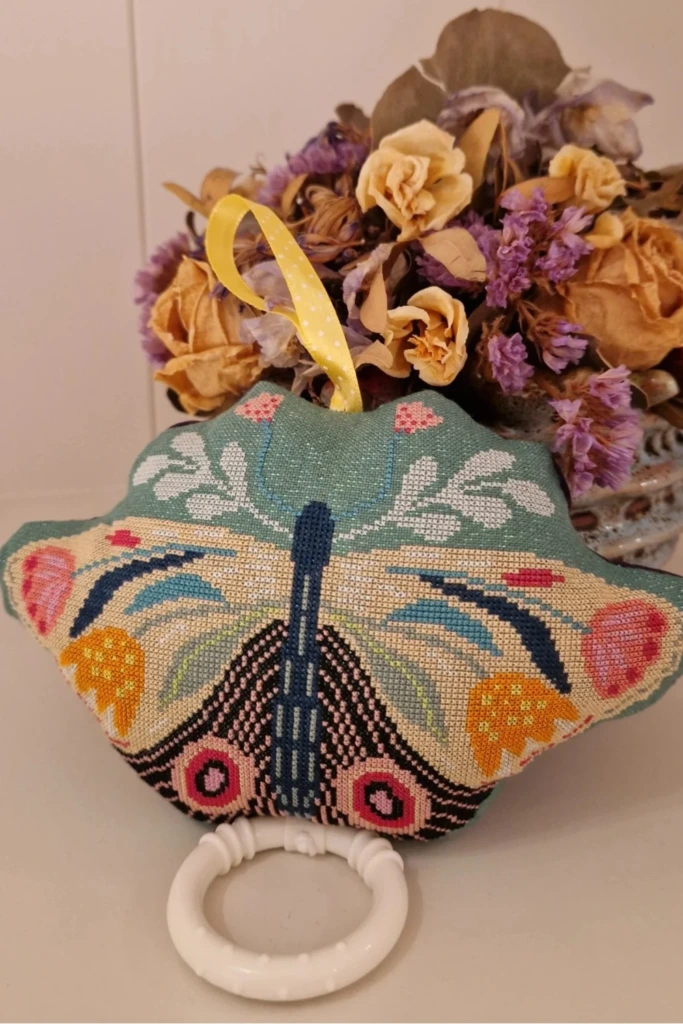
An embroidered butterfly pillow toy combines soft fabric construction with decorative needlework. It can become a colorful room accessory, a handmade keepsake, or part of a collection of fabric creatures.
Draw a butterfly outline on paper and use it to cut two matching fabric pieces. Before joining them, embroider the wings with colorful patterns, small flowers, or simple geometric shapes. Stitch the two pieces together, leaving a small opening for stuffing, then close the opening neatly.
Lightweight cotton is suitable for decorative pillows, while soft felt can work well for smaller designs. A ribbon loop can be added for display if the toy is intended as decoration.
If you are making this item for a baby or young child, avoid loose ribbons, detachable parts, beads, and other potential choking or entanglement hazards. Decorative versions should be kept out of reach during sleep and unsupervised play.
7. Knot-Handle Lunch Bag
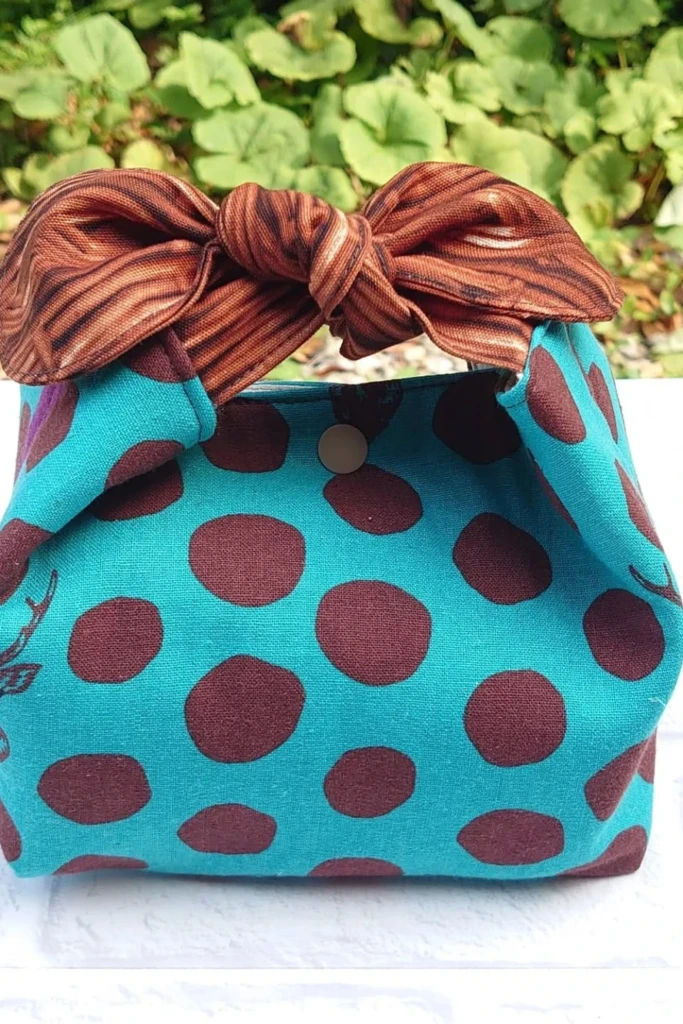
A knot-handle lunch bag is a practical sewing project that combines everyday usefulness with a simple, distinctive design. Its integrated handles reduce the need for additional hardware and create an attractive finish.
Choose sturdy cotton or another washable fabric, then cut the bag panels according to your desired dimensions. Sew the sides and bottom, shape the corners if you prefer a boxier base, and add a lining for extra durability. Extend the upper fabric into long handles that can be tied into a secure knot.
For a more functional lunch bag, use an appropriately washable, food-safe lining or a separate food container to protect the fabric from spills. Reinforce the handle attachment areas so the bag can carry its intended load.
You can customize the exterior with printed cotton, contrasting panels, embroidered initials, or small fabric pockets. Before making a full-size version, test your measurements with paper to check that the finished bag will fit your usual lunch containers.
8. Felt Dinosaur Plush
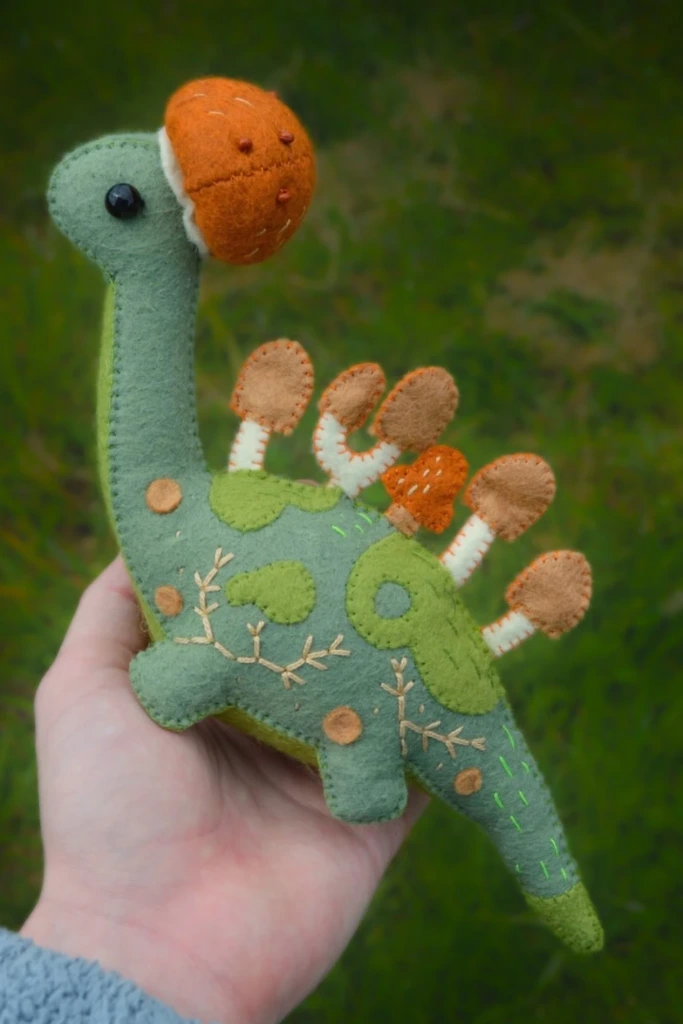
A felt dinosaur plush is a delightful project for anyone who enjoys making soft toys. You can design a friendly little dinosaur with rounded features or experiment with spikes, spots, and decorative details.
Sketch a simple dinosaur silhouette and cut two matching body pieces from felt. Prepare any contrasting features, such as belly panels, back spikes, or small arms, before joining the main pieces. Use a blanket stitch around the edges, leaving an opening for soft stuffing.
Add the filling gradually to avoid lumps, then finish the opening with secure stitches. Embroidered eyes and facial details give the dinosaur personality without requiring extra accessories.
You can also create a prehistoric landscape with stitched leaves, flowers, or small decorative mushrooms. Keep the design simple for a first attempt, then introduce more intricate details as your hand-sewing skills improve.
9. Strawberry Coin Purse
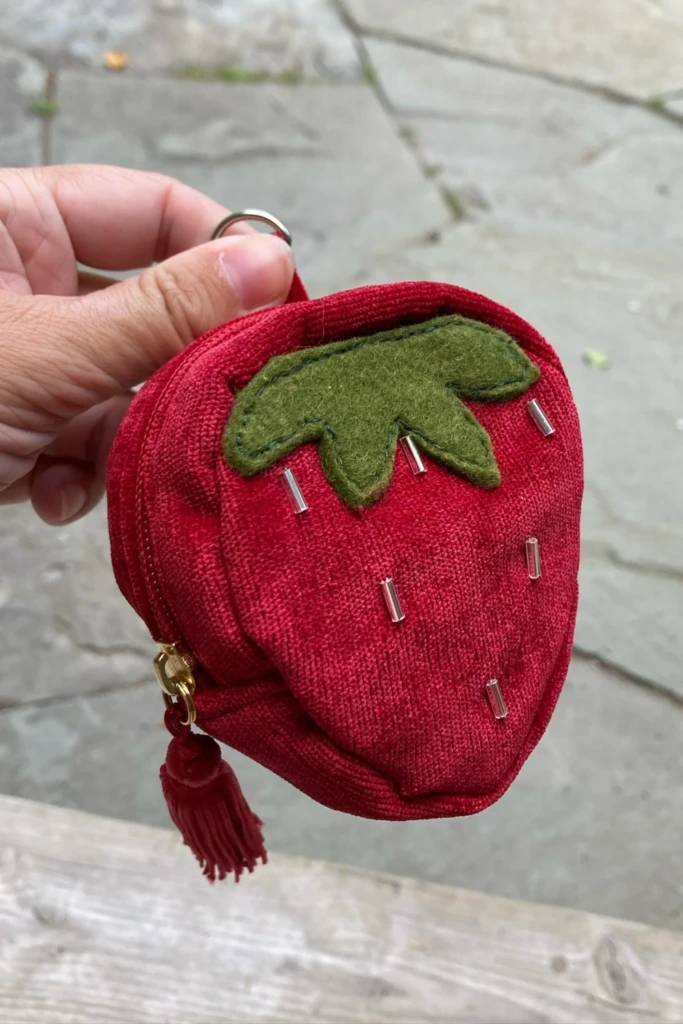
A strawberry-shaped coin purse is a charming way to practice sewing small accessories. Its compact size makes it useful for holding coins, folded notes, earbuds, or other tiny everyday items.
Cut two strawberry-shaped pieces from red fabric and prepare a green felt or cotton piece for the leafy top. Attach the leaves to the outer fabric, then install a small zipper along the opening before sewing the remaining edges together.
If you prefer a more decorative finish, embroider tiny seeds onto the strawberry using contrasting thread. A fabric loop or keyring attachment can make the finished purse easier to carry.
Choose fabric that is easy to handle and reinforce the zipper ends with extra stitching. Since the pieces are small, accurate cutting and careful seam placement will make a noticeable difference to the finished shape.
10. Drawstring Portrait Bag
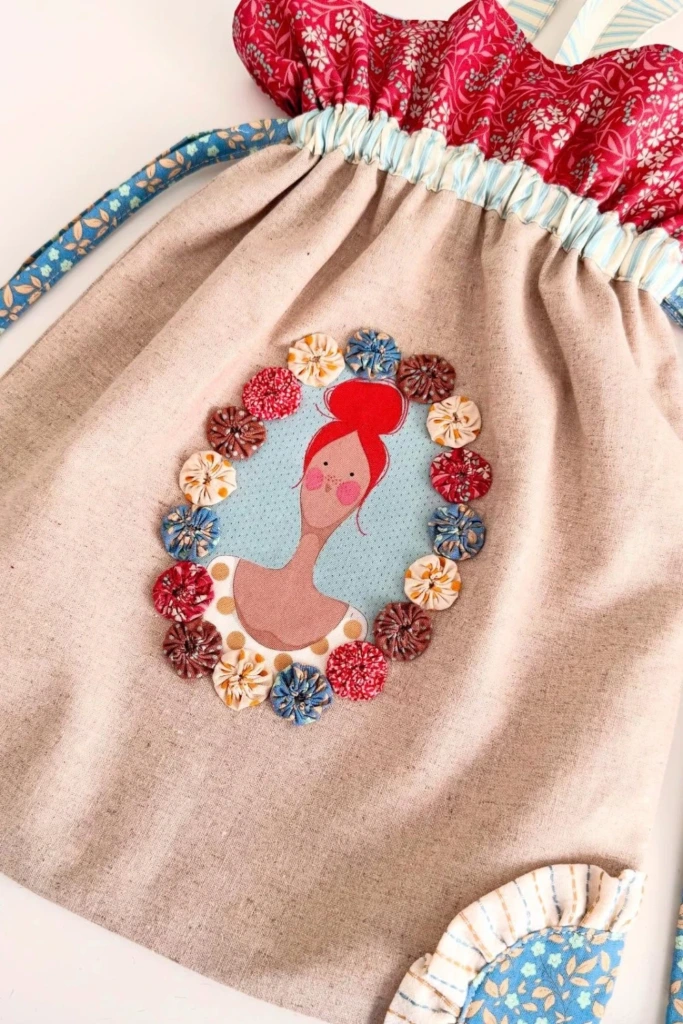
A drawstring portrait bag combines a simple fabric pouch with a personalized decorative panel. It is a creative choice for storing craft supplies, small accessories, or lightweight personal items.
Begin with two fabric rectangles and decide how much space you need for the finished bag. Prepare a portrait design using fabric appliqué, an embroidered illustration, or a printed textile patch. Attach the artwork to the front panel before assembling the bag.
For additional texture, surround the portrait with small fabric circles, rosettes, or decorative stitching. Finish the top with a folded casing through which you can thread a drawstring.
Use a sturdy cord or ribbon that slides smoothly through the casing, and reinforce the opening where the cord exits. You can personalize the design with a family illustration, a favorite animal, or a stylized character to create a thoughtful handmade gift.
11. Patchwork Zipper Pouches
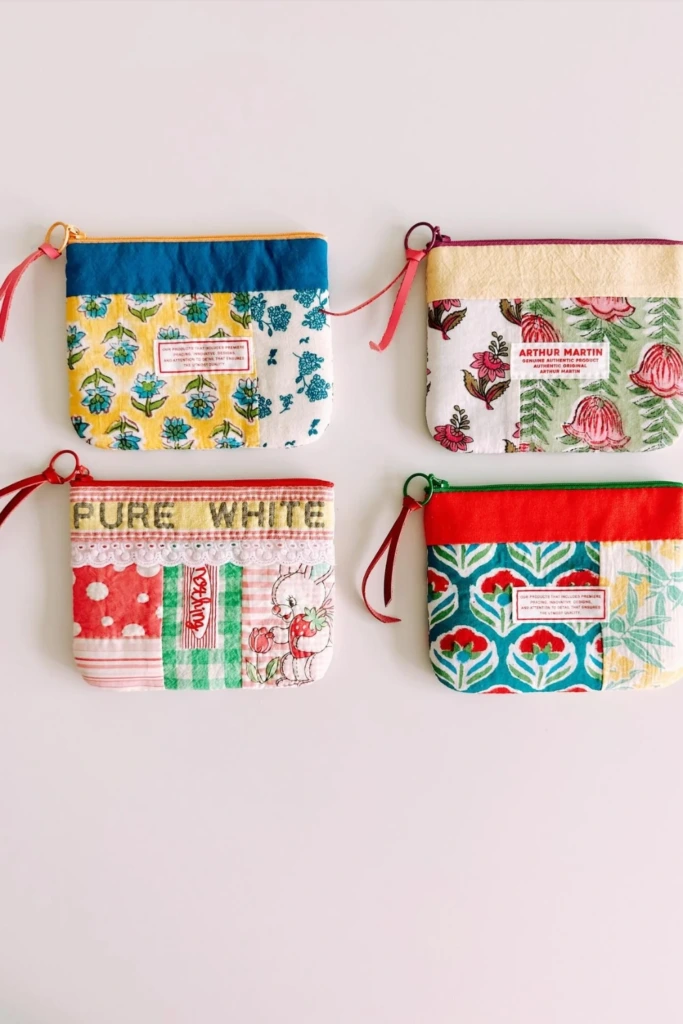
Patchwork zipper pouches are excellent for practicing precision sewing while making something useful. They can hold makeup, stationery, sewing supplies, charging cables, or small travel essentials.
Gather fabric scraps in complementary colors and arrange them into squares, rectangles, or narrow strips. Sew the pieces together to create the outer panels, then trim the edges so the two sides match. Add interfacing if your chosen fabric needs more structure.
Attach the zipper before joining the outer panels and lining, following a construction method suitable for your pattern. Take extra care around the zipper ends to prevent bulky corners and uneven seams.
For a personal finish, add a ribbon zipper pull, decorative label, contrast lining, or embroidered initials. Making several pouches in different sizes is also a practical way to use up leftover fabric.
12. Applique Pouch with Quote
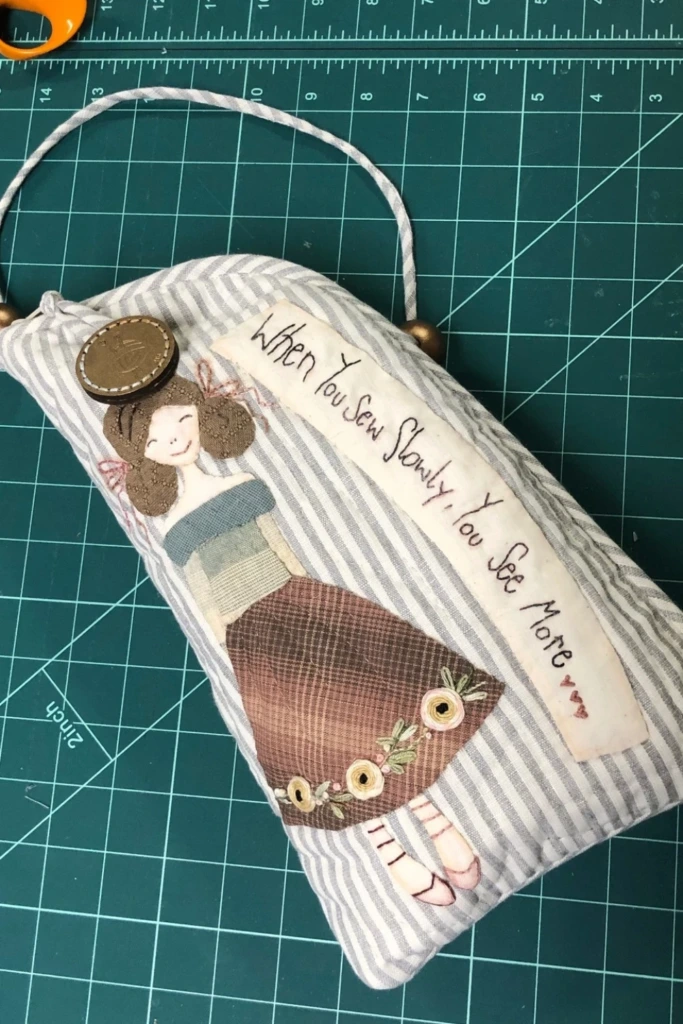
An appliqué pouch allows you to combine fabric decoration with a useful storage accessory. It is particularly appealing if you enjoy lettering, illustrations, or personalized gifts.
Choose a sturdy base fabric and cut the pouch panels to your preferred size. Prepare a decorative motif from contrasting fabric, then attach it to the front panel using an appropriate appliqué technique. You can create a flower, animal, abstract shape, or other simple design.
Add a short quote using embroidery, fabric lettering, or a small stitched label. Keep the lettering large enough to remain readable and avoid placing delicate decorative elements where they may catch during everyday use.
Once the front panel is complete, assemble the pouch and add a zipper or another suitable closure. A coordinating lining will help conceal interior seams and give the finished piece a polished appearance.
13. Plush Whale Family
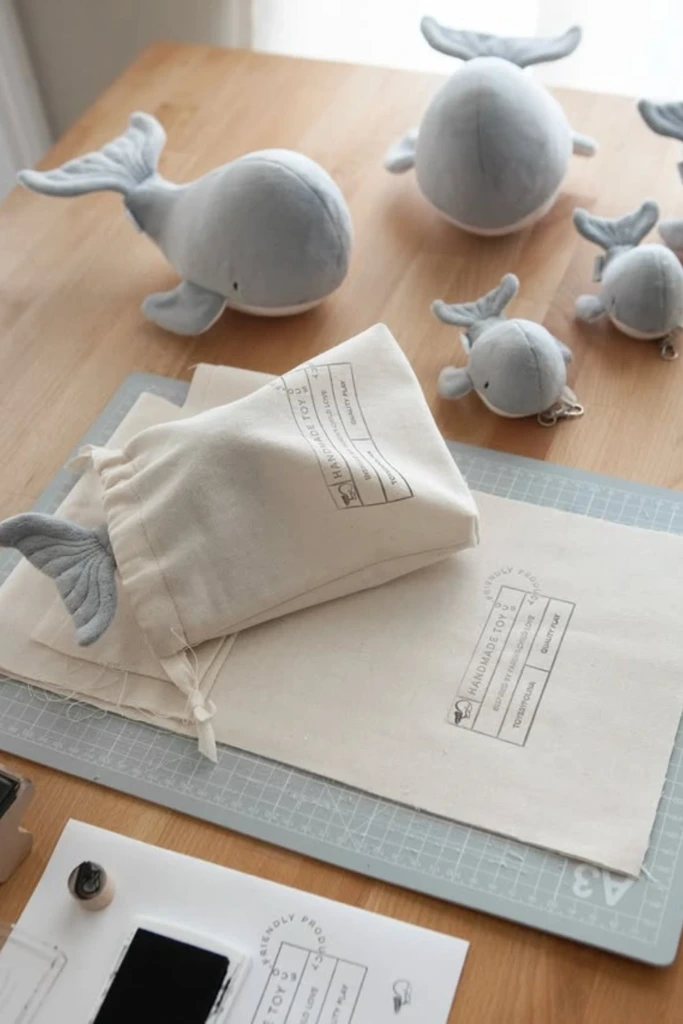
A family of fabric whales is a lovely project for creating coordinated soft toys in different sizes. Their curved bodies and simple silhouettes make them adaptable to many colors and decorative styles.
Draw or print a whale pattern with a rounded body and a small tail. Cut the required pieces from fleece, felt, or another soft fabric, allowing sufficient seam allowance. Attach any contrasting belly panels or fins before sewing the main body together.
Leave an opening for stuffing and distribute the filling evenly so the whale maintains a smooth shape. Close the opening securely and add facial details with embroidery thread.
Create a collection using different fabrics and sizes, or personalize each whale with a unique color combination. If the toys are intended for young children, embroidered facial features are generally preferable to detachable plastic eyes, which may present a choking hazard.
14. Fabric Storage Basket
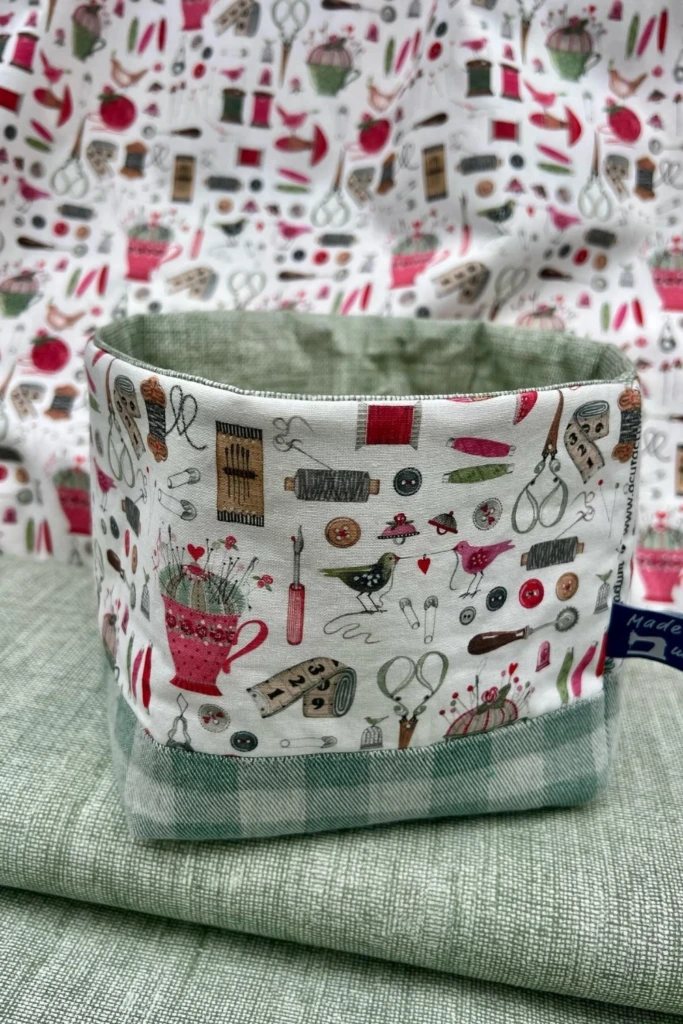
A fabric storage basket offers an attractive solution for organizing sewing supplies, stationery, toiletries, or small household items. You can coordinate it with your room décor or use contrasting fabric scraps for a more playful design.
Cut matching outer and lining panels according to the basket dimensions you want. Interfacing or suitable stabilizer can help the basket stand upright, especially when working with lightweight cotton.
Sew the panels together and create boxed corners to form a flat base. Assemble the lining, place it inside the outer basket, and finish the upper edge with a neat seam. Folding the top down slightly can reveal a contrasting lining and create a decorative cuff.
For a more substantial basket, use a firmer stabilizer and reinforce the bottom. You can also add small fabric handles to make the basket easier to move between rooms.
15. Felt Frog Brooch
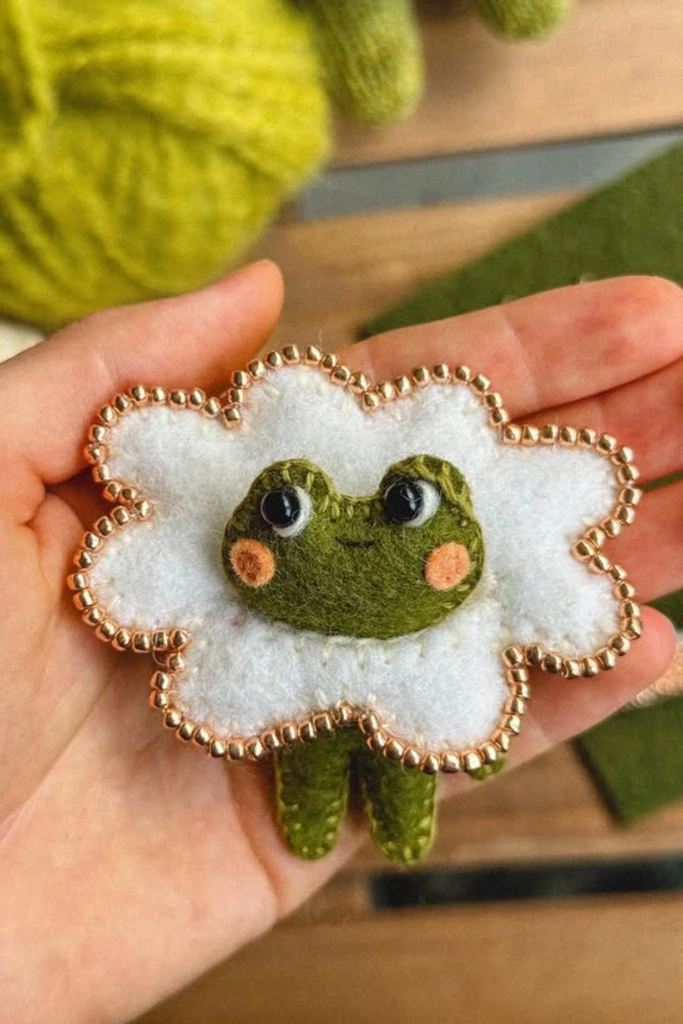
A felt frog brooch is a quick craft that lets you experiment with small shapes, hand stitching, and decorative details. It can brighten up a jacket, backpack, fabric tote, or handmade gift.
Cut the frog's head and body from green felt using a simple template. Add rounded eyes and stitch the main pieces together with embroidery thread. Use additional felt shapes or embroidery to create a mouth, cheeks, or tiny decorative markings.
For extra character, place the frog against a contrasting felt flower or leaf. Small embroidered accents can provide detail without making the design too complicated.
Attach a suitable brooch pin to the back, securing it firmly through a supporting felt layer. Keep the pin closed when the brooch is not being worn, and store it away from small children.
16. Baby Overall Dress
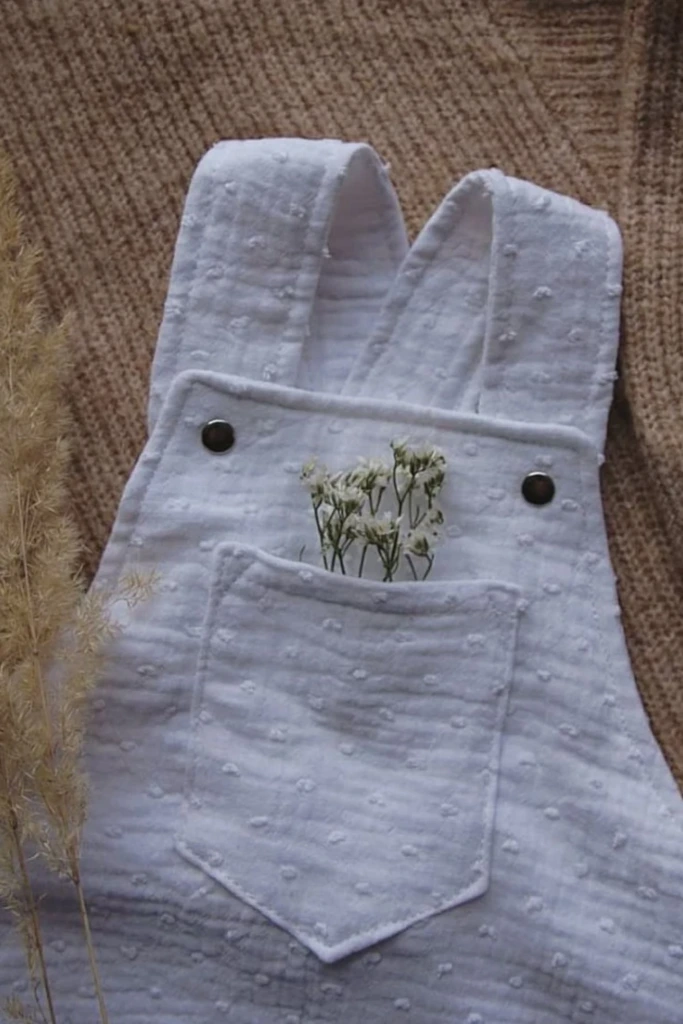
A baby overall dress is a rewarding garment project for sewists who want to create something practical and personalized. Soft cotton, double gauze, and other breathable fabrics are useful options, provided they suit the pattern and intended season.
Start with a pattern designed for the baby's size and carefully check the measurements before cutting the fabric. Assemble the main body, finish the seams, and add a front pocket if desired. Shoulder straps can be secured with appropriate closures or sewn in place according to the pattern instructions.
Choose soft materials that are comfortable against delicate skin, and avoid rough seams or irritating decorative elements. Wash the fabric before sewing to account for possible shrinkage.
Because this is a garment for a baby, pay close attention to fit and safe construction. Any fasteners must be securely attached, and small decorative pieces that could detach should be avoided. Follow the pattern's guidance for openings, movement, and easy dressing.
17. Simple Tote Bag
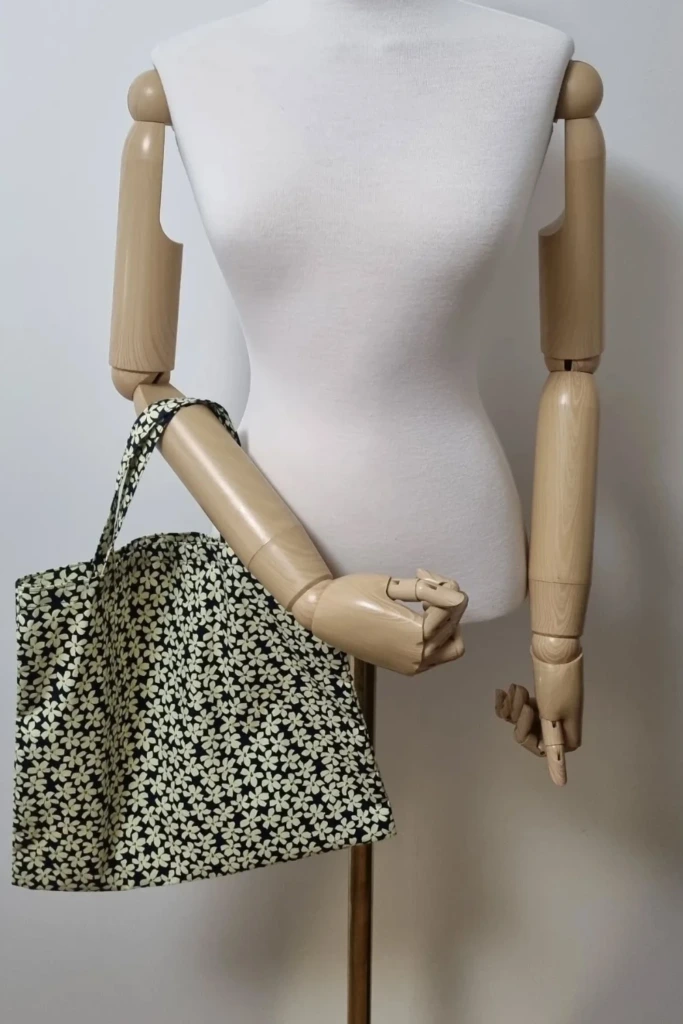
A basic tote bag is one of the most versatile projects for anyone learning to sew. It requires relatively few materials and can be adapted for grocery shopping, library visits, craft supplies, or everyday errands.
Cut two equal rectangles from canvas, denim, or sturdy cotton. Place the fabric pieces together with their right sides facing inward and stitch the side seams and bottom. Finish the raw edges to reduce fraying, then turn the bag right side out.
Prepare two matching fabric straps and attach them evenly to the upper edge. Reinforce the strap attachment points with additional stitching because these areas carry much of the bag's weight.
You can leave the tote unlined for a quick project or add a lining and an interior pocket for extra organization. Decorate the finished bag with appliqué, fabric paint, embroidery, or contrasting handles.
For a first attempt, use a simple rectangular shape and focus on keeping the seams straight. Once you are comfortable with the construction, experiment with boxed corners or a wider base.
18. Fabric Butterfly Accent
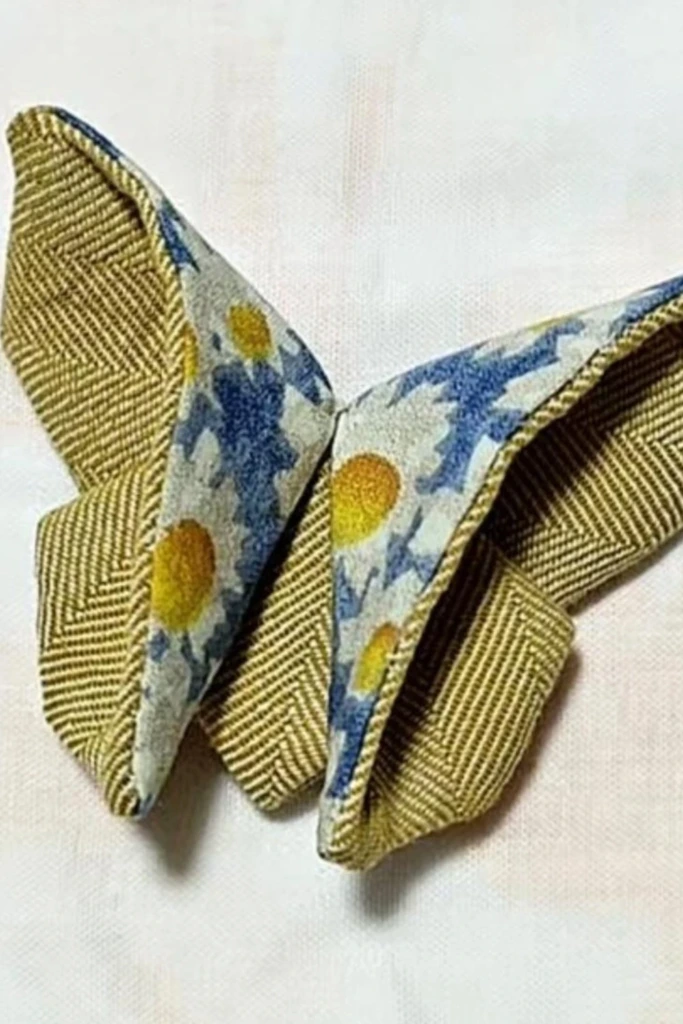
Fabric butterflies make cheerful decorations for clothing, handbags, hair accessories, and home décor. Their small size makes them suitable for using leftover fabric from larger sewing projects.
Choose two coordinating fabrics and cut matching butterfly shapes using a paper template. Place the pieces together and stitch around the edges, leaving a small opening if you want to turn the shape for a cleaner finish. Close the opening and fold the wings into position.
Use a few hand stitches at the center to create the butterfly's body and hold the wings in place. Embroidery thread, small fabric strips, or a contrasting center panel can provide additional detail.
For clothing or bags, attach the finished butterfly securely and choose materials appropriate for the item being decorated. Multiple butterflies in different prints can create an attractive pattern on a cushion, tote, or wall hanging.
19. Fabric Strawberry Plushies
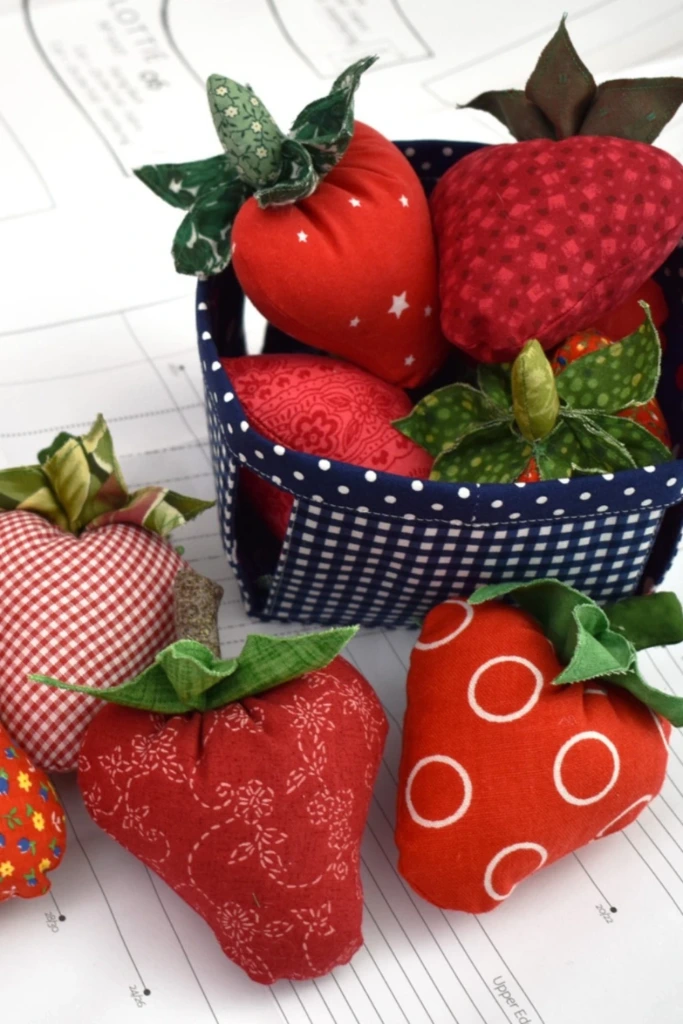
Fabric strawberry plushies are a delightful way to transform colorful scraps into soft decorative objects. Their simple shapes make them suitable for practicing curved seams, stuffing, and small finishing techniques.
Cut several strawberry-shaped fabric sections, following a pattern that creates a rounded base and tapered top. Sew the sections together, leaving an opening for the filling. Turn the shape right side out if your construction method requires it, then add stuffing until the strawberry looks full without becoming overly firm.
Close the opening and attach green felt leaves or a fabric stem at the top. Embroidered seeds can give the strawberry a more realistic appearance, while polka-dot fabric creates a whimsical alternative.
Try different sizes to make a coordinated collection for a shelf, sewing room, or decorative bowl. If you plan to use the strawberries as children's toys, choose secure stitching and avoid small detachable embellishments.
20. Felt Strawberry Dragon
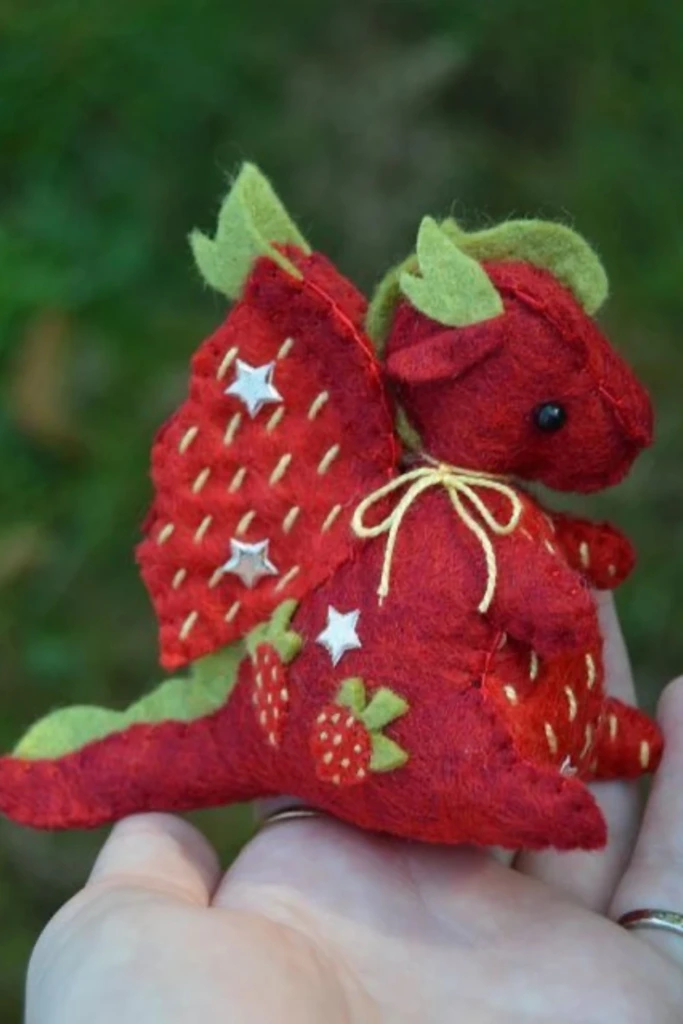
A felt strawberry dragon brings together the charm of a fantasy creature and the bright colors of a fruit-inspired design. It is a good choice for crafters who enjoy inventing unusual characters rather than following traditional toy patterns.
Sketch the dragon's body, wings, tail, and facial features before cutting the felt. Use red or pink for the main body, with green accents for leafy horns, scales, or decorative spikes. Prepare the smaller components first so they can be securely attached before assembling the main shape.
Stitch the body sections together, add stuffing where appropriate, and finish the seams neatly. Embroidered strawberry seeds, contrasting wing details, and a stitched smile can help give the creature a distinctive personality.
You can create a seated dragon, a miniature plush ornament, or a larger soft toy by adjusting the pattern. Begin with a simplified silhouette if you are new to felt construction, then add more intricate details as your confidence grows.
What fabric should I start sewing with?
Woven cotton, particularly quilting cotton, is an excellent starting material for most beginners. It is generally easy to cut, holds its shape well, and does not stretch significantly during ordinary sewing.
Choose a medium-weight cotton with a clear weave and a print you enjoy working with. It is suitable for tote bags, simple pouches, fabric baskets, patchwork blocks, and many decorative accessories.
Felt is another beginner-friendly option for small crafts because its edges usually do not unravel. For your first projects, however, it is sensible to postpone slippery satin, delicate chiffon, and highly stretchy knits. These materials often require more control and specialized techniques.
Before using new fabric, wash and dry it according to its care instructions if the finished item will eventually need laundering. Press it flat, practice stitching on a small offcut, and check that your needle and thread work well with the material.
How do I stop my sewing machine from bunching thread?
Thread bunching beneath the fabric is a common sewing-machine problem, and it often happens when the upper thread has not been correctly seated in the tension system. Incorrect bobbin placement, unsuitable tension settings, or a damaged needle can also contribute.
Try the following troubleshooting steps:
Raise the presser foot before rethreading. This allows the upper thread to settle correctly into the tension discs.
Remove and reinstall the bobbin. Follow your machine's manual to check that it is inserted in the correct direction and that the thread follows the intended path.
Check the needle. Replace a bent, blunt, or damaged needle with the correct type and size for your fabric.
Verify the threading path. Make sure the upper thread passes through every required guide and the take-up lever.
Hold the thread tails when beginning. Keep the upper-thread and bobbin-thread ends behind the presser foot for the first few stitches.
Test on scrap fabric. Sew a short line and inspect both sides before returning to your main project.
Avoid adjusting several settings at once. Correct threading and a suitable needle often resolve the problem without changing the tension. If the thread continues to tangle, consult the machine's manual and check for lint around the bobbin area.