29 DIY Crafts To Do In 2026
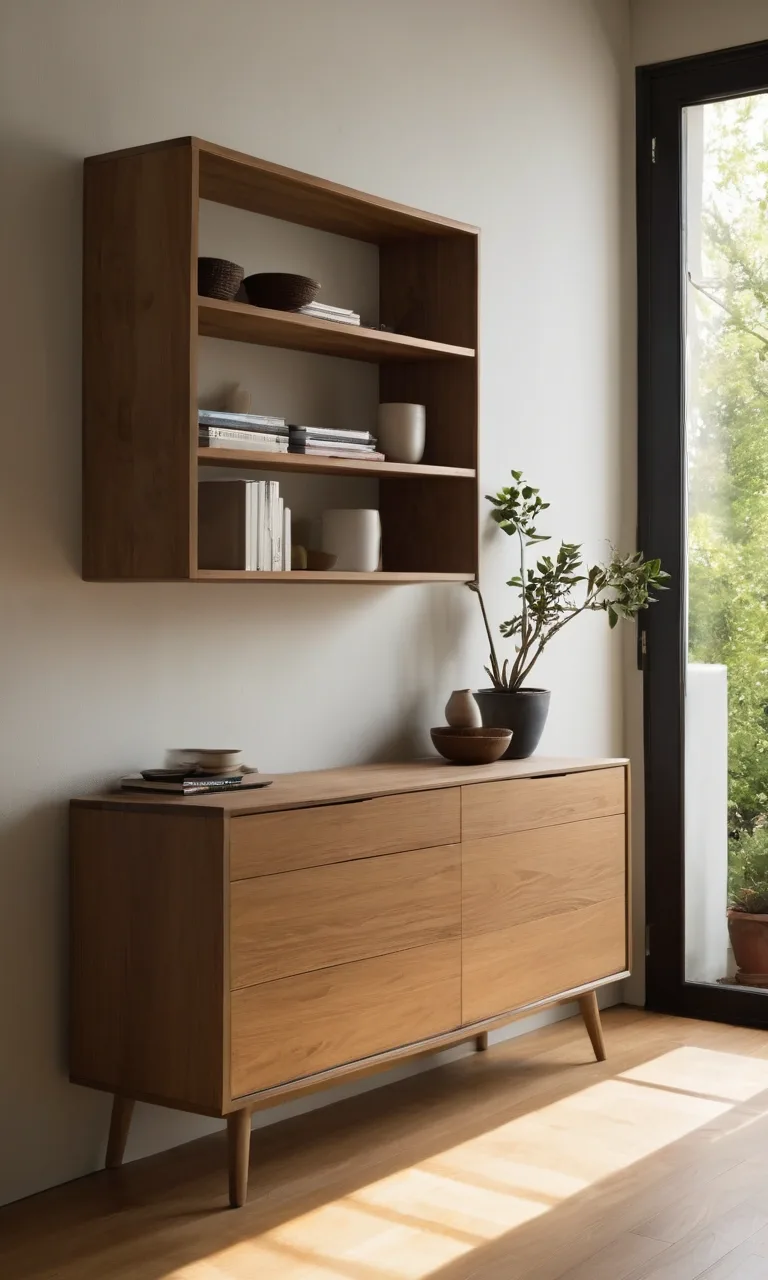
DIY crafts offer a simple way to explore your creativity, personalize your surroundings, and make useful items from everyday materials. Whether you enjoy painting, working with paper, sewing small accessories, or creating decorations, a hands-on project can turn a quiet afternoon into something enjoyable and productive.
You don't need expensive equipment or advanced artistic skills to get started. Many craft projects use supplies such as cardboard, glass jars, yarn, paper, fabric scraps, and natural materials that you may already have at home.
This collection of 28 DIY craft ideas includes projects for children, beginners, and experienced crafters. You'll find colorful decorations, handmade gifts, recycled creations, and seasonal activities that can be adapted to different tastes and skill levels.
1. Recycled Crafts
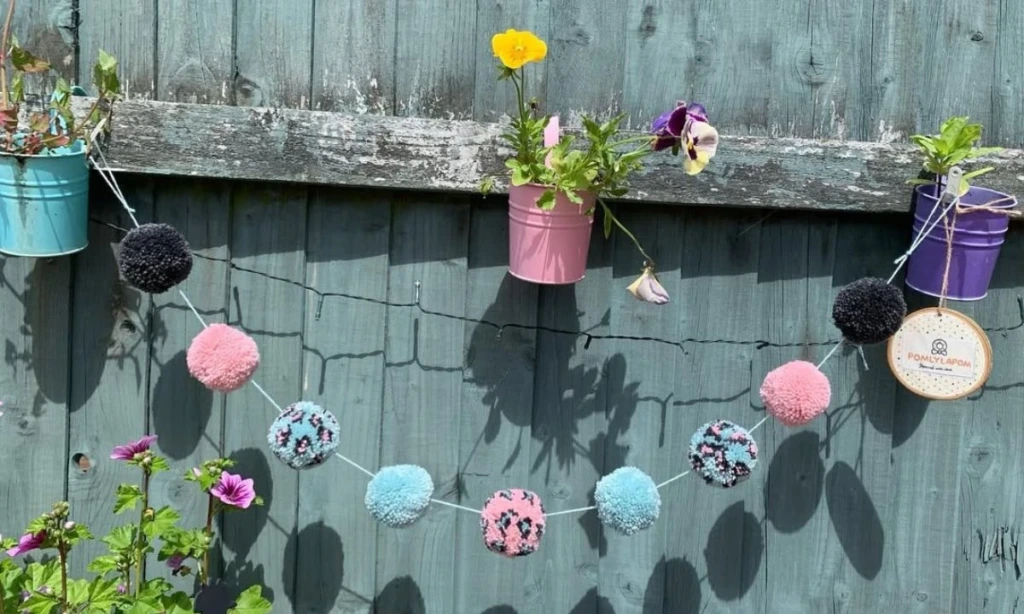
Recycled crafts give ordinary household items a fresh purpose instead of sending them straight to the trash. Empty containers, leftover fabric, cardboard packaging, and unused paper can become attractive decorations, organizers, toys, and thoughtful handmade presents.
These projects are also a practical way to make crafting more affordable. Before buying new supplies, look through your recycling bin and craft drawer for materials you can reuse. Clean containers thoroughly, remove sharp edges, and choose suitable adhesives and paints for the material you're working with.
Reusing everyday objects encourages resourcefulness while allowing you to experiment with colors, shapes, and textures. It's an especially rewarding activity for families who want to introduce children to creative problem-solving and waste reduction.
2. Watermelon Bowls
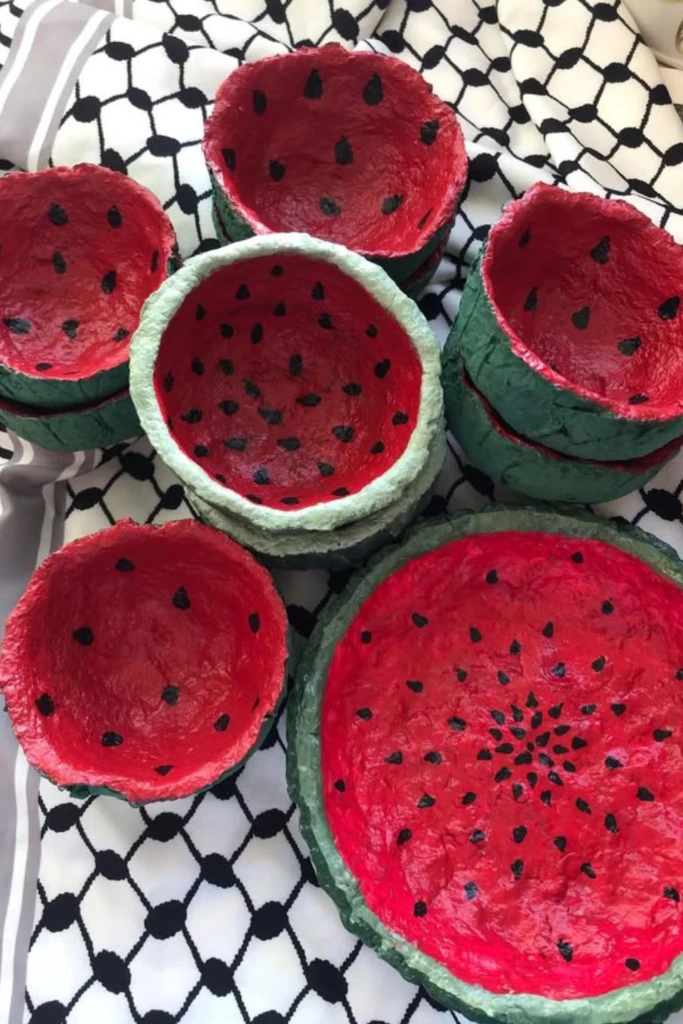
<PRIVATE_PERSON> watermelon-inspired bowls can add a cheerful summer touch to a desk, shelf, or party table. Start with a small bowl made from air-dry clay or paper-mâché, then decorate it with a red center, a green outer edge, and tiny black seed details.
Allow the base to dry completely before painting and adding decorative touches. For a more polished finish, apply a suitable craft sealer according to its instructions.
These colorful bowls work well as decorative catchalls for wrapped sweets, keys, or other lightweight objects. Unless the materials and finish are specifically rated for food contact, use them for decoration rather than serving snacks directly.
3. Painted Rocks
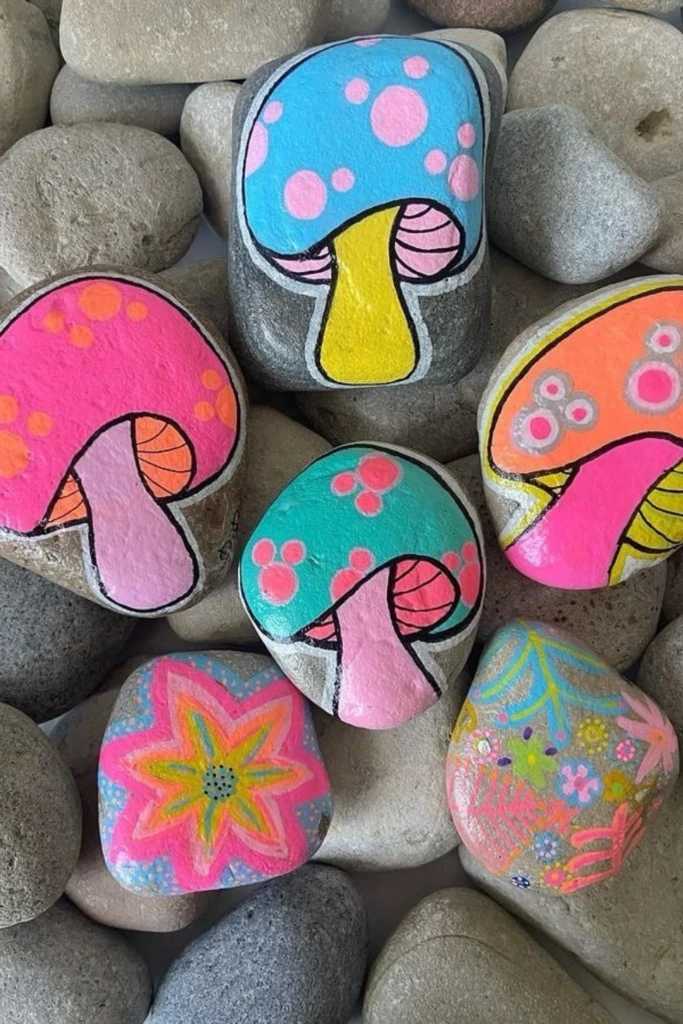
Smooth stones are excellent canvases for small, imaginative designs. Wash and dry a few rocks, then paint them with colorful mushroom patterns, cheerful faces, flowers, geometric shapes, or miniature landscapes.
For a whimsical look, create toadstools with brightly colored caps and contrasting dots. Acrylic paints are a practical choice for many rock-painting projects, while an appropriate outdoor sealer can help protect designs displayed in the garden.
Painted rocks can brighten a windowsill, decorate a plant pot, or become playful additions to a personal art collection. Choose stones with stable, smooth surfaces to make painting easier.
4. Snail Buddies
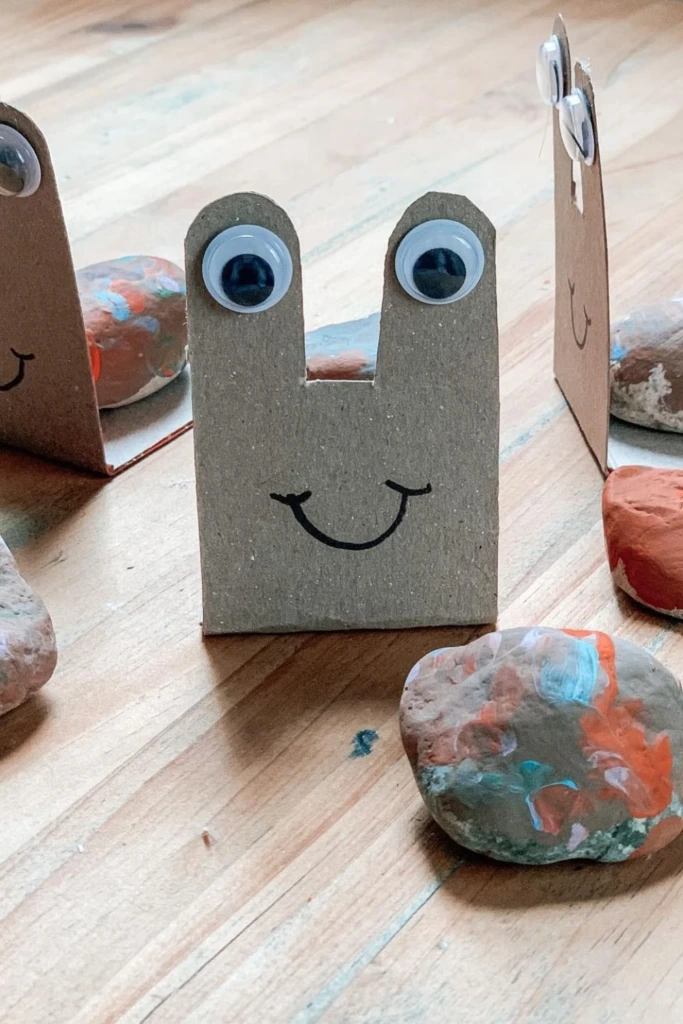
Make charming little snails using clean cardboard, small stones, paint, and craft eyes. Cut the cardboard into a simple snail-shaped body, decorate it with a friendly expression, and use a painted stone as the shell.
You can add spots, swirls, or stripes to give every snail a different personality. Children may enjoy creating a whole group of garden-inspired characters with different colors and facial expressions.
This project encourages imaginative play and introduces simple techniques such as cutting, painting, and assembling shapes. Adults should handle cutting tools, and small decorative pieces should be kept away from children who might swallow them.
5. Bottle Flowers
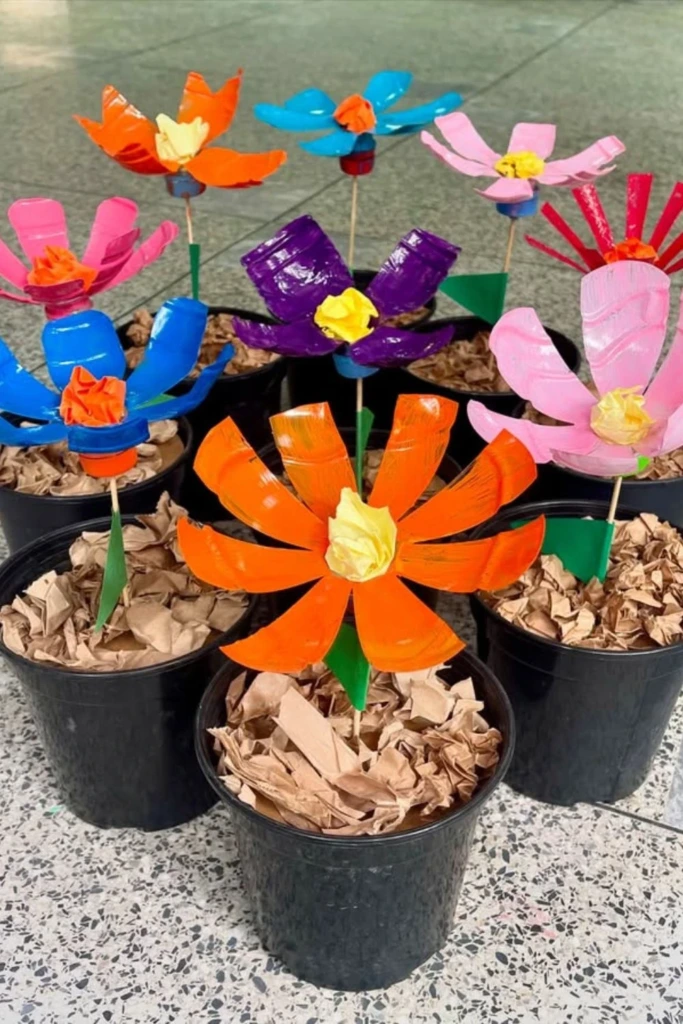
Turn empty plastic bottles into colorful decorative flowers instead of throwing them away. After cleaning the bottles, carefully cut the plastic into petal shapes and bend or arrange the pieces to create a flower.
Paint each flower in a different shade, then attach it to a suitable stem or wooden stick. A small pot filled with paper or another stable filler can hold the finished arrangement upright.
Bottle flowers are useful for brightening a porch, craft room, or sheltered outdoor corner. Since cut plastic can have sharp edges, an adult should handle the cutting and smooth or cover exposed edges before the flowers are used as decorations.
6. Scrunchie Jar
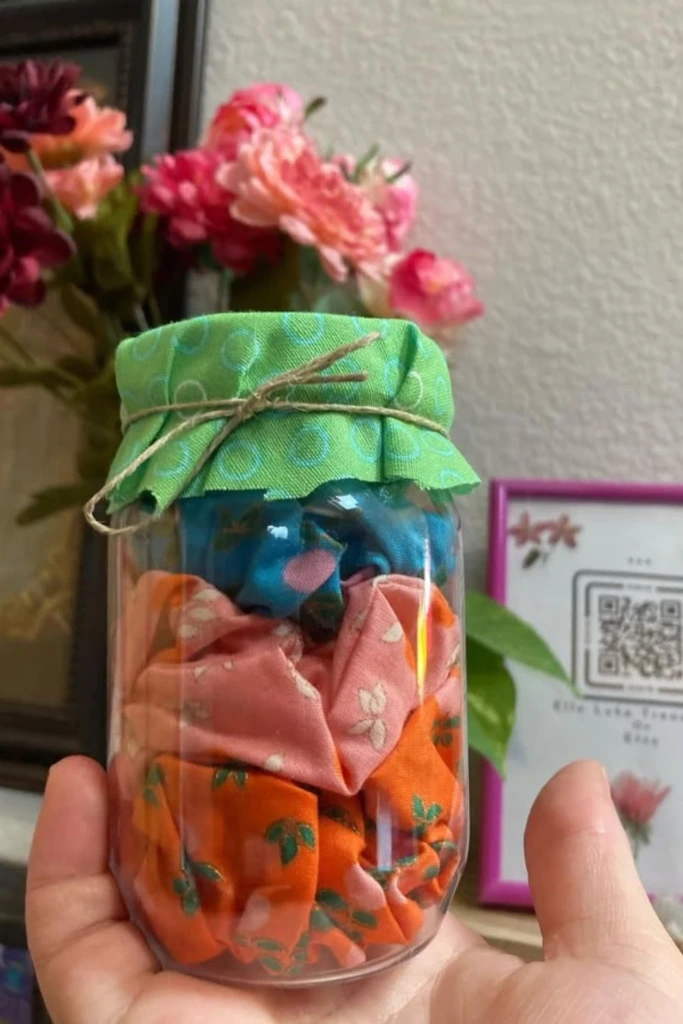
A jar filled with handmade scrunchies makes a practical gift for someone who enjoys hair accessories. Choose several fabric patterns that complement one another, sew the material into scrunchies, and arrange the finished pieces inside a clean glass jar.
Cotton prints, soft florals, satin, and colorful remnants can all work well, depending on the look you want. Finish the jar with a ribbon, twine, a small gift tag, or a decorative fabric cover.
This project combines sewing with attractive presentation, making it suitable for birthdays, holiday gifts, or self-care packages. You can also select fabrics based on the recipient's favorite colors or clothing style.
7. Holiday Jar
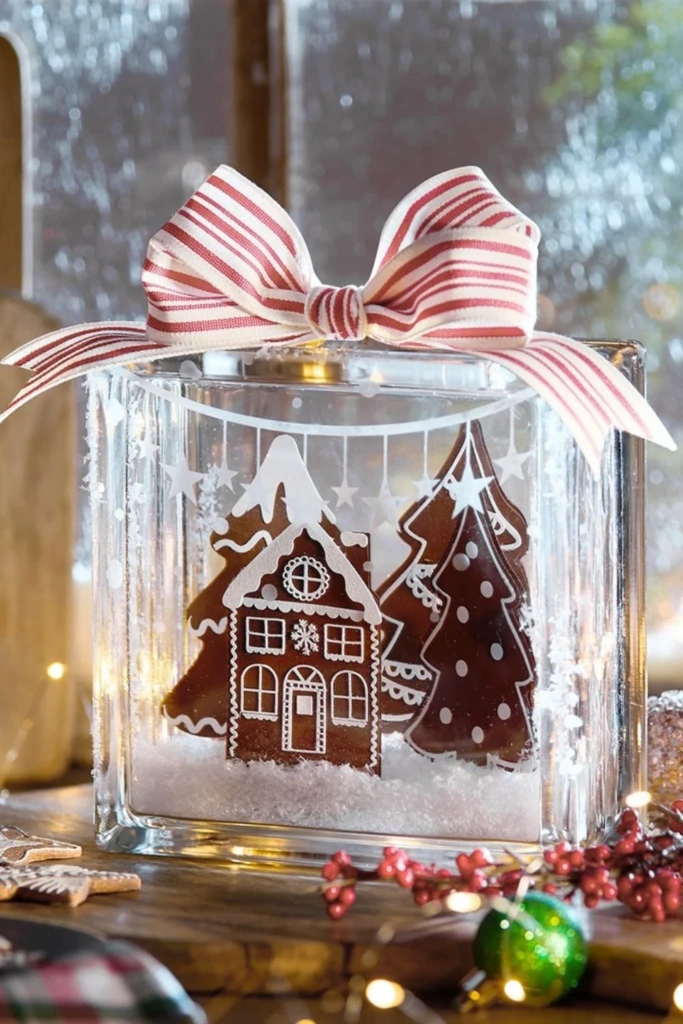
Create a festive display by decorating a clear jar or glass container with seasonal details. For a winter theme, use paper gingerbread figures, artificial snow around the base, and battery-powered fairy lights to produce a cozy glow.
Tie a striped ribbon around the lid or neck of the container to complete the design. You can easily change the decorations for other occasions by using autumn leaves, spring flowers, or miniature paper ornaments.
Place the finished jar on a mantel, side table, or holiday display shelf. If you include lights, choose a battery-operated set intended for decorative use and follow its safety instructions rather than placing an open flame inside the container.
8. Woodland Organizer
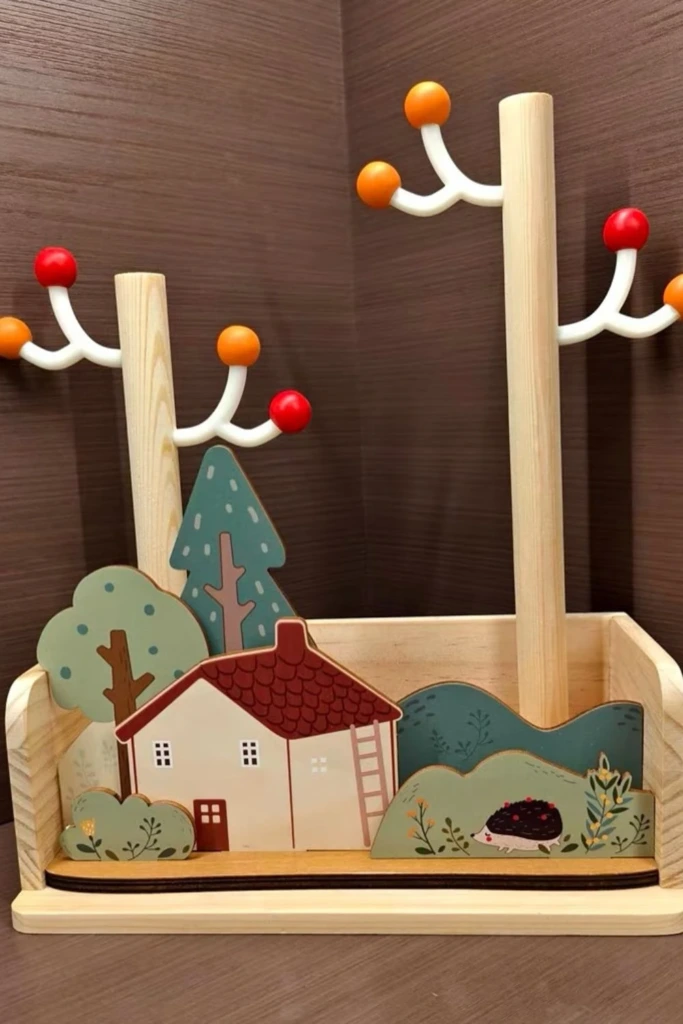
A woodland-inspired organizer can make everyday storage more appealing. Use a wooden board or sturdy craft base to create a scene with painted trees, a miniature house, and branch-shaped hooks for hanging lightweight items.
Choose earthy colors for a natural appearance, or add pastel shades for a playful, storybook design. Small hooks can hold keys, necklaces, bracelets, and other accessories, provided the base is strong enough to support them.
This craft is particularly useful for an entryway, bedroom, or craft station. Secure the hooks properly and use suitable wall fixings if you intend to hang the organizer rather than place it on a shelf.
9. Craft Stick Critters
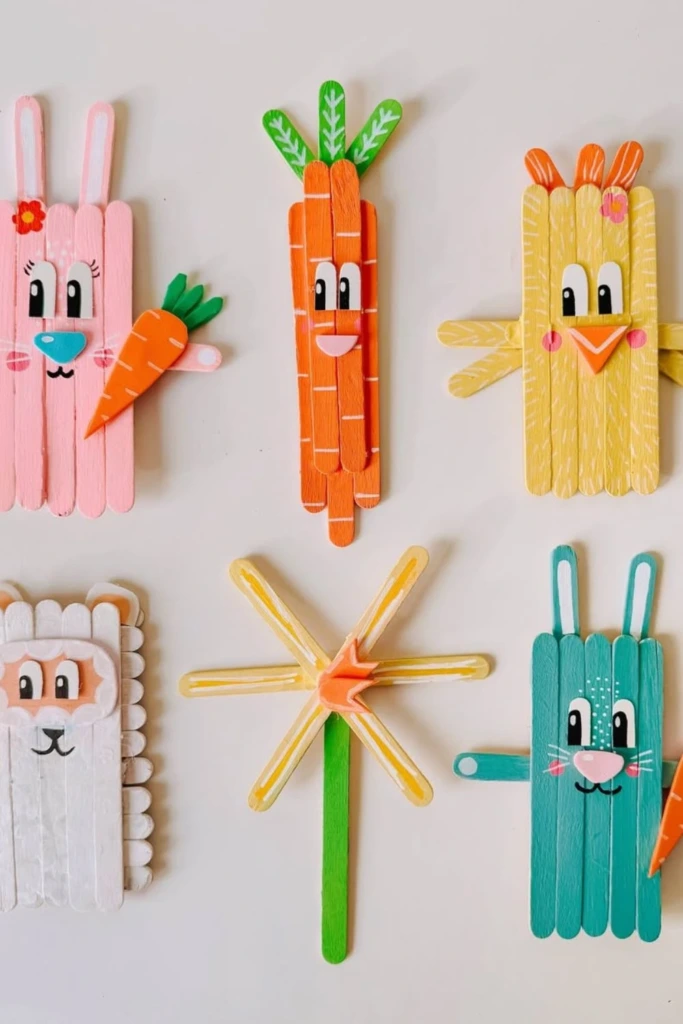
Turn ordinary popsicle sticks into a collection of friendly animal characters. Paint the sticks in pastel or bright colors, then add paper ears, drawn faces, small accessories, and other details to create rabbits, chicks, butterflies, or imaginative creatures.
You can also use several sticks together to form the body of a larger character. Once the paint and glue have dried, arrange the figures in a display or use them as props for storytelling.
Craft stick animals are inexpensive and adaptable for classroom activities, rainy-day projects, and seasonal celebrations. Younger children can choose colors and decorate the figures while an adult assists with assembly.
10. Bead Turtle
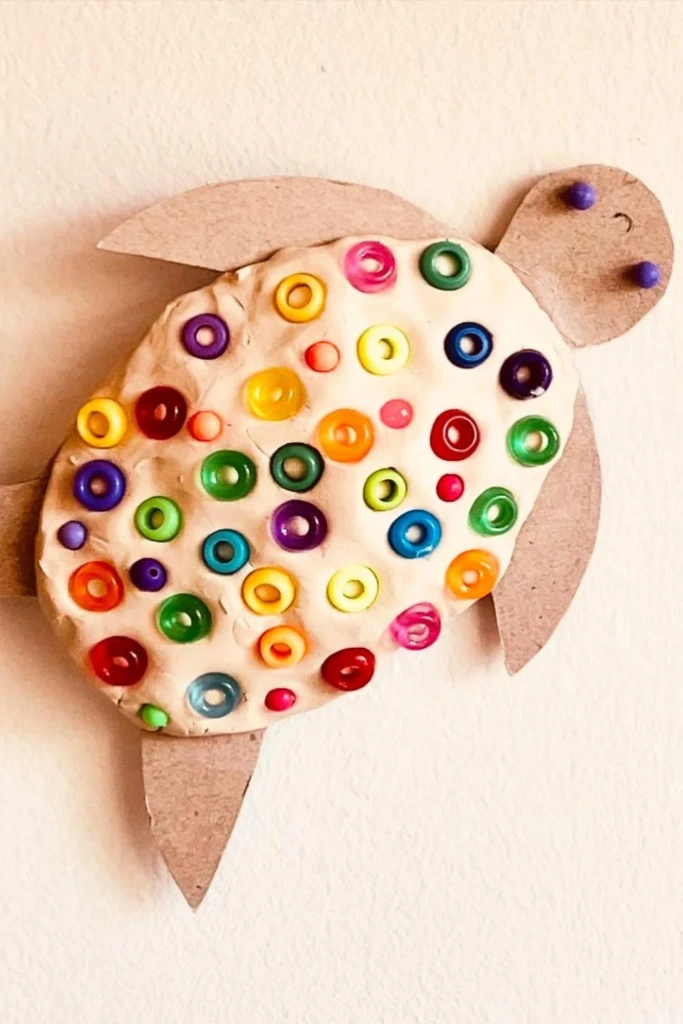
Make a decorative turtle using cardboard, air-dry clay, and colorful craft beads. Cut a simple turtle shape from cardboard, then form a rounded shell with clay or another suitable craft material.
Press beads into the shell while the clay is still workable, arranging them in a pattern or mixing colors for a playful mosaic effect. Add a head and four flippers, then leave the piece to dry according to the material's instructions.
The finished turtle offers a fun way to explore patterns, color combinations, and texture. Because beads can be choking hazards, this activity is best reserved for older children with appropriate supervision or for adults to complete on behalf of younger children.
11. Birdy Mobile
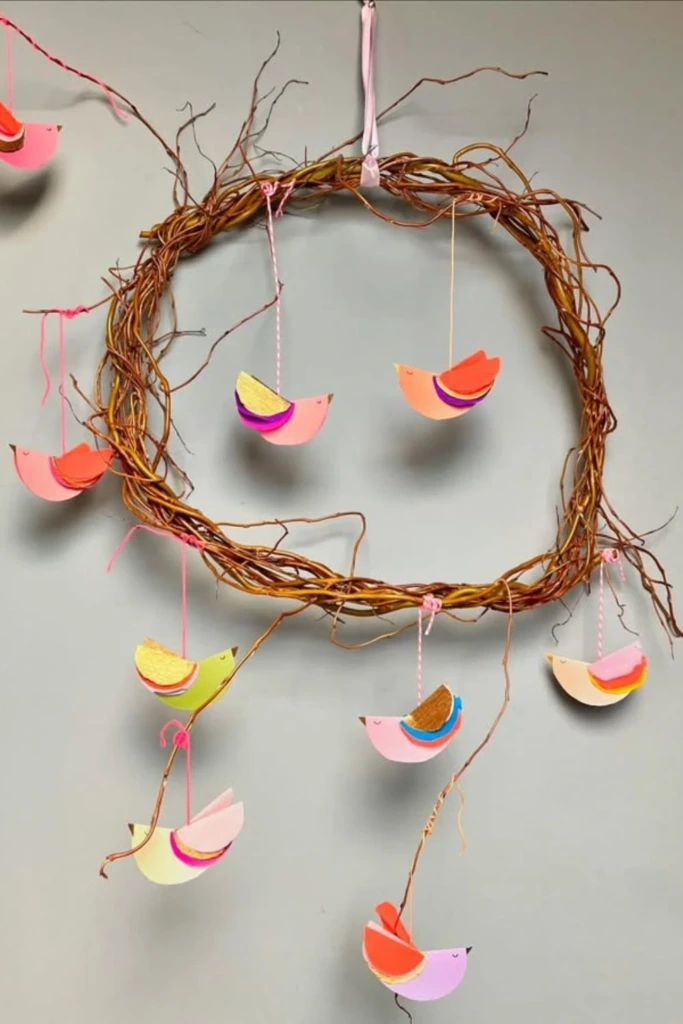
A handmade bird mobile can bring movement and color to a bedroom, reading corner, or seasonal display. Begin with a lightweight ring or small grapevine wreath, then prepare several bird shapes from colored paper or thin cardstock.
Fold paper circles or layer cutout shapes to give the birds more dimension. Attach them to strings of different lengths and secure the strings evenly around the ring so the finished mobile hangs in balance.
Use complementary colors for a coordinated look, or combine several shades for a brighter display. Check that every attachment is secure, and hang the mobile out of reach of young children rather than directly above a baby's sleeping area.
12. Sock Bunnies
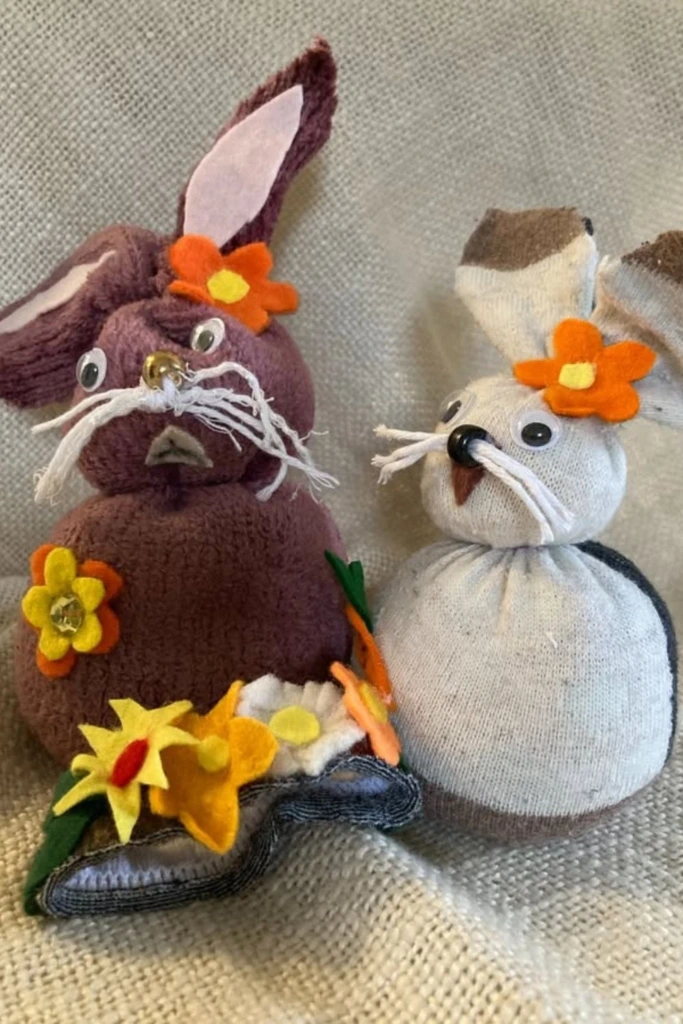
Give a clean, unused sock a second life by turning it into a soft bunny decoration. Fill the sock with suitable stuffing, shape the body, and create two long ears from the upper section. Use thread, fabric scraps, or felt to define the face and add small decorative details.
A ribbon around the neck or a tiny fabric flower can make each bunny distinctive. You can also choose patterned socks for a colorful result without needing to paint the finished figure.
Sock bunnies are lovely additions to spring displays, Easter baskets, and handmade gift collections. If the bunny is intended for a young child, avoid detachable buttons and other small pieces, and use securely attached, age-appropriate facial details.
13. Punny Love Cards
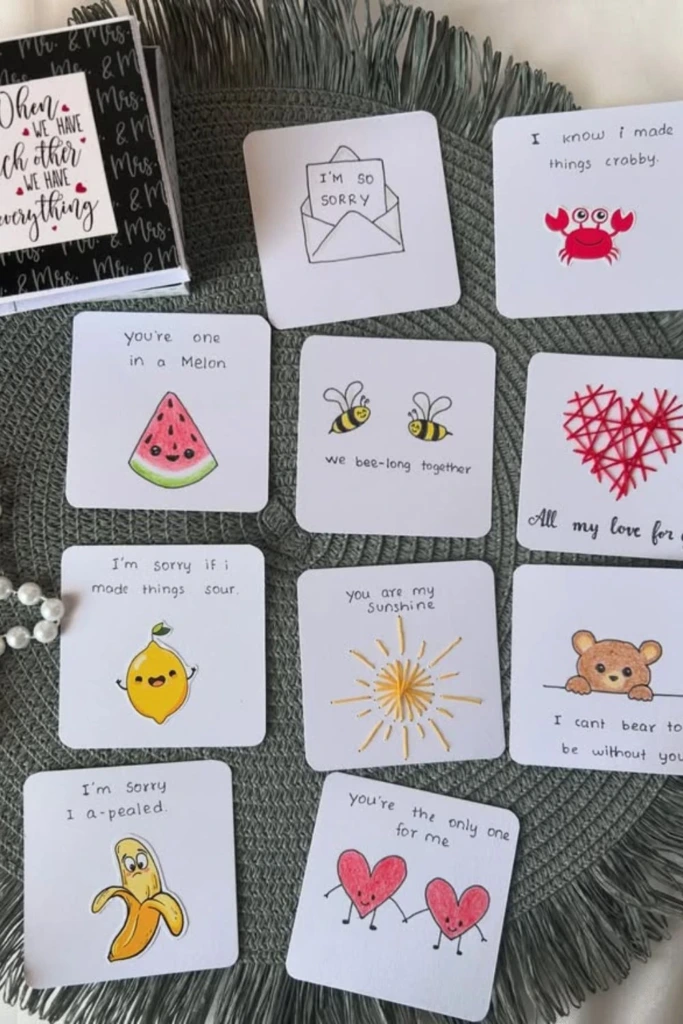
Handmade cards become more memorable when a simple illustration is paired with a clever message. Fold cardstock into small greeting cards, then draw a familiar object or animal that connects naturally with a playful pun.
For example, a watermelon illustration could accompany a message about being one of a kind, while a crab drawing could help communicate an apology in a lighthearted way. Use colorful markers, fine-tip pens, and a pencil for planning the design before adding permanent details.
These cards are suitable for birthdays, anniversaries, friendship notes, and Valentine's Day. Personalize each one with an inside message to make the recipient feel that the card was created especially for them.
14. Nest Plate
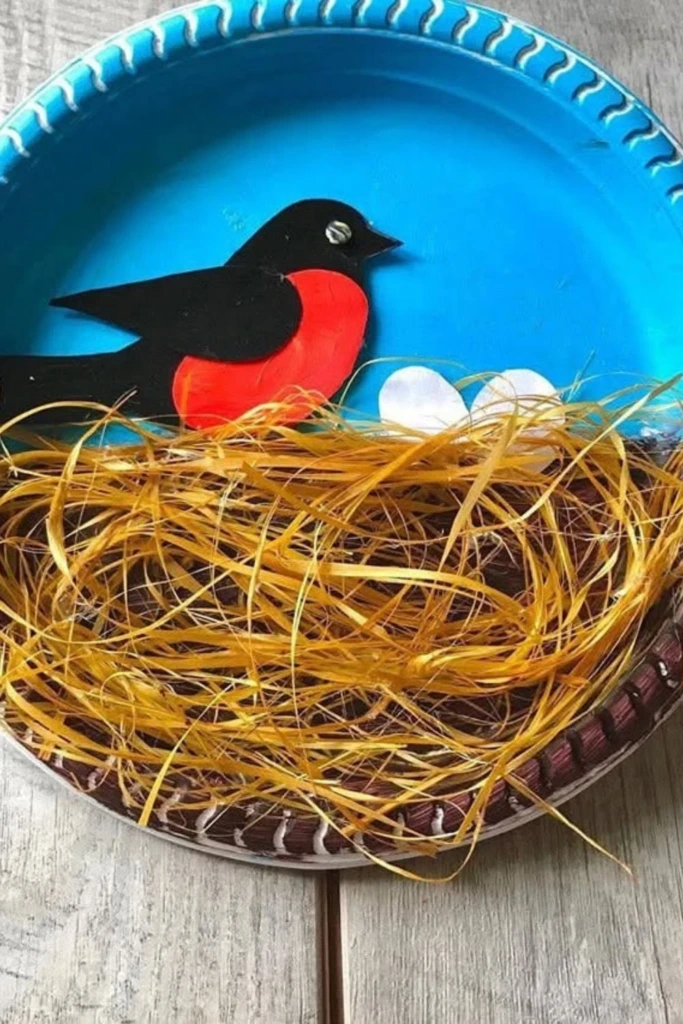
Create a springtime bird's nest using a paper plate, colored paper, glue, and shredded paper or raffia. Paint the plate with a sky-blue background, then add a paper bird with a contrasting belly and a nest filled with small paper eggs.
Layering the materials helps create a sense of depth while introducing different textures. You can add branches, clouds, leaves, or tiny flowers to build a more detailed outdoor scene.
This activity works well for nature-themed lessons and family craft sessions. It also provides an opportunity to discuss birds, nesting habits, and seasonal changes while children practice cutting, arranging, and gluing shapes.
15. Home Sign
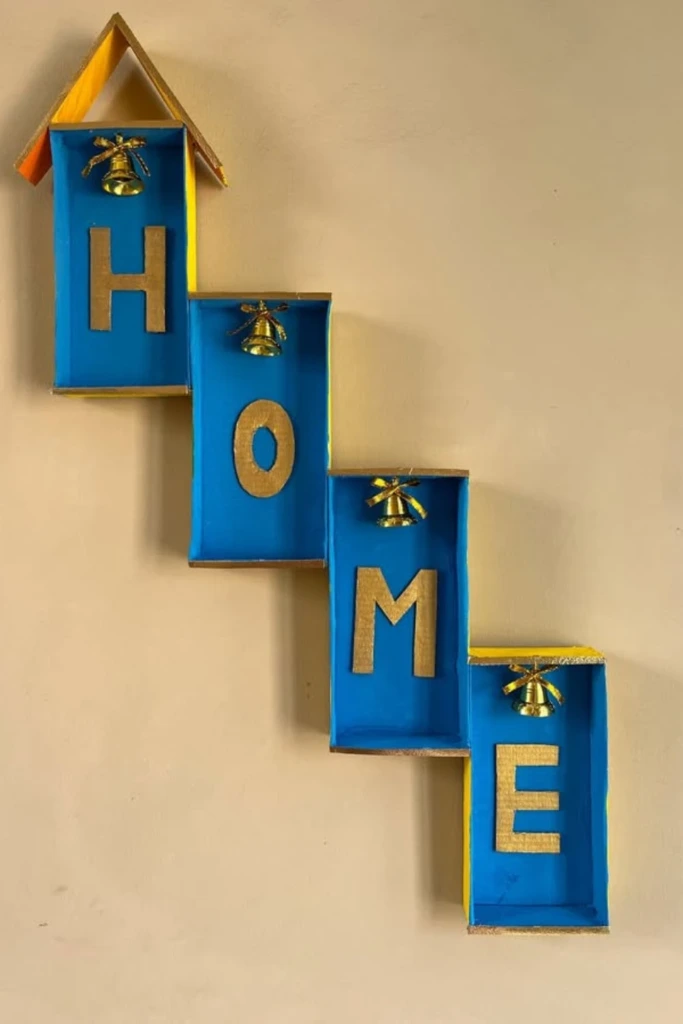
Make a welcoming home sign from sturdy cardboard boxes or layered cardboard shapes. Arrange the pieces into a stepped design, paint them in coordinating colors, and add large letters spelling out HOME.
A roof-shaped top, small bell, ribbon, or decorative border can give the sign additional character. You might choose blue and gold for a bold finish or use cream and brown for a softer, rustic appearance.
Display the completed piece on an entryway shelf or against a wall. Reinforce the cardboard if necessary so the structure stays upright, and use lightweight decorations that won't cause the sign to tip over.
16. Candy Stand
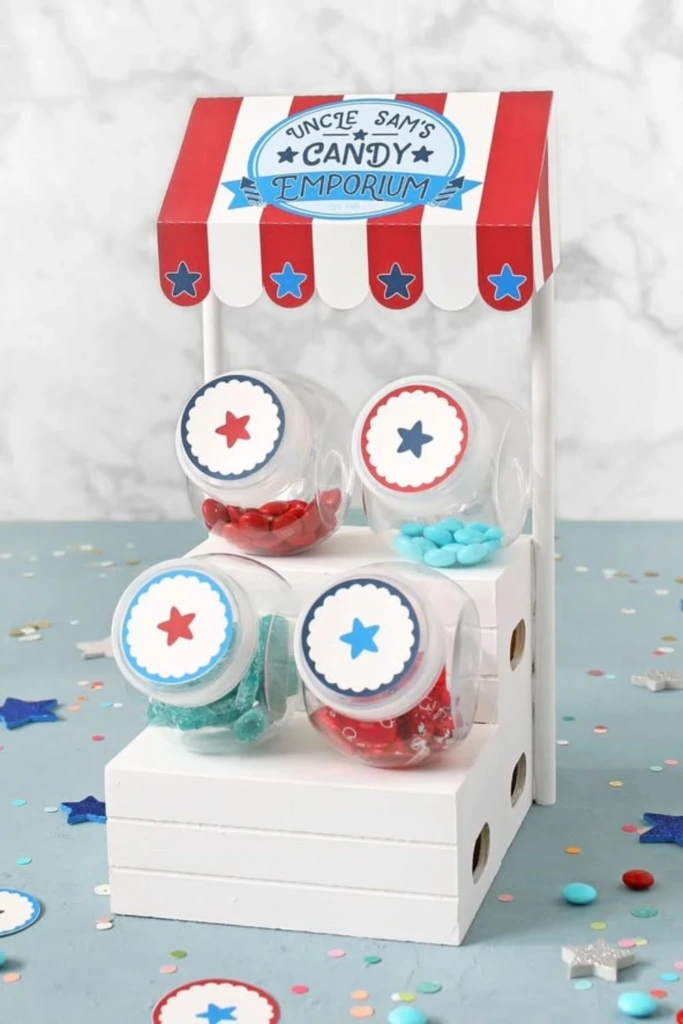
A miniature candy stand can serve as a playful centerpiece for birthdays, school events, and themed parties. Use clean boxes or sturdy platforms to create different levels, then decorate the structure with striped paper, colorful labels, and a small awning.
Arrange transparent jars or containers filled with individually wrapped sweets across the stand. Stars, flags, ribbons, or a personalized sign can help match the display to the event.
Choose stable containers and distribute the weight evenly to keep the arrangement from tipping. If you plan to serve food, use clean, food-safe containers and keep the sweets protected from dust and handling.
17. Yarn-Wrapped Rocks
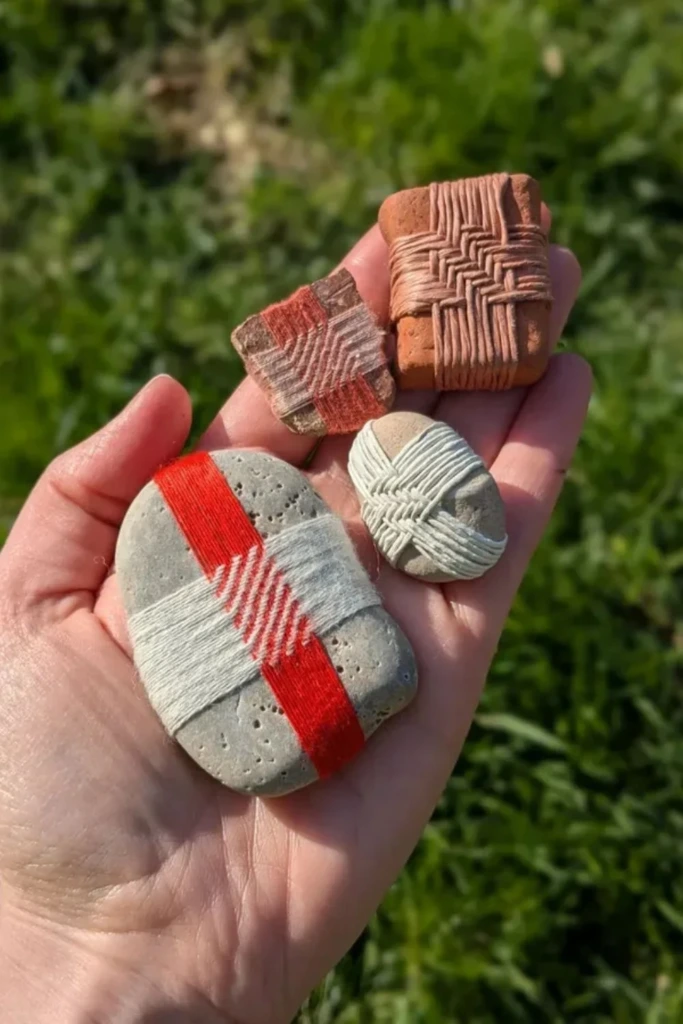
Combine natural stones with colorful yarn to create small textured decorations. Select smooth rocks, secure the yarn at one point with an appropriate adhesive, and wrap it around the surface in overlapping lines or decorative patterns.
You can use one color for a minimalist look or alternate several shades to produce stripes and contrasting sections. Different yarn thicknesses will also create different textures.
The finished rocks can decorate shelves, desks, and plant displays. This is a relaxing project for experimenting with color and texture, and it can make use of leftover yarn from knitting or crochet projects.
18. Petal Frames
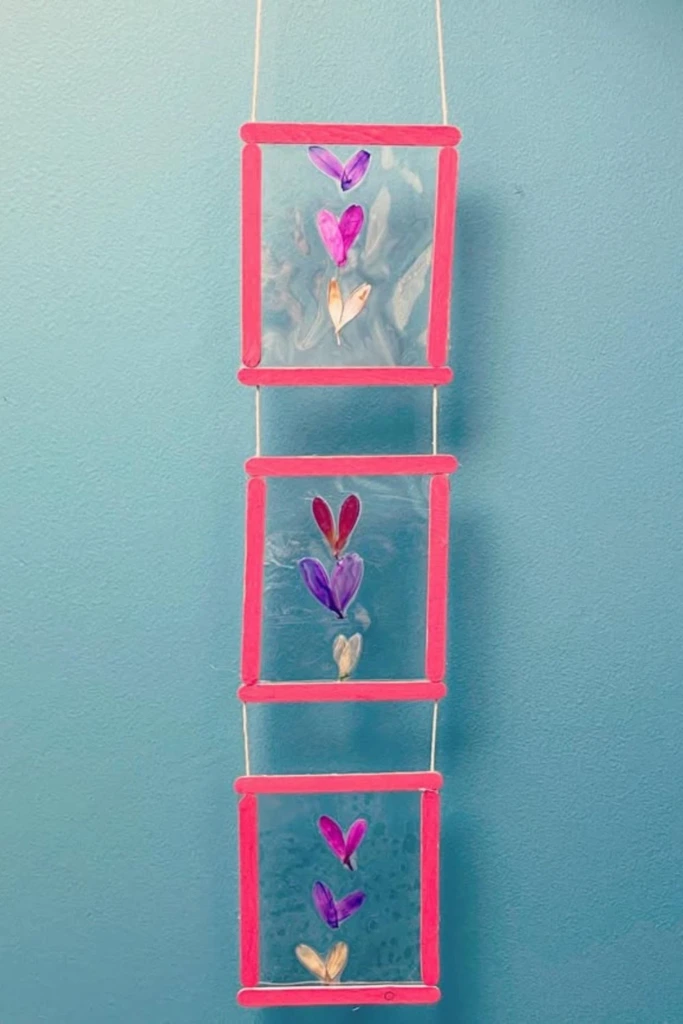
Preserve the delicate appearance of flowers by displaying pressed petals in a handmade frame. Collect suitable petals, press them until dry, and arrange them between clear sheets or inside a frame designed for botanical displays.
Craft sticks can be painted and assembled into a decorative border, with bright pink, green, or neutral tones complementing the flowers. Arrange the petals before fixing them in place so you can experiment with the composition.
These botanical frames make thoughtful gifts and attractive decorations for bedrooms, craft rooms, or reading spaces. Keep the finished artwork away from excessive moisture and direct sunlight to help maintain the colors of the preserved petals.
19. Chick Basket
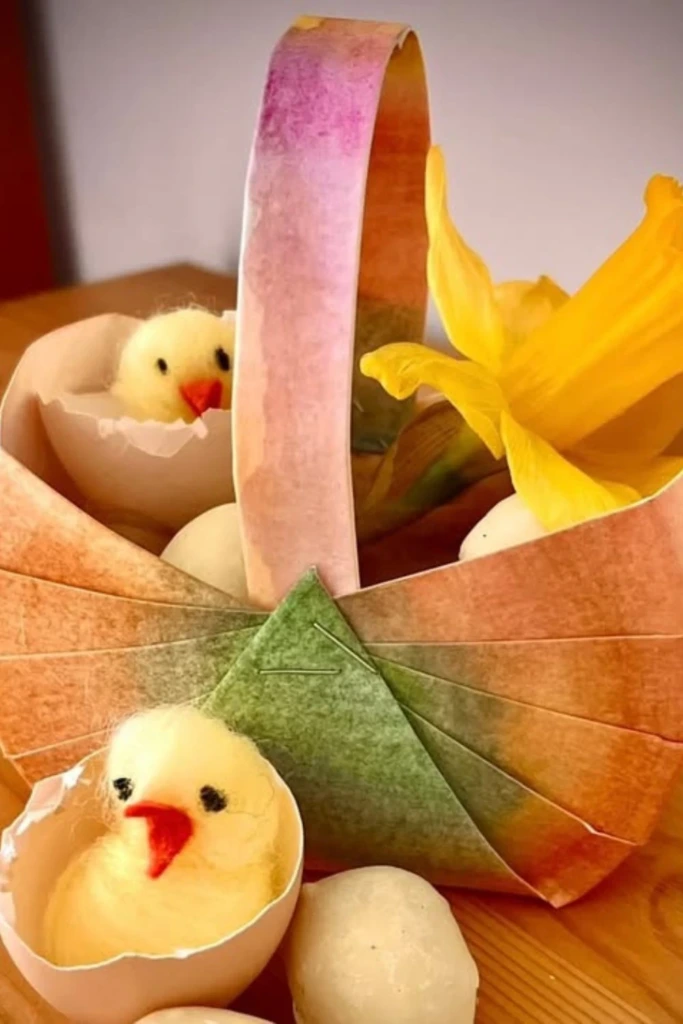
Create a cheerful spring basket using colored craft paper, cardstock, or a small ready-made basket. Add yellow chick figures made from felt, paper, or other lightweight materials, then decorate the arrangement with pastel eggs, paper flowers, and green accents.
A curved handle and layered paper details can make the basket look more complete. You can also personalize it with a name tag or use colors that coordinate with your holiday decorations.
The basket works well as a table centerpiece, seasonal gift, or decorative container for lightweight treats. If you are making one for a young child, select age-appropriate materials and avoid loose small parts.
20. Photo Blocks
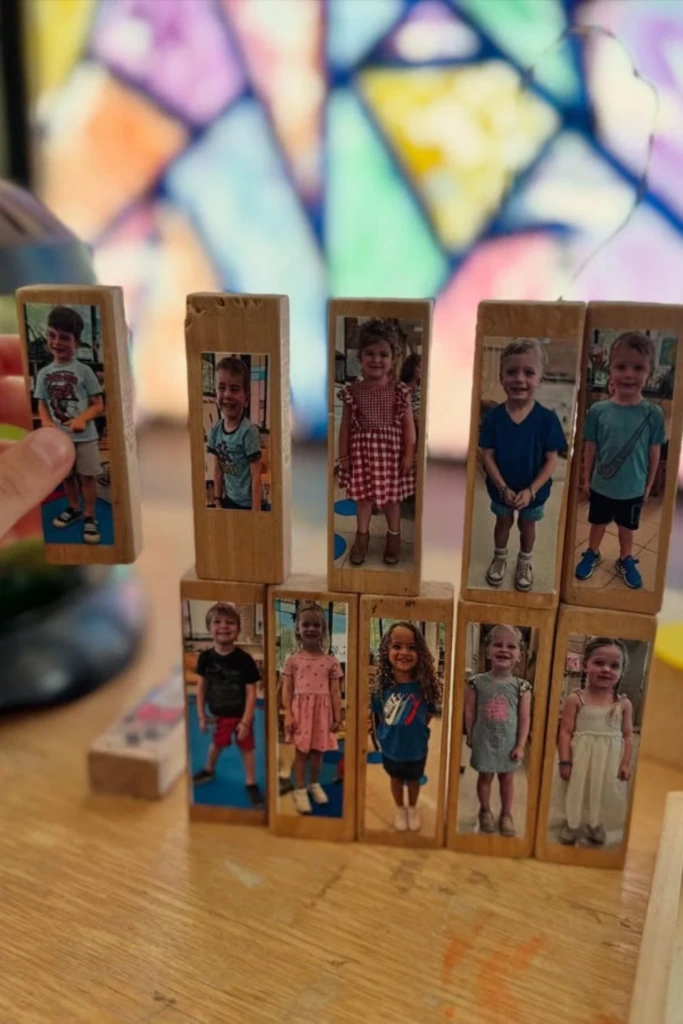
Turn simple wooden blocks into personalized photo decorations by attaching small printed pictures to their surfaces. Choose family photographs, pictures of friends, or favorite memories, then trim them to fit the blocks neatly.
You can decorate the remaining sides with names, numbers, colors, or simple patterns. Several blocks can be arranged together to form a small display or used as part of a photo-themed gift.
Photo blocks are particularly suitable for grandparents, family celebrations, classroom projects, and memory displays. Use an adhesive compatible with both the photograph and the wood, and allow everything to dry before arranging the finished pieces.
21. Leaf Hedgehogs
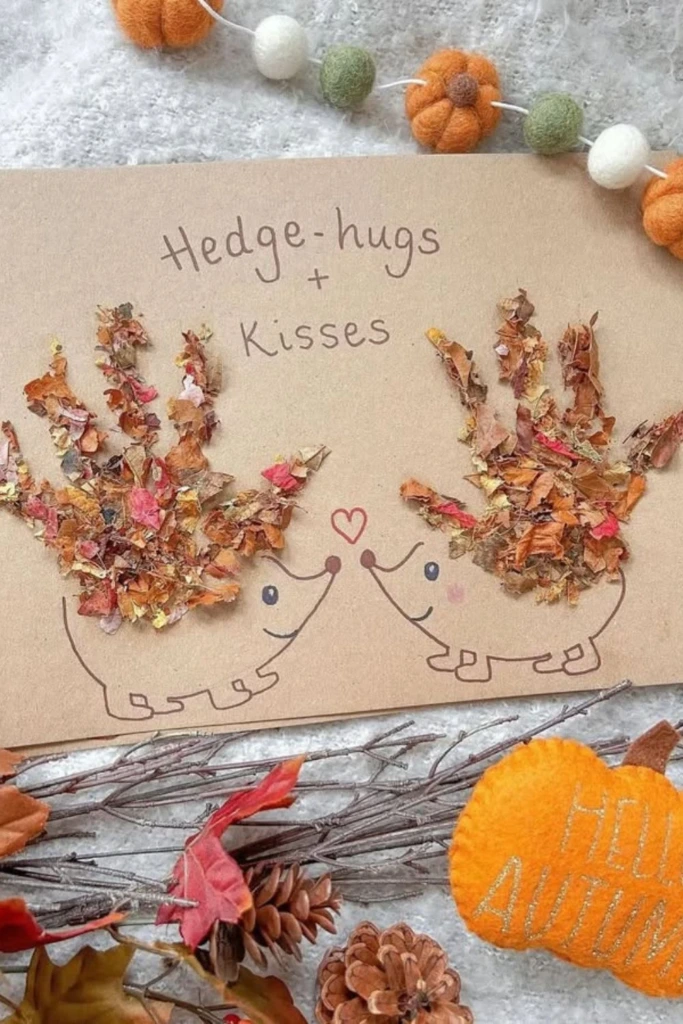
Bring an autumn woodland theme to your craft table with handmade hedgehog cards. Draw or cut out a hedgehog body from paper, then attach dried leaves along its back to resemble spines.
Small pieces of leaf confetti can fill gaps, while drawn eyes, a nose, and a smile complete the character. Add hearts or a short seasonal greeting to turn the design into a handmade card.
This activity encourages children to observe natural shapes and explore the colors of fall. Collect leaves from suitable areas, check that they are clean and dry, and avoid gathering plants that may be irritating or unsafe to handle.
22. Stick House
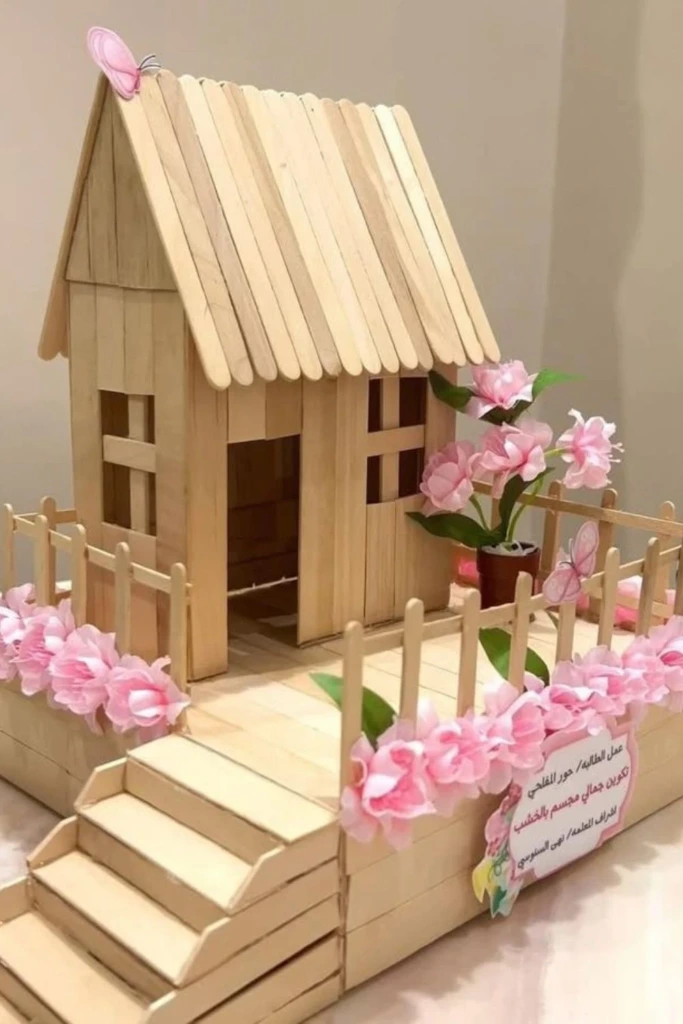
Build a miniature house using craft sticks, glue, and a sturdy base. Arrange the sticks to form walls, then add a sloping roof, a small staircase, windows, or a simple fence.
Once the structure is assembled, decorate it with painted doors, paper flowers, miniature trees, or butterfly accents. You can create a rustic cottage, a colorful fairy house, or a modern little building depending on your chosen materials.
This project introduces basic construction concepts such as balance, alignment, and structural support. It is useful for classroom STEM activities, imaginative play displays, and miniature dioramas, although small decorative structures should not be treated as load-bearing toys.
23. Mushroom Family
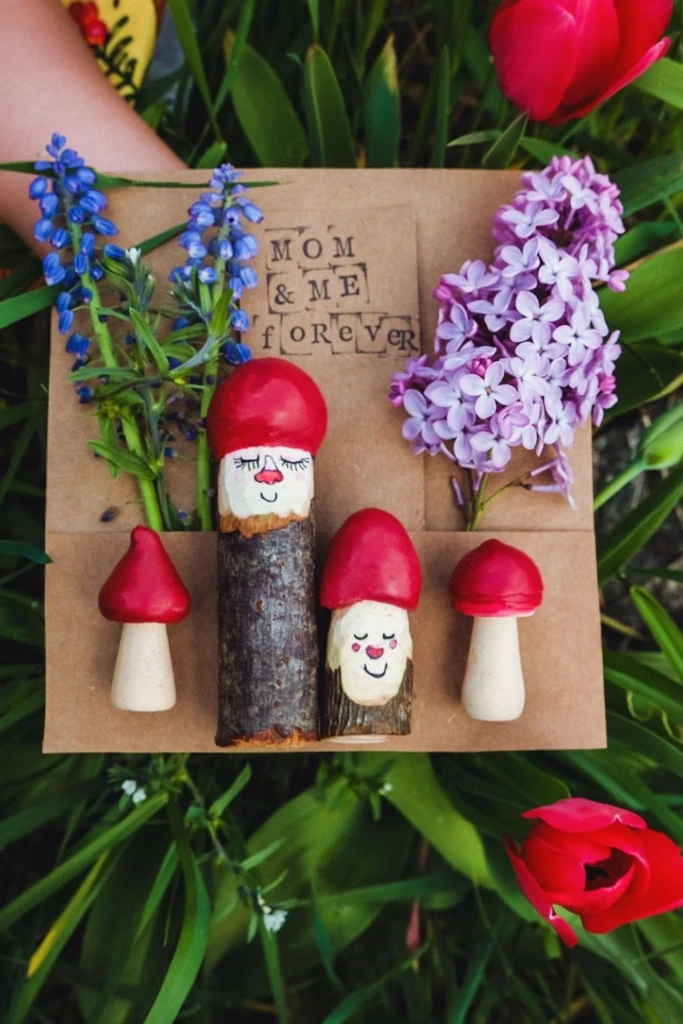
Create a whimsical woodland scene using small pieces of wood, air-dry clay, or other suitable craft materials. Shape or select mushroom forms, paint the caps in bright colors, and add white spots, little faces, and floral details.
Arrange several mushrooms together on a base to create the appearance of a tiny family living in a magical forest. Varying the heights and colors makes the scene more interesting and gives every character its own personality.
This craft is suitable for autumn decorations, fairy-garden displays, and handmade gifts. Use clean, non-toxic materials and keep the finished pieces decorative rather than presenting them as real mushrooms or edible objects.
24. Purple Wreath
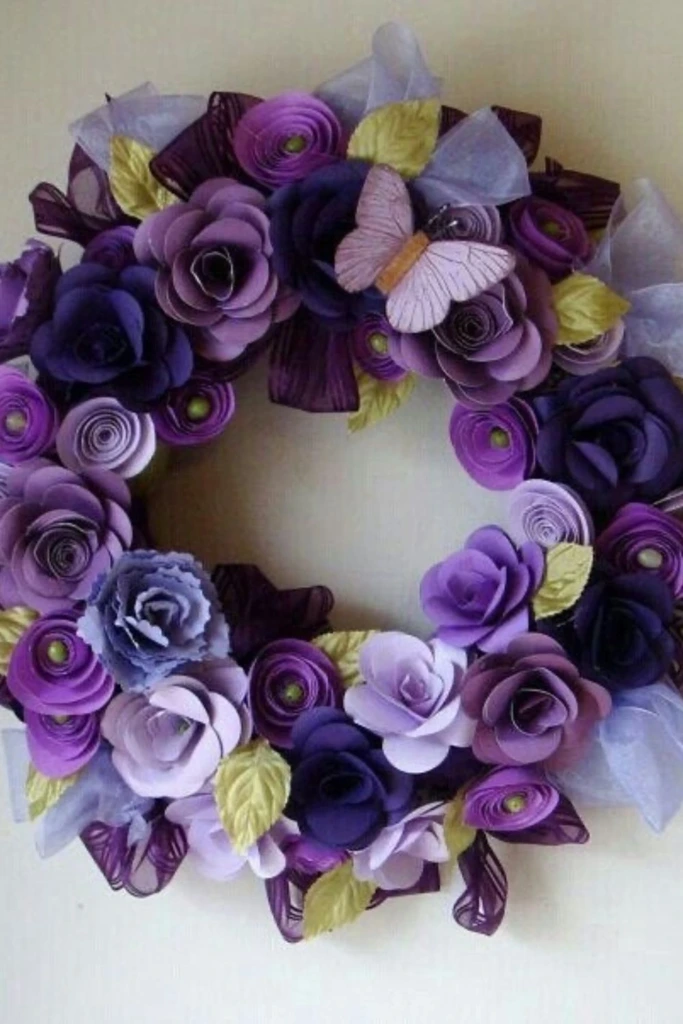
A purple floral wreath can add color to a front door, bedroom wall, or party backdrop. Start with a lightweight wreath base, then create paper flowers in several shades of purple and arrange them with green paper leaves.
Layering the petals creates fuller blooms, while smaller flowers can fill empty spaces around the base. A pastel butterfly, ribbon, or contrasting accent can complete the design without making it look overcrowded.
Choose a color palette that suits the season or occasion. This wreath can work for spring celebrations, weddings, or everyday decor, and paper flowers allow you to enjoy a floral display without needing fresh blooms.
25. Twine Lanterns
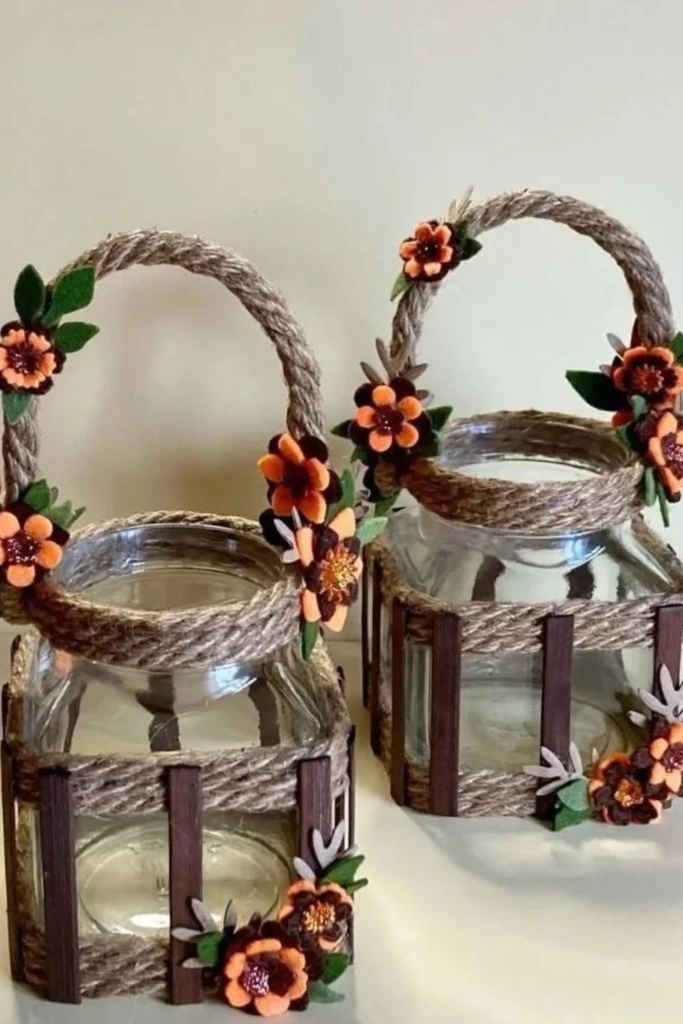
Repurpose glass jars as rustic lantern-style decorations with twine, wooden accents, and felt flowers. Wrap the outside of a clean jar with twine, attach a decorative handle if appropriate, and finish with small floral or seasonal embellishments.
A combination of natural fibers and warm colors creates a farmhouse-inspired appearance. You can customize the decorations for different occasions by changing the flowers, ribbons, or accent colors.
For a safe illuminated display, use battery-powered fairy lights or an LED light designed for decorative containers. Avoid placing real flames inside jars decorated with twine, felt, glue, or other combustible materials.
26. Beaded Butterflies
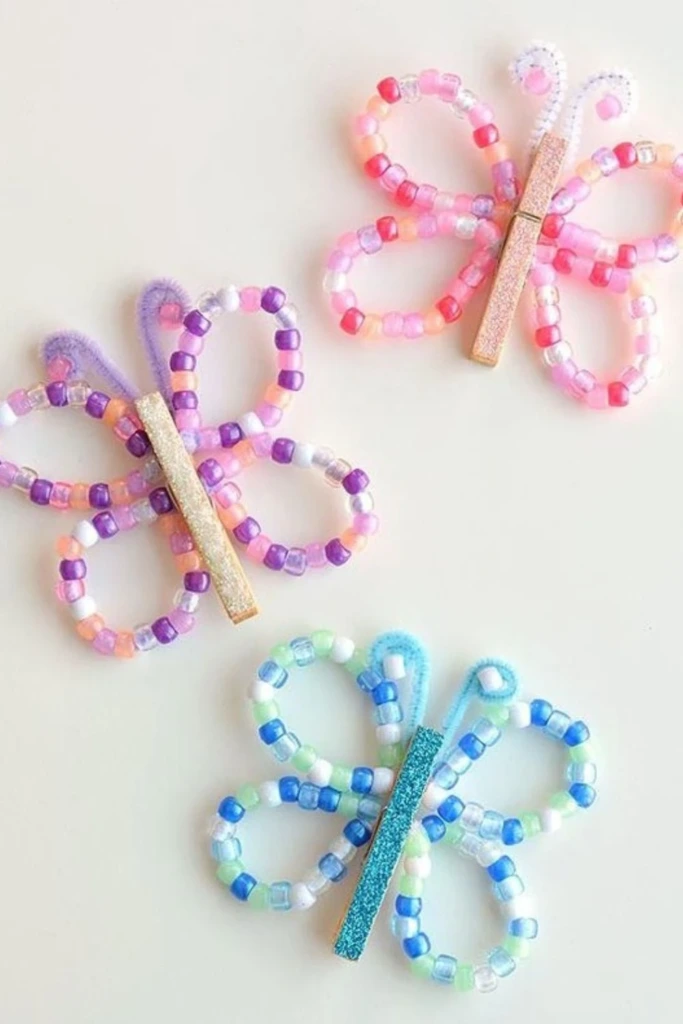
Make colorful butterfly decorations using pipe cleaners, pony beads, and clothespins. Slide beads onto the pipe cleaners, bend the wires into wing shapes, and attach them securely to the clothespin body.
Add antennae and a small painted face to finish the butterfly. Mixing transparent, metallic, and bright beads can create a playful appearance, while coordinated colors produce a more polished design.
These butterflies can decorate gift packages, party tables, windows, or indoor plants. They are also useful for introducing children to simple pattern-making and fine motor activities, provided the supplies are appropriate for their age.
27. Paper Beads
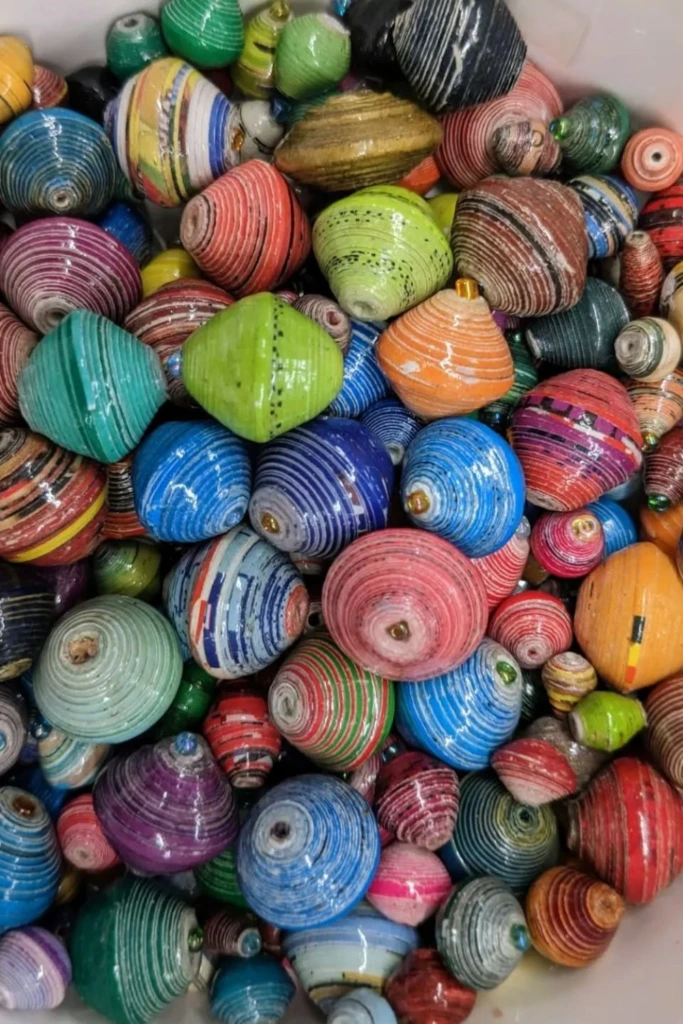
Transform leftover paper into handmade beads for jewelry and decorative projects. Cut paper into long tapered strips, then roll each strip tightly around a thin stick or similar tool, starting at the wider end.
Apply a suitable adhesive to secure the roll, then allow it to dry. Once the beads are firm, use an appropriate clear craft finish if you want a smoother appearance and added protection.
Combine different paper colors and patterns to create distinctive beads for bracelets, necklaces, keychains, or hanging decorations. Recycled magazines, wrapping paper, and colorful scrap sheets are useful materials, making this project both economical and creative.
28. Felt Envelopes
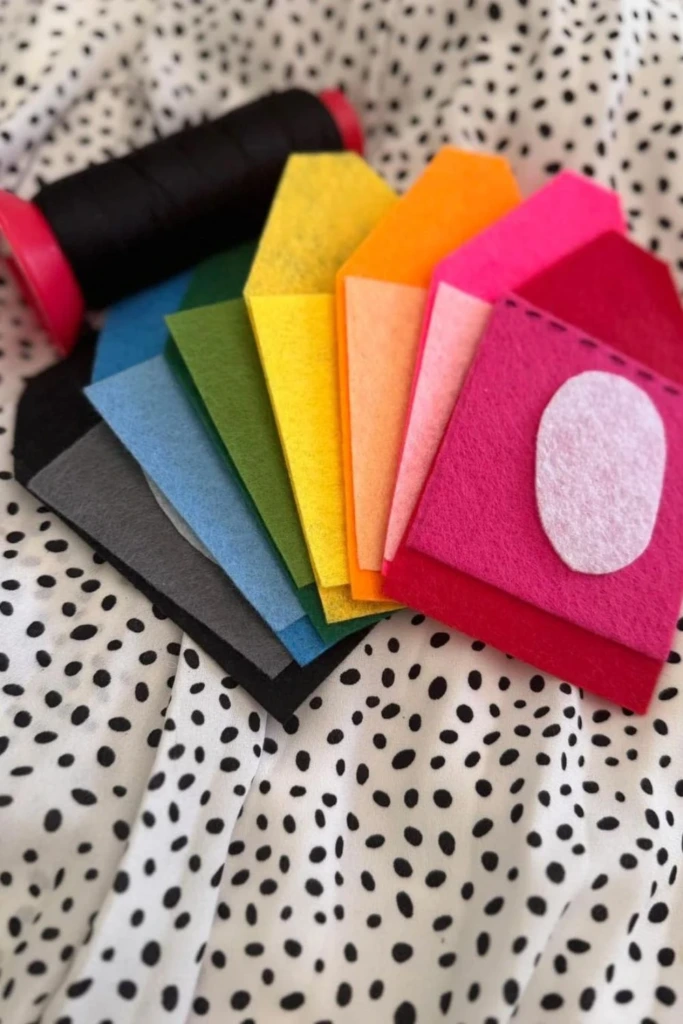
Small felt envelopes are useful for holding gift cards, tiny notes, handmade coupons, or little messages. Cut felt into a simple envelope shape, fold the sides inward, and stitch or glue the edges using materials suitable for the intended use.
Choose bright colors such as pink, yellow, blue, and green, or combine several shades for a rainbow-inspired collection. A felt heart, button-style decoration, or embroidered initial can make each envelope more personal.
These miniature envelopes work well for birthdays, classroom exchanges, and holiday countdown activities. Children who are learning to sew can practice simple stitches with close adult supervision and age-appropriate tools.
29. Paper Roll Bunnies
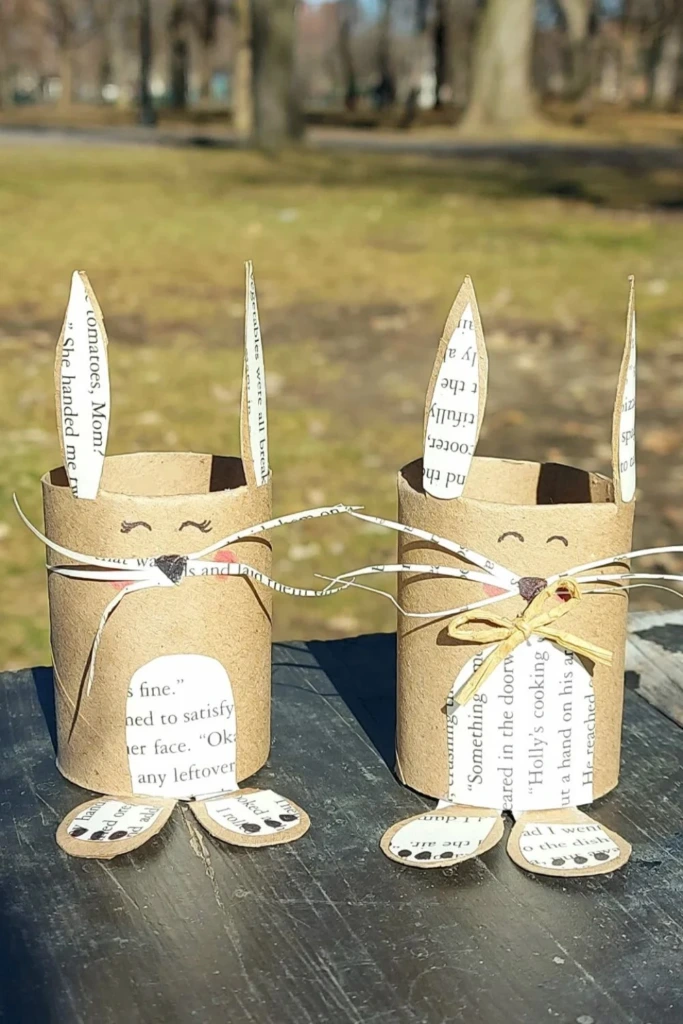
Empty toilet paper rolls can become charming bunny figures with just a few basic supplies. Paint the cardboard tubes or cover them with paper, then add long ears, whiskers, paws, and a friendly face using cardstock and markers.
You can use leftover book pages, patterned paper, or colorful scraps for the ears and body details. Each bunny can have a different expression or accessory, making the project a fun opportunity for storytelling and imaginative play.
Arrange the finished figures as spring decorations, add them to an Easter display, or use them as characters in a homemade puppet scene. Reusing cardboard tubes keeps the project inexpensive, while adult assistance with cutting and small decorative pieces helps make it suitable for younger crafters.